Monitoring Authorization DB Rights
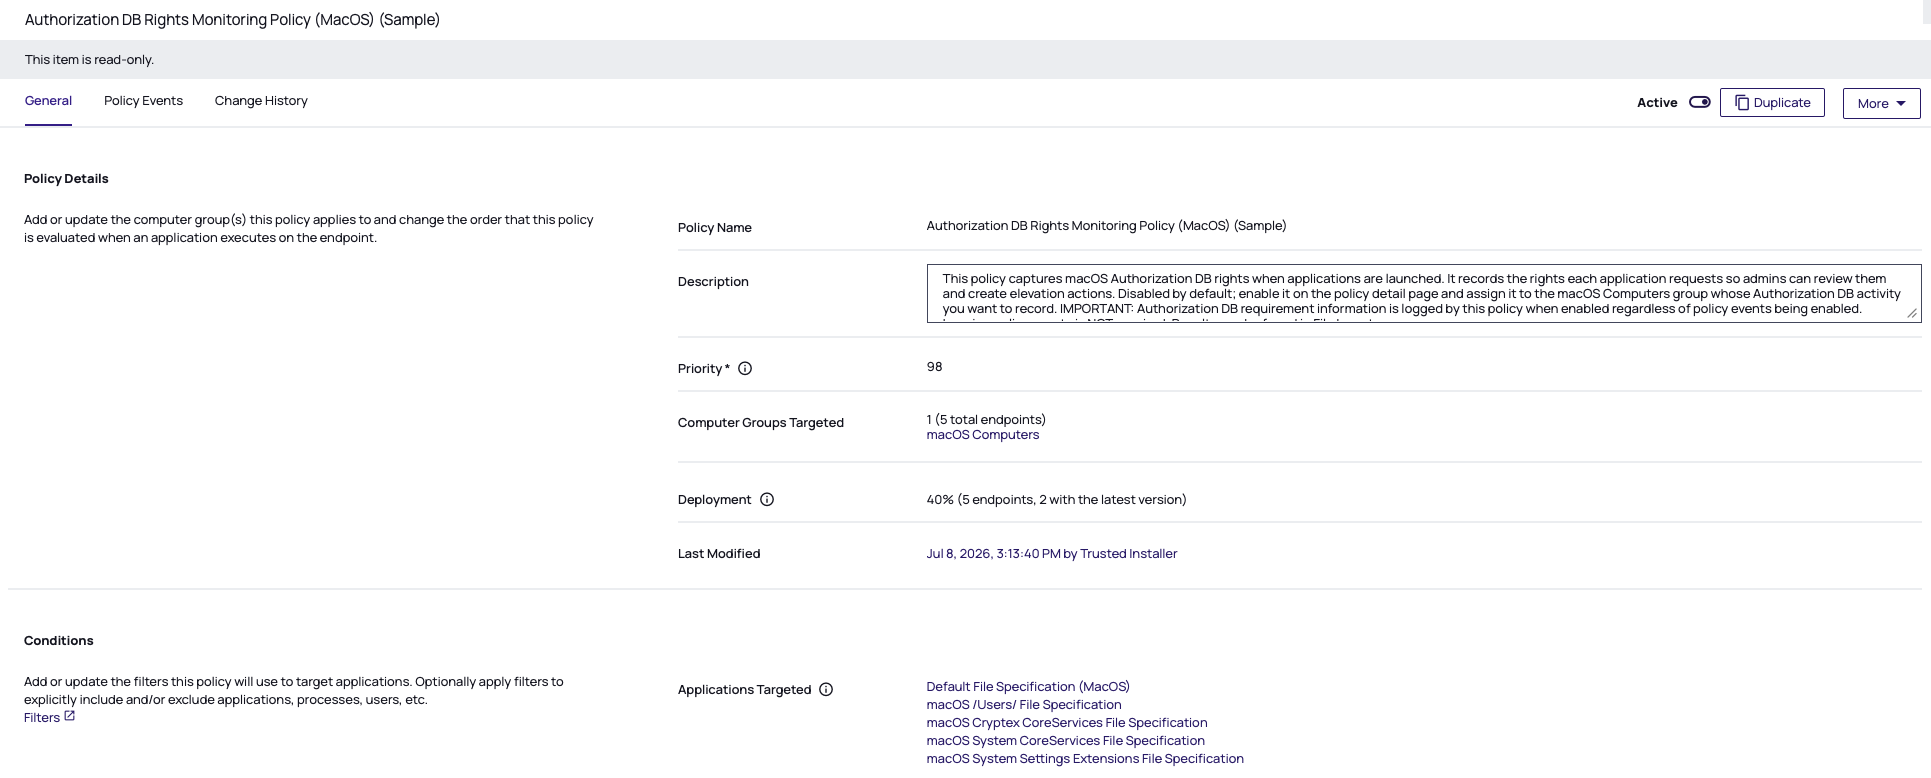
Privilege Manager includes an out-of-the-box sample policy named Authorization DB Rights Monitoring Policy (MacOS) (Sample). It records the macOS Authorization DB rights that applications request when they launch, so admins can review what each application needs and create actions from those rights.
-
The policy is disabled by default. Enable it on the policy detail page to begin recording.
-
It is located in the default macOS computer group. Assign it to the macOS computer group whose Authorization DB activity you want to record.
-
It records rights only. It does not elevate, block, or otherwise change how applications behave.
-
Policy event logging does not need to be enabled. Rights are recorded whenever the policy is enabled, and the results appear in File Inventory.
Enabling the Policy and Creating an Action
-
In the console, open the default MacOS Computer Group and go to its Application Policies.
-
Locate Authorization DB Rights Monitoring Policy (MacOS) (Sample) in the policy list.
-
Open the Policy Details page.
-
In the Policy Details section of the page (Computer Groups Targeted), assign the policy to the MacOS Computer Group whose Authorization DB activity you want to record.
-
Enable the policy and save your changes.
-
Allow the agent on the target computers to receive the updated policy.
-
On a target Mac, launch or use the applications whose rights you want to discover so they request their Authorization DB rights.
-
The macOS agent records the requested rights immediately, as the applications request them. The recorded rights are then sent to the server on the next send events cycle. You do not need to enable policy event logging; rights are recorded whenever the policy is enabled.
-
Open the application in File Inventory and review the Requested Authorization DB Rights (macOS) section, which lists each right along with its Granted or Denied status.
-
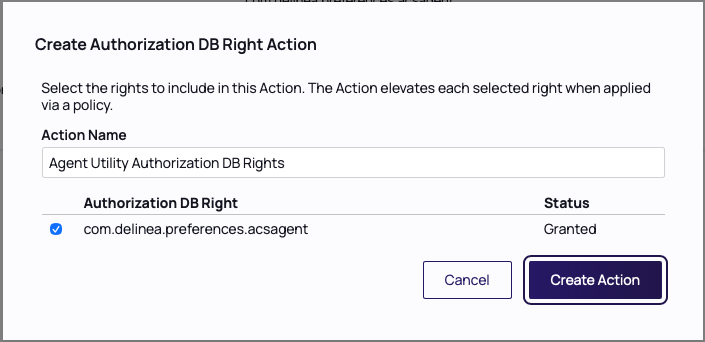
To turn discovered rights into an action, use the Create Action button on the file inventory detail. See Creating Actions from Discovered Rights.
Creating a Custom AuthorizationDB Right Action
An AuthDB action can now contain more than one Authorization DB right. A single action can grant several rights at once, so you no longer need a separate action for each right. Existing actions that contain a single right continue to work without any changes.
-
Navigate to Admin | Actions.
-
Click Create Action.
-
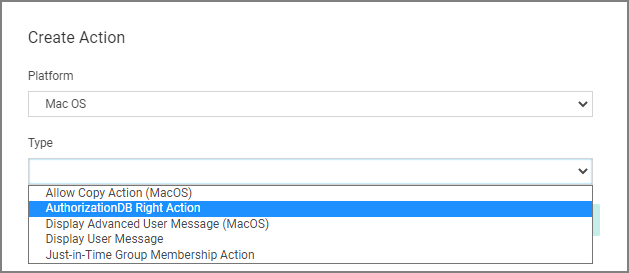
From the Platform drop-down select MacOS Computers Actions.
-
From the Type drop-down select AuthorizationDB Right Action.
-
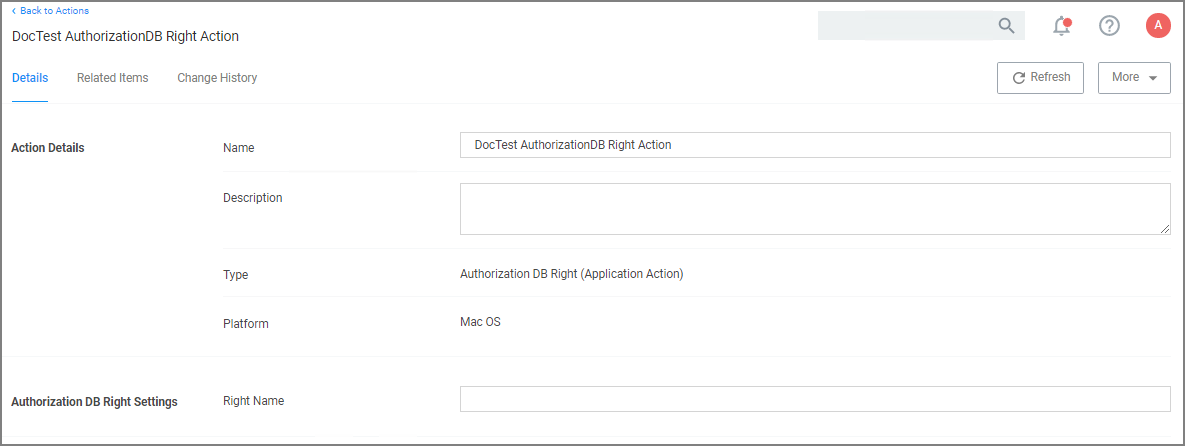
Enter a name, that allows you to easily identify the action for future use.
-
Click Create.
-
Under Authorization DB Right Settings, enter the desired authorization right names. There can be more than one authorization right per action.
-
Click Save Changes.
The action can now be added to existing macOS elevation policies or selected at policy creation following the use of Modify Authorization Right on the final create policy wizard page by selecting it from the Right Name drop-down.
Refer to the following examples:


