Configuring Secret Server
To configure automatic updating of secrets in Delinea Credentials Cache using an event pipeline, complete the following steps:
SecretChanged API Endpoint
The Event Pipeline integration uses the POST /api/secretchanged endpoint
in the Credentials Cache API to trigger immediate cache refreshes when a secret password changes.
| Method | POST
|
| Path | /api/secretchanged
|
| Authorization | Required (Bearer token) |
| Content-Type | application/json
|
| Success response | 202 Accepted
|
Request body:
{ "secretId": "<SecretId>" }Behavior: Validates the request, fetches the updated secret from Secret Server using the supplied secret ID, and updates or inserts the secret in the local cache.
For interactive testing via Swagger, see Delinea Credential Cache Supported Endpoints.
Step 1: Creating an Application Account in Secret Server
The Delinea Credentials Cache integration requires an application account to authenticate with Secret Server. If you don't have an application account, you can create one. For more information about creating an application account, see Managing Local Accounts in the Secret Server documentation.
The application account's role in Secret Server must have the following permissions:
-
Administer Secret Server Pipelines - Required to create and manage Event Pipeline policies.
-
Administer Secret Server Scripts - Required to create and manage PowerShell scripts.
-
View Secret - Required for the Credentials Cache application to retrieve secrets.
The following procedure describes how to create a role with these permissions and how to assign the role to the application account.
To create a role with the required permissions and assign it to the application account:
-
In Secret Server, navigate to Access > Roles.
-
Select Create role.
-
In the Create role dialog, provide a name and an optional description for the new role, and select Save.
-
Go to the Permissions tab for the role.
-
Select Edit and in the Scope dropdown list, select All.
-
Search for the Administer Secret Server Pipelines permission by using the search box at the top.
-
Select the checkbox next to the permission name and select Save.
-
Repeat steps 6–7 to add the following permissions to the role:
-
Administer Secret Server Scripts
-
View Secret
The Permissions tab shows the permissions added to the role.
-
-
Assign the role to the application account:
-
Navigate to Access > Users.
-
On the User management page, search for and select the application account.
-
On the user page, go to the Roles tab and select Edit.
-
In the window that appears below, search for and select the role that you created and select the checkbox next to the role name.
-
Select Save.
-
Step 2: Create a Secret in Secret Server
You must create a secret in Secret Server to store the credentials that will be managed by Delinea Credentials Cache. You must also grant the Secret Server application account that you use for this integration the View permission for the secret.
The following procedure describes how to create a secret and how to grant the application account the View permission for the secret.
To create a secret:
-
In Secret Server, choose the folder to store the secret or create a folder for the secret.
Make sure that the application account in Secret Server that you use for this integration has the View permission for the folder. If there are any folders above the folder, make sure that the application account also has the View permission for each of those parent folders. For information about creating folders and folder permissions, see Folders in the Secret Server documentation.
-
In the Create New Secret page, select the template from which to create a secret.
A custom template should be created with the following fields: TENANTURL, CLIENTID, CLIENTSECRET, CREDCACHEURL, and DOMAIN.
-
Grant the application account the View permission for the secret:
-
Go to the Sharing tab of the secret's page.
-
Select Edit in the upper-right corner.
-
Clear Inherit permissions.
-
Search for the application account by using the search box at the top.
-
Select the check box to the left of the application account name and then select View in the dropdown list under Secret Permissions.
-
Select Save.
-
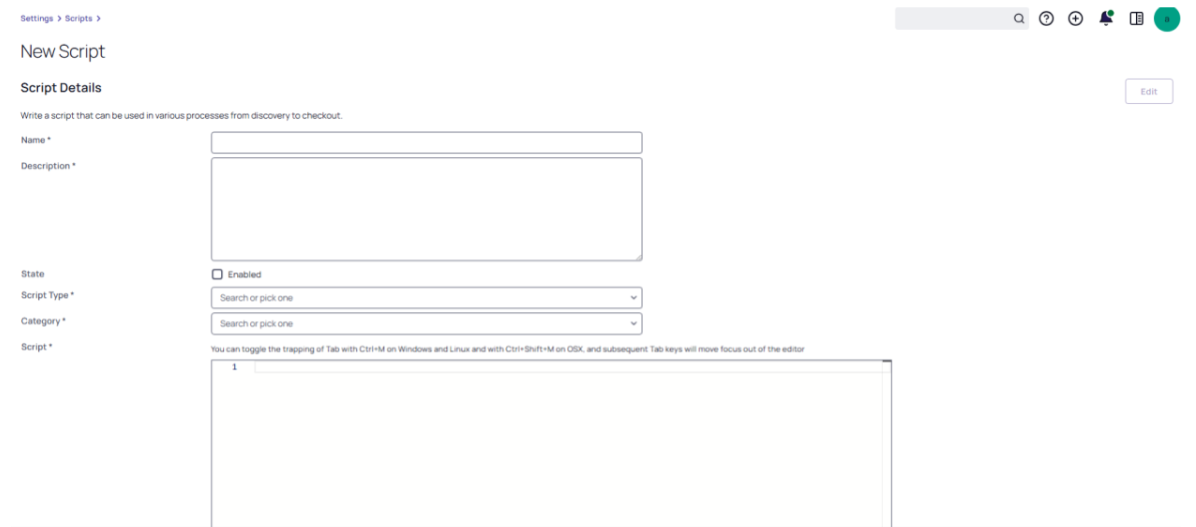
Step 3: Create a PowerShell Script in Secret Server
Your script must accept the Secret ID as an input parameter, call the Delinea Credentials Cache /api/secretchanged endpoint, and log the request and response for monitoring purposes.
-
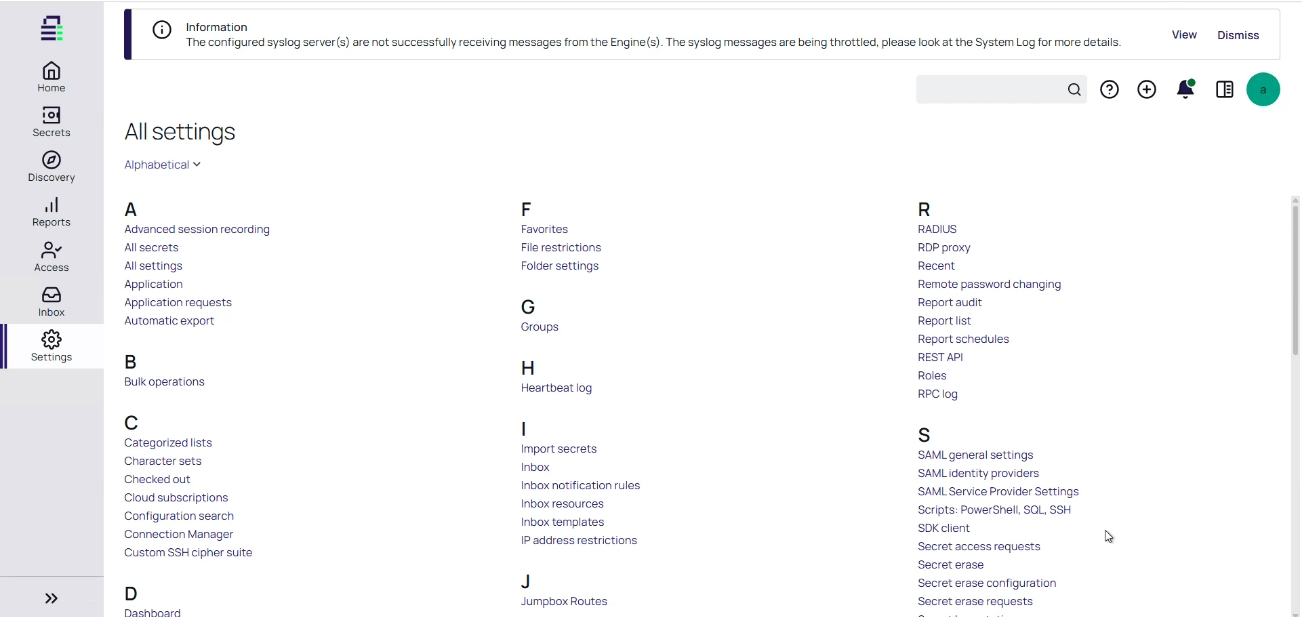
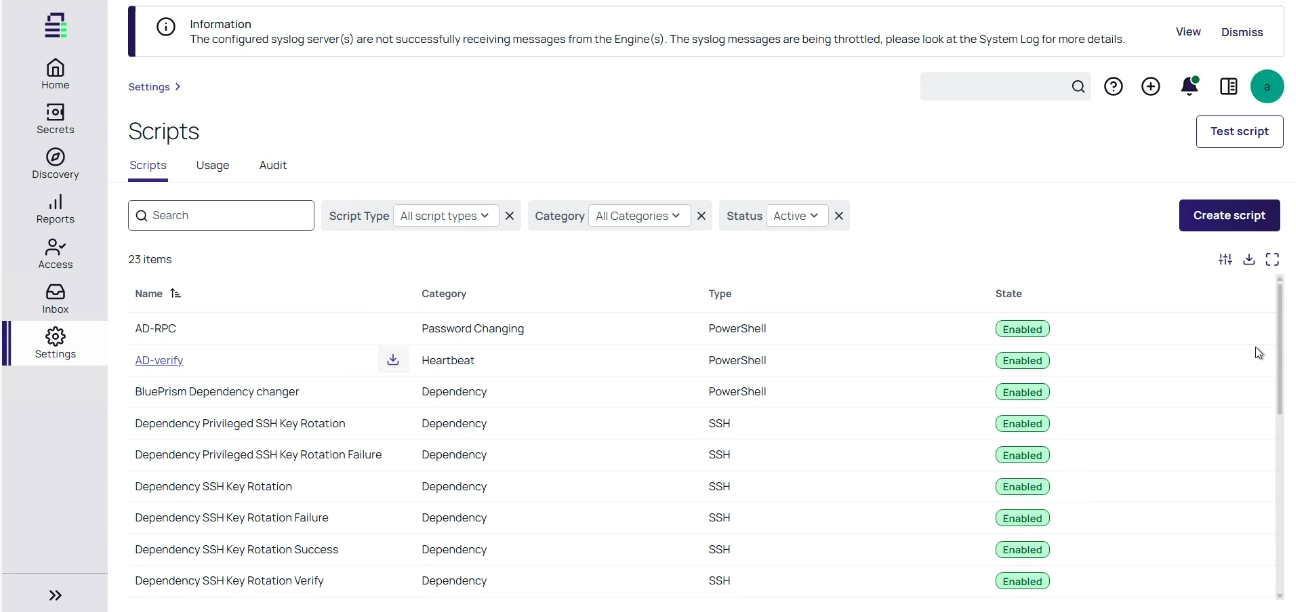
Open Secret Server and navigate to Settings.
-
Select Scripts: PowerShell, SQL, SSH.
-
Select Create script.
-
Complete the script details:
-
Name: Name of the script.
-
Description: Optional description of the script.
- Script Type: PowerShell
- Category: Password Changing
- Use PowerShell Core: Clear this checkbox.
- Script: Paste the below PowerShell script in the script editor section:
- Select Save to store your PowerShell script.
$ItemId = $Args[0]
  # ===============================
# CONFIGURATION
# ===============================
$BaseUrl    = $Args[1]
$Username   = $Args[2]
$Password   = $Args[3]
$ApiBaseURI = $Args[4]
$Domain     = $Args[5]
# ===============================
# TLS + CERT FIX (DEV ONLY)
# ===============================
[Net.ServicePointManager]::SecurityProtocol = [Net.SecurityProtocolType]::Tls12
[System.Net.ServicePointManager]::ServerCertificateValidationCallback = { $true }
# ===============================
# STEP 1: GET JWT TOKEN
# ===============================
$TokenUrl = "$ApiBaseURI/api/token"
$TokenBody = @{
    Username = $Username
    Password = $Password
    BaseUrl  = $BaseUrl
    Domain   = $Domain
}
try {
    Write-Host "Requesting JWT token..."
    $TokenResponse = Invoke-RestMethod `
        -Method Post `
        -Uri $TokenUrl `
        -ContentType "application/x-www-form-urlencoded" `
        -Body $TokenBody `
        -ErrorAction Stop
    $AccessToken = $TokenResponse.token
    if ([string]::IsNullOrWhiteSpace($AccessToken)) {
        throw "JWT token missing in response."
    }
    Write-Host "JWT token retrieved successfully."
}
catch {
    Write-Error "❌ Token request failed: $($_.Exception.Message)"
    exit 1
}
# ===============================
# STEP 2: CALL SECRET CHANGED API
# ===============================
$SecretChangedUrl = "$ApiBaseURI/api/secretchanged"
$Headers = @{
    Authorization = "Bearer $AccessToken"
    "Content-Type" = "application/json"
}
$Body = @{
    secretId = "$ItemId"
} | ConvertTo-Json
try {
    Write-Host "Calling SecretChanged API..."
    Invoke-RestMethod `
        -Method Post `
        -Uri $SecretChangedUrl `
        -Headers $Headers `
        -Body $Body `
        -ErrorAction Stop
    Write-Host "✅ Secret cached successfully."

}
catch {
    Write-Error "❌ SecretChanged API failed."
    Write-Error $_.Exception.Message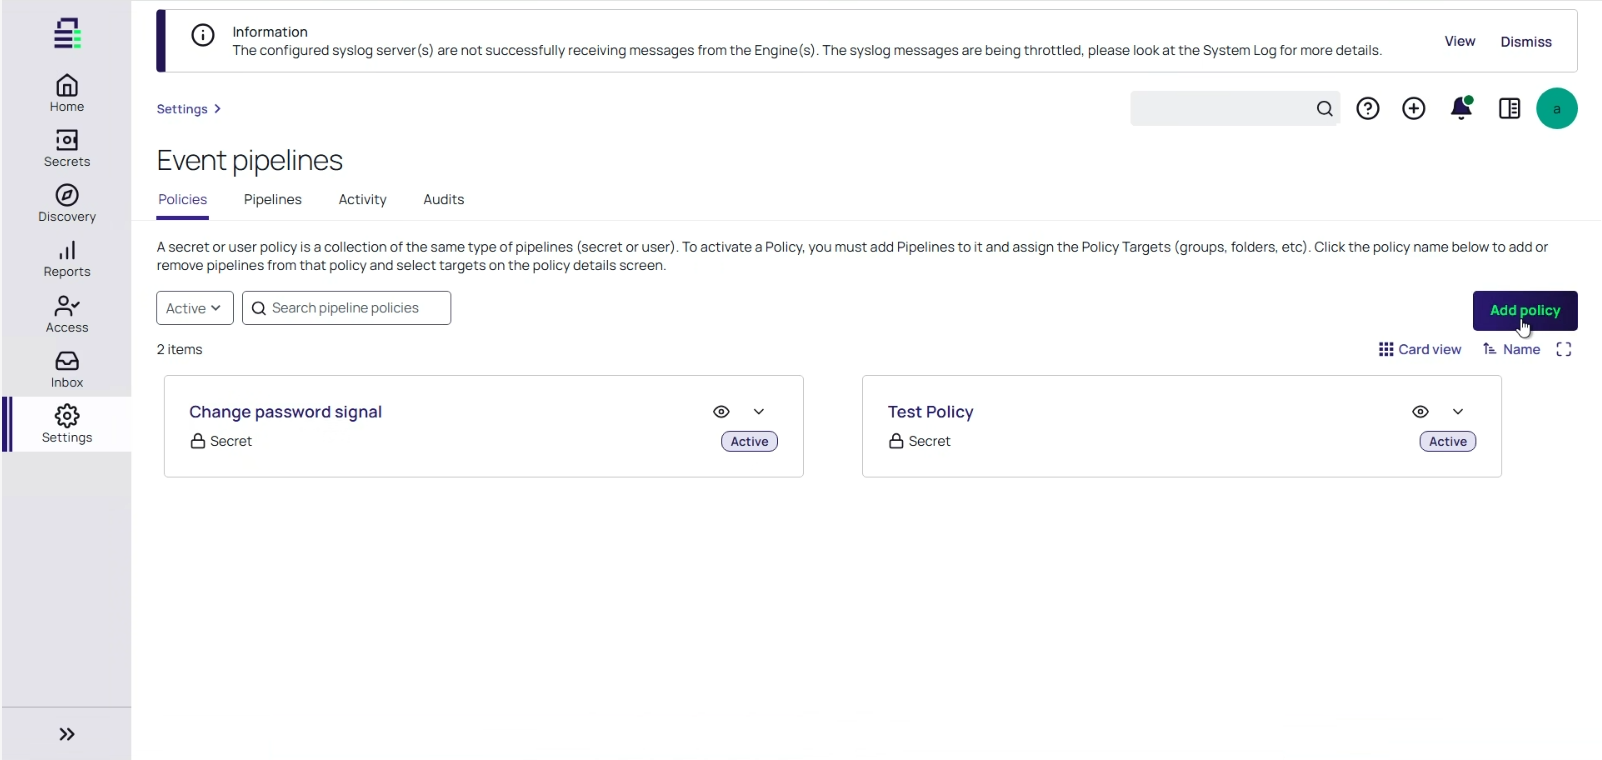
}Step 4: Create an Event Pipeline Policy
-
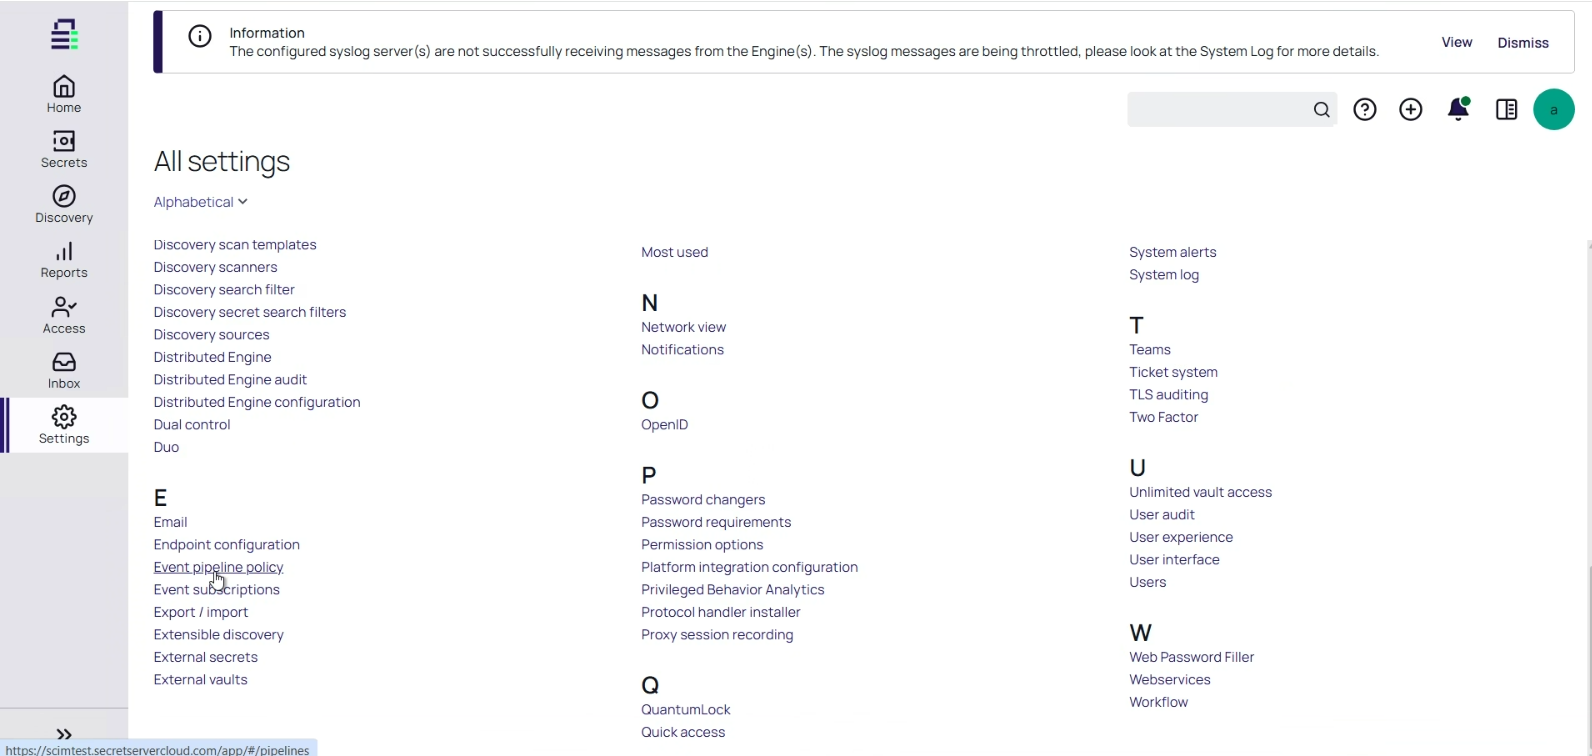
Open Secret Server and navigate to Settings.
-
Select Event pipeline policy.
-
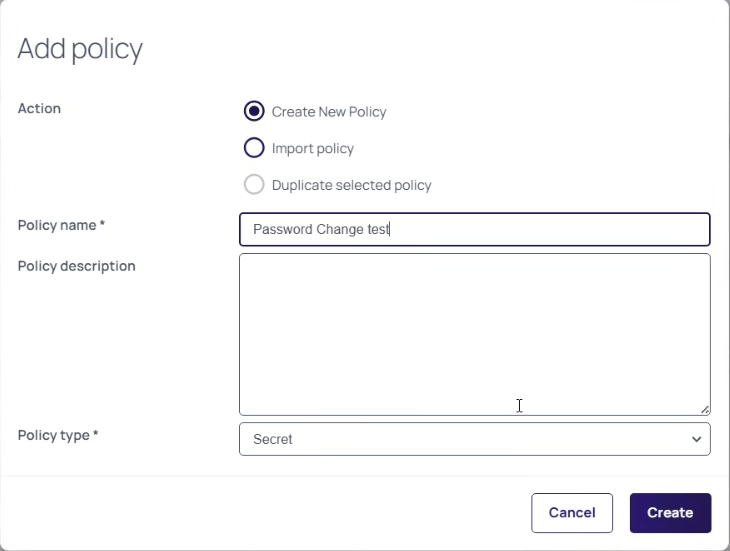
Click Add policy.
-
In the Add policy window, type the name of your policy and select Secret as the policy type.
- Click Create to create the event policy.
Step 5: Configure a Pipeline Task
To configure the pipeline task:
- Click on your created Pipeline Policy.
- Open the pipeline and select Trigger.
- From Add Secret Triggers, select Secret Password Change.
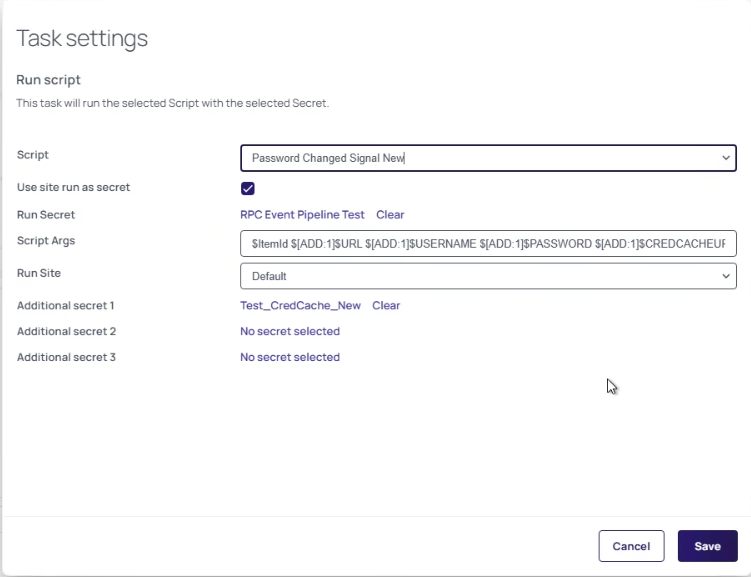
- Select Tasks and from Add Secret tasks, select Run script.
-
In the Task settings dialog, provide the following information:
- Script: Select the name of the PowerShell script you created.
- Use site run as secret: Select this checkbox.
Script Args: Select $ItemId $[ADD:1]$URL $[ADD:1]$USERNAME $[ADD:1]$PASSWORD $[ADD:1]$CREDCACHEURL $[ADD:1]$DOMAIN as the script argument.
$ItemIdcontains the Secret ID passed to the script when the pipeline runs.Input Parameters:
Secret ID (automatically passed by Secret Server)
URL: Secret Server URL
Username: Secret Server application account username
Password: Password of the application account
Cred Cache URL: Credentials Cache URL
Domain: Secret Server domain (optional)
- Run Site: Select the site in your Distributed Engine.
- Additional secret 1: Select the secret containing the application account credentials.
- Select Save.
Secret Server automatically passes the Secret ID to your script during execution.
If Credentials Cache is installed on multiple Distributed Engines, each instance independently receives the update trigger and refreshes its local cache.
Execution Flow
After configuration is complete, the following sequence occurs automatically each time a secret password changes:
- The secret password changes in Secret Server.
- The Event Pipeline Policy evaluates the trigger and finds a match.
- A pipeline task is dispatched to the Distributed Engine.
- The Distributed Engine executes the configured PowerShell script.
- The script calls the Credentials Cache
/api/secretchangedendpoint with the changed secret ID. - Credentials Cache authenticates and fetches the updated secret from Secret Server.
- The local cache is refreshed with the new credential value.
Error Handling and Monitoring
Event Pipeline execution status is visible in Secret Server and can be used to confirm successful cache updates or diagnose failures.
To monitor pipeline execution:
- In Secret Server or Delinea Platform, navigate to Admin > Settings > Event Pipelines.
- Select the Activity tab.
- Locate the relevant pipeline execution and verify:
- Status — should show Success for a successful execution.
- Triggered by — shows which event triggered the pipeline.
- Timestamp — confirms execution time matches the password change.
For detailed log-level verification, navigate to the log directory configured in the
LogPath parameter of your appsettings.json file on the Distributed
Engine host. Successful execution produces entries confirming that the secret was retrieved
from Secret Server and the cache was updated for the specified secret ID.
If no log entries appear after a password change, verify that
EnableLogging is set to true in appsettings.json.
If a pipeline task fails, subsequent tasks in the same pipeline will not run. For additional monitoring guidance, see Event Pipelines in the Secret Server documentation. For end-to-end verification, see Verification.