Setting Up Policies
PCS authentication policies provide users with machine-level (server) permissions for logging in to remote computers and servers managed by Delinea Platform and performing actions on them. By assigning machine-level policies, you can ensure that each asset adheres to compliance standards, maintaining both security and efficiency across your network.
For a policy to grant access, all the policy's rules and conditions must be satisfied, and the user must not be denied access by a different policy with the same rules and conditions.
Viewing Policies
From the left navigation, select Policies. The Policies page opens, listing each policy available in your Platform environment on a table row, with columns for details including the policy name, state, deployment status, and policy type.
Deployment Status
Deployment Status refers to the deployment of the policy on the target. The status can be Active, Activating, Active - incomplete, Activation Failed, Deactivating, Deactivation Failed, or Inactive. The Activating and Deactivating statuses appear for just a few seconds.
When the policy is not being enforced on one or more targets that are included in the policy, because the Delinea Agent is not installed on the targets, a warning message is displayed in the Deployment Status area. Click the message to get a list of the affected computers.
For a policy to be deployed, at least one Command Relay workload must be running and in the Active state on a Delinea Engine in the same domain as the policy's target. For more information about what the Command Relay is and how to install it, see Command Relay Workload.
Global Settings for Local Administrator Login
This feature is currently available only to customers participating in a Public Preview. For details, see Preview Program.
Delinea Platform provides global policy settings that affect the ability of Platform administrators to log in. These settings function independently of any other authentication policies.
-
Windows local admin login: Local Platform administrators can log in to endpoints where the Delinea Agent is installed. When this setting is disabled, only users specifically granted access by a policy can sign in.
-
Windows local admin emergency access: Even if basic required functionality is not available, local Platform administrators can log in to endpoints where the Delinea Agent is installed. This setting ensures that administrators will not be locked out of the Platform tenant. Access is still allowed in the following situations:
-
Audit data from the Audit Collector workload is required to log in to an endpoint, but the audit can not be performed for some reason.
-
The Delinea Agent is not functioning.
-
Multi-factor authentication (MFA) failed or was unavailable.
-
These global settings are enabled by default for every workload in the platform, so even before you define any authentication policies, administrators are assured of the ability to log in.
These settings take precedence over the user access controls in individual policies you define.
To enable or disable the global policy settings:
-
Open the Policies page. (Use the Search bar to find it.)
-
Select the Global Settings tab.
-
Select Enable or Disable next to each global policy setting.
Delinea recommends you keep at least the emergency access setting enabled until you have created one or more policies to grant user login access to your endpoints. Turning off this feature when you do not have a policy enabled on the Windows endpoint will prevent users from logging in. Make sure you have restrictions in place to manage disabling the default global setting for Windows local admin emergency access.
Creating a Policy
To define a policy, use the following steps.
-
From the left navigation, select Policies. The Policies page opens, listing each policy available in your Platform environment.
-
Click Create Policy.
-
On the Create Policy page, click a radio button to select a policy type from among the types listed. A policy type is defined by the events you want to control. Select one of the following:
-
Emergency Access: Users who meet the conditions defined in this policy can log in and perform elevation actions when a server can not communicate with the Delinea Platform.
We strongly suggest that you define and enable an Emergency Access policy, at the minimum, to avoid losing access to your Delinea Platform instance. -
Endpoint Login: Users who meet the conditions defined in this policy can log in to any computer where the policy is enabled.
-
Local Administrator Privileges: Users who meet the conditions defined in this policy gain administrative privileges on the target agent. The user can run any command as administrator or root. On Windows, the Run with Privilege option is used; on Linux, the
dzdocommand is used. -
Granular Privilege Elevation:
For users who meet the conditions defined in this policy, administrators can assign elevated permissions so they can run commands on Windows and Unix/Linux servers.
In a standard UNIX shell environment, an ordinary user account can execute a large number of common command-line programs without any special privileges, but one or more administrative accounts, such as root, are required to execute commands that perform privileged operations. If ordinary users need to execute any of the commands requiring administrative privileges, they might have to switch to an administrative account that requires them to know the password for a privileged user, or they might be granted access by configuration settings in a
sudoersfile. A Granular Privilege Elevation policy makes it easier to grant this sort of access. You can grant certain users permission to execute commands that would otherwise require administrative or root privileges.
-
-
Click Select template. A page opens where you can create a new policy. For details about how to fill out this page, see the next few sections.
Policy Details
In the first section of the Create Policy page, specify the basic information about the policy.
-
Enter a policy name in the Name field.
-
(Optional) Enter a policy description in the Description field.
-
Select the box next to Enabled to enable the policy.
Command Groups
(For Granular Privilege Elevation policies only. If you are defining a different type of policy, skip forward to Policy Subjects.)
A Granular Privilege Elevation policy controls access on Delinea Platform managed computers to all the commands in the command group. In this section of the Create Policy page, choose one or more command groups to specify which commands you want to enable users to run.
Each command group contains a set of command-line programs. Before you can add command groups to a policy, you must first define the commands, then add them to command groups, as described in the next few sections.
Creating Commands
If needed, create one or more new commands. Commands are configured by defining command rights, adding the rights to the appropriate roles, and assigning the roles to different users and groups. Users who have been assigned the appropriate roles can then run privileged commands by invoking the dzdo command.
The most common reason for defining a command right is to grant access to commands that perform privileged operations. For example, you might want to grant users additional privileges to execute specific commands in a standard shell environment that they are not otherwise allowed to execute with the default rights associated with their account.
You can define command access rights to tightly control the specific commands users can execute. You can also refine those rights to only allow specific arguments to be used or to require an executable to be located in a specific directory.
-
From the left navigation, select Policies, then Commands.
-
Click Create command and choose the operating system: Linux/Unix or Windows.
-
Click Create custom command.
-
Enter a name and (optional) description.
The name is required and must not be more than 63 characters in length or contain any special characters, such as asterisks (*), slashes (\ /), question marks (?), or quotation marks (“).
The rest of the steps depend on whether you are defining a Linux/Unix command or a Windows command.
-
For a Linux/Unix command, use steps 5 - 8.
-
For a Windows command, use steps 9 - 12.
-
-
(Linux/Unix) In Command, give the name of the command as you would enter it at the command line; for example,
vi.You can also use wild cards or a regular expression to specify commands matching a particular pattern.
-
(Linux/Unix) In Arguments, give any input arguments that the command requires; for example,
/etc/ssh/sshd_configto edit the SSH server's config file. Glob pattern matching is used to expand any wildcard expressions. If you do not specify any arguments, the default value of asterisk (*) is used. -
(Linux/Unix) In Match path, choose the path where the command can be found:
-
Select Standard user path to use the local operating system’s common set of user directories to find the command; for example,
/bin,/usr/bin. -
Select Standard system path to use the directories the root user would normally get on the local operating environment to find the command; for example,
/sbin,/usr/sbin -
Select System search path to search for the command in a predefined set of locations. The search locations are defined using the
dzdo.search_pathconfiguration parameter. If you select System search path and thedzdo.search_pathparameter is not defined, the current user’s path is used to search for the command. For example,/sbin,/usr/sbin,/bin,/usr/bin. -
Select Specific path to define a custom set of locations for finding the command specified. You can specify one or more paths, separated by a colon. If you set both Command and Specific path to match all strings (*), any command from any path is allowed.
-
-
(Linux/Unix) In Run command as, choose the user role that determines the permissions that will be used to run the command. You can specify a user account or run the command as root. The user account must be present on the endpoint.
In most cases, the local root account is the appropriate account to use, because it allows ordinary users to execute the specified command using root account privileges. However, you can click Add to add other users, groups, or service accounts that can be used to execute the command. Use the format #UID for UID values, %group for group names, or %#GID for GID values.
The account used to execute commands can be an Active Directory user with a UNIX profile in the zone or a local UNIX user account. However, the account used to log on and invoke the command using
dzdomust be associated with an Active Directory account.The role that is set in Run Command As is only applicable to users executing policies under thedzdocommand. Users with the Restricted Shell (dzshdefined as their login shell) continue to execute policies as the logged-in user. -
(Windows) In Application, give the name of the application runtime file; for example,
taskschd.msc. -
(Windows) In Arguments, give any input arguments that the application requires; for example,
\s. If you do not specify any arguments, the field is left blank.The use of the asterisk (*) as an argument is not supported. The value
/*can be used as an argument, but it does not act as a wildcard. The literal text/*is used. -
(Windows) In Match path, choose the path where the command can be found:
-
Standard system path
-
Specific path; for example,
%systemroot%\system32\
-
-
(Windows) In Run command as, select one of the following to choose the user or group whose permissions will be used to run the command:
-
To use a Windows built-in security group: Choose Built-in group from the dropdown, then choose one of the provided Active Directory security groups. For more information about these groups, see Active Directory security groups in the Microsoft documentation.
-
To use an individual user: Choose AD domain user from the dropdown, then click Select a domain user to search for and select a user account. The user account must be present on the endpoint.
-
To use an Active Directory security group that is defined in one of the domains accessible to your policy: Choose AD domain group from the dropdown, then click Select a domain group to search for and select an Active Directory domain group.
-
-
Click Create command.
The command is saved, and the Commands list page is displayed again. The new command appears in the list.
If needed, repeat these steps to create more commands.
Creating Command Groups
After creating all the commands you need, create command groups.
-
From the left navigation, select Policies, then Command groups.
-
Click Create command group.
-
Enter a name and (optional) description.
-
Click Assign command.
-
Click one or more checkboxes next to the commands you want to include in the command group.
If you are not sure which commands to choose, you can click the name of any command to see its details.
-
Click Create group.
If needed, repeat these steps to create more command groups.
Adding Command Groups to the Policy
After creating all the command groups you need, you are ready to fill out the Command Groups part of the Create Policy page for a Granular Privilege Elevation policy.
-
Click Add command groups.
The Select Command Groups page shows all the command groups that have been defined.
-
Click one or more checkboxes next to the command groups you want to include in the policy.
If you are not sure which groups to choose, you can click the name of any group to see which commands it includes.
Modifying Commands and Command Groups
You can edit commands and command groups after creating them and adding them to policies. To do so, display the command or command group and click Edit or Delete.
The Delinea Platform keeps track of changes to commands and command groups. The Platform records the modification date and the username of the person who made the change. The Platform then updates its display wherever the changed entity is shown.
For example, when a command is modified, the modification date and username are updated and displayed in the following pages:
-
Commands page, which lists all of the commands
-
Pages for any command group that contains the command
-
Pages for any policy that includes a command group where the command is a member
When a command is added to a command group or removed from a command group, the date and username are updated and displayed in the following pages:
-
Command Groups page, which lists all the command groups
-
Pages for any policy that includes the command group
When a command is deleted, the date and username are updated and displayed in the following pages:
-
Pages for any command group that contained the command
-
Pages for any policy that included a command group where the command was a member
When a command group is deleted, the date and username are updated and displayed in the pages for any policy that included the command group.
Policy Subjects
After filling out the Policy Details section, choose the policy subjects. Subjects are the users and user groups your policy can apply to, based on the template you selected earlier.
-
Scroll down to the Subjects section to see a list of available subjects.
-
Click Add Subjects.
-
Select the box next to each AD user and user group you wish to add to the policy.
-
Click Update.
Using Local Users and Groups as Policy Subjects
This feature is currently available only to customers participating in a Public Preview. For details, see Preview Program.
When defining the subject of a policy, the Add Subjects dialog is automatically populated with Active Directory users and groups. You can also use local Windows or Linux/UNIX users, local Windows or Linux/UNIX groups, or the built-in Windows Local Administrators Group. This is useful for defining policies to cover local service accounts that need access, giving access to custom local groups, or providing an emergency fallback means of access for local administrators.
Multi-factor authentication (MFA) is not available with this type of policy subject.
When a local user or group is used as the subject of a policy, validation is performed when the user attempts to log in on the target endpoint (defined in the Targets section of the policy). If the user or group exists on the endpoint, login is successful, and the policy name, type of login (local user vs. local group), and the user or group name is recorded in the audit log; for example, Local Group: BackupOps (Policy: LinuxServers-Admins). If the user or group is not valid, login is denied, and an entry is made in the audit log.
Linux/UNIX local user and group subjects are not enforced by policy at sign-in. These still utilize the local PAM. Accounts outside the platform directory may continue to authenticate using the system's default path.
To use a local user or group in the subject of a policy, in step 3 of Policy Subjects, do one of the following:
-
Select Local Administrators Group.
-
Type the name of a local group; for example, RemoteDesktopUsers.
-
Type the name of a local user; for example, LocalAdmin2.
Permissions Needed
You can use this feature if you have the Platform Administrator role or the Unix User Provisioning permission.
Policy Targets
Targets are the computers and computer groups your policy can apply to. The target is where the Subject can perform an action, based on the template you selected earlier.
-
Scroll down to the Targets section.
To define the targets, make one of the following choices:
-
To add individual computers and computer groups, click Add computers. In the Select Computers dialog, select the box next to each computer and computer group your policy will apply to.
Computers where the Delinea Agent is installed and AD computers where the Delinea Agent is not yet installed can all be selected as policy targets. To see whether a computer has the agent installed, see Checking for Agent Installation.
-
To add collections, click Add collections. In the Select Collections dialog, select the box next to one or more collections, then click Add Collections. For more information about collections, see Grouping with Collections
-
-
Click the Update button.
When you finish defining the policy and you set its status to Enabled, the policy will start to be enforced on the selected targets where the Delinea Agent is installed.
For any target that does not have the Delinea agent installed, a policy that is set to Enabled will start to be enforced whenever the agent is installed and the target is joined to a domain and zone. A message is displayed on the Policy page to let you know when one or more targets that are included in the policy are not being enforced because the agent is not installed. Click the message to get a list of these computers so you can remedy the situation. You can download the list in CSV format.
For more information about installing the agent or determining whether it is already installed on a computer, see Task 7: Install the Privilege Control Agent in the PCS Setup page.
Policy Conditions
(Optional) Conditions define when or how the policy should by applied. If a policy has a time range condition, the policy will apply only within that time range. All of the time conditions must be met. Local time, not universal time, is used.
If a policy has no time range condition, the policy will apply at all times.
-
Scroll down to the Conditions section.
- Click Add Condition.
- In Condition Type, click inside the Search or pick one box.
-
Select one of the condition types displayed or enter text to search.
When you have selected a condition type, options appear below Constraint.
- Set the constraints for the condition you selected.
-
To add another condition, click Add Condition again and follow the same procedure.
Policy Controls
Controls are additional requirements the user must meet to fulfill the requirements of the policy. All of the control conditions must be met.
Policy controls can be set in the following ways:
-
Session recording enabled: The user's activity is recorded. In addition, you can select Required, which denies access if session recording cannot be performed on the endpoint. For example, session recording is not available if the audit service is not enabled on the endpoint or a session recording process is blocked. Require Session Recording can be assigned as the only control, or in conjunction with MFA. Require Session Recording can also be applied to local administrator privileges.
Emergency Access profiles always allow access without session recording, so the option is not shown.
-
Require MFA: Requires multi-factor authentication. If you select Require MFA, you must also select an authentication profile to specify which MFA challenges the user must pass and how much time will elapse before the user is prompted again for authentication.
Emergency Access profiles always allow access without MFA, so the Require MFA option is not shown.
-
Access actions: Platform administrators can enforce which login methods are permitted on Windows machines: console, Remote Desktop Protocol (RDP), remote PowerShell, or any combination of them. By setting these options, administrators can make sure users access systems only through approved methods. This improves control, security, and adherence to organizational access policies.
To define policy controls:
-
Scroll down to the Controls section.
-
In Audit, select one or both of the following:
-
Session recording enabled: Select this option to record the user's activity.
-
Required: Select this option if you want to deny user access when session recording can not be performed. Session recording enabled must also be selected. If the Required option is not selected, but Session recording enabled is, the user's activity is audited if possible, but user access is not denied if auditing is not possible.
Emergency Access profiles always allow access without session recording, so the Required option is not shown.
-
-
Select Require MFA if you want to require multi-factor authentication.
Emergency Access profiles always allow access without MFA, so the Require MFA option is not shown.
-
If you selected MFA, click Select and select an authentication profile where MFA is configured.
-
In an Endpoint Login policy, if you selected MFA, you must also select an option to determine whether the pass-through duration is used, depending on the source and target of the login attempt. For more information, see Choosing an MFA Pass-Through Type.
-
In an Endpoint Login policy, if you selected MFA, you can optionally set a user risk score threshold of Low, Medium, High, or Critical. This setting overrides the authentication profile. When the user's risk score (which the Platform calculates automatically) reaches the selected threshold, the Platform requires the user to pass an MFA challenge to log in. If you do not want to use the risk score in this way, select N/A.
-
In Access Actions, select which login methods are permitted.
-
When you have made all the required changes, click Create.
-
Click Enable to activate the policy.
Choosing an MFA Pass-Through Type
(For Endpoint Login policies only)
In the Controls section of an Endpoint Login policy, you can specify conditions under which the user receives an MFA challenge, depending on the source machine where the user is trying to log in and the target machine that the user is trying to log in to.
-
Same source
Allow a person to log in to any endpoint within the pass-through time period, as long as they are on their own trusted computer and they have passed MFA once.
-
Same target
Allow a person to log in to a given endpoint multiple times from one or more computers within the pass-through time period, as long as they have passed MFA once. There can be more than one given website, and the user must pass MFA on each of them when they log in for the first time.
-
Same source and target
Allow a person to log in to a given endpoint multiple times within the pass-through time period, as long as they are on their own trusted computer and they have passed MFA once. There can be more than one given website, and the user must pass MFA on each of them when they log in for the first time.
-
Never
Strictest level of security. The user must always pass an MFA challenge whenever logging in, even if they passed MFA on the same computer or website previously.
Example
Suppose four people are using their computers to remotely log in to another computer, DB Server 1. An authentication profile and endpoint login policy are in effect on each user’s computer, and in all four cases, the endpoint login policy defines the user as the Subject and DB Servers 1, 2, and 3 as the Targets. In the Controls section of all the endpoint login policies, MFA is set. In the authentication profiles, the “pass-through” time is set to 15 minutes. (For more information about authentication profiles, see Authentication Profiles. For more information about endpoint login policies, see Creating a Policy.)
The only difference between the four user situations is the pass-through type that is set in the endpoint login policy:
-
Same source
-
Same target
-
Same source and target
-
Never pass through
When the four users attempt to log in to Web 1 for the first time, they are challenged for MFA, pass it, and they are all logged in to Web 1 successfully.
Now suppose each of these four users disconnects from Web 1 and tries to log back in to Web 1 within 15 minutes. Each user has a different experience, depending on the type of pass-through:
-
Same source
Login is successful without another MFA prompt, as long as the user is still on the same computer.
-
Same target
Login is successful without another MFA prompt, as long as all additional endpoint login policy conditions are still met (for example, if the policy states session recording is required, session recording must still be turned on).
All endpoint login policies must have the same target as a pass-through option. If not, the others are ignored.
If any policies have a different authentication profile, but the same target, the shortest pass-through time period is used.
The user can log back in to Web 1 from the same computer or from a different computer.
-
Same source and target
Login is successful without another MFA prompt, with the same conditions as for Same target, except that the user must use the same machine to log in again.
-
Never pass through
The user is challenged for MFA.
Now suppose the four users try to connect to a different target, Web 2 (whether still logged in to Web 1 or not). The result depends on the type of pass-through:
-
Same source
Login is successful without another MFA prompt, as long as the user is still on the same computer and all additional endpoint login policy conditions are still met (for example, if the policy states session recording is required, session recording must still be turned on).
All endpoint login policies must have the same source as a pass-through option. If not, the others are ignored.
If any policies have a different authentication profile, but the same source, the shortest pass-through time period is used.
If the user tries to log in to Web 3 from inside Web 2, an MFA challenge is presented.
-
Same target
The user gets an MFA challenge the first time they log in to Web 2 within the pass-through time period.
-
Same source and target
The user gets an MFA challenge and must pass it to log in to Web2.
-
Never pass through
The user is challenged for MFA.
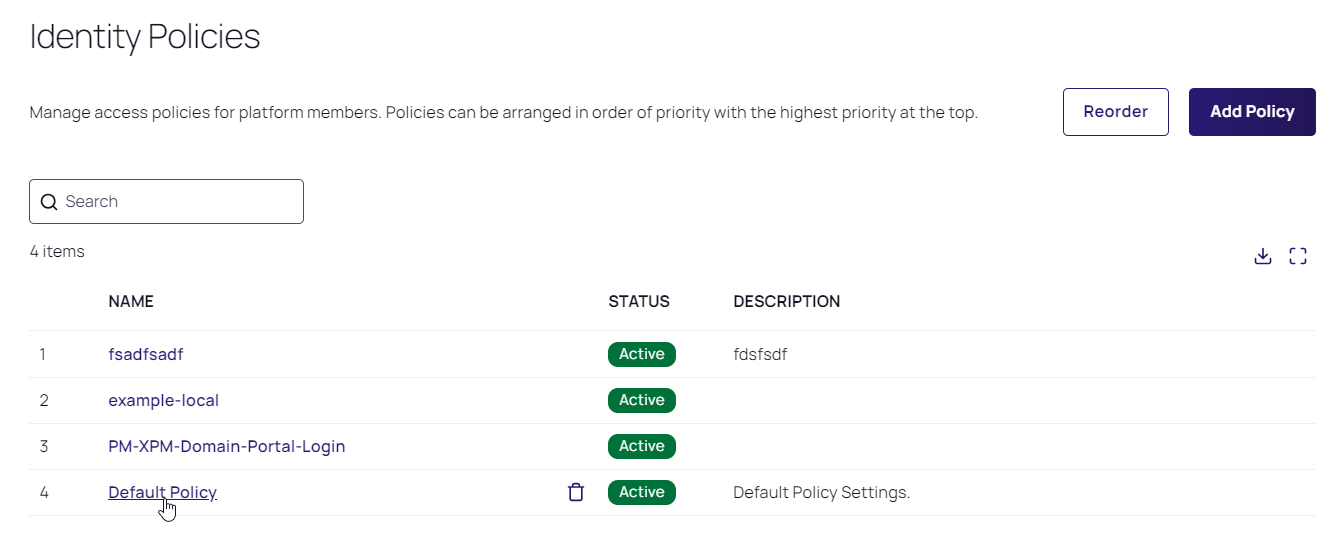
Enabling IWA on the Default Identity Policy
For PCS to function, IWA must be enabled on the default identity policy.
-
From the left navigation, select Access, then Identity policies.
-
Click to open the Default Policy.
-
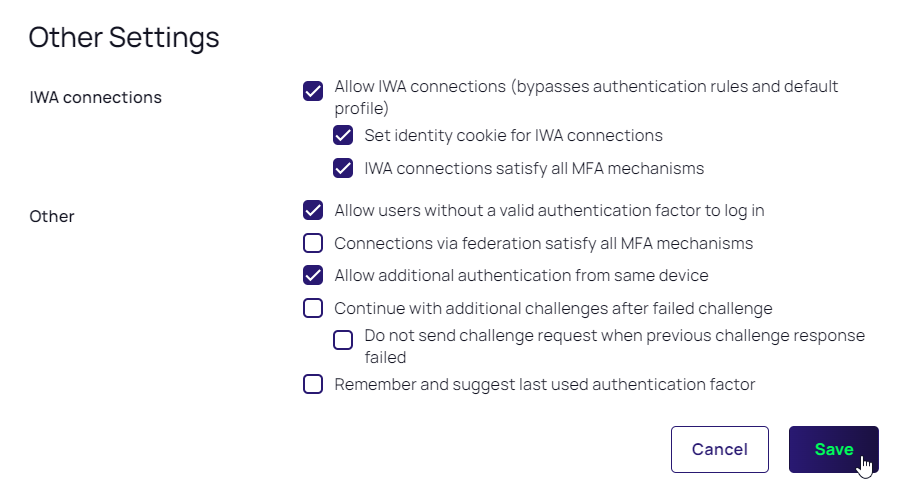
Select the Authentication tab.
-
Scroll to the Other Settings section and click Edit.
-
Enable IWA connections and the two available IWA options.
-
Click Save.
-
Log in to the Delinea Platform as one of the AD users you created.