Installing RabbitMQ
Overview
What is RabbitMQ?
RabbitMQ is a robust message queuing software package that Secret Server uses to communicate with its distributed engines. For detailed information about RabbitMQ, go to the RabbitMQ website.
Why Install It?
RabbitMQ is an enterprise-grade external message queue and is the recommended queue type for all production Secret Server deployments. It supports clustering with 3 or more nodes and can handle up to 200 distributed engine sites.
MemoryMQ is a simpler, built-in alternative that does not require external software installation. However, MemoryMQ does not support clustering and is limited to 100 sites. It is appropriate only for trials, proof-of-concept environments, very small deployments, or organizations that cannot use open-source software for compliance reasons. MemoryMQ should not be used in production.
| Feature | RabbitMQ | MemoryMQ |
|---|---|---|
| Type | External message queue (open-source) | Built-in message queue |
| Clustering | Yes (3+ nodes recommended) | Not supported |
| Production use | Recommended | Not recommended |
| Max sites | Up to 200 | Up to 100 |
| Best for | Production, enterprise, clustered deployments | Trials, POCs, small deployments, compliance restrictions on open-source software |
RabbitMQ and Encryption
All data sent from or read by Secret Server from RabbitMQ is encrypted. If you would like to add SSL despite the data already being encrypted, please follow the Advanced installation of RabbitMQ with TLS use case. Please note that Delinea Support can help with non-SSL installations. For SSL installation, configuration, troubleshooting, and RabbitMQ clustering, please contact Delinea Professional Services to learn more about our Professional Services rates.
Downloading Delinea's RabbitMQ Helper
Please go to Installing RabbitMQ with RabbitMQ Helper to download the most recent version.
Prerequisites
RabbitMQ requires:
General Requirements
See the Software Downloads and Requirements section in Installing RabbitMQ with RabbitMQ Helper section of RabbitMQ documentation.
SSL Certificate
-
A server certificate of the PFX type and a root authority certificate of the CER type.
-
The PFX certificate should have:
- A name that matches the RabbitMQ Fully qualified machine name.
- If you plan on making a RabbitMQ cluster, add DNS names (SANs) to your certificate.
- Your certificate must be a RSA certificate. CNG is not supported and will cause the installation to fail.
-
If you do not have an internal PKI and prefer not to use a public certificate, you can use a self-signed certificate.
Installation
Task 1: Secret Server
In the Secret Server UI:
-
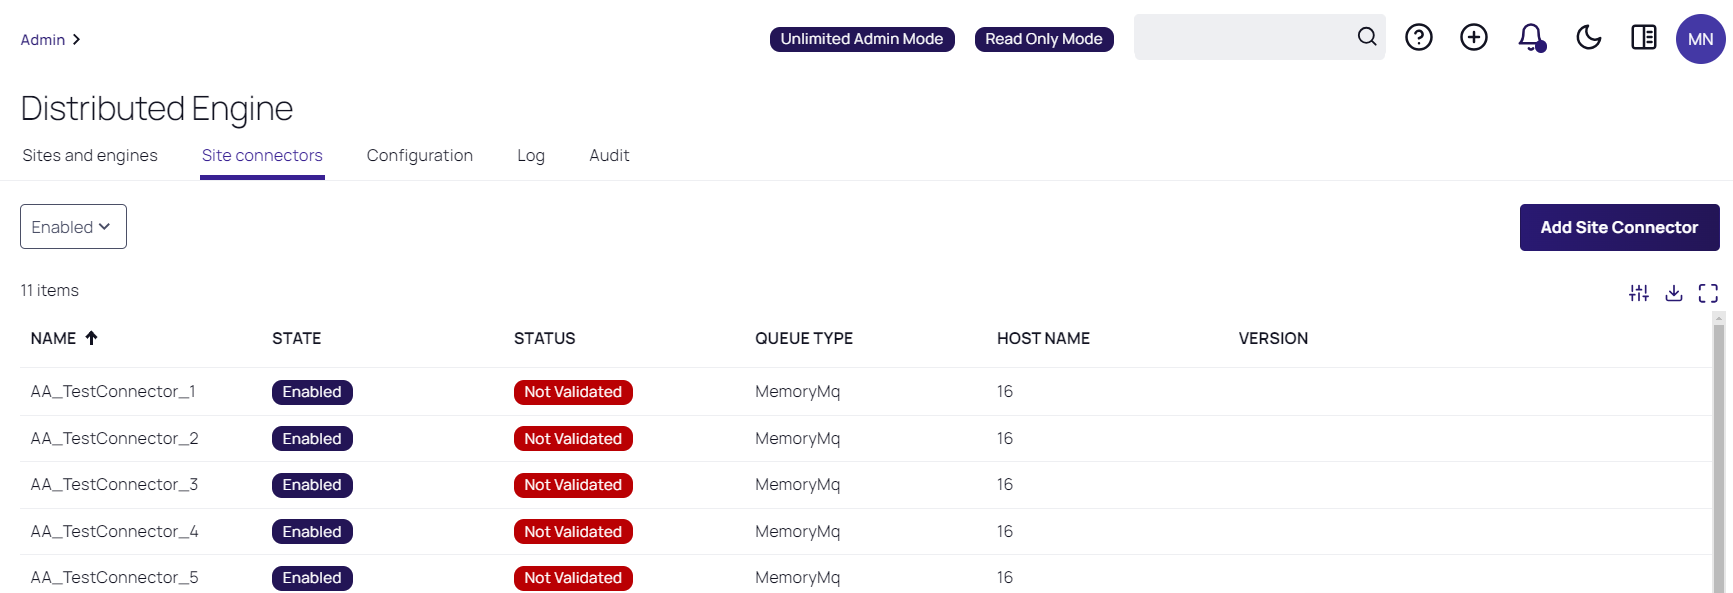
Navigate to Admin > Distributed Engine.
-
Access the Site Connectors tab and select Add Site Connector:
-
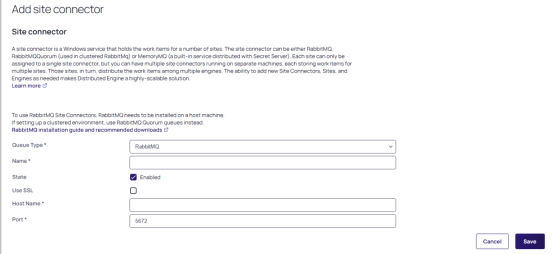
On the Add Site Connector page, select RabbitMQ in the Queue Type drop-down list.
RabbitMQ must be selected as the queue type whenever you are configuring RabbitMQ infrastructure, including clustered deployments with 3 or more nodes. Do not select MemoryMQ here — MemoryMQ does not support clustering and is not compatible with the RabbitMQ setup described in this guide.
For more information on RabbitMQ clustering, see the Cluster section in the RabbitMQ Helper documentation.
-
Type a name for your new site connector in the Name text box.
-
Select the Enabled check box.
-
Type the host name of the machine where you plan to install RabbitMQ, in the Host Name text box.
The Engines need to be able to resolve this host name or the connection will fail. Inbound firewall rules must be created on the machine that is hosting the connector as well. -
Type either port 5672 (non-SSL) or 5671 (SSL) in the Port text box.
-
Click the Save button.
-
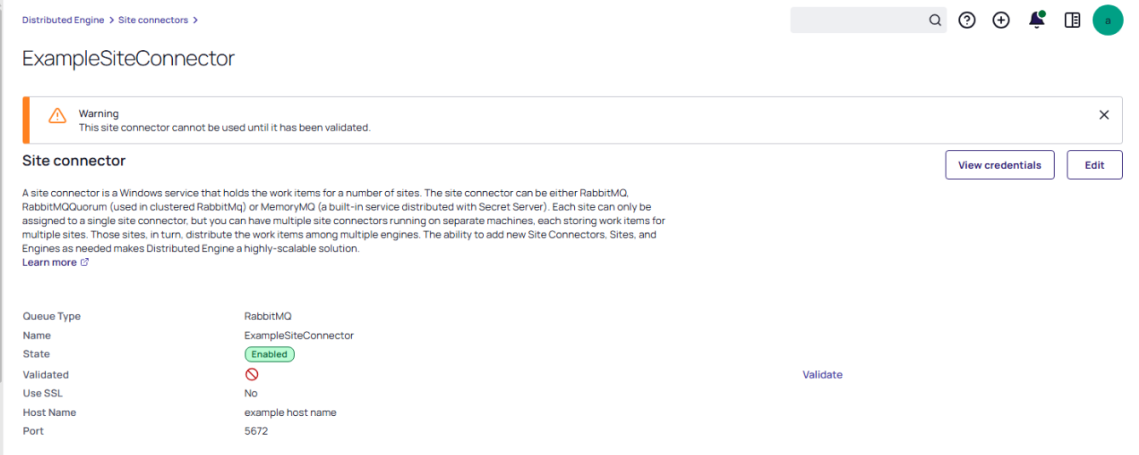
After the site connector is created, click the site connector's link. The Site Connector Details will page appear:
-
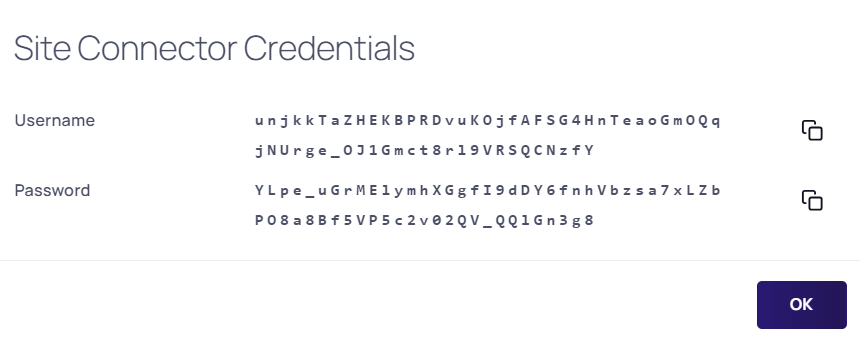
Select the View Credentials button to retrieve the automatically generated credentials. The Site Connector Credentials pop-up will appear:
You can ignore the informational message that the connectivity has not been validated for now, as you will be doing so after you install RabbitMQ on the host you have selected.
-
Select the copy icons for both the User Name and Password values, to copy and store them for use in the next section.
-
Select the OK button.
Task 2: RabbitMQ Host
See RMQ Helper Installation for details.
Troubleshooting
Please refer to Troubleshooting for RabbitMQ Helper for details.