Configuration
All the data we have now under Workday Configuration should be under a new section called “Create API Client for Integration” (read comment)
To make this integration work, you must create an Integration System Service Group (ISSG) security group and assign domain permissions to it. Once the ISSG is created, an Integration System User (ISU) can be assigned to the group to inherit those permissions. Once the ISSG and ISU are set up, create an API Client for Integrations.
Creating Integration System Service Group
Step 1: Create Security Group Task
-
Go to your Workday instance and log in with your credentials.
-
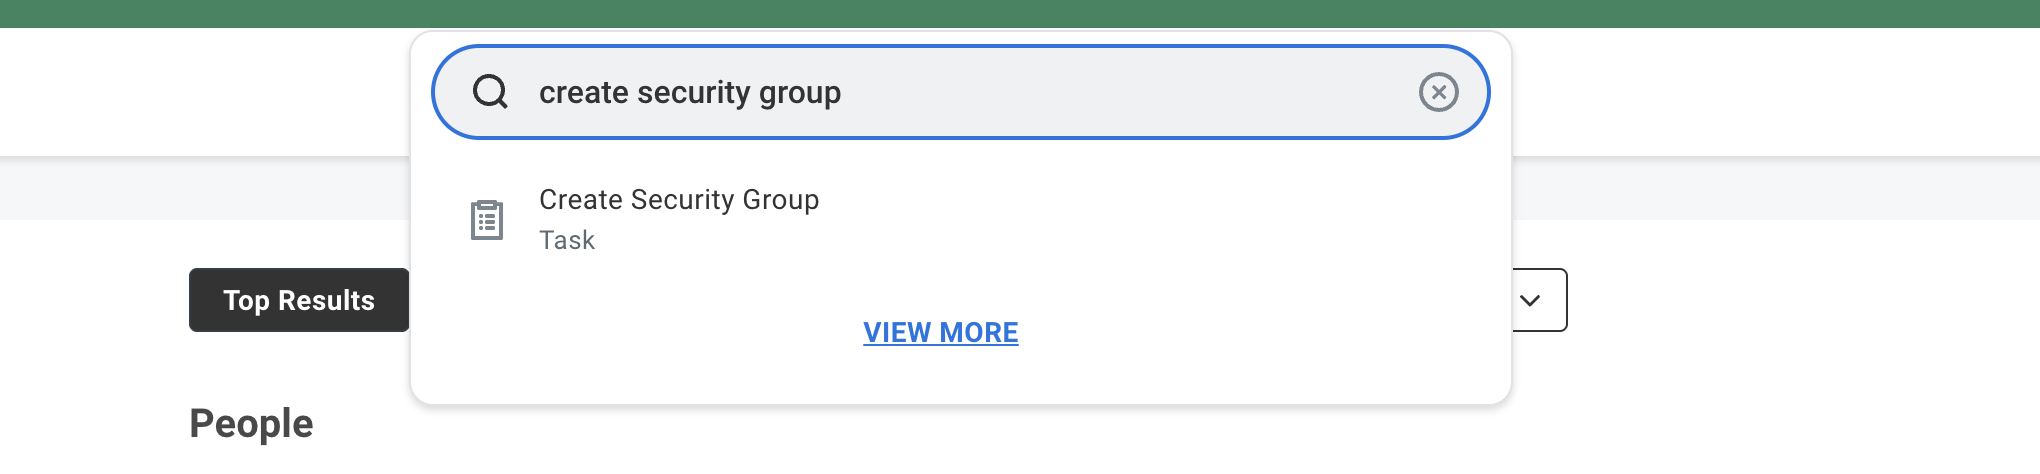
In the Workday search bar,enter Create Security Group and select the task.
-
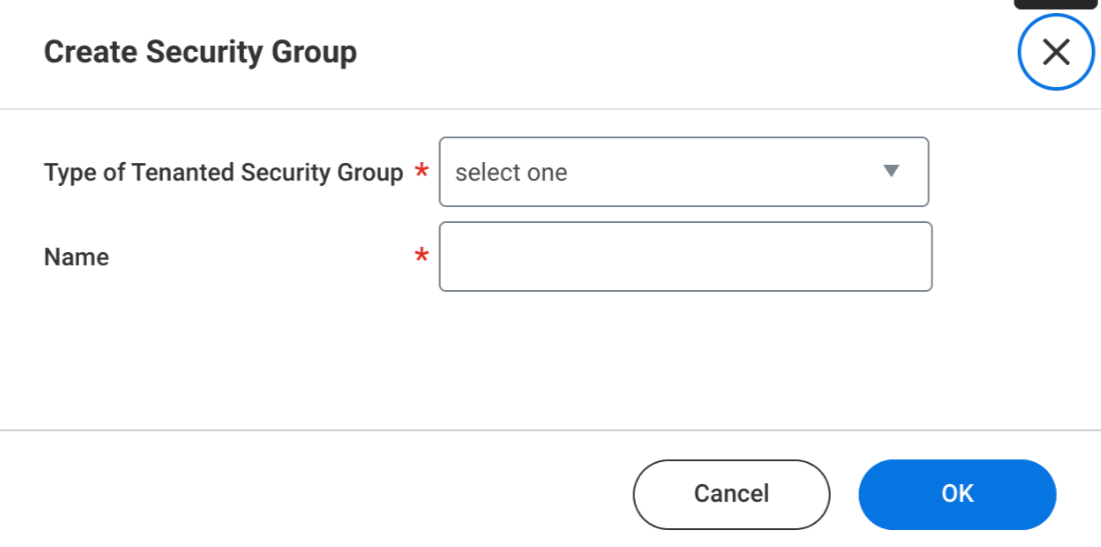
The Create Security Group page opens.
-
In the Type of Tenanted Security Group field select the Integration System User Security Group (Unconstrained) option from the drop-down list.
-
In the Name field enter the name to identify the Integration System Service Group as being associated with Delinea.
-
Select Ok.
Step 2: Maintain Permissions for Security Group Task
-
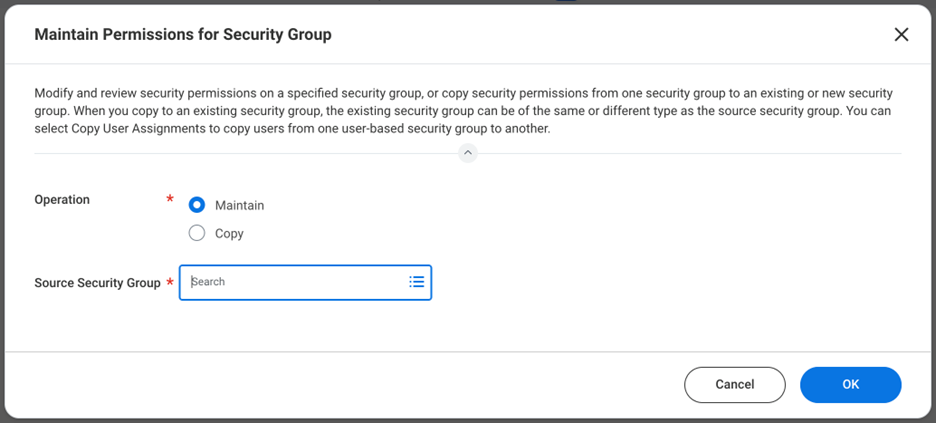
In the Workday search bar, enter Maintain Permissions for Security Group and select the task. The Maintain Security Group page opens.
-
In the Source Security Group field, search for and select the Integration System User Security Group you created earlier (the one for Delinea). This will load the details for that Integration System Security Group.
-
Select Ok.
Step 3: Add Security Changes Based on the Minimum Access Needed
-
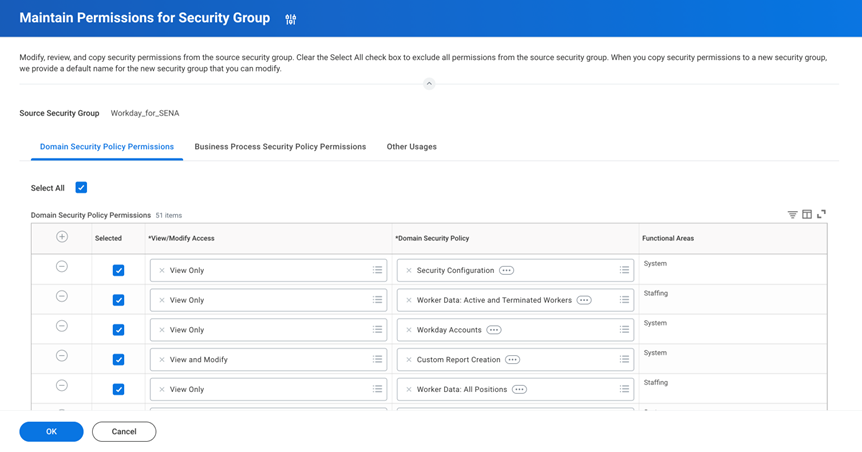
After selecting the Integration System User Security Group, navigate to the Security Policies section of the Security Group Details page.
-
In the Modify Access section, add the following permissions:
-
Custom Report Creation
-
Set Up: Organization
-
-
In the View Access section, grant permission for:
-
Audit: Contact Information
-
Business Process Administration
-
Business Process Reporting
-
Candidate Reporting
-
Data Translation
-
External Committee Member: Contact Information
-
Manage: Student Contact Information Errors
-
Person Data: Home Contact Information
-
Person Data: Work Contact Information
-
Pre-Hire Data: Name and Contact Information
-
Security Administration
-
Security Configuration
-
Set Up: Organization
-
System Auditing
-
Workday Accounts
-
Workday Query Language
-
Worker Data: Active and Terminated Workers
-
Worker Data: All Positions
-
Worker Data: Business Title on Worker Profile
-
Worker Data: Current Job Profile Information
-
Worker Data: Current Staffing Information
-
Worker Data: Public Worker Reports
-
-
In the Put Access section, assign permissions for:
-
System Auditing
-
Worker Data: Connections
-
Worker Data: Dependents
-
Worker Data: Employment Data
-
Worker Data: Reports
-
Worker Data: Staffing
-
Worker Data: Support Roles
-
Worker Data: Worker ID
-
Worker Data: Workers
-
-
In the Get Access section, grant permission for:
-
Audit: Contact Information
-
Candidate Reporting
-
External Committee Member: Contact Information
-
Manage: Student Contact Information Errors
-
Person Data: Home Contact Information
-
Person Data: Work Contact Information
-
Pre-Hire Data: Name and Contact Information
-
Staffing Organizations
-
Staffing Organizations: Company
-
Student Data: Staffing
-
Worker Data: Active and Terminated Workers
-
Worker Data: All Positions
-
Worker Data: Current Job Profile Information
-
Worker Data: Current Staffing Information
-
Worker Data: General Staffing Information
-
Worker Data: Historical Staffing Information
-
Worker Data: Previous System Staffing Information
-
-
Review the Modify, View, Put, and Get access permissions for each domain and save the changes to the security group.
Step 4: Activate Pending Security Policy Changes
-
In the Workday search bar, type Activate Pending Security Policy Changes and select the task.
-
In the Comment field, add a description of the changes you made.
-
Workday will show a summary of the pending security policy changes you made to the Integration System Security Group (ISSG).
-
Review the changes to ensure everything is correct (e.g., permissions for Modify, View, Put, Get access are appropriately configured).
-
Select Confirm to confirm the changes.
-
Select Submit to activate the security policy changes.
Creating Integration System User
-
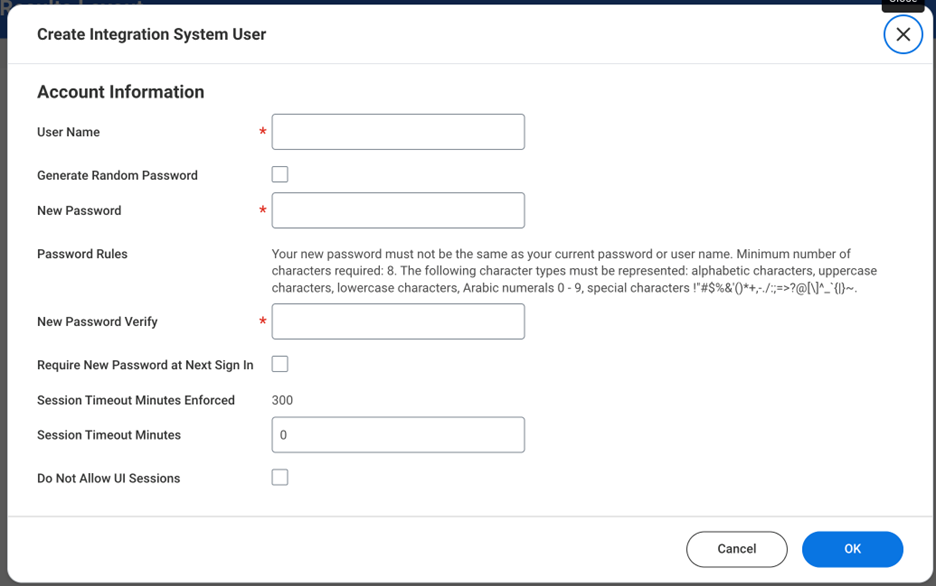
In the Workday search bar, type Create Integration System User and select the task. The Create Integration System User page opens
-
In the User Name field, enter the name you want the Integration System User to have.
-
Create a password in the New Password field, and then verify it in the New Password Verify field.
-
Select the Do Not Allow UI Sessions checkbox to ensures that the user can only perform integration tasks and cannot manually log in to the UI.
-
Select Ok to submit the user creation request.
Assigning the User to the ISSG Security Group in Workday
-
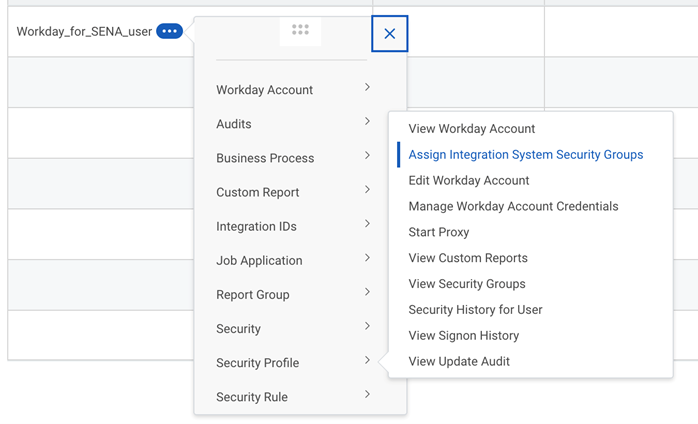
In the Workday search bar, enter the name of the Integration System User you just created.
-
On the Integration System User profile page, go to Action Menu -> Security Profile-> Assign Integration System Security Groups.
-
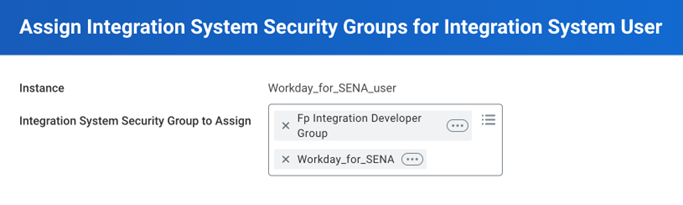
The Assign Integration System Security Groups for Integration System Users page opens.
-
The Instance field displays the Workday instance to which the Integration System Security Group is being assigned.
-
In the Integration System Security Group to Assign field search for the relevant Integration System Security Group (ISSG) that you want to assign to the Integration System User.
-
Select Assign.
Creating API Client for Integration
-
Open your Workday application.
-
In the Search field, type Register API Client for Integration.
-
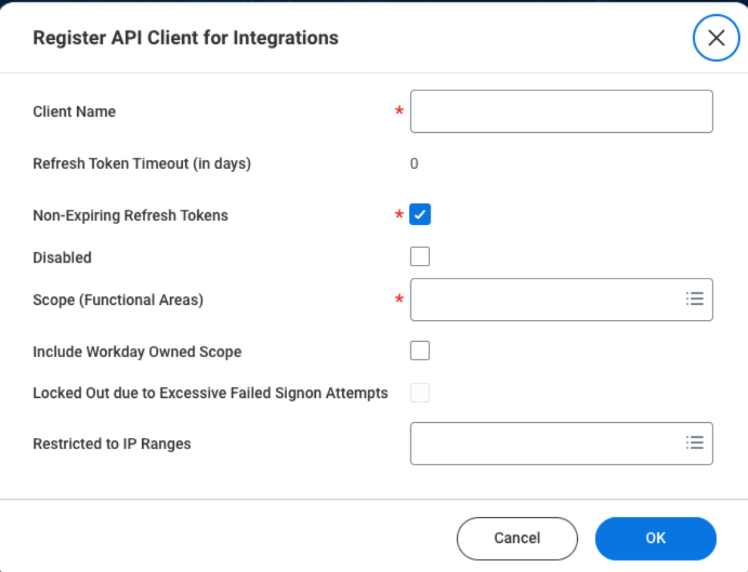
Press Enter. The Register API Client for Integration page opens.
-
Complete the following available fields:
-
Client Name
-
Select the Non-Expiring Refresh Tokens checkbox.
-
Scope (Functional Areas)
-
Contact Information
-
Organizations and Roles
-
Staffing
-
System
-
System Health Dashboard
-
Tenant Non-Configurable
-
Worker Profile and Skills
-
Worktags
-
-
Select the Include Workday Owned Scope checkbox.
-
Select OK.
-
-
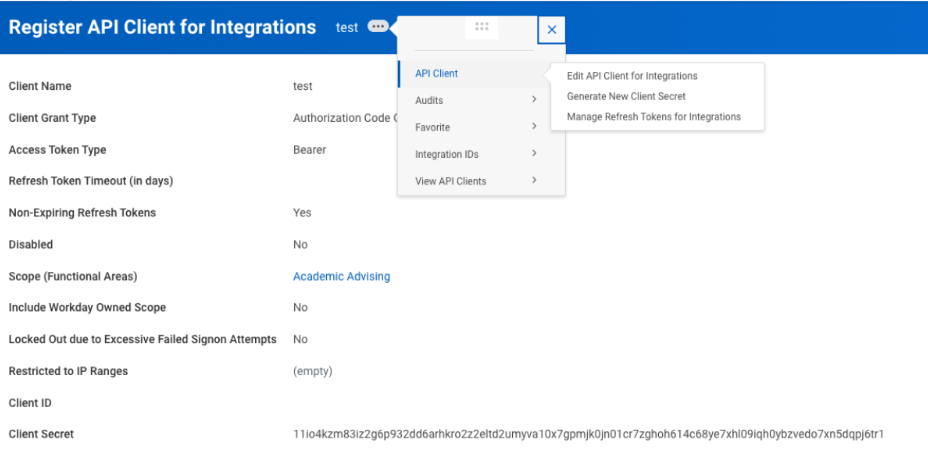
Copy the Client ID and the Client Secret to use it in the next steps in the Delinea Platform.
-
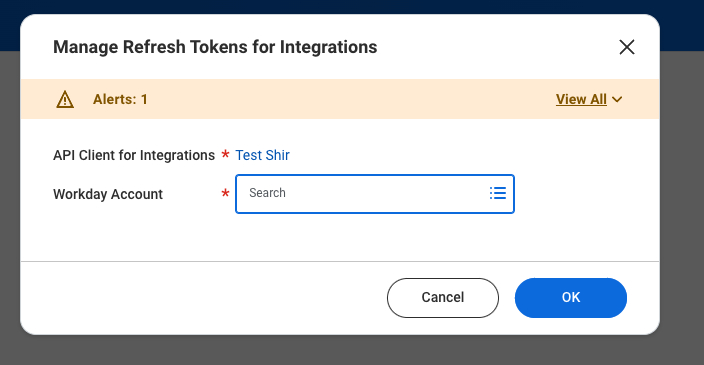
Navigate to More> API Client > Manage Refresh Tokens for Integrations.
-
The Manage Refresh Tokens for Integration page opens.
-
Insert the Workday account that you created earlier.
-
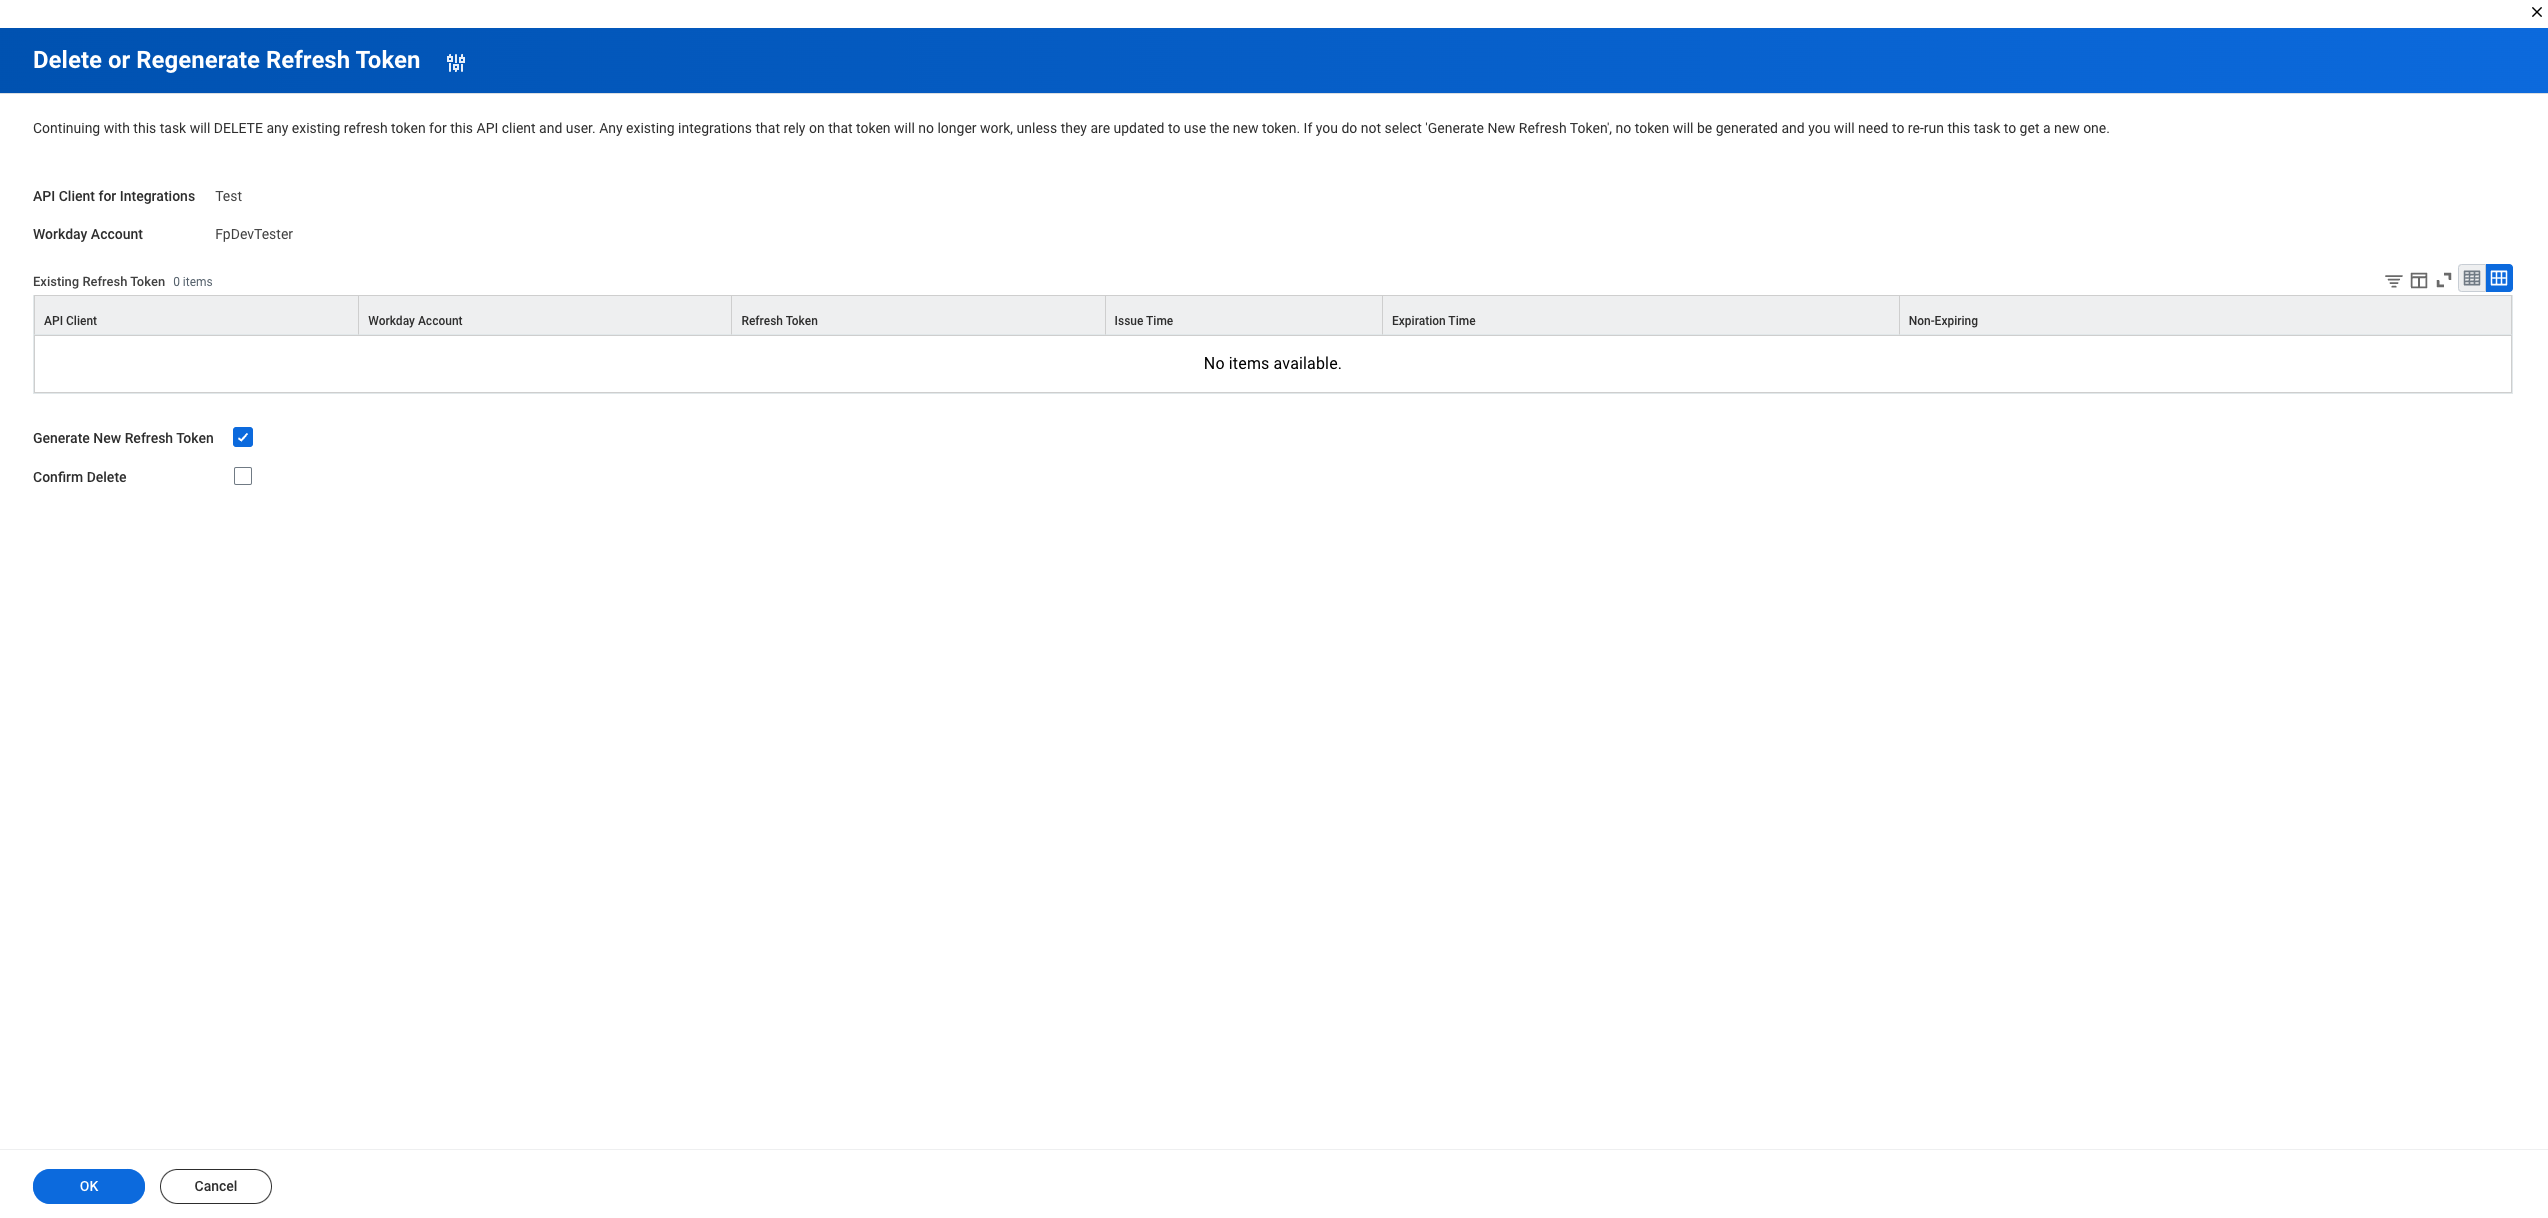
Select Ok. The Delete or Regenerate Refresh Token page opens.
-
Select the Generate New Refresh Token checkbox.
-
Copy the Refresh Token to use it in the next steps in the Delinea Platform
Delinea Platform
-
Open the Delinea Platform.
-
Navigate to Discovery > Entitlement & Threat Sources.
-
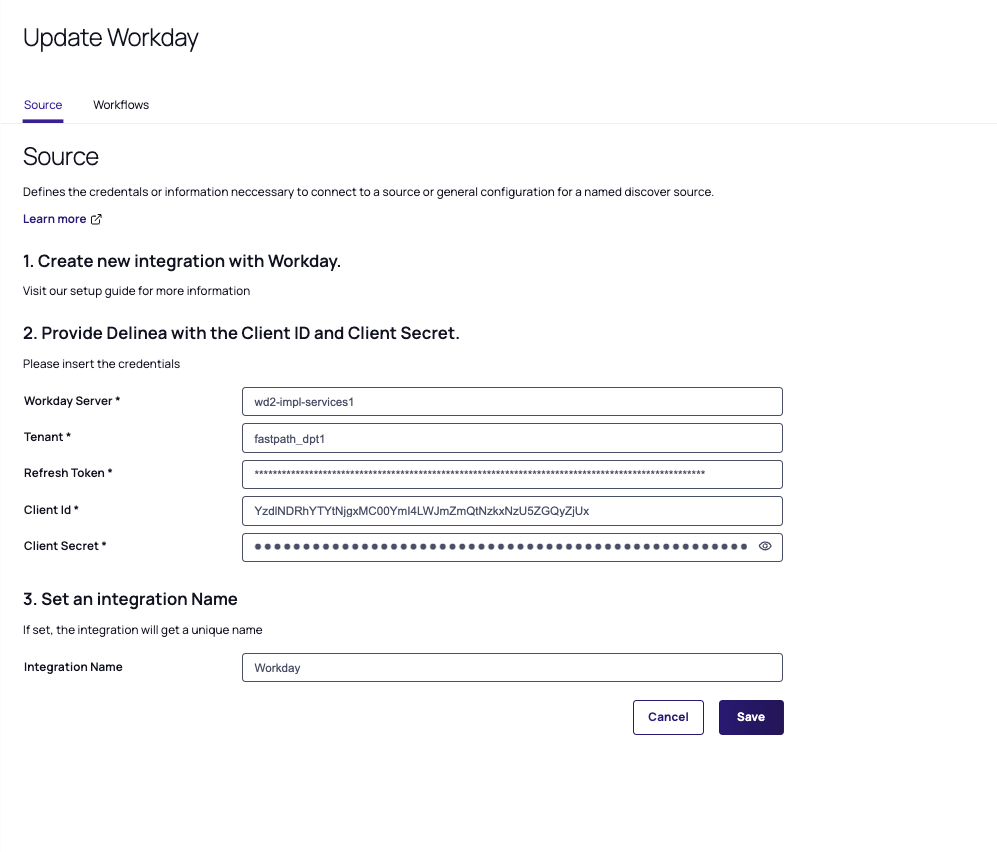
Go to Add New App and select the Workday option. The Integrate Workday dialog opens.
-
Enter your Workday Server, Tenant, Refresh Token, Client ID and Client Secret that you previously copied in Workday.
-
Workday Server - The URL for the server where your Workday instance is hosted. For example, wd-impl-services.workday.com. Must include services/services. Do not include the https:// or anything after the domain (.com).
-
Tenant - The name of the Workday tenant. This can often be found in the URL after logging in to Workday
-
-
(Optional) You can enter a unique name for this integration.
-
Scroll up at the top of the page, and select Save.
By default, the integration will be named Workday.
The Workday option is displayed as a source. The synchronization process begins, and its status will be shown when it is completed.