Configuring HSM in Utimaco
Configuring a Utimaco Hardware Security Module (HSM) involves several steps, including setting up the hardware, initializing the HSM, creating users, managing cryptographic keys, and ensuring the necessary software environment is in place.
Hardware Setup
-
Ensure you have all the necessary components (the HSM device, cables, etc.) that came with the Utimaco HSM.
-
Connect the device to both a power supply and your network using the appropriate ports. This may include Ethernet cables for network access and power cables for the device itself.
Network Configuration
Set a Static IP Address:
-
When you connect the HSM to your network, you must assign a static IP address so that it can be reliably accessed at all times.
-
Access the HSM’s network settings either through a management interface or command-line tool.
-
Set:
-
Static IP address
-
Subnet mask (the range of IP addresses within your local network)
-
Gateway (the router or device that connects your network to the internet)
-
DNS servers (used for resolving domain names if required)
-
Installing Software Requirements
Install Java (LTS Version):
-
Download and install the latest Java LTS version, which is required to run the CryptoServer software.
Installing the Security Server:
-
Download SecurityServerEvaluation-V6.0.0.0.zip.
This software package will be provided by Utimaco.
-
Unzip the package and run SecurityServer-6.0.0.0.msi.
- Installation steps:
-
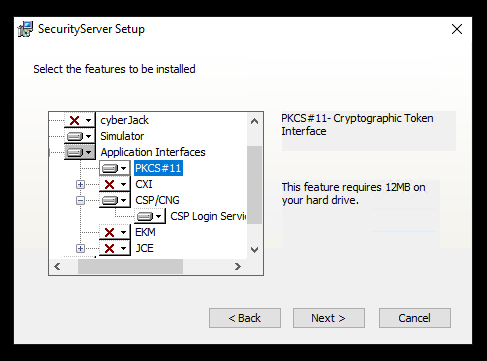
Choose the default folder(s) and select Custom installation.
-
Ensure the correct features are selected:
-
For PKCS#11, select the PKCS#11 feature.
-
For CNG, select the CSP/CNG feature.
-
-
Select Next.
-
Select Install.

-
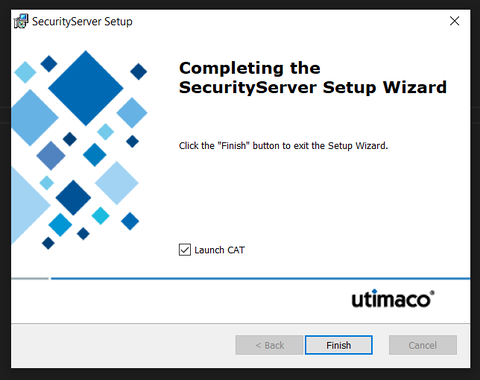
Select Finish.
Setting up PKCS#11 / CNG
PKCS#11 Setup
-
Set up PKCS#11 files and log folders:
-
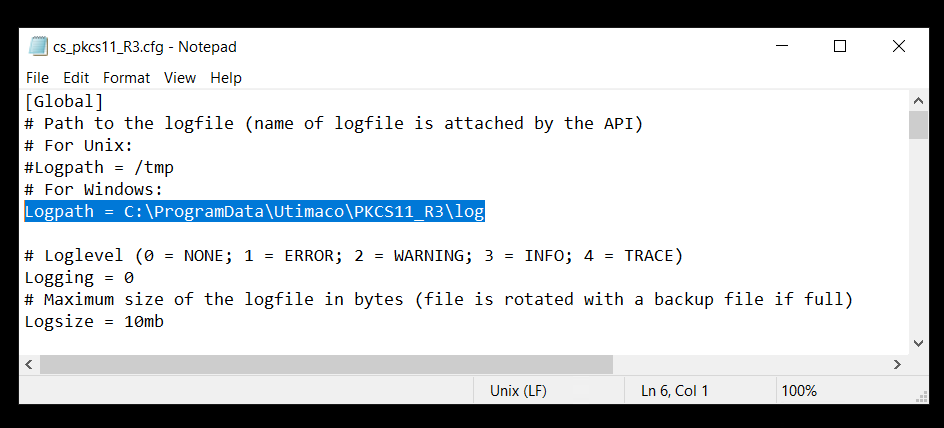
Navigate to C:\ProgramData\Utimaco\PKCS11_R3 and create a log folder.
-
Update the #Logpath = C:\ProgramData\Utimaco\PKCS11_R3 to Logpath = C:\ProgramData\Utimaco\PKCS11_R3\log inside the cs_pkcs11_R3.cfg file.
-
-
Initialize Slot Token and Set Up Users:
-
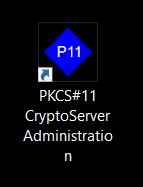
Open the PKCS#11 CryptoServer Administration Tool (CAT) by selecting the PKCS#11 icon on your desktop.
or
-
Open a command prompt as administrator and run the
java -jar p11cat.jarcommand.
-
-
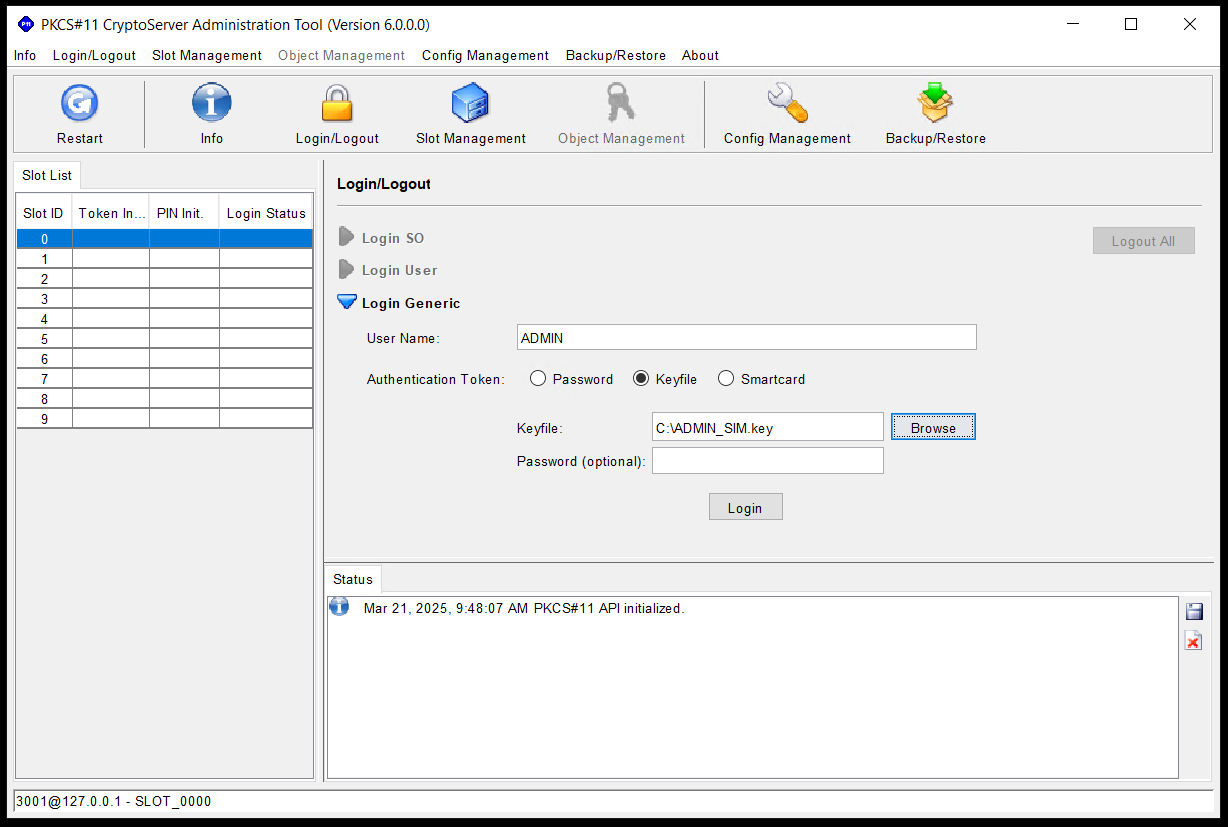
Log in as an administrator in CAT:
-
In the CAT, go to the Slot List tab and select Slot ID: 0. This is typically the default slot on the HSM.
-
Login to the Slot using the ADMIN_SIM.key file, which should have been copied to the *C:* drive. This key file is used to authenticate the administrator (SO) on the device.
-
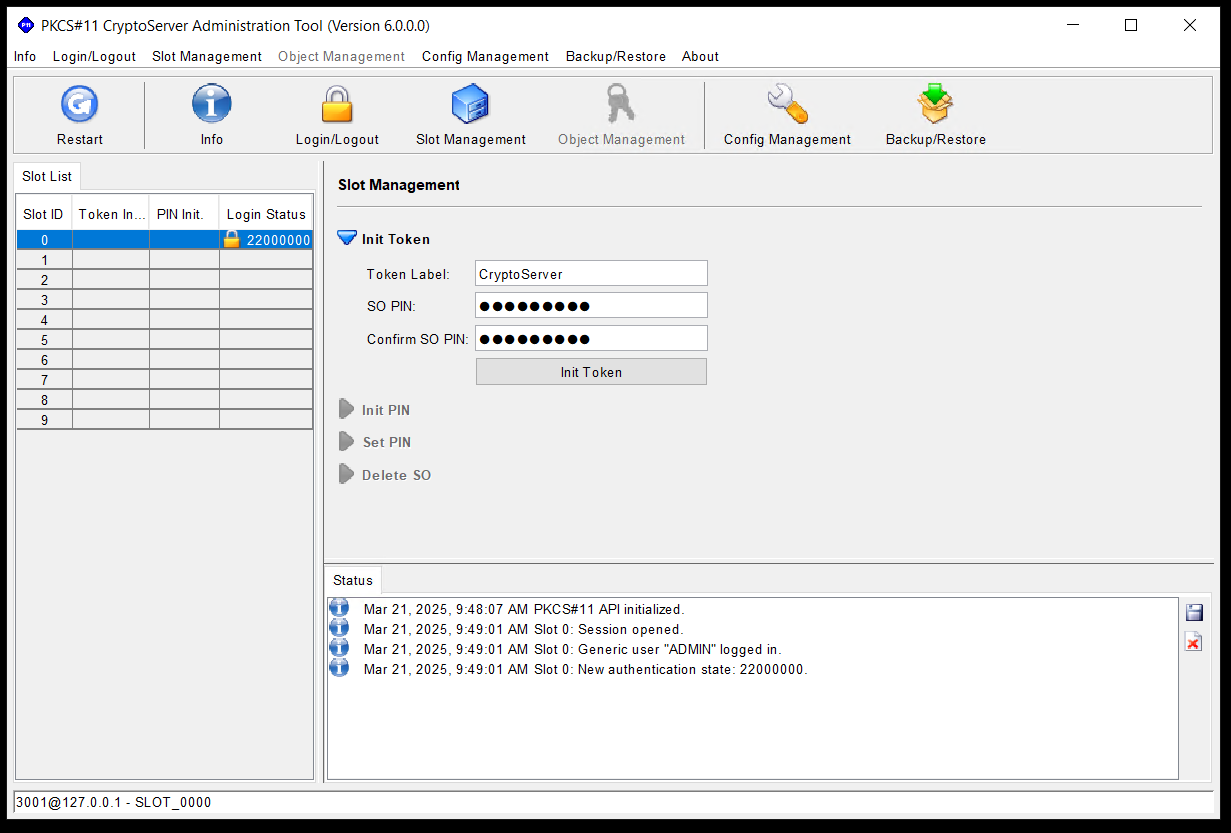
Once logged in, navigate to the Slot Management tab to configure various settings for the Slot Token.
-
In the Token Label field, assign a label that will help identify the Slot Token(this will used in Secret Server).
This label helps manage and identify the token easily in a larger security environment.
-
In the SO PIN field, enter the temporary PIN. The SO is responsible for initializing and managing the token, including creating the User (CO) PIN.
A typical SO PIN might be set to something secure, such as a 6- or 8-digit number, and it is essential to remember this PIN as it provides access to the token's administrative controls.
-
Select Init Token.
-
Go to the Login/Logout tab and then select Logout All.
-
Login as SO User.
-
Set the SO PIN.
-
Go to the Login/Logout tab and then select Logout All.
-
Login as SO User.
-
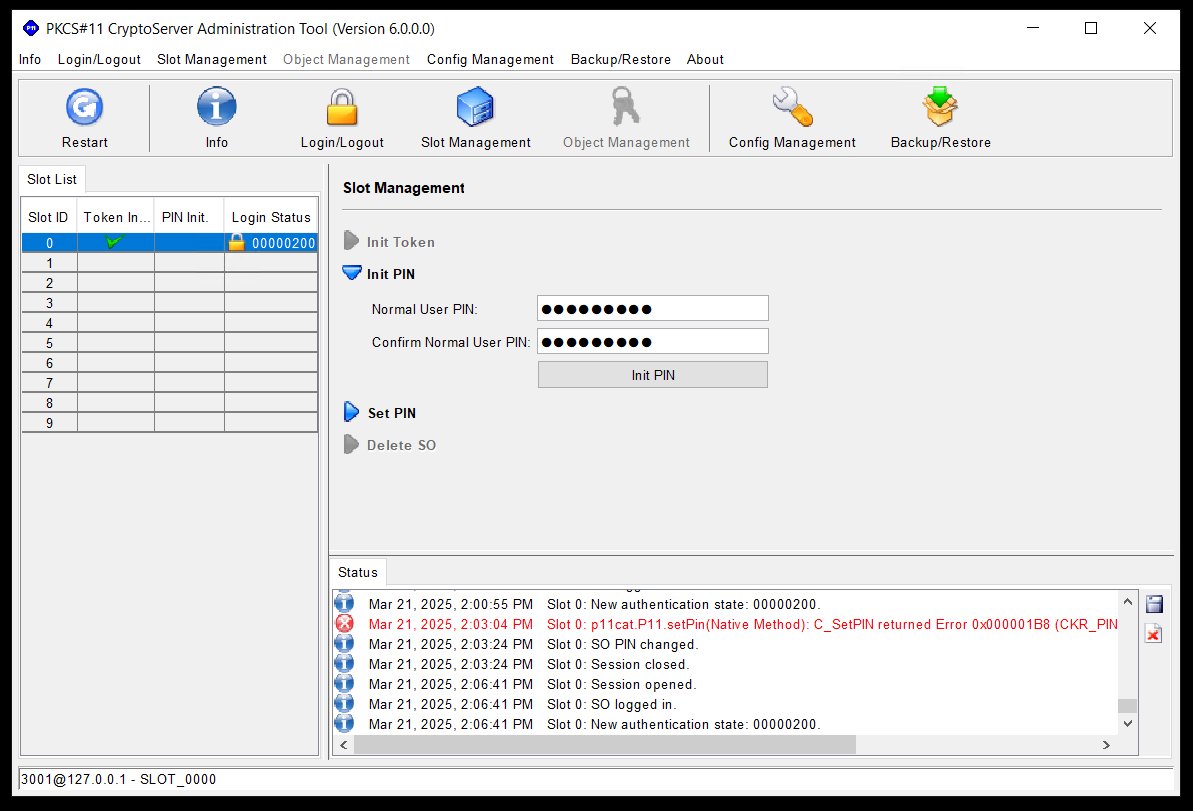
Go to the Slot Management tab and expand the Init PIN section.
-
In the Normal User PIN field enter a temporary PIN and then confirm it.
-
Go to the Login/Logout tab and then select Logout All.
-
Login as Crypto User.
-
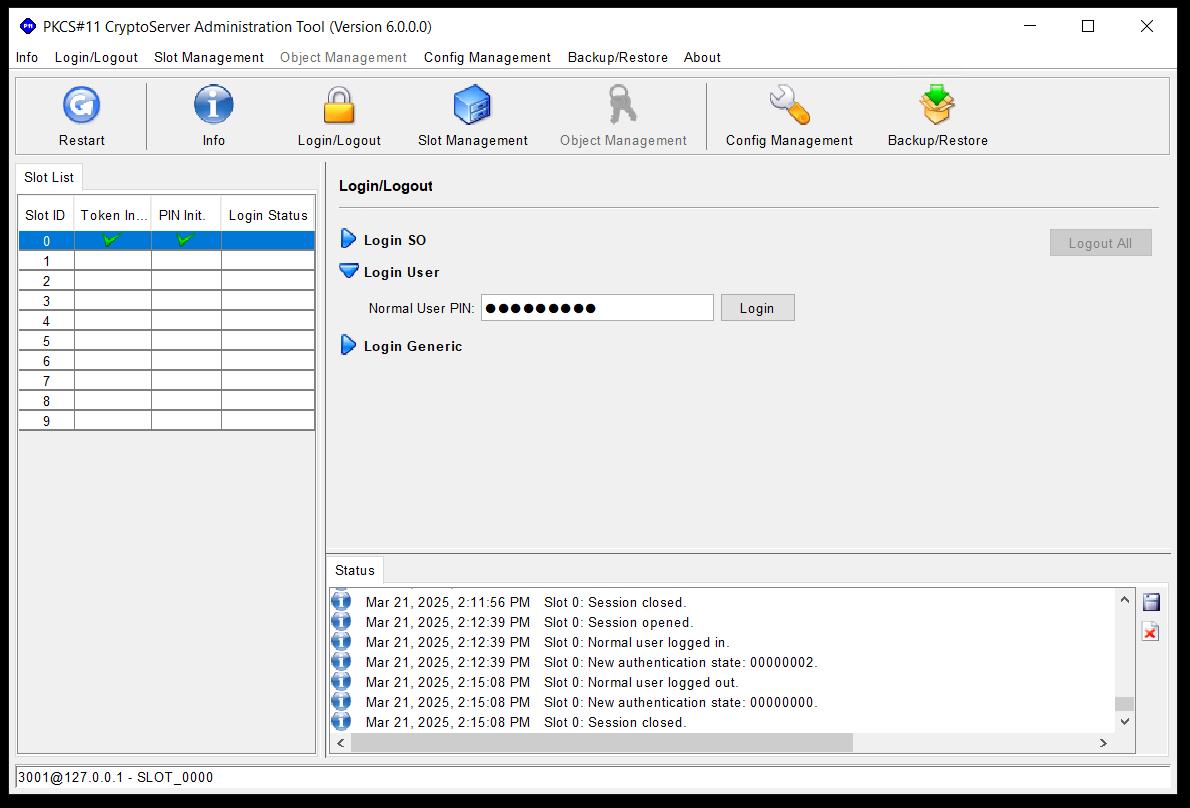
Go to the Login/Logout tab. The Login/Logout page opens.
-
Expand the Login User section.
-
In the Normal User PIN field type the previously created temporary PIN.
-
Select Login.
-
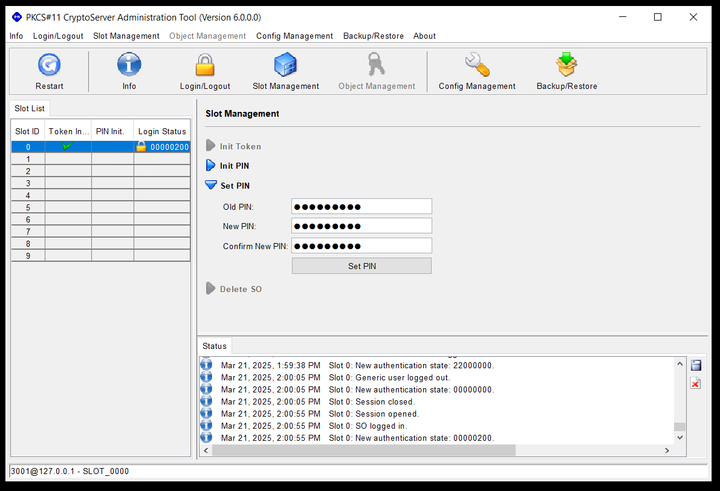
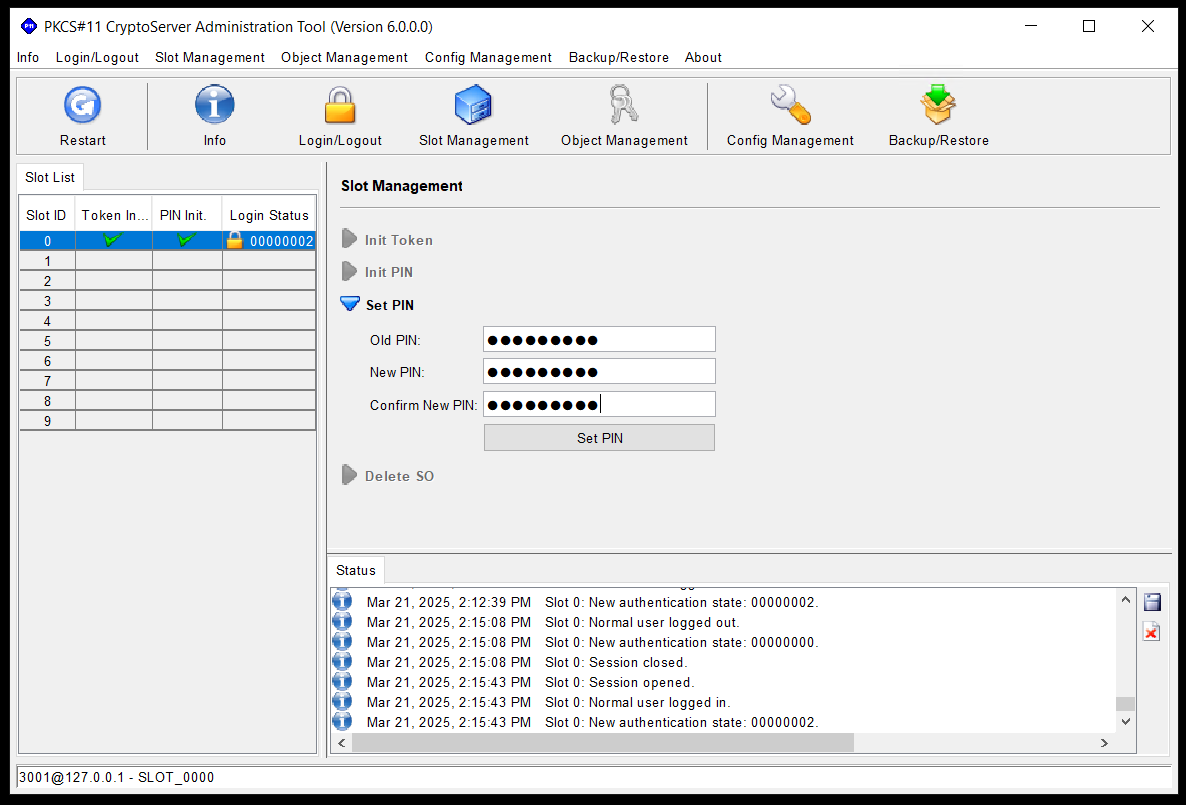
Go to the Slot Management tab.
-
Expand the Set PIN section, and enter the old PIN and then set a new PIN.
-
Select Set PIN to confirm the change of your PIN.
-
Go to the Login/Logout tab. The Login/Logout page opens.
-
Expand the Login User section.
-
In the Normal User PIN field enter the newly changed PIN.
-
Select Login.
-
Select the Object Management tab. The Object Management page opens.
-
Select Generate to generate a key. This verifies if the Crypto User was setup properly.
CNG Setup
-
Open the CryptoServer Administration Tool (CAT) by selecting the CryptoServer Administration icon on your desktop.
-
Open a command prompt as administrator and run the
java -jar p11cat.jarcommand. -
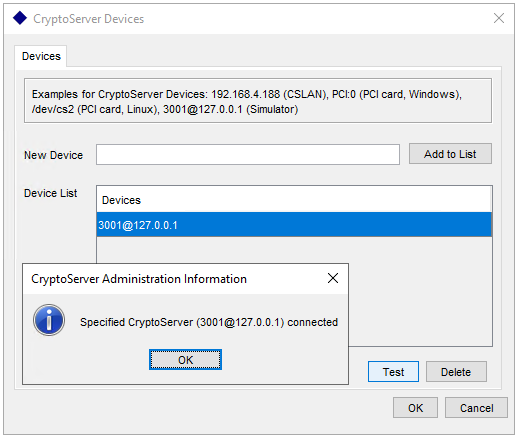
Select Test to ensure that you are connected to the HSM.
-
Select Ok to close the success token pop-up screen.
-
Select Ok in the CryptoServer Devices page to close the Devices modal.
-
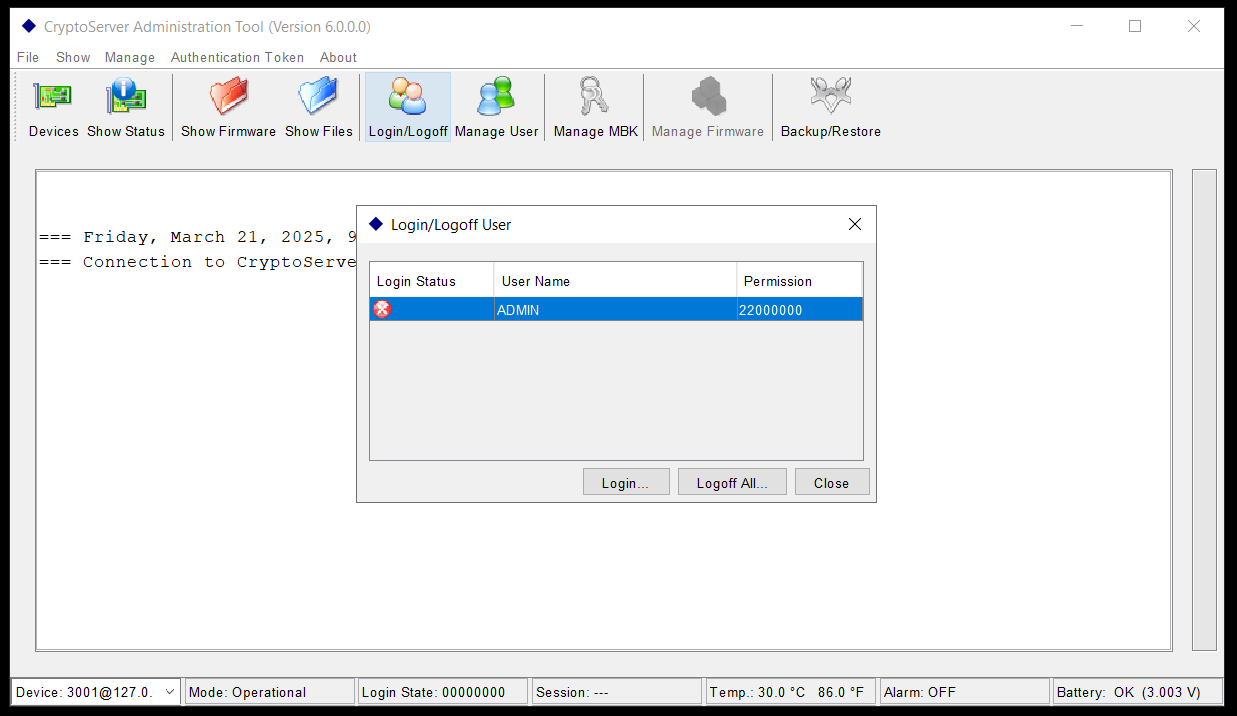
Log in CryptoServer Administration Tool using the Admin user:
-
Select the Login/Logout tab.
-
In the users list, select ADMIN.
-
Select Login. The Choose User Token for Login page opens.
-
Select the Keyfile Token checkbox.
-
Select Browse and select the Keypath (browse to ADMIN_SIM.key in the C:\ drive), and leave the password blank.
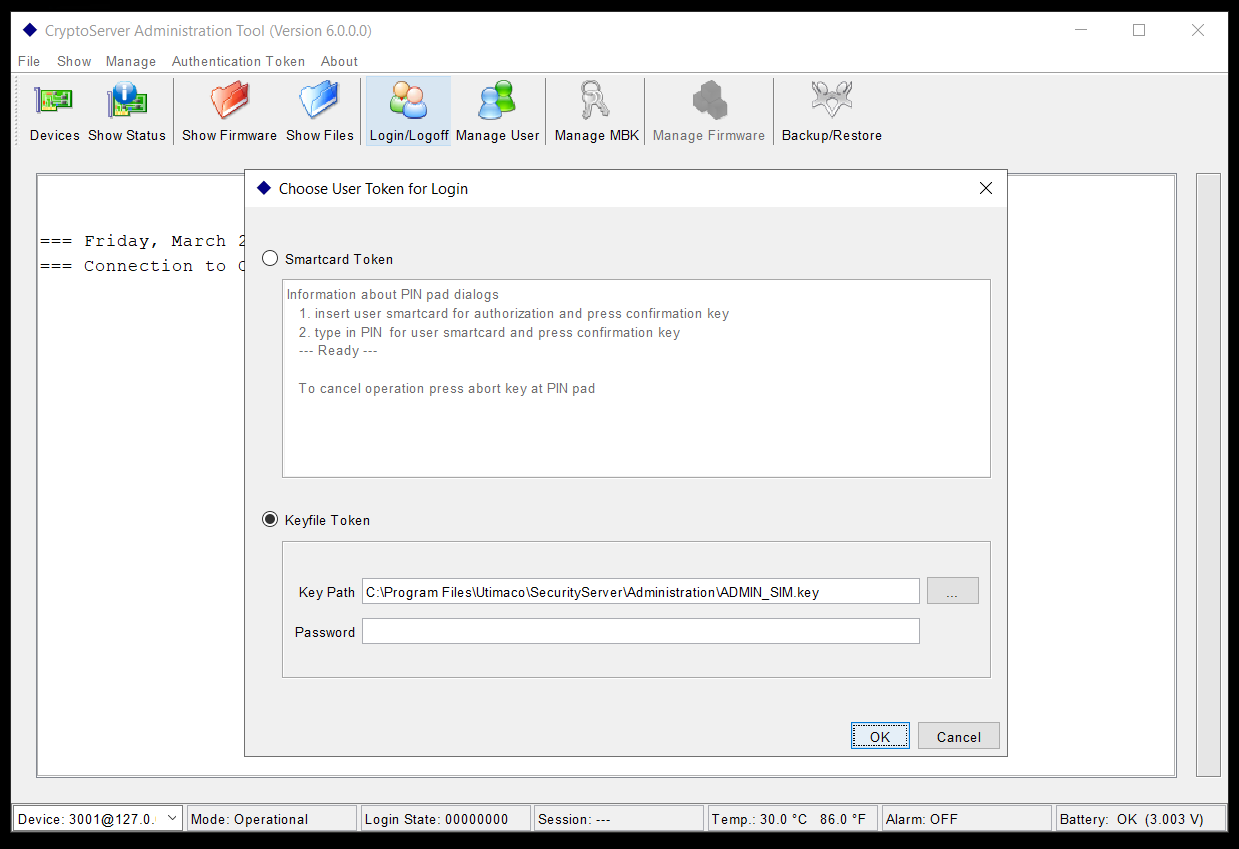
-
Select Ok.
-
Select Close to the Login/Logoff User modal.
-
In the Manage User page, select Add User to start adding a CNG User. The Add User page opens.
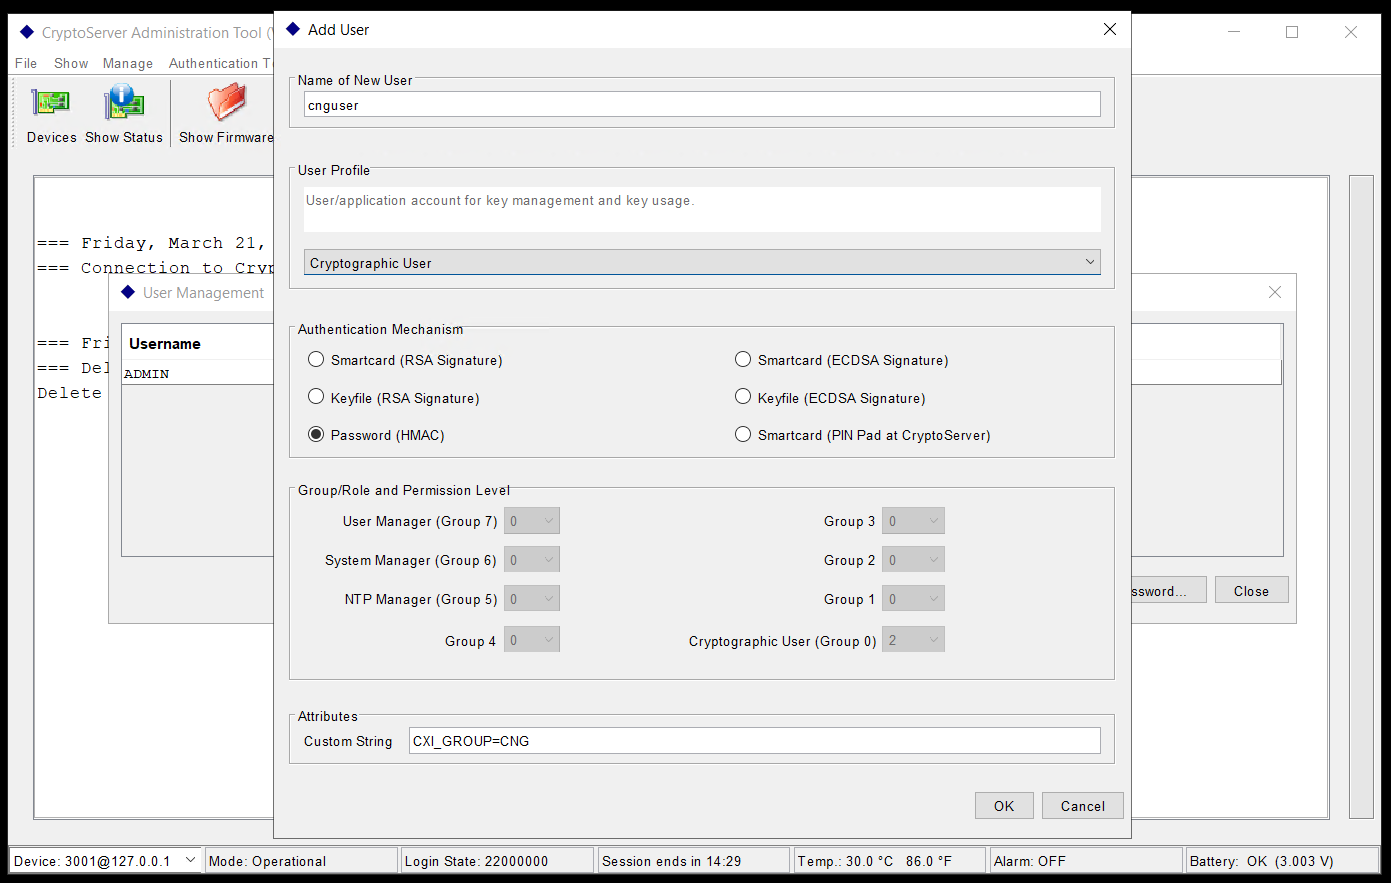
-
In the Name of New User field, enter the name of the new user: cnguser.
-
Select the Cryptographic User in the User Profile dropdown list.
-
In the Authentication Mechanism section, select the Password (HMAC) checkbox.
-
In the Attributes section, in the Custom String field, enter the following: CXI_GROUP=CNG
-
Select Ok.
![]()
or
Make sure there are no spaces on either side or it will not work.
Ensure user passwords are updated from the initial password before they can be used.
-
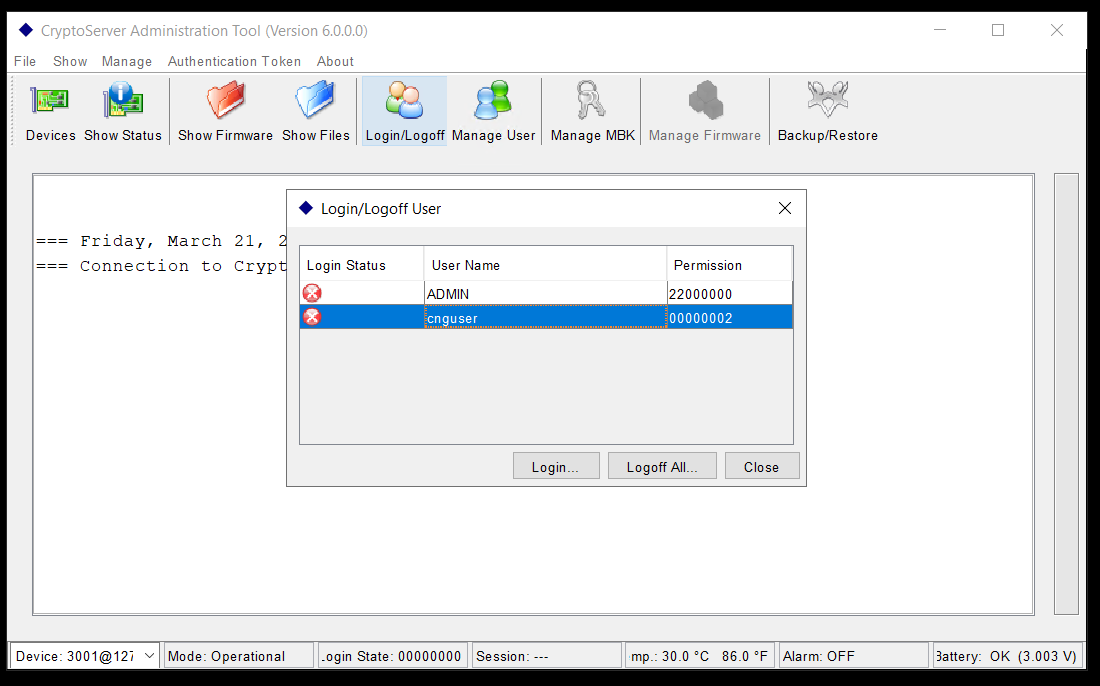
Launch CryptoServer Administration Tool (CAT) on your system.
- Select Login/Logoff tab.
- In the Login/Logoff page window, select cnguser from the list of available users.
- Select Login....
- After entering the password, select OK to log in.
- Select Close to close the login window.
- Select Manage User from the menu. The User Management page opens.
- Select cnguser from the list of users.
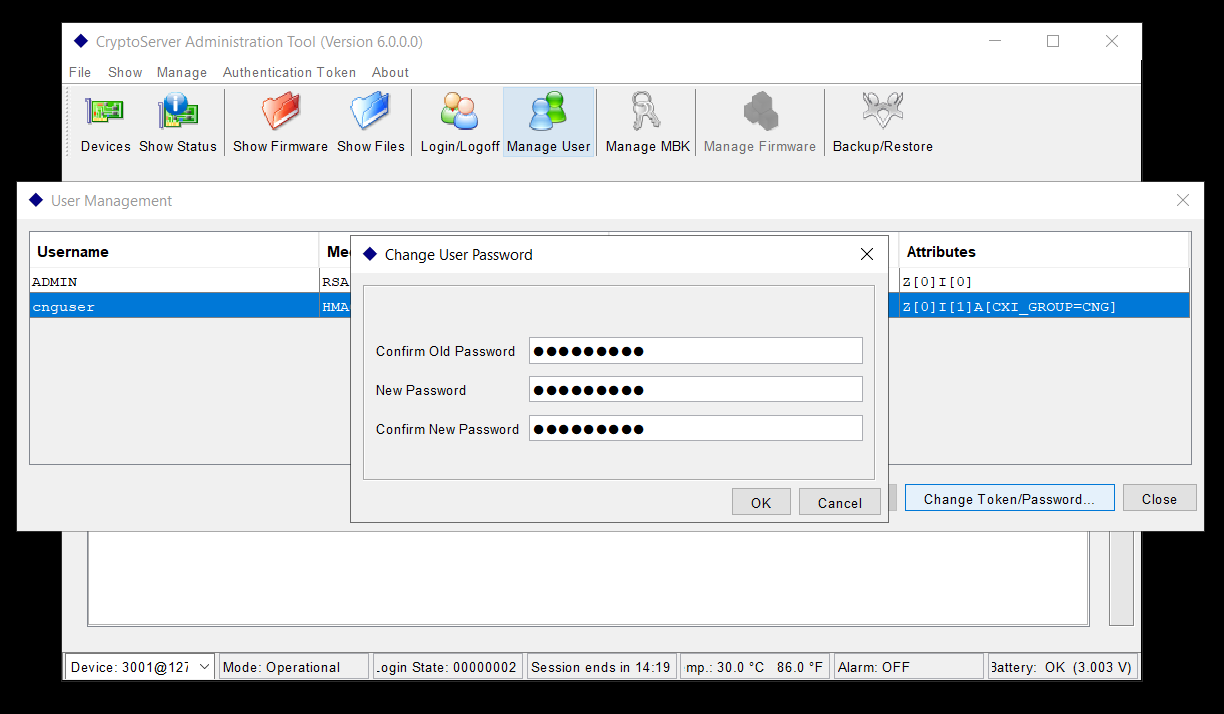
- Select Token/Password. The Change User Password page opens.
- Enter the current password (initial password provided) and the new password for cnguser.
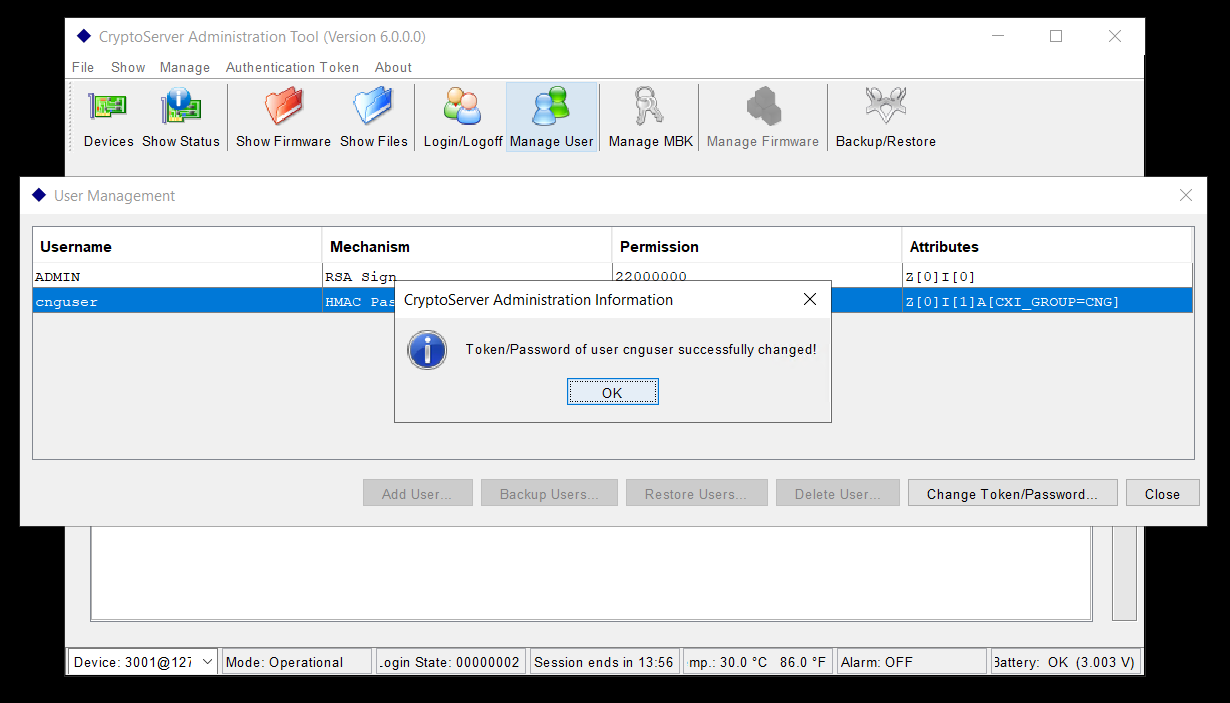
- Select Ok. The following message will be displayed if the password was changed successfully:
-
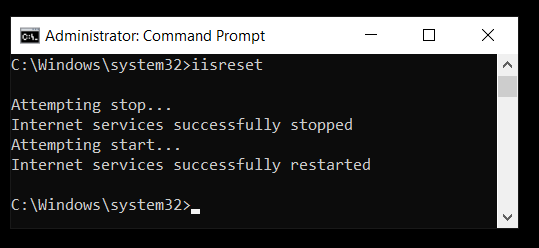
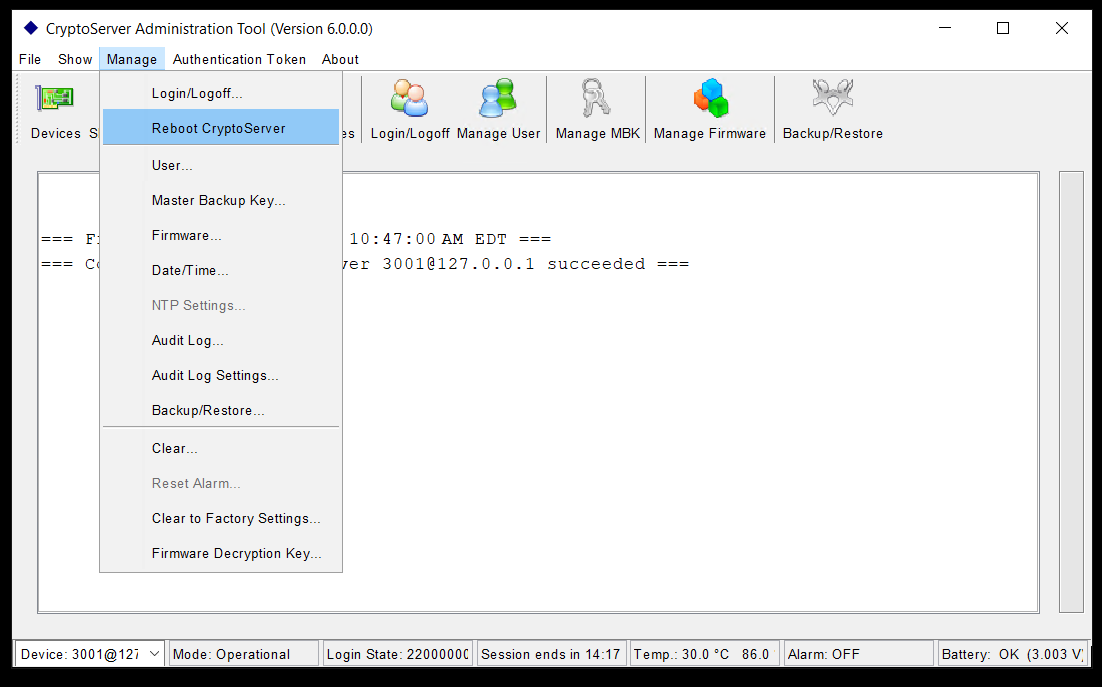
Go to Manage and select Reboot CryptoServer.
-
Open the command line and perform an iisreset or recycle your application pool to finalize the setup.
Update user credentials:
The user passwords must be updated from the initial password before they can be used. This ensures proper security and prevents errors like "The user credentials need to be updated" in CNG logs.
Managing Cryptographic Keys
Once the users are created, configure the cryptographic algorithms, key types, and key storage.
-
For PKCS#11 and CNG, generate and manage keys as required using the CryptoServer Administration Tool and Secret Server.
-
To view or list generated keys:
-
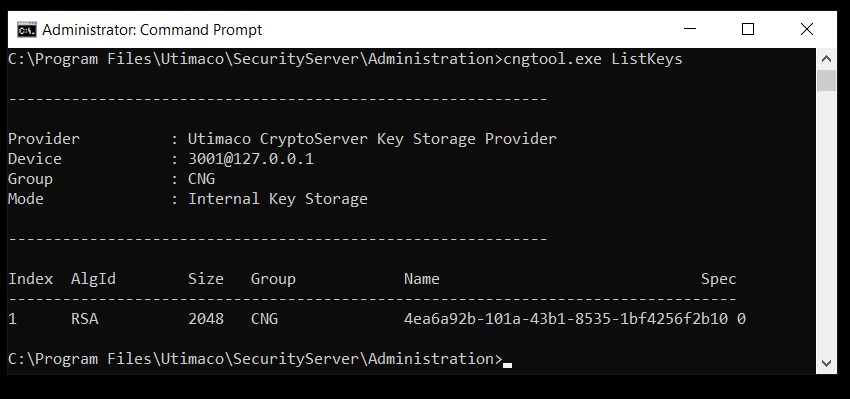
For CNG:
-
Use the cngtool.exe ListKeys command to view the created keys.
-
-
For PKCS#11:
-
Use the PKCS11 CryptoServer Administration Tool (PKCS11 CAT) to view the keys.
-
Select the Object Management tab. The Object Management page opens. Here you can see the PKCS#11 keys.
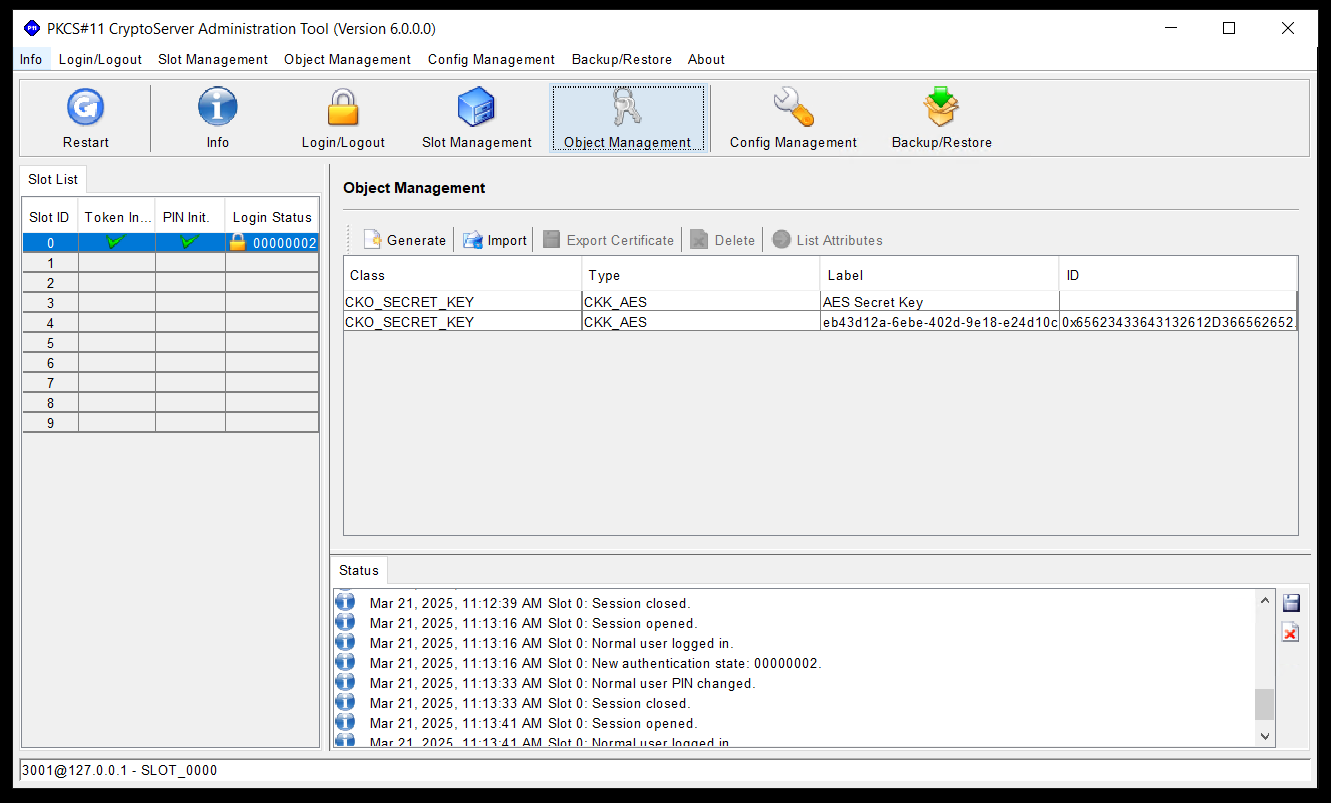
Only the Crypto Users can see these keys displayed in the Object Management page.
-
-