Configuration
To enable the integration between BackBox Network Automation Manager and Secret Server, complete the following configuration tasks in the order listed:
Configuring Secret Server
Creating an Application Account
The integration requires an application account in Secret Server.
If you don't have an application account, you can create one. For detailed information about creating an application account, see Managing Local Accounts in the Secret Server documentation.
Creating a Secret in Secret Server
You must create a secret in Secret Server to store the credentials that BackBox will retrieve during automation and then share the secret with the service user.
The following procedure describes how to do this.
To create and share a secret:
-
In Secret Server, select Secrets > All Secrets.
-
Select Create Secret, and in the Create New Secret dialog, do the following:
-
(Optional) Change the default folder.
Make sure that the service user has View permission for the folder. For more information about folder permissions, see Folder Permissions in the Secret Server documentation.
-
Under Choose a Secret Template, select the template from which to create the secret. You can use any template that fits your environment.
-
Enter a name for the secret and the username and password to store.
-
Provide values for other secret fields according to the template.
-
Select Create Secret.
-
-
Share the secret with the service user:
-
Go to the Sharing tab of the secret’s page.
-
Select Edit in the upper-right corner.
-
Clear Inherit permissions.
-
Use the search box to find the service user.
-
Select the check box next to the user’s name and choose View in the Secret Permissions dropdown.
-
Select Save.
-
Configuring BackBox Network Automation Manager
After creating the service user and secret, configure BackBox to connect to Secret Server and use the stored credentials.
To configure BackBox:
-
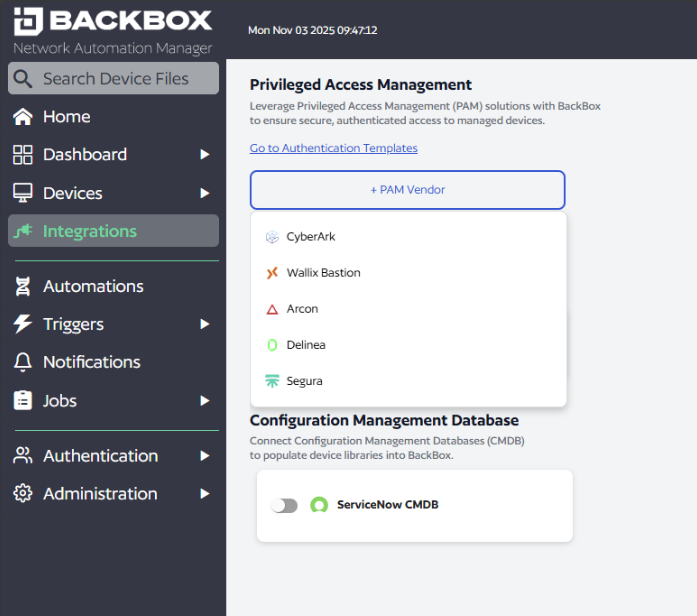
Log in to the BackBox portal at https://<serverFQDNOrIP>.
-
Navigate to Integrations > + PAM Vendor > Select Delinea.
-
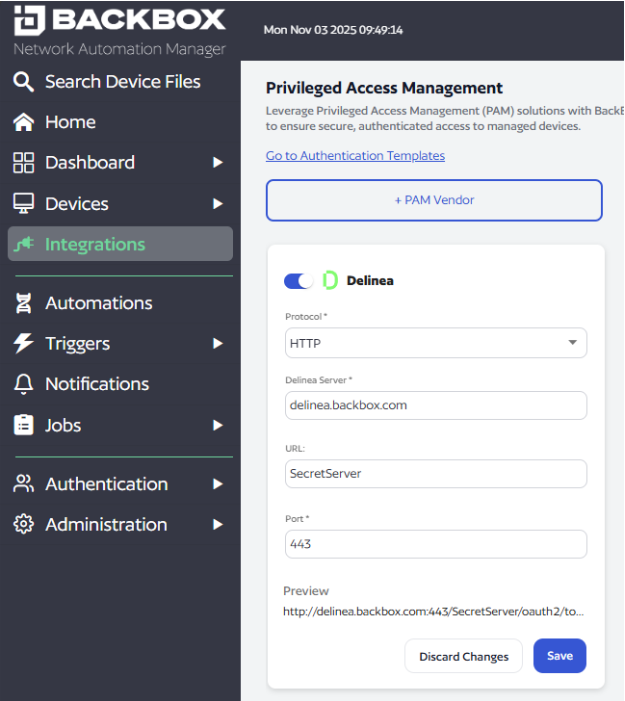
Configure the following parameters:
-
In the Protocol field, select HTTP from the dropdown.
-
In the Delinea Server field, enter the Server FQDN/IP.
-
In the URL field, enter the API path for your Secret Server instance.
-
In the Port field, enter the port number used by your Secret Server (typically is 443 for HTTPS).
-
-
Validate that the Preview URL is correct for your implementation.
-
Select Save.
-
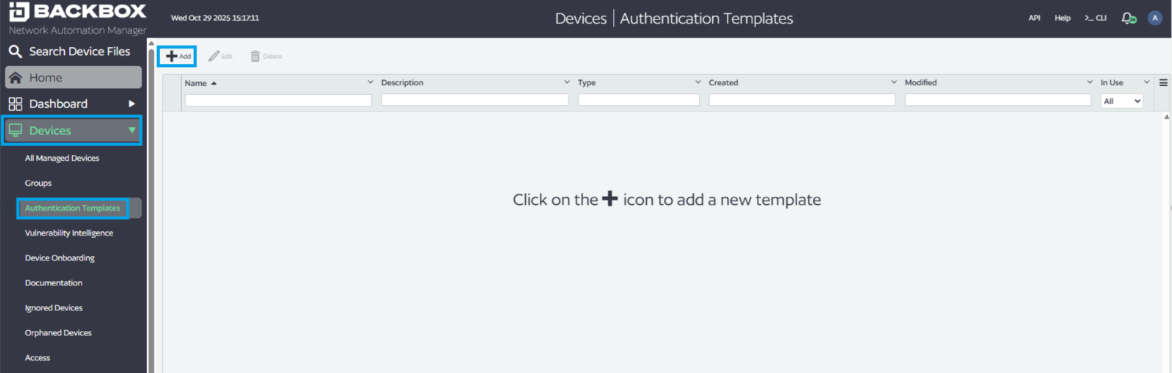
Navigate to Devices > Authentication Templates.
-
Select +Add to add a new template.

-
From the Type dropdown, select Delinea.
-
Enter a Name, optional description, and username.
-
Save the template.
-
In the Integration Pane, enter the credentials for the Secret Server application account.
-
Select Configure Fields
-
Select +Add.
-
Set Search Field to Host.
-
Set Field Type to Device IP.
-
Save all dialogs to complete the configuration.
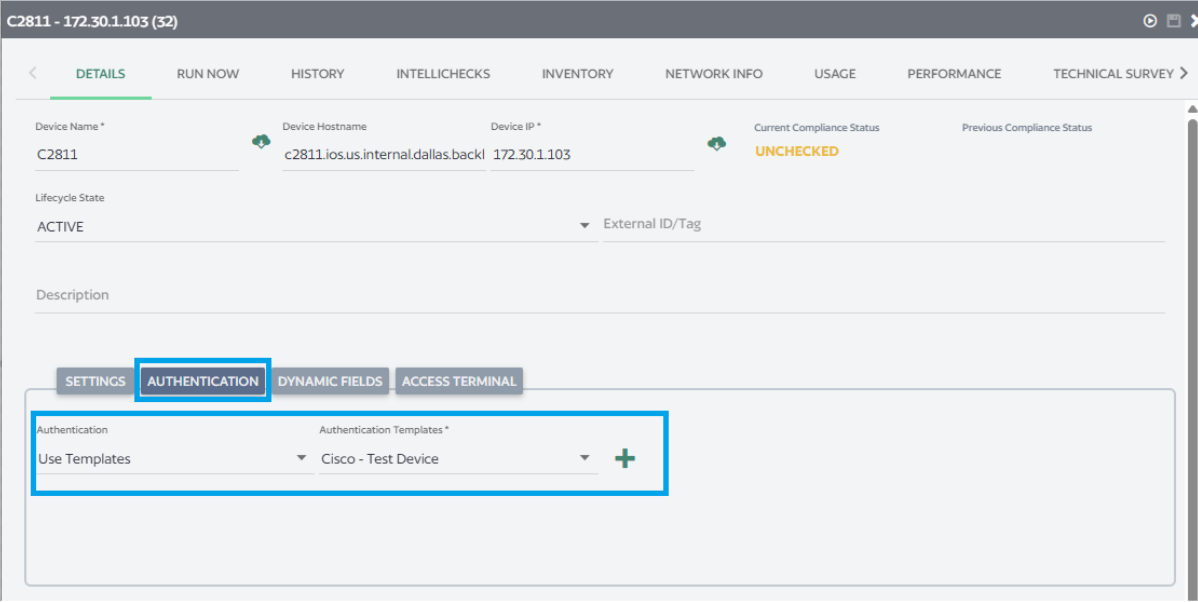
Assign the Template via a Device
-
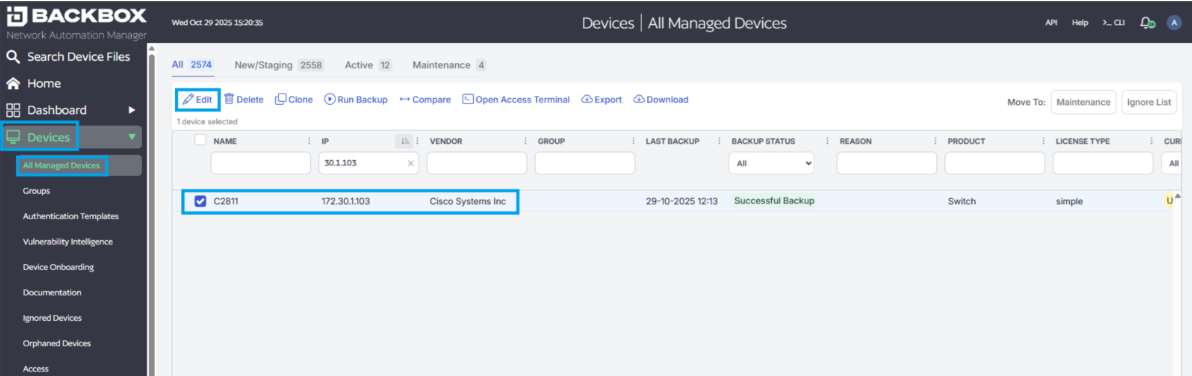
Navigate to Devices > All Managed Device , and select Edit for the device you want to assign the template to.
-
Open the Authentication tab.
-
Verify that the correct Delinea authentication template is selected.
-
-
Save the configuration.