Setup
To set up Splunk Cloud Platform and Secret Server for the integration, you must set up a universal forwarder in Splunk Cloud Platform. A universal forwarder streams event data from Secret Server to your Splunk Cloud Platform instance. For more information about universal forwarders, see the Splunk documentation. For detailed steps to set up a universal forwarder, see the following section.
Setting Up a Universal Forwarder
Before a forwarder can transmit data, you must configure it by specifying two key aspects:
- What data to send — Specify the type or source of the data to be forwarded.
-
Where to send the data - Specify the destination or endpoint to forward the data to.
Because universal forwarders do not have Splunk Web, you must provide a configuration for the forwarder during the installation. Install and configure a universal forwarder on the server machine where Secret Server is installed.
To install and configure a universal forwarder:
-
In your web browser, enter the URL of your Splunk Cloud Platform instance and log in with your credentials.
-
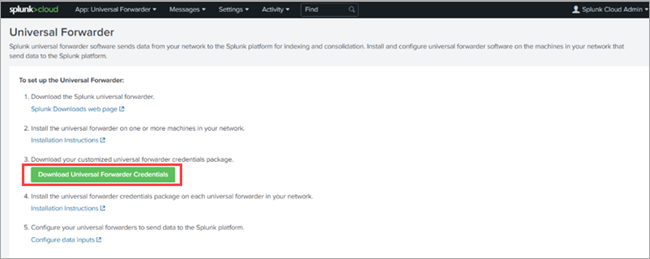
Select Universal Forwarder.
The Universal Forwarder page opens.
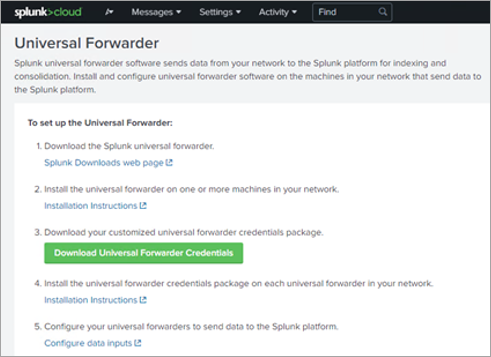
-
Select the Splunk Downloads web page link.
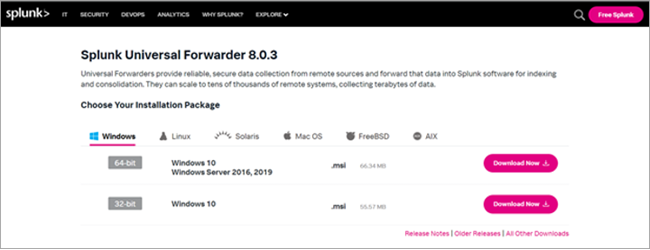
-
Select an installation package.
-
Double-click thesplunkforwarder-8.0.3-a6754d8441bf-x64-release.msi file to start the installation.
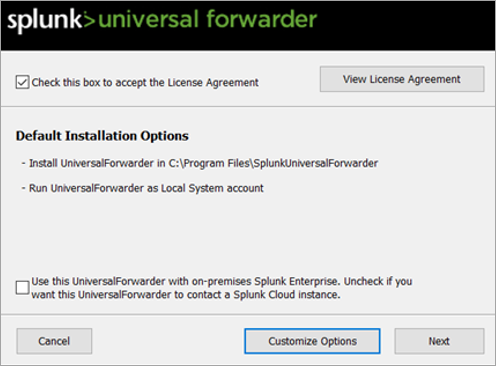
-
Select the Check this box to accept the License Agreement checkbox.
-
Clear the Use this Universal Forwarder with on-premises Splunk Enterprise. Uncheck if you want this UniversalForwarder to contact a Splunk Cloud instance checkbox.
-
Create credentials for the admin account.
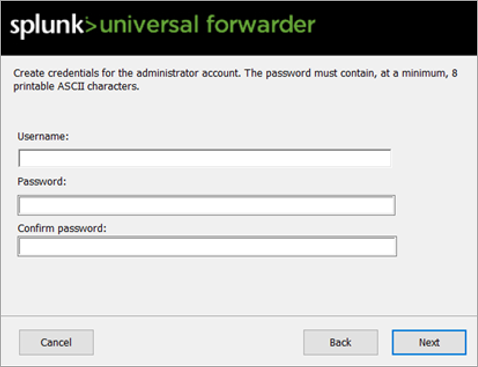
-
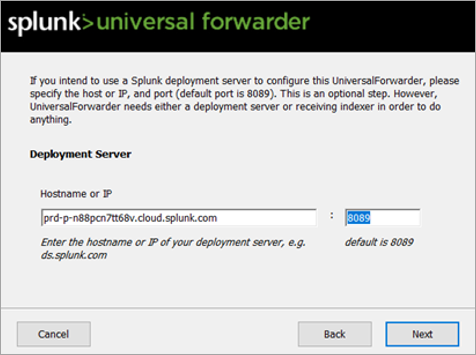
Enter the hostname of your Splunk Cloud Platform instance and the default port 8089.
-
Select Install.
-
After configuration of the universal forwarder, go to the Splunk Cloud home page.
-
Select Universal Forwarder.
-
On the Splunk Cloud home page, select Download Universal Forwarder Credentials to download the splunkclouduf.spl file.
-
When prompted, select Save File and select OK.
By default, the splunkclouduf.spl file downloads to the Downloads directory. If you download to a different location, make a note of that location.
-
Move the splunkclouduf.spl file to the C:\ProgramFiles\SplunkUniversalForwarder\etc\apps directory of your forwarder.
-
Open a command prompt window and enter the following command:
tar xvf splunkclouduf.spl -
Go to the /bin subdirectory of the deployment server.
-
Enter the following command in the command prompt window:
splunk install app \<full path to splunkclouduf.spl\> -auth\<username\>:\<password\>where
<full path to splunkclouduf.spl>is the path to the directory, where the splunkclouduf.spl file is located, and<username>:<password>is the username and password of an existing admin account on the forwarder.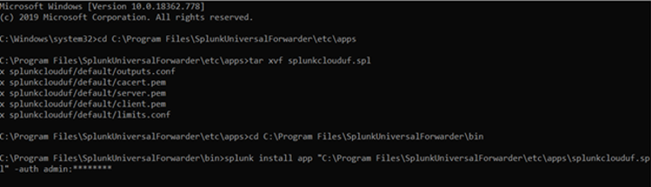
-
Restart your forwarder:
/splunk restart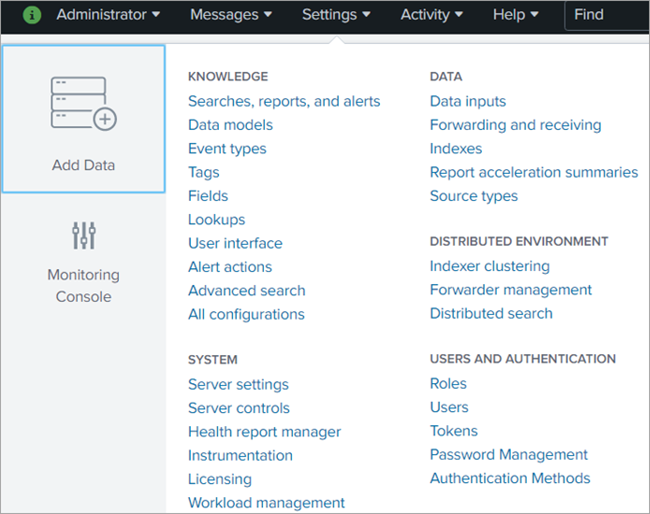
-
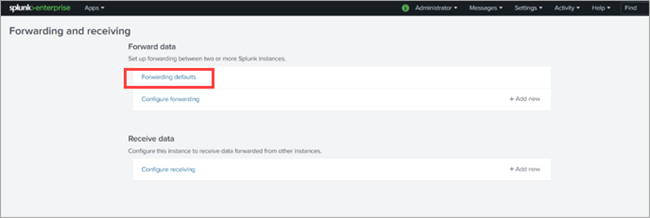
Select Forwarding defaults.
-
Select Yes to store and maintain a local copy of the indexed data on the forwarder.
-
At the right end of Configure forwarding, select Add new.

-
Enter the hostname or IP address for the receiving Splunk instance(s) and the receiving port stated when the receiver was configured (for example, enter receivingserver.com:9997).

-
Select Save.
-
Go to Settings > Server Controls to go to Server Control.

-
Select Restart Splunk.
-
Download the SPL package from your Splunk Cloud.
It's not the regular universal forwarder executable file that you get from Splunk (no need to install separate universal forwarder software). https://yourcloudname.splunkcloud.com/en-US/app/splunkclouduf/setupuf
-
On the Splunk Cloud home page, select Download Universal Forwarder Credentials to download the splunkclouduf.spl file.
-
When prompted, select Save File and OK.
By default, the splunkclouduf.spl file downloads to the Downloads directory. If you download to a different location, make a note of that location.
-
Move the splunkclouduf.spl file to the C:\ProgramFiles\Splunk\etc\apps directory of your enterprise.
-
Open a command prompt window and run the following command:
tar xvf splunkclouduf.spl. -
Go to the /bin subdirectory of your deployment server.
-
In the command prompt field, run the following command on your Splunk Heavy Forwarder (or the path of the Splunk installation):
    splunk install app \<full path to splunkclouduf.spl\| -auth
    \<usernameZZ_BAR_ZZ:\<passwordZZ_BAR_ZZ where \<full path to
    splunkclouduf.spl\| is the path to the directory where the
    splunkclouduf.spl file is located and \<username\|:\
    <password\| are the username and password of Splunk Enterprise.
-
Restart your forwarder:
/splunk restart - Once Splunk has restarted, confirm that the correct output.conf is installed.
-
Make sure that
C:\ProgramFiles\Splunk\etc\apps\yourcloudnamesplunkcloud\default\outsputs.conf is the same as C:\ProgramFiles\Splunk\etc\system\local\outputs.conf.
- If the files above aren’t the same, copy C:\ProgramFiles\Splunk\etc\apps\yourcloudnamesplunkcloud\default\outsputs.conf to C:\Program Files\Splunk\etc\system\local\outputs.conf and restart Splunk.