Configure ServiceNow for Single Sign-On
The following steps are specific to this application and are required to enable Single Sign-On (SSO).
-
Add the Service Now application in Admin Portal.
-
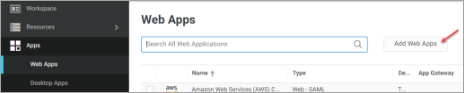
In the Admin Portal, select Apps > Web Apps, then click Add Web Apps.
-
The AddWeb Apps window displays.
-
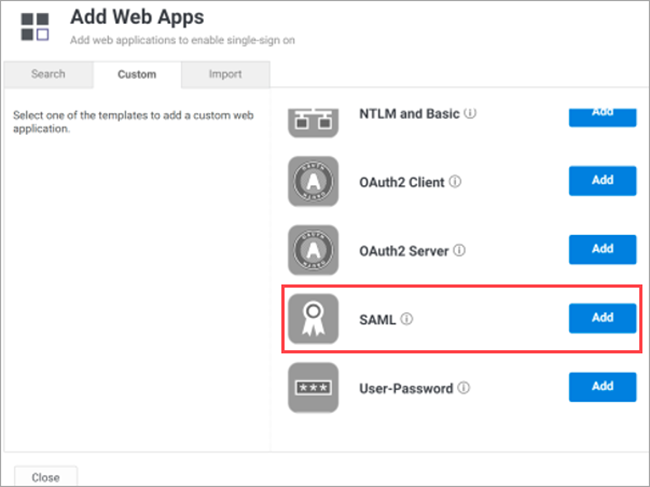
Go to the Custom tab and click Add next to SAML.
-
In the Add Web App window, click Yes to confirm.
-
Click Close to exit the Application Catalog.
-
The application that you just added opens to the Settings page.
-
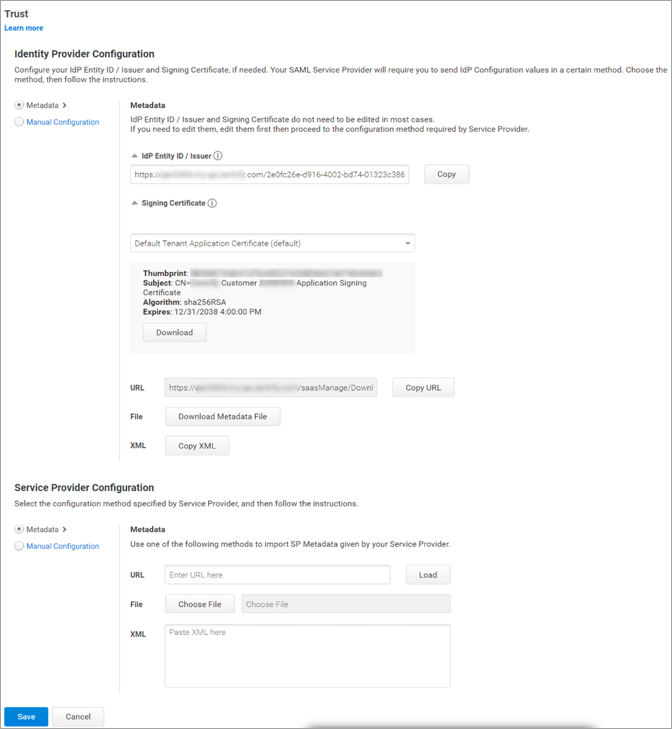
Click the Trust page to begin configuring the application.
-
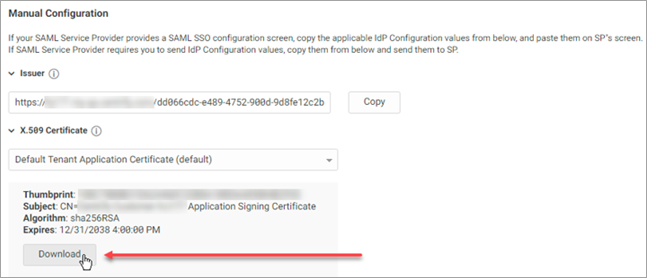
The UI changes to simplify application configuration. You might have to select Manual Configuration to expose settings, as shown in the following example.
Any previously configured applications retain their configuration and do not require reconfiguration. If you are configuring an application for the first time, refer to the Trust page for any settings previously found on the Application Settings page.
In addition, the description of how to choose and download a signing certificate in this document might differ slightly from your experience. See Choose a certificate file for the latest information.
-
(Optional) In the Service Provider Configuration > Manual Configuration area, select Encrypt SAML Response Assertion to use an encryption certificate to encrypt the SAML Response Assertion.

-
In the Identity Provider Configuration area of the Trust page, expand the certificate area and select the certificate that you want to use for the application, and click Download.
-
On the Settings page in the Admin Portal, specify the following settings:
| Option | Description |
|---|---|
| Your ServiceNow instance name | Enter your ServiceNow instance. For example, if you log in to ServiceNow using https://acme.service-now.com, enter acme. |
| Application ID | Configure this field if you are deploying a mobile application that uses the Delinea mobile SDK, (for example, mobile applications that are deployed into a Samsung KNOX version 1 container). PAS uses the Application ID to provide single sign-on to mobile applications. Note the following: The Application ID must be the same as the text string that is specified as the target in the code of the mobile application written using the mobile SDK. If you change the name of the web application that corresponds to the mobile application, enter the original application name in the Application ID field. There can only be one SAML application deployed with the name used by the mobile application. The Application ID is case-sensitive and can be any combination of letters, numbers, spaces, and special characters up to 256 characters. |
| Show in User app list | Select Show in the User app list to display this web application in the Admin Portal, (this option is selected by default). If this web application is added only to provide SAML for a corresponding mobile app, deselect this option so the web application won’t display for users in the Admin Portal. |
-
Create and enable a test user, then add that user to the Permissions page for your ServiceNow app. By default, users added to the Permissions page have View, Run, and Automatically Deploy permissions.
-
Open a new tab in your web browser.
It is helpful to open the web application and the Delinea Admin Portal simultaneously to copy and paste settings between the two browser windows.
-
Go to your ServiceNow login URL (for example, you have a login URL such as https://acme.service-now.com where acme is your company instance name).
Enable Multiple Provider SSO Plugin in ServiceNow
-
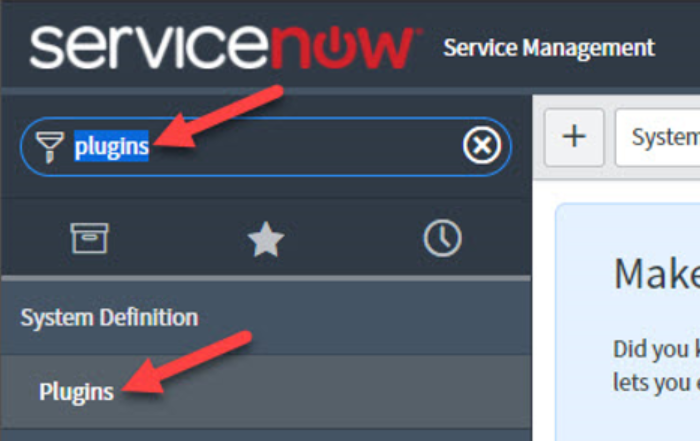
In the left panel, search for plugins.
-
Click Plugins in the search results.
-
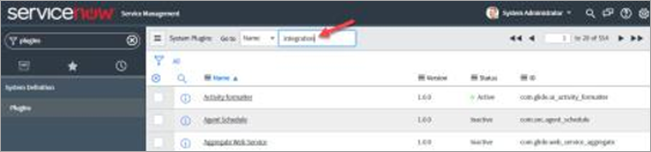
At the System Plugins window search for integration.
-
Click Integration - Multiple Provider Single Sign-On Installer in the list of search results.
-
Click Activate/Upgrade.
-
Click Activate to confirm and wait for the Plugin Activation progress bar to finish.
-
Click Close & Reload Form.
Add New Security Certificate
-
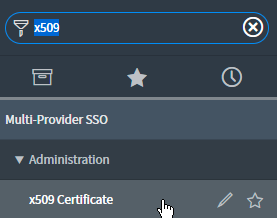
Search for x509 in the Filter Navigator and click x509 Certificate under Multi-Provider SSO.
-
Click New.
-
Open the certificate you downloaded earlier in a text editor, copy the contents, and paste them into the web application’s Certificate field. For ServiceNow, paste the contents into the PEM Certificate field.
-
Configure the following fields. Any fields not listed in this table require no action.
-
Name: Enter SAML 2.0.
-
Format: Select the PEM format.
-
Active: Select the Active check box.
-
-
Click Submit.
Add New Identity Provider
-
Use the Filter Navigator to search for SSO and click Identity Providers under Multi-Provider SSO.
-
Click New to create a new Identity Provider.
-
Click SAML to select the type of Identity Provider to create.
-
Click Cancel when prompted to import metadata.
-
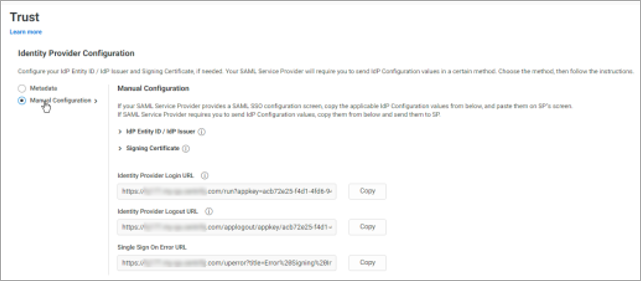
Copy the following values from the IdentityProvider Configuration > Manual Configuration area of the Admin Portal and paste them into the matching fields in the ServiceNow Company Dashboard.
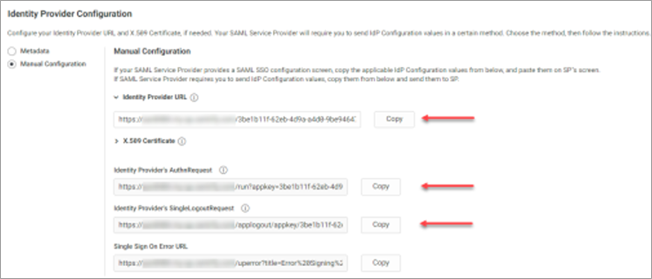
-
Identity Provider URL
- To enable SP-initiated SSO, copy the contents of the Identity Provider URL from the Admin Portal and paste it here.
- For IdP-initiated only, enter another URL.
-
Identity Provider’s AuthnRequest
-
Identity Provider’s SingleLogoutRequest
-
If you want users to log out of the Delinea PAS when they log out of ServiceNow, copy the URL from the Identity Provider’s SingleLogoutRequest in the Admin Portal and paste it here.
-
If you want to keep users logged into the Admin Portal after they log out of ServiceNow, enter a different URL or leave this field blank.
-
-
Configure the following remaining fields in the ServiceNow Company Dashboard. Any fields not listed in this table require no action.
| Field | What you do |
|---|---|
| Name | Enter the name you want to use for the IdP (for example, Delinea-AABX567). |
| Default | (Optional) Select this check box if you want to enable SP-initiated SSO. |
| Identity Provider URL | The Identity Provider entity ID. |
| Identity Provider’s AuthnRequest | The Identity Provider AuthnRequest service endpoint. The AuthnRequest will be posted to this URL as the SAMLRequest parameter. |
| Identity Provider’s SingleLogoutRequest | The Identity Provider SingleLogoutRequest service endpoint. The LogoutRequest will be posted to this URL as the SAMLRequest parameter. |
| ServiceNow Homepage | Replace <yourinstance> in the URL in this field with your company instance name |
| Entity ID / Issuer | Replace <yourinstance> in the URL in this field with your company instance name |
| Audience URI | Replace <yourinstance> in the URL in this field with your company instance name |
| NameID Policy | Replace the default value of the NameID Policy field with: urn:oasis:names:tc:SAML:1.1:nameid-format:unspecified |
| External logout redirect | Use the default value. |
| Failed Requirement Redirect | When SAML 2.0 single sign-on fails because the session is not authenticated, or this is the first login, redirect to this URL. This is the base URL where the initial SAML 2.0 AuthnRequest is sent using the SAMLRequest parameter. |
| Field | What you do |
|---|---|
| Delinea attribute mapping property | Select the property to use for attribute mapping. |
| User ID Field | Set how your assertion is constructed, for example, email or user_name. Note: If you change this setting, make sure that it matches the attribute used for user account mapping in the ServiceNow application settings. Note: If you change this setting, you have to also change the last part of the NameID policy to match the attribute. |
| Single Sign-On Script | Click the magnifying glass and select the MultiSSOv2_SAML2_custom script. |
| NameID Attribute | Leave empty. |
| Clock Skew | Provides a buffer on the valid period of the SAML token. Recommended value: 60. When set to 60, this provides a 60-second buffer when the token is valid before the notBefore constraint and after the notOnOrAfter constraint. |
| Create AuthnContextClass | (Optional) If selected, ServiceNow requires that you present a specific login mechanism such as a form, Kerberos, etc., to create an AuthnContextClass request in the AuthnRequest statement. |
| Protocol Binding for the IDP’s AuthnRequest | The protocol binds the Identity Provider’s AuthnRequest service. Value can be either ‘urn:oasis:names:tc:SAML:bindings:HTTP-Redirect’ or urn:oasis:names:tc:SAML:bindings:HTTP-POST’. |
| AuthnContextClassRef Method | (Optional) Use the default value. |
| Protocol Binding for the IDP’s SingleLogoutRequest | Use the default value. |
| Force AuthnRequest | Leave unselected. |
| Is Passive AuthnRequest? | Leave unselected. |
| IDP Metadata URL | This attribute holds the Metadata URL from where the IDP properties will be imported. |
-
On the same Identity Providers page, scroll down and click the Advanced tab and configure the following fields.
-
Click Submit.
-
Click on the identity provider that you just created, then click Test Connection and sign in with the test user account you created in the Delinea Admin Portal.
If you receive a connection error message for more information about testing the connection and troubleshooting connection errors.
-
In the Filter Navigator, search for Properties, then click Properties under Multi-Provider SSO Administration.
-
Configure the following options.
| Options | What you do | |
|---|---|---|
| Enable multiple provider SSO | Select the **Yes | No** check box. |
| Enable debug logging for the multiple provider SSO integration | (Optional) Select the **Yes | No** check box. |
| The field on the user table that identifies a user accessing the “User identification” login page | Use the default. |
- Click Save to complete the configuration in ServiceNow.
- Deploy the application by setting permissions on the application or by adding the application to a set.
Set Application Permissions
-
On the Permissions page, click Add. The Select User, Group, or Role window displays.
-
Select the user(s), group(s), or role(s) that you want to give permissions, then click Add. The added object appears on the Permissions page with View, Run, and Automatically Deploy permissions selected by default.
-
Select the desired permissions, then click Save.

Add Application to a Set
-
Add the application to the appropriate set. You can either create a new set or add the application to an existing set.
-
In the Sets section, right-click a set name, then click Modify.
-
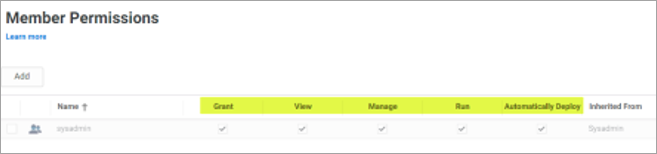
On the Member Permissions page, click Add, and the Select User, Group, or Role window displays.
-
Select the user(s), group(s), or role(s) that you want to give permissions, then click Add. The added object appears on the Permissions page with View, Run, and Automatically Deploy permissions selected by default.
-
Select the desired permissions, then click Save.
-
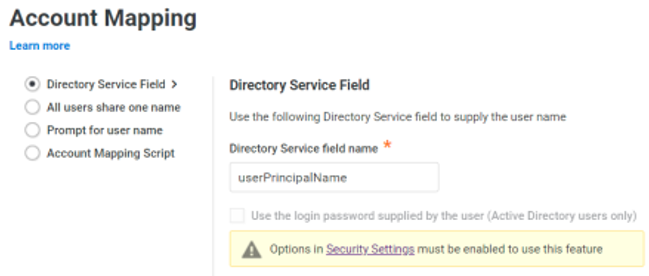
On the Account Mapping page, configure how the login information is mapped to the application’s user accounts. Depending on your application, the available options might vary slightly.
- Directory Service Field: Use this option if the user accounts are based on user attributes. For example, specify an Active Directory field such as mail or userPrincipalName or a similar field from the Delinea Directory.
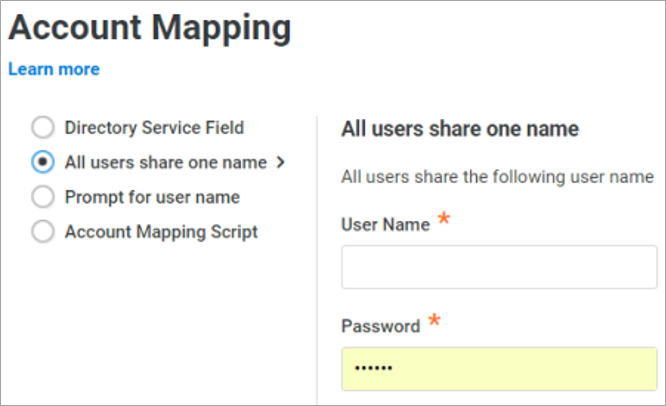
- All users share one name: Use this option if you want to share access to an account but not share the User Name and Password. For example, an application developer account can be shared.
-
Prompt for user name: Use this option if you want users to supply their user name and password. This option only applies to user password application types. The first time that users launch the application, they enter their login credentials for that application. The Delinea Directory stores the user name and password so that the next time the user launches the application, the Delinea Directory logs in the user automatically.
-
Account Mapping Script: You can customize the user account mapping by supplying a custom JavaScript. For example, you could use the following line as a script:
LoginUser.Username = LoginUser.Get('mail')+'.ad';
The script sets the login user name to the user’s mail attribute value in Active Directory and adds ‘.ad’ at the end. For example, if the user’s mail attribute value is Adele.Darwin@acme.com then the account mapping script sets LoginUser.Username to Adele.Darwin@acme.com.ad.
- Click Save to finish configuring the application for single sign-on.