Request Initiation Zone Role Workflow (ZRW)
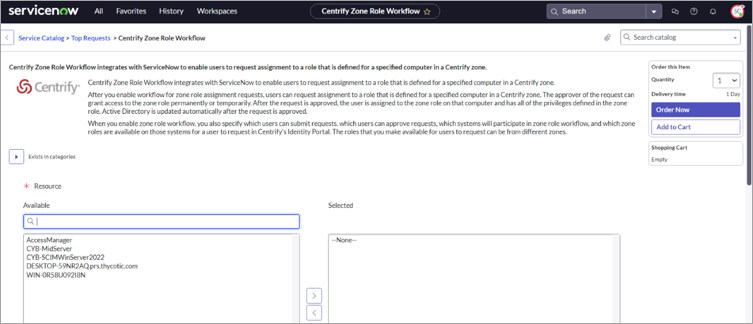
1. Go to All > Service Catalog > Search the application (Centrify Zone Role Workflow).
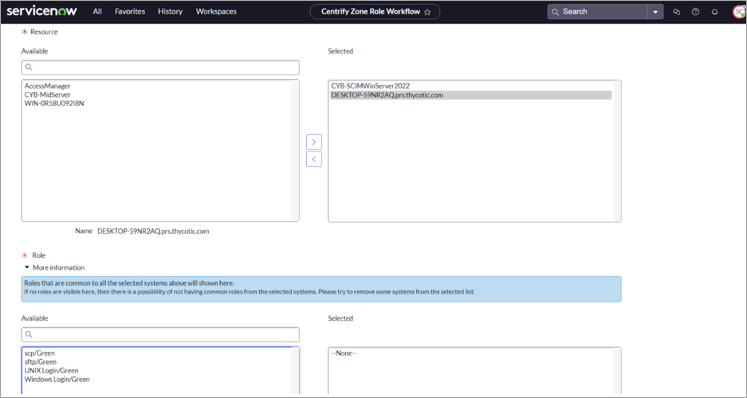
2. Select Resource (multiple resources can be selected).
3. Select the Roles (multiple roles can be selected).
This section displays the roles that are shared by all systems selected. If no roles are visible, it may be because they are not shared between selected systems. Remove a few systems from the chosen list.
4. Select the type of access: Temporary, Permanent, or Windowed. If you choose Temporary or Windowed, specify the duration.
By default, only Temporary and Windowed access options are available in the dropdown. Only users with the Permanent Access role (x_cenr3_priv_acces.approver) can view the Permanent access type in the dropdown menu.
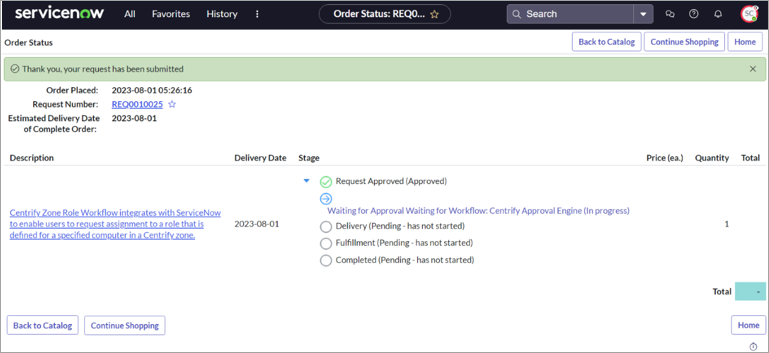
5. Enter the reason and submit the request.
Automatic ZRW Approvals for Specific Roles
How to Create an Approval Rule for Automatic Approvals for Specific Roles
1. Login to ServiceNow with an Admin account.
2. Go to All > Centrify Privilege Access Request > Approval Rules.
3. Click New to create a new Approval Rule.
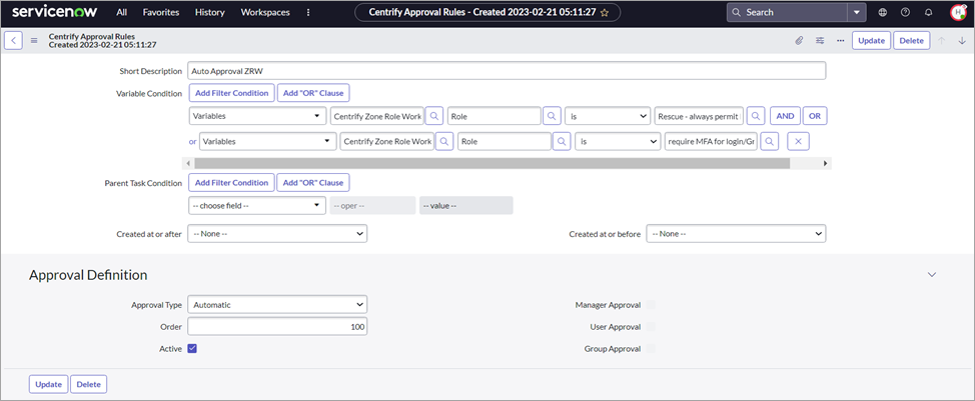
4. Give the Approval Rule a suitable name.
5. In Variable Condition select the dropdown arrow, click Show related fields, then select Variables.
6. Select the application and Role (Role Name). Multiple roles can be added in a single Approval Rule.
7. Select Automatic as the Approval Type.
8. Set Order as 1.
9. Select the Active checkbox.
10. Click Update to save.
Create Approval Rule for PM Approvals
If a single approver is added to the Approval Rule, any requests initiated by that approver will be automatically rejected.
1. Login to ServiceNow with an Admin account.
2. Go to All > Centrify Privilege Access Request > Approval Rules.
3. Click New to create a new Approval Rule.
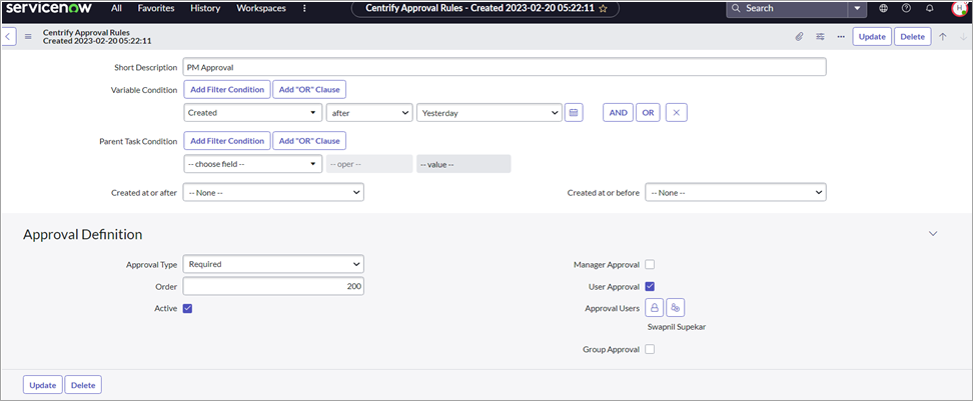
4. Give the Approval Rule a suitable name.
5. In Variable Condition select Created > after > Yesterday.
6. Select Required as the Approval Type.
7. Set the Order as 2.
8. Select the Active checkbox.
9. Select the User Approval checkbox.
10. Select the Approver.
11. Click Update to save.
The Auto Approval rule order must be set before the PM Approval. If the order value of PM Approval is 1 and Auto Approval is 2, the request won't be auto approved. It will be sent to the approver for approval.