Creating Approval Process and Policy
To validate the integration, you also need to create the Approval Process, Approval Type, Approval Action, and the Application Policy. These components ensure that when an approval request is triggered by Privilege Manager, the appropriate workflows and actions are executed in ServiceNow.
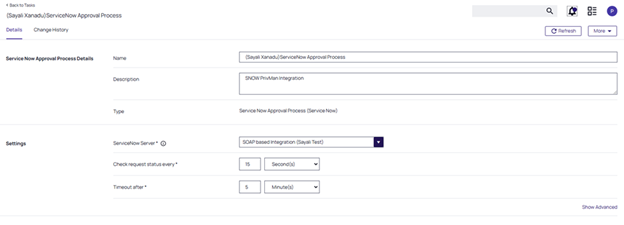
Step 1: Create Approval Process
-
In Privilege Manager, navigate to Admin → Tasks → Automation → Automation → Approvals → Approval Processes. The Tasks page opens.
-
Select Create. The New page opens.
-
Select the ServiceNow Approval Process option from the Template dropdown list.
-
In the Name field enter a name for your approval process.
-
Select Create. The page for the approval process opens.
-
On the Settings section, select the Foreign System configuration you created above from the ServiceNow Server.
-
Save the changes.


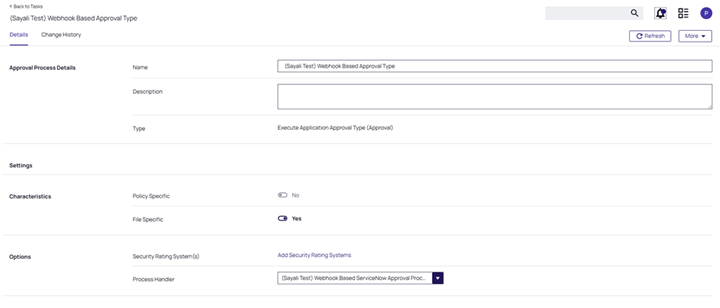
Step 2: Create Approval Type
-
Navigate to Admin → Tasks → Automation → Automation → Approvals → Approval Types.
-
Select Create. The New page opens.
-
In the Name field, enter a name for your approval request type.
-
Select Create. The page for the approval request type opens.
-
Use the File Specific toggle to enable it.
-
In the Process Handler field select the previously created approval process.
-
Save the changes.

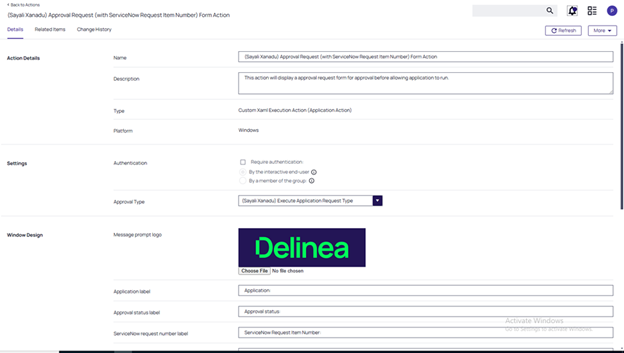
Step 3: Create a New Approval Action
-
Go to Admin → Actions.
-
In the search bar, search for: Approval Request (with ServiceNow Request Item Number) Form Action and open it.
-
Select Duplicate.
-
In the Name field enter a name for your approval action.
-
Select Create.
-
On the Settings section, in the Approval Type field select the previously created approval type.
-
Save the changes.
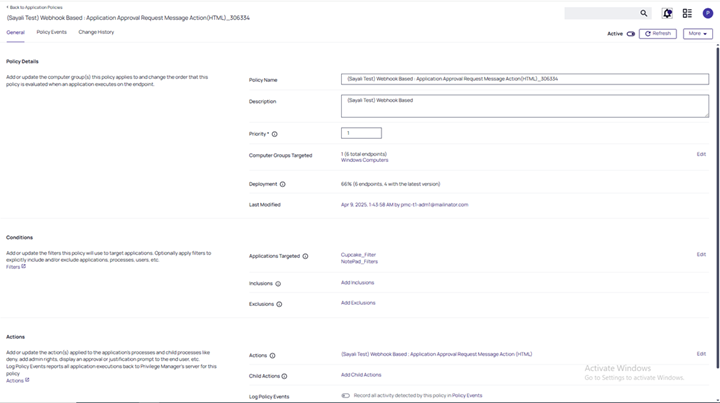
Step 4: Create a Policy for ServiceNow Standard
-
Navigate to Windows Computers → Application Policies.
-
Go to Create Policy > Skip the wizard. The page to create a new policy opens.
-
On the Policy Details section, in the Policy Name field, enter a name for the policy.
-
On the Conditions section, in the Application Targeted field, select Edit to assign an executable such as putty.exe.
-
In the Actions section, select Edit to add the previously created approval action.
- Select Save and then enable the Active toggle.