Manually Running the Delinea MID Server Setup Utility for PAS
The Delinea MidServerSetupUtility generates all required parameters and offers a secure and reliable way to store user credentials without using plain text configuration in the Mid Server configuration file. In this utility you can either set the complete configuration or only encrypt the credentials.
During Discovery, ServiceNow does not treat credentials as "once per device"; instead, credentials are resolved per probe and per discovery phase. For a single machine, different discovery activities such as port scanning, OS detection, and horizontal discovery run independently and may each request credentials on their own. As a result, the same credential can be resolved multiple times during a single discovery run. This behavior is by design in ServiceNow.
UI Restrictions
If the Linux system runs in a headless configuration (for example, when the DISPLAY environment variable is unset or no GUI session is active), JavaFX fails to initialize its graphics subsystem. As a result, the UI utility does not launch and throws a toolkit initialization exception.
If you cannot enable or access a graphical display session on the Linux VM, use the command-line utility (see "(Optional) Running Delinea MidServer SetupUtility with Command Line Arguments" below) instead. The command-line utility provides the same configuration capabilities and does not require a graphical environment.
-
Open the command prompt and run the
DelineaMidServerCLIUtility jarcommand. -
Run the command
java -jar DelineaMidServerCLIUtility.jarYou can use bundled Java to run the DelineaMIDServerCLIUtility.jar without any extra setup if using built-in Java.
Open Command Prompt, go to the following folder:
C:\servicenow\agent\jre\binThen run this command:
java -jar C:\servicenow\agent\extlib\DelineaMidServerCLIUtility.jarThis uses the same Java that the MID Server runs on, so it is compatible and no separate Java installation is needed for Delinea integration.
-
For additional information, enter the command
"--help"for each question.It is important to run this utility on the same server as the MID Server and ensure the Java version is at least 11. If not done correctly, the encryption and decryption process may not work as intended.
-
To set up the complete configuration, enter y to the question, "Do you want to set up the complete configuration?" and enter the following information:
-
Privilege Access Service Username: Provide the PAS user name.
-
Privilege Access Service Password: Provide the password set while creating the user.
-
Proxy: If you use a proxy, enter
yand then the proxy host and port. -
Host: Enter the URL that you use to access PAS.
-
Application ID: Enter the value that you previously configured in PAS.
-
Grant Type: Enter the value that you previously configured in PAS.
-
Scope: Enter the value that you previously configured in PAS.
-
(optional) DNS: To enable reverse DNS lookup, enter yes.
-
(optional) FQDN:To enable FQDN (fully qualified domain name) lookup, enter yes.
-
(optional) FQDN: To allow FQDN based on localhost, enter yes.
-
Find and copy the generated parameters from a
configuration.txtfile within the same folder and paste it into theconfig.xmlfile of the ServiceNow MID Server.
-
-
To encrypt credentials, enter the following information:
-
Do you want to setup the complete configuration? (y/n): if the answer to this question is no, then only the credential will be encrypted.
-
Privilege Access Service Username: Enter the PAS user name.
-
Privilege Access Service Password: Enter the password for the PAS user.
-
Proxy: If you are use a proxy, enter y and then enter the proxy host and port.
-
Host: Enter the URL that you use to access the PAS.
-
Application ID:Enter the value that you previously configured in PAS.
- Grant Type: Enter the value that you previously configured in PAS.
-
Scope: Enter the value that you previously configured in PAS.
-
Find and copy the generated parameters from a
configuration.txtfile within the same folder and paste it into theconfig.xmlfile of the ServiceNow MID server.
DelineaMidServerSetupUtility validates PAS credentials at runtime. If the credentials are not validated, the process will stop.
-
(Optional) Running Delinea MidServer SetupUtility with Command Line Arguments
To run the Delinea MidServer Setup Utility using command line arguments:
-
Open the command prompt.
-
Run the
java -jar DelineaMidServerCLIUtility.jar vaultType username password host applicationId grantType scope proxyHost proxyPortcommand.-
proxyHost: Proxy Server IP (if required)
-
proxyPort: Proxy Server port (if required)
-
The command will only generate the pas_auth_str parameter. You need to copy the remaining parameters manually into the config.xml file.
MID Server Configuration
Modifying config.xml is necessary to add additional parameters for communicating with the External Credential Store plugin.
To modify the file:
-
Log into MID Server.
-
Go to
<Mid Server path>/agent folder and locate the file namedconfig.xml.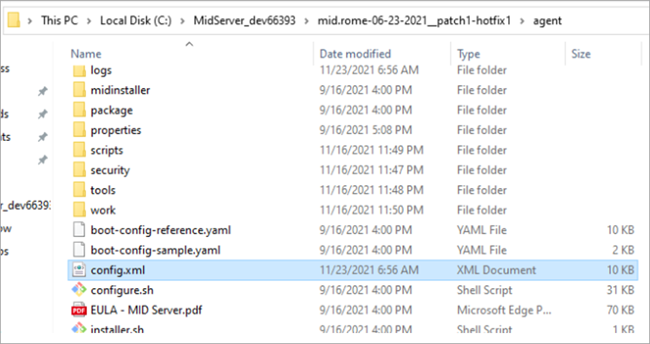
-
Modify the file to add the parameters below. These are added at the end of the file just before the closing tag
<parameters>.Parameter Value Description pas_auth_str This parameter is set to an encrypted string generated by the encryption utility containing the username and password of the PAS Server. host The URL you use to access PAS. application_id Required value: oauth_2_client. grant_type Required value: client_credentials. scope Required value: passwordCheckout. proxy_host This field will likely be blank, unless you know a proxy needs to be used to get out to the internet from your MID Server. proxy_port This field will likely be blank, unless you know a proxy needs to be used to get out to the internet from your MID Server. vault_type This parameter should set to PAS as the credentials are to be validated with Privileged Access Service. credential_lookup_type Required value: narrow. is_logging This parameter can be set to either true or false to enable additional logging other than the default one. Along with this parameter we have to set the LogLevel. log_level This parameter allows user to log based on the requirement. Value can be either 1, 2, 3 or 4.
- Log Level 1: (Logs Info) logs Information.
- Log Level 2: (Logs Debug) logs for developer.
- Log Level 3: (Logs Error) error logs are printed.
- Log Level 4: (Logs all) all 3 logs types are printed.
allow_self_signed_certificates This parameter can be set to either true or false to allow self-signed certificates for getting a token. By default the plugin does not allow self-signed certificate so if a PAS is using a self-signed Certificate then we need to add this parameter and set it to true. password_checkin_interval An optional parameter to delay the password check-in. It can be beneficial when a configuration to rotate a password after check-in is set to true in PAS. User will get some period to perform required task at ServiceNow before the password is rotated. The required value for this parameter is 60000 (in milliseconds). It is available to set another value as per the requirement. use_reverse_dns_lookup This parameter allows plugin to perform a reverse DNS lookup. This can be set to either true or false. It is optional and the default value is false, if undefined. use_fqdn_lookup This parameter allows plugin to perform a FQDN lookup. This can be set to either true or false. It is optional and the default value is false, if undefined. look_up_order This parameter is a list of three values IP, DNS and FQDN. User to enter at-least one of the three values. It is an optional parameter and the default value is IP, if undefined. Refer to Performing Lookups to identify the resources in PAS Server section for more details about lookups. allow_fqdn_based_on_localhost In some networks, the remote machine does not return the FQDN, so this parameter will be useful to increase the success rate to identify the systems having FQDN configured in PAS. This parameter allows a plugin to form an FQDN by identifying the domain name of its localhost/MID Server and append it with the FQDN of a remote machine. This can be set to either true or false. retry_attempts This is an optional parameter to set custom retry attempts to handle request failures. The value should be a number between 0 and 5.
If the parameter is not defined, then the default retry attempt is 3.
If the value is 0 then no retries will be attempted.
The maximum supported retries are 5. Any value greater than 5 will be ignored and considered to be max value (5).
Retry attempts are performed if there are failures in fetching systems from the PAS.
When lookup parameters are defined, then the lookUpOrder items will be executed sequentially in each retry attempt considering the failure in fetching the details.
retry_interval This is an optional parameter to set custom retry interval for each retry attempt.
The default value is 3000 (in milliseconds) when this parameter is not defined.
The minimum value should be 1000 and maximum should be 10000.
If the value is less than 1000 then it will be considered as 1000 and if the value provided is greater than 10000 then it will be considered as 10000.
use_cred_cache This is an optional parameter and can be set to either true or false. Setting it to true enables the caching and saves the credential in the encrypted format in the DelineaCredCache.properties file. The value is ideally narrow, but if PAS does not have all the IP addresses for all your servers, you must set this to wide.
-
Select Save.
-
Restart MID Server.
- Go to the Discovery > MID Servers.
- Open the relevant MID Server record and select Restart MID.