Configuring Delinea
This section describes how to configure either Delinea Secret Server or the Delinea Platform for Azure DevOps integration. Configure the option that applies to your environment.
Azure DevOps requires an application account in Secret Server to authenticate and retrieve secrets through the Delinea DevOps task. The account must be assigned a least-privilege role with the required permissions.
Configuring Secret Server
Step 1: Create Application Account
The application account's credentials will be used to log in your Secret Server instance to create, fetch, or update secrets for use in Azure DevOps. For more information about creating an application account, see Application Accounts in the Secret Server documentation.
A dedicated application is required for Azure DevOps to authenticate to Secret Server. This account is used exclusively by the Azure DevOps pipeline and must not require interactive login or MFA.
-
Log in to Secret Server.
-
Navigate to Users > Application Accounts.
-
Create an application account (example: svc_azuredevops_ss).
-
Requirements:
-
Enabled
-
Strong password
-
No MFA
-
Non-interactive login
-
-
This account will authenticate Azure DevOps task calls.
Step 2: Enable Web Services (Secret Server On-Premises Only)
Web Services must be enabled for REST API access.
- Log into Secret Server as an administrator.
- Navigate to Admin > Configuration.
- Select the General tab, select Application.
-
On the Application page, if Enable webservices is set to No, select Edit and then select the Enable webservices checkbox.
- Save the changes.
- Verify by navigating to:
https://your-secret-server/webservices/sswebservice.asmx
Step 3: Create a Custom Role for the Azure DevOps Integration
You must create a least-privilege role and assign it to the application account.
For Secret Server (On-Prem or Cloud)
- Navigate to Access > Roles.
- Select Create Role.
-
In the Create Role dialog, enter the following:
- Role Name: Azure DevOps Integration
- Description: Limited role for Azure DevOps pipeline secret access
- Go to the Permissions tab and click Edit.
- Set Scope to All.
- Add the following minimum required permissions:
Users tab
- View User: Allows the application account to authenticate via API.
Secrets tab
- View Secret: Allows the application account to read secret values.
- List: Allows the application account to see folders and secrets in the hierarchy.
Optional permissions (add only if needed)
- View Secret Audit: Allows viewing secret access audit entries (useful for debugging or compliance).
- Select Save to apply the permissions.
- The Permissions tab will show all assigned permissions.
Step 4: Assign the Role to the Application Account
The application account must have a role with the View Launcher Password and View Secret permissions in Secret Server. To learn how to create a role with these permissions and how to assign the role to your application account in Secret Server open the Creating Roles topic in Secret Server.
Step 5: Configure and Share Secrets
You must create a secret in Secret Server to store the credentials you want to retrieve for use within Azure DevOps tasks.
-
Navigate to Secrets > All secrets.
- (Optional) Change the default folder for the secret. Make sure the application account has View permission for the folder.
-
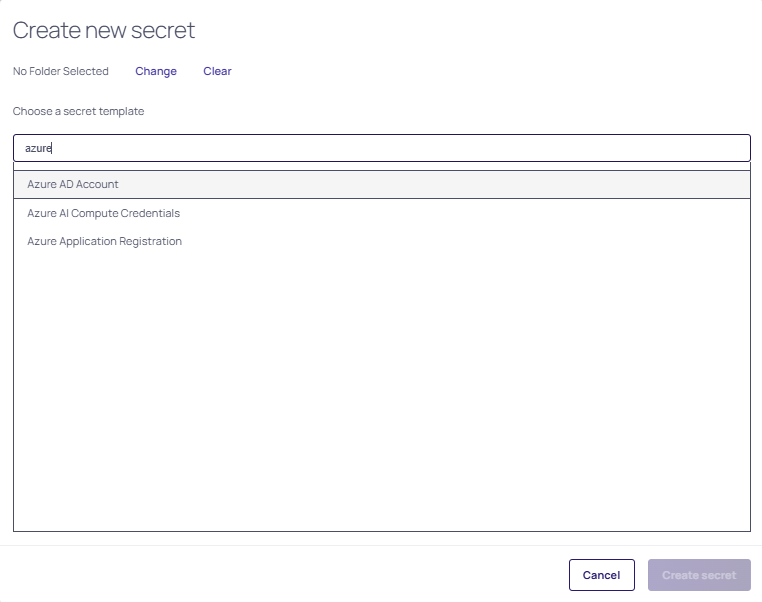
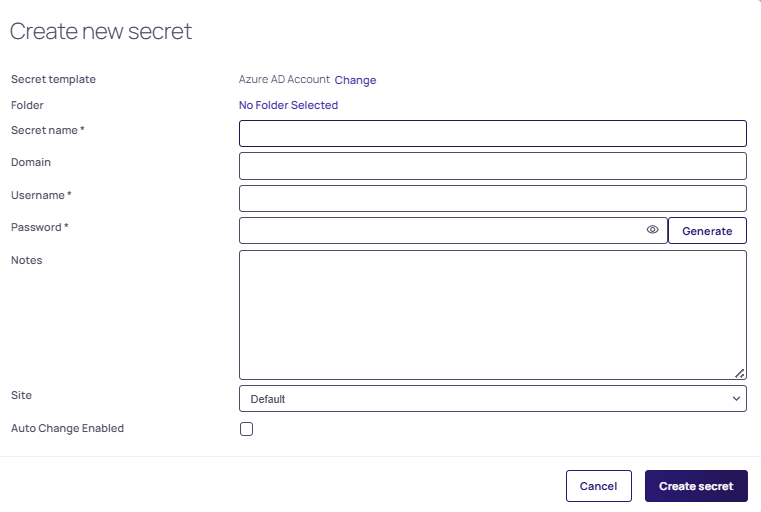
In the Create new secret dialog:
- Select the secret template.
- Enter a name, username, and password.
- Enter any additional required fields.
- Select Create secret.
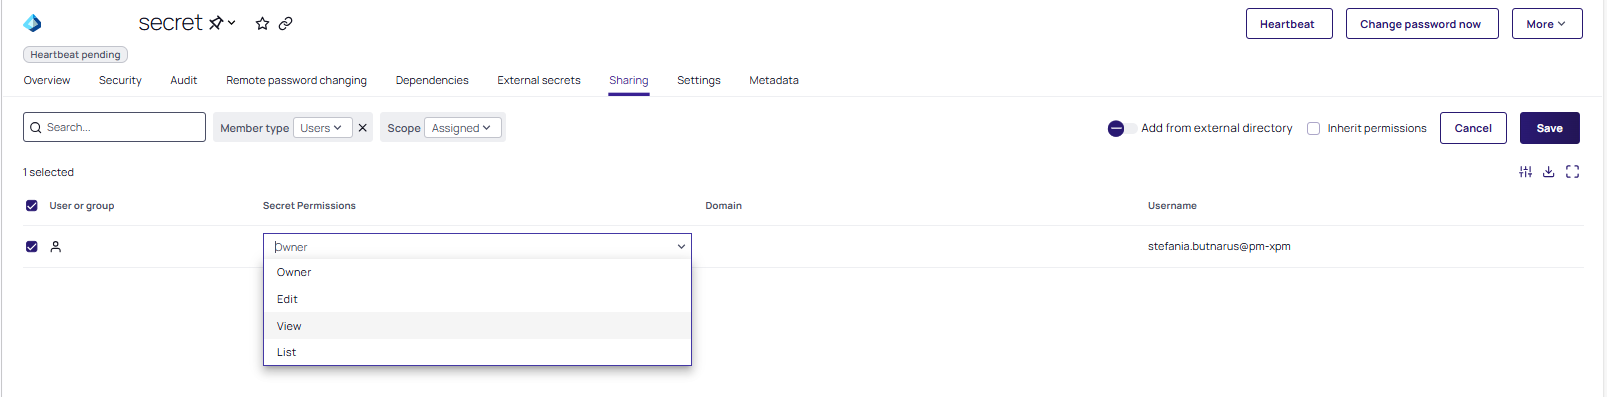
To share the secret with the application account:
- Go to the Sharing tab of the secret.
- Select Edit.
- Clear Inherit permissions.
- Search for the application account.
- Select the checkbox next to the account and choose View permission.
- Select Save.
Configuring Delinea Platform
Step 1: Create a Service User
The integration requires a service user in the Delinea Platform to log in your Delinea Platform instance to create, fetch, or update secrets for use in Azure DevOps. If you don't have a service user, you can create one. For detailed information about creating a service user, see Service Users in the Delinea Platform documentation.
Step 2: Create a Custom Role for the Azure DevOps Integration
You must create a least-privilege role and assign it to the service user:
-
Navigate to Access > Roles.
-
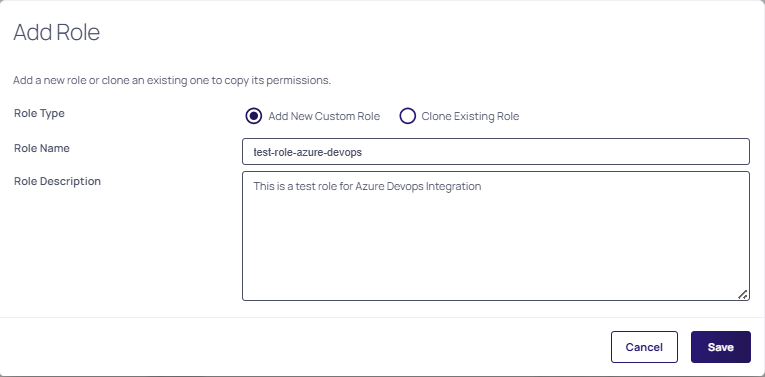
Select Add Role. The Add Role page opens.
-
Add a new role or clone an existing one to copy its permissions.
-
Select Save to finalize the role creation.
-
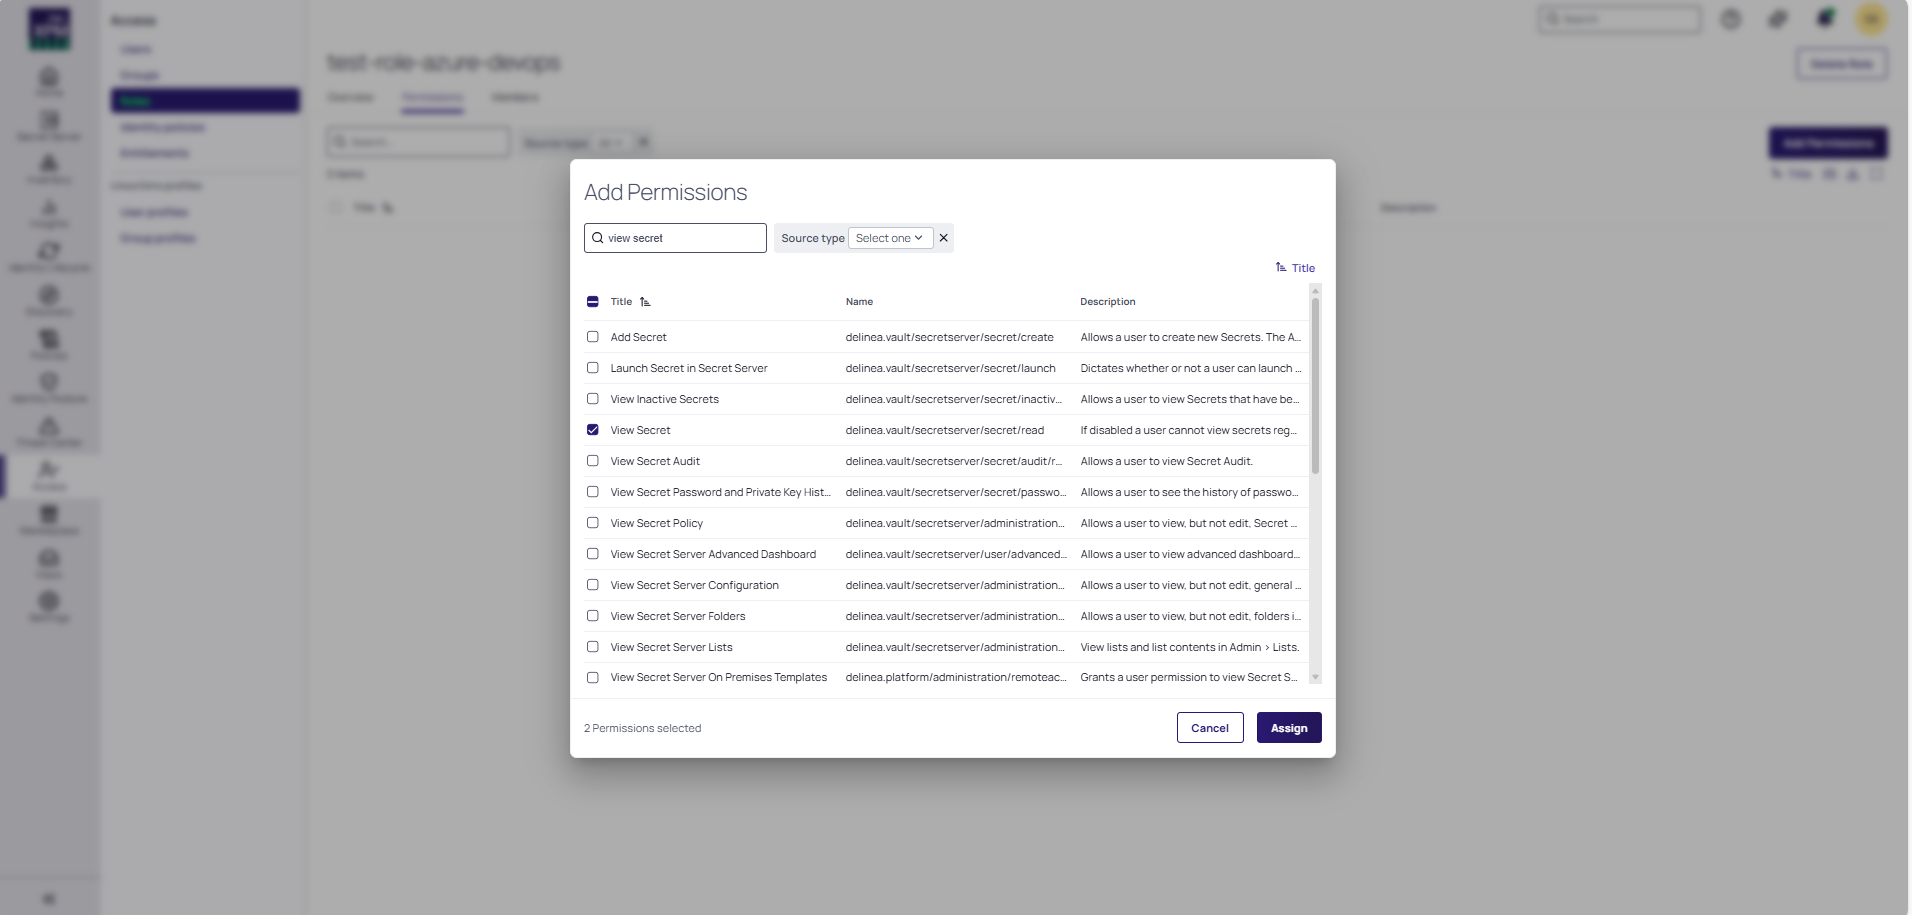
Go in the Permissions tab, and select Add Permissions to start adding permissions to the role.
- Add the following minimum required permissions:
- View User Role Assignment: Allows the service user to view the roles assigned to users.
- View Secrets: Allows the service user to view secrets to launch Privileged Remote Access sessions.
-
Select Assign.
For information about how to view the permissions assigned to a role, see Roles and Permissions in the Delinea Platform documentation (go to the "Editing Role Permissions" section on the page).
Step 3: Assign the Custom Role to the Service User
Assign the custom role created at step 2 to the service user by following the steps in the Managing User Accounts in the Delinea Platform documentation (go to the "Roles Tab" section on the page).
Step 4: Configure and Share Secrets
You must create a secret in Delinea Platform to store the credentials you want to retrieve for use within Azure DevOps tasks.
-
Log into the Delinea Platform using you admin credentials.
-
Navigate to Secret Server > All secrets and then select Create secret.
- In the Create new secret dialog, select the secret template.
- Once you found your template, select Create secret.
- In the Create new secret dialog complete the following fields:
- Enter a name for your secret in the Secret name field, username, and password.
- Enter any additional required fields.
- Select Create secret.
To share the secret with the service user:
- Go to the Sharing tab of the secret.
- Select Edit.
- Clear the Inherit permissions checkbox.
- Search for the service user.
- Select the View permission from the dropdown.
- Select Save.