Configuring WebSphere Application Server for a Data Source Connection
If you want your application to connect to the database using a data source connection, you must complete the following tasks in WebSphere Application Server:
-
Create a JDBC provider for the Delinea JDBC Proxy Driver.
-
Create a data source for the Delinea JDBC Proxy Driver.
-
Update the JDBC provider and data source for a native driver.
The following topics describe how to perform these tasks.
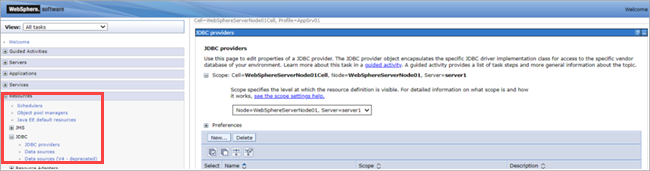
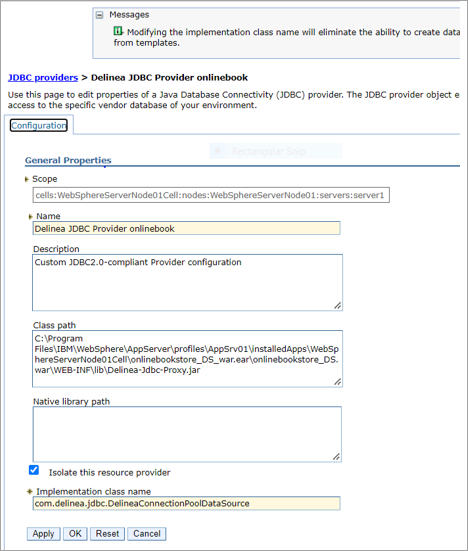
Creating a JDBC Provider for the Delinea JDBC Proxy Driver
-
In the WebSphere Application Server administrative console, navigate to Resources > JDBC Provider > New.
-
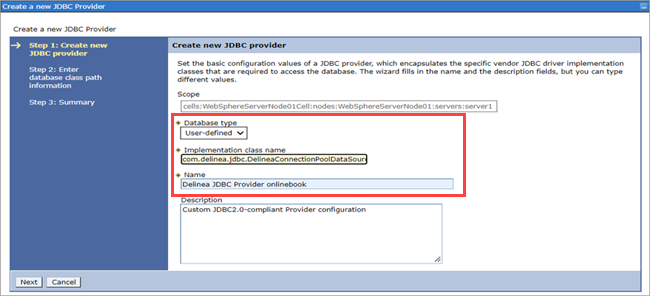
Enter the following information and select Next.
- Database Type: User-defined database type.
- Implementation class name: com.delinea.jdbc.DelineaConnectionPoolDataSource.
- Name: Provide a name of your choice (for example, "Delinea JDBC Provider onlinebook").
-
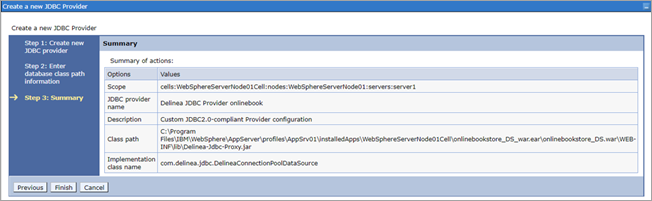
In the Class path box, enter the location of the Delinea Proxy driver JAR file (for example, the Delinea jar file in the WEB-INF/lib folder of the application) and select Next.

-
When the summary information is displayed, select Finish.
Creating a Data Source for the Delinea JDBC Proxy Driver
-
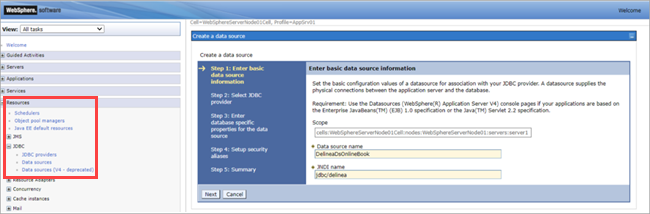
In the WebSphere Application Server administrative console, navigate to Resources > Data sources > New.
-
Enter the following information and select Next:
- Data source name: Provide a name of your choice.
- JNDI name:JDBC/Delinea (this configures in the configuration file of the application).
-
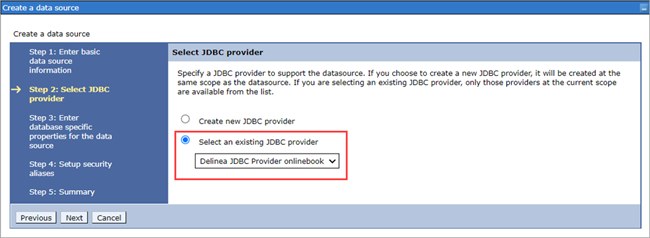
In the Select JDBC provider section, select Select an existing JDBC provider.
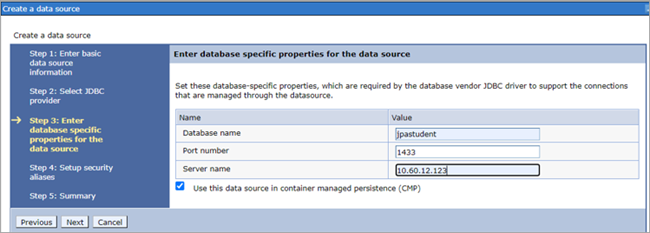
-
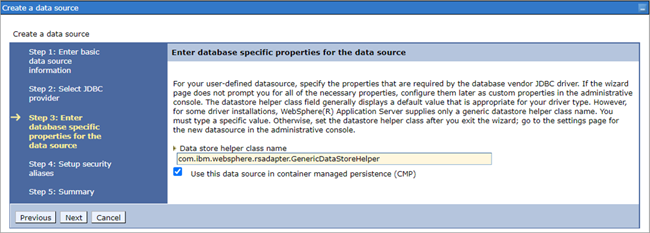
In the Enter database specific properties for the data source section, select Use this data source in container managed persistence (CMP) and select Next.
-
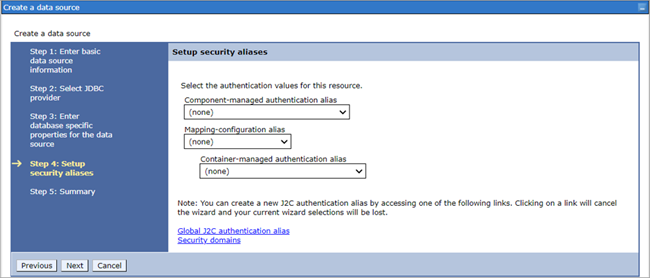
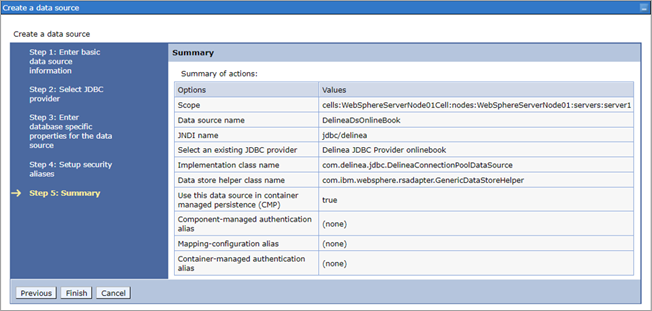
In the Setup security aliases section, select (none) and then click Next. Select Finish.
The Summary is displayed.
-
Select Resources > JDBC and select the created JDBC provider.
-
Select the Isolate this resource provider checkbox.
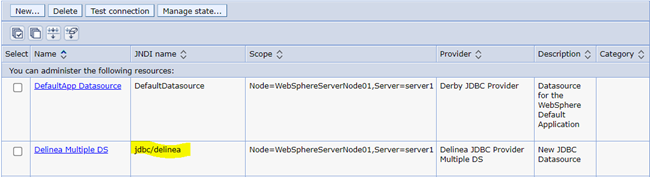
The above-created data source and JDBC provider are displayed in the Data source section.
-
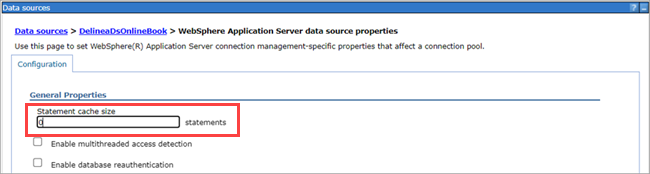
Go to Applications > **JDBC > Data Source > Delinea Data Source (** for example, “jdbc/delinea” > WebSphere Application server data source properties > Statement Cache Size) to update the statement cache size in the Delinea data source.
-
Set Statement cache size to 0 because the Delinea driver does not implement any caching-specific logic. It is forwarded to the native driver to handle.
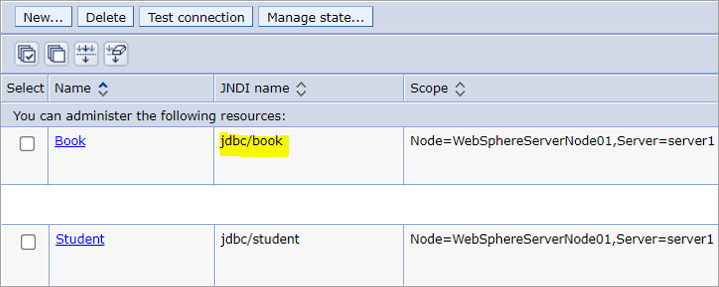
Updating the JDBC Provider and Data Source for a Native Driver
If you have already a native JDBC Provider and a data source (for example, jdbc/book, jdbc/student) configured in WebSphere Application Server , use the following information for the Delinea JDBC Proxy Driver connection.
-
Select WebSphere admin console > Resources > JDCB > Data sources >; then select Created Data source > Security settings.
-
From the Security settings window, select (none) for all the authentication alias parameters.

-
Restart the WebSphere server and test the application.
If the JDBC Provider Database Type Is SQL Server
-
Select SQL Server for the Database type.
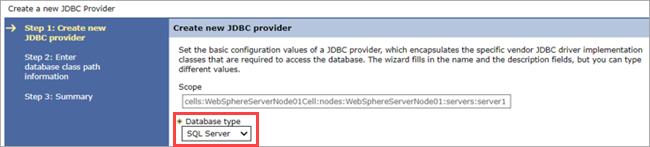
The database connection details of the native Data source are displayed.
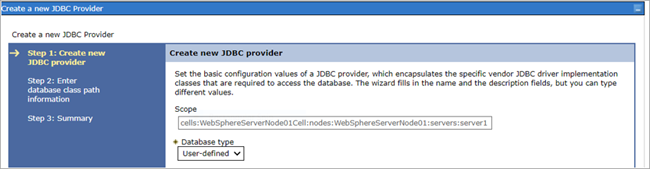
If the JDBC Provider Database type Is User-defined
-
Select User-defined for the Database type.
-
The Data Source using that JDBC provider must set the Custom Properties.
-
Select DataSource > Data Source Name > Custom Properties.
-
Enter the following information:
- portNumber: Port number of the database.
- relaxAutoCommit: Set to true.
- databaseName: Database name that the application is using.
- serverName: Server name in which the database was created.
