Configuring a Direct Connection
To configure a direct connection to the database for your Java application using the Delinea JDBC Proxy Driver, you must perform the following tasks:
Step 1: Configuring the Class Name of the JDBC Proxy Driver
You must modify the application configuration file with the following connection string:
| Database | Database Connection String | Delinea Driver Connection String |
|---|---|---|
| MYSQL | Jdbc:mysql://localhost:port/database | jdbc:delinea:SSID:mysql://localhost:port/database |
| SQLSERVER | jdbc:sqlserver://localhost:port;databaseName= database | jdbc:delinea:SSID:sqlserver://localhost:port;databaseName= database |
| Oracle | jdbc:oracle:thin:@localhost:port: database | jdbc:delinea:SSID:oracle:thin:@localhost:port: database |
| Apache Derby | :derby://localhost:port/database | jdbc:delinea:SSID:derby://localhost:port/database |
The Delinea driver class name remains the same across databases (MySQL, SQL Server, Oracle, Apache Derby).
Optional: If you want to add an auto comment, first you need to enable it on the secret, and then append the comment value after the SSID in the Delinea Driver connection string using the following format:
jdbc:delinea:SSID:comment:mysql://localhost:port/databaseName
SSID = Secret ID
comment = any comment
Driver Class
| Database Class | Delinea Driver class name | |
|---|---|---|
| ANY | com.mysql.jdbc.Driver | com.delinea.jdbc.DelineaDriver |
This example shows the driver class of the Delinea JDBC Proxy Driver for MySQL. The class name is the same for SQL Server, Oracle, and Apache Derby.
Step 2: Configuring a Direct Connection in the Application Configuration File
-
Go to the folder where your installed application is located in WebSphere Server, for example, C:\ProgramFiles\IBM\WebSphere\AppServer\profiles\AppSrv01\installedApps\WebSphereServerNode01Cell.
-
Open the configuration file.
The application configuration file name extension can vary. It can be a file with the * .txt, *.xml, *. properties, or *.config extension.
-
Make the following changes in the configuration file:
jdbc.user. Remove this property.jdbc.password. Remove this property.jdbc.url: This parameter contains the connection string of the database. Add delinea:SSID to the beginning of the connection string. For example, the connection string for SQL Server isjdbc:delinea:SSID:sqlserver://localhost:PortNumber;databaseName=databaseName.- If you have any comments for the Secret, please add them after the SSID:
jdbc.driver: Replace the current value of this parameter with the com.delinea.jdbc.DelineaDriver class name of the Delinea JDBC Proxy Driver.
jdbc:delinea:SSID:comment:mysql://localhost:port/databaseName
SSID refers to the ID of a secret in Secret Server.
-
Save the changes in the file and restart your application.
See an example of how to configure a direct connection in the application configuration file.
Example: Configuring a Direct Connection in the Application Configuration File
The following is an example of the configuration file for a Java JPA application. The configuration file contains the following details for connecting to two databases:
-
Username
-
Password
-
Connection string
-
Driver class name
The configuration file looks like the following:
<persistence-unit name="PersistenceUnit1" transaction-type="RESOURCE_LOCAL">
      <class>com.jpa.entity.Book</class>
      <properties>
          <property name="javax.persistence.jdbc.url" value="jdbc:mysql://localhost:3306/databaseName"/>
         <property name="javax.persistence.jdbc.driver" value="com.mysql.cj.jdbc.Driver"/>
         <property name="javax.persistence.jdbc.user" value="XXXX"/>
         <property name="javax.persistence.jdbc.password" value="XXXX"/>
       </properties>
 </persistence-unit>
<persistence-unit name="PersistenceUnit2" transaction-type="RESOURCE_LOCAL">
    <class>com.jpa.entity.Student</class>
      <properties>
          <property name="javax.persistence.jdbc.url" value="jdbc:mysql://localhost:3306/databaseName"/>
         <property name="javax.persistence.jdbc.driver" value="com.mysql.cj.jdbc.Driver"/>
         <property name="javax.persistence.jdbc.user" value="XXXX"/>
         <property name="javax.persistence.jdbc.password" value="XXXX"/>
       </properties>
 </persistence-unit>
Modify the configuration file so that it looks like the following:
<persistence-unit name="PersistenceUnit1" transaction-type="RESOURCE_LOCAL">
      <class>com.jpa.entity.Book</class>
      <properties>
          <property name="javax.persistence.jdbc.url" value="jdbc:delinea:61:mysql://localhost:3306/databaseName"/>
         <property name="javax.persistence.jdbc.driver" value="com.delinea.jdbc.DelineaDriver"/>
       </properties>
 </persistence-unit>
<persistence-unit name="PersistenceUnit2" transaction-type="RESOURCE_LOCAL">
    <class>com.jpa.entity.Student</class>
      <properties>
          <property name="javax.persistence.jdbc.url" value="jdbc:delinea:62:mysql://localhost:3306/databaseName"/>
         <property name="javax.persistence.jdbc.driver" value="com.delinea.jdbc.DelineaDriver"/>
       </properties>
</persistence-unit>-
javax.persistence.jdbc.url: Add the suffix delinea:SSID after jdbc of the connection string, as shown above. -
javax.persistence.jdbc.driver: Replace the value of this parameter with the com.delinea.jdbc.DelineaDriver class name of the Delinea JDBC Proxy Driver. -
javax.persistence.jdbc.userandjavax.persistence.jdbc.password: These parameters are not needed, so remove them.
Step 3: Setting Up the Native Driver Classpath
Update the native driver path in the WebSphere Application Server administrative console so that the Delinea JDBC Proxy Driver can directly call the native driver.
-
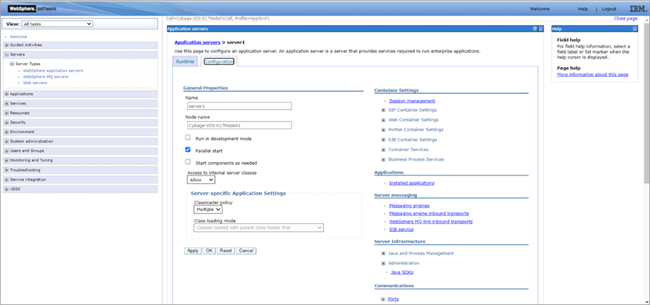
In the administrative console, navigate to Servers > Server Types > WebSphere application Servers > server1.
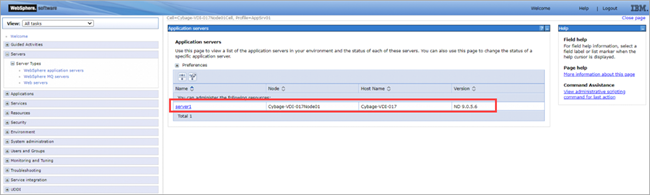
The Application Server Configuration page opens.
-
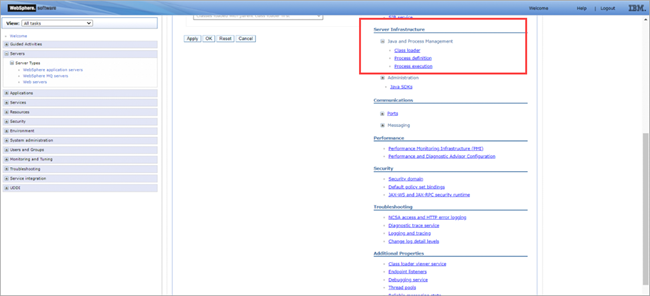
Under Server Infrastructure, navigate to Java and Process Management > Process definition.
-
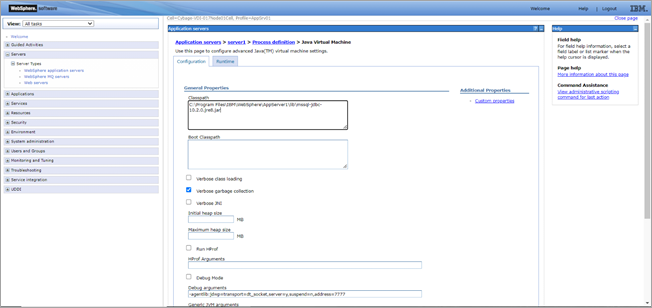
Under Additional Properties, select Java Virtual Machine.
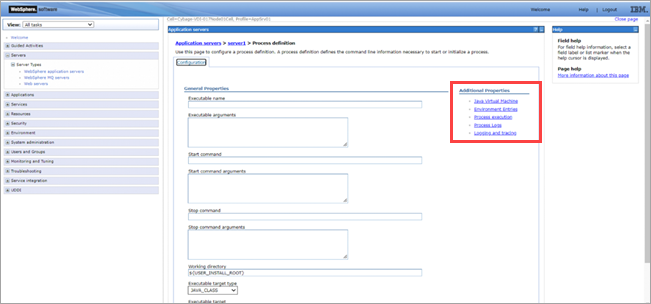
-
Provide the JDBC driver path of the native driver (for example, SQL Server) and then select Apply and Save.
-
Restart WebSphere Application Server and test your application with the Delinea JDBC Proxy Driver.