Configuring Non-XA Datasource
If your application uses the JNDI name in the application’s configuration file and uses a Non-XA data source connection, use the following implementation class name of the JDBC Proxy Driver:
| Database | Non-XA Implementation class name |
|---|---|
| ANY | com.delinea.jdbc.DelineaConnectionPoolDataSource
|
Step 1: Run the SetupUtlity.jar
Run the SetupUtility.jar
For detailed instructions, see Setup.
Step 2: Configuring a Non-XA DataSource in WebSphere UI
If you want your application to connect to the non XA datasource, you must complete the following tasks in WebSphere Application Server:
- Create a JDBC provider for the Delinea JDBC Proxy Driver.
- Create a Data Source for the Delinea JDBC Proxy Driver.
Creating a JDBC Provider for the Delinea JDBC Proxy Driver
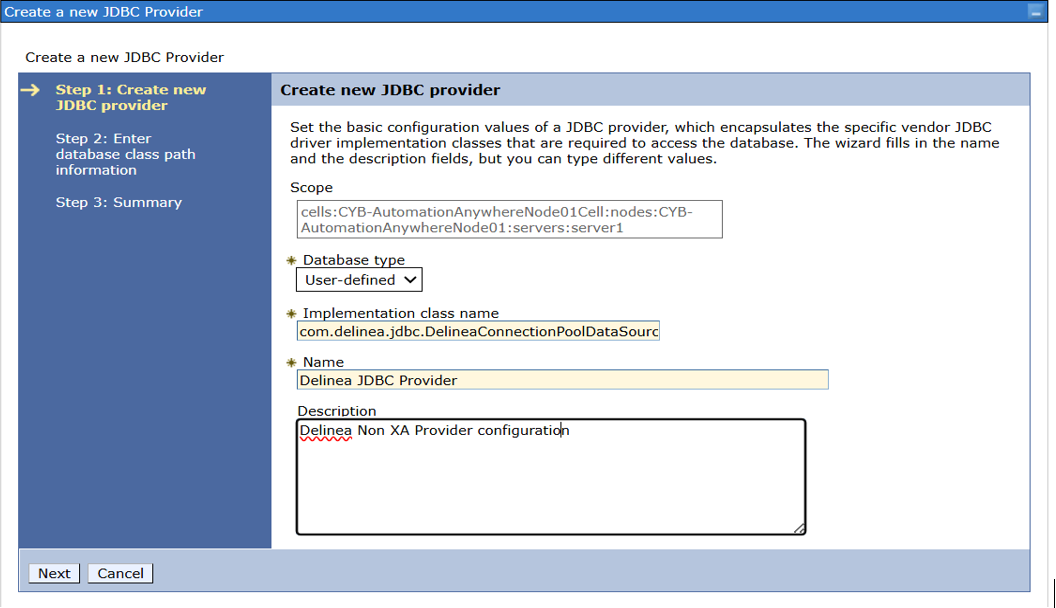
- In the WebSphere Application Server administrative console, navigate to Resources > JDBC Provider > New.
-
Enter the following information and select Next:
- Database Type: User-defined database type.
- Implementation class name:
com.delinea.jdbc.DelineaConnectionPoolDataSource. - Name: Provide a name of your choice (for example, "Delinea JDBC Provider for Non XA DataSource").
-
In the Class path box, enter the location of the Delinea Proxy driver JAR file
(for example, the Delinea jar file in the
WEB-INF/libfolder of the application) and select Next.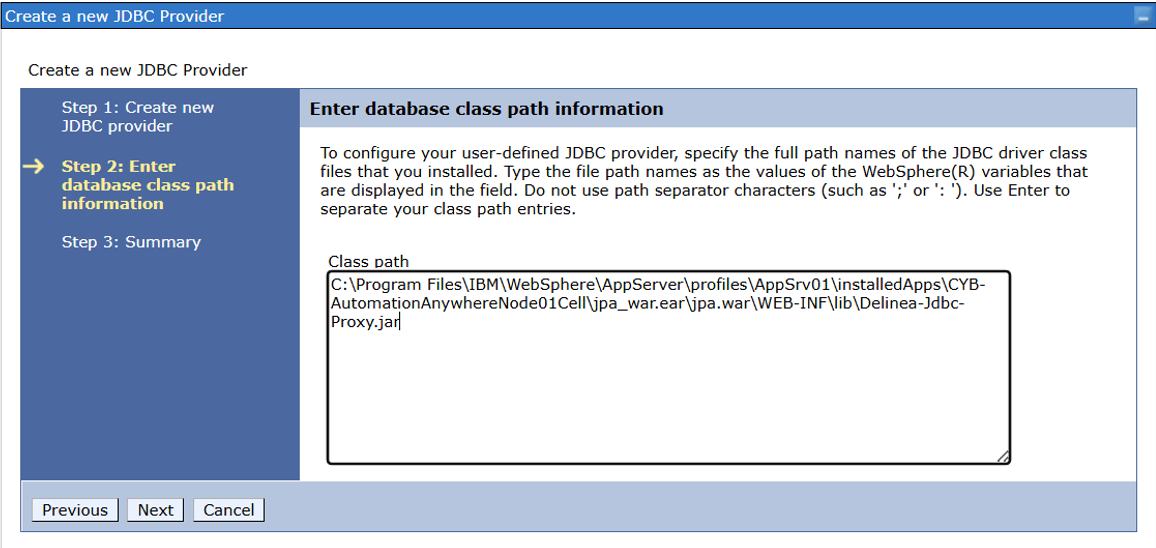
- When the summary information is displayed, select Finish.
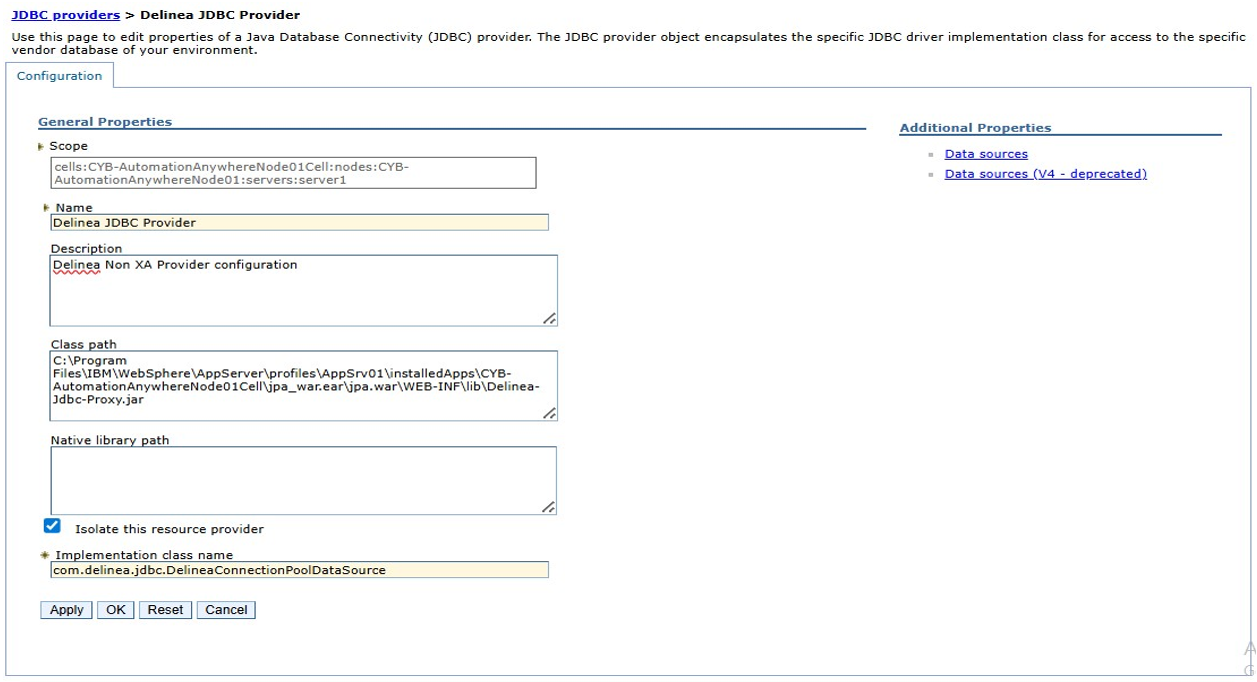
- Select Resources > JDBC and select the created Delinea JDBC provider.
- Select the Isolate this resource provider checkbox and then select Apply.
Creating a Data Source for the Delinea JDBC Proxy Driver
- In the WebSphere Application Server administrative console, navigate to Resources > Data sources > New.
-
Enter the following information and select Next:
- Data source name: Provide a name of your choice.
- JNDI name: The name that the application expects – this is the same JNDI name that is written
in the application's code, for example:
jdbc/delineabook.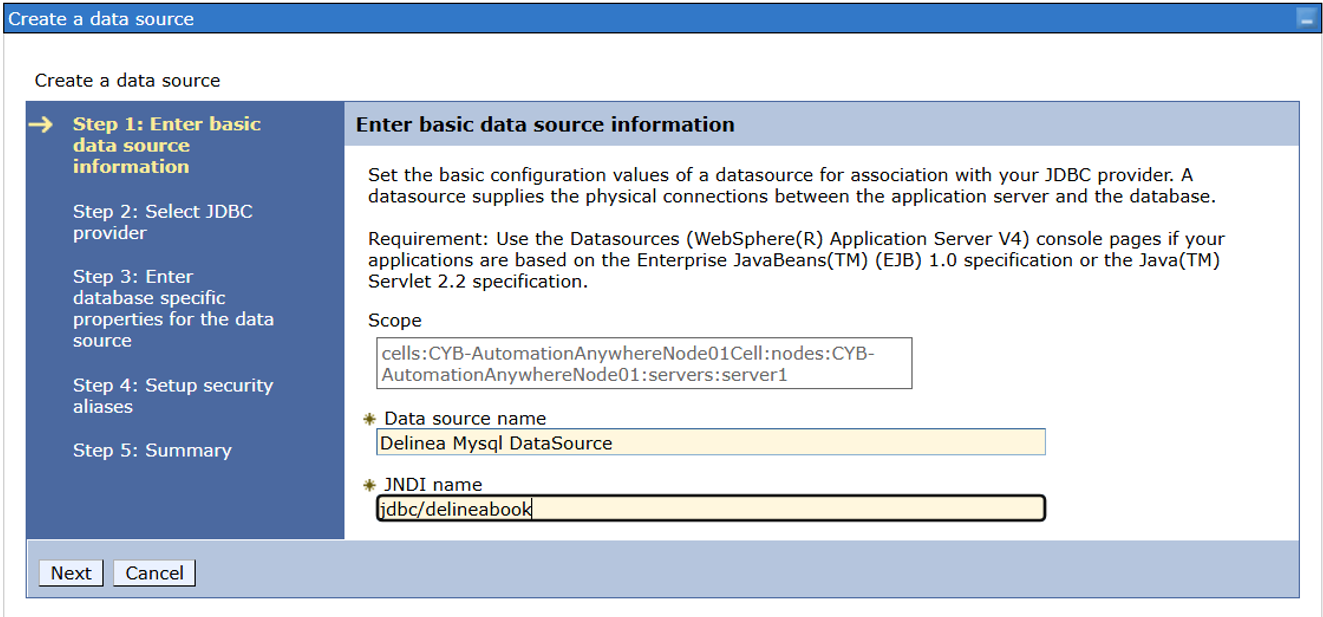
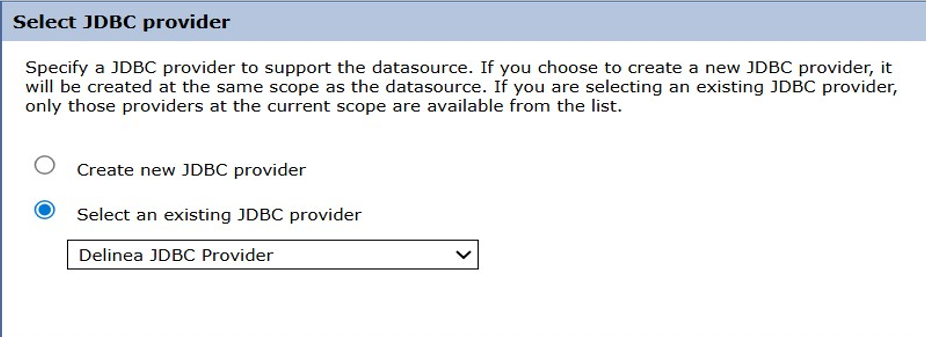
- In the Select JDBC provider section, select the Select an existing Delinea JDBC provider checkbox and select the Delinea JDBC Provider option from the drop-down list.
- In the Enter database specific properties for the data source section, select Use this data source in container managed persistence (CMP) and select Next.
-
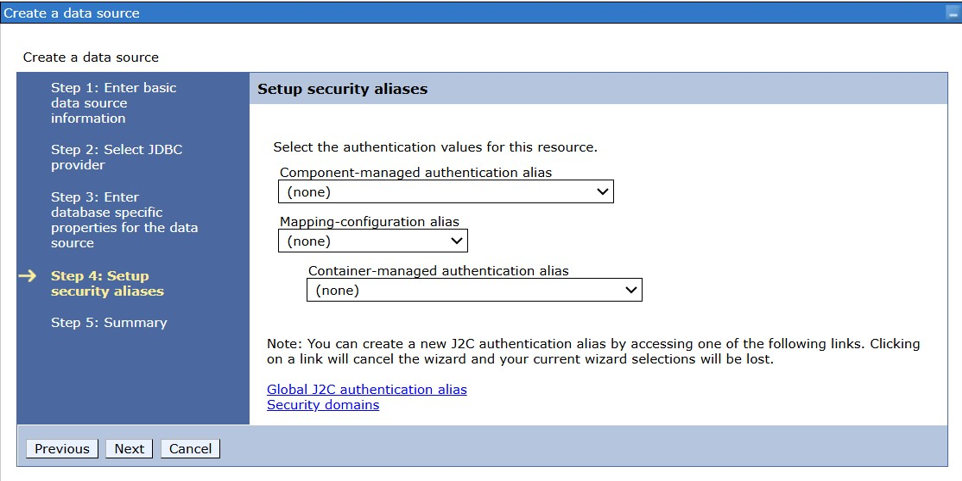
In the Setup security aliases section, select (none) for all the fields, and then click Next.
- Review the Summary page and click Finish.
-
Navigate to the existing data source (Resources > JDBC > Data sources).
- Click the data source just created to see its details.
- Navigate to Custom properties.
- Create custom properties.
The following table lists the Delinea JDBC driver configuration properties.
The property names are case-sensitive and must be specified exactly as shown.
Database-Specific Configuration
For databases such as MySQL, Oracle, MariaDB, SQLite, and H2:
These drivers support URL-based configuration. Additional connection properties are not required. Add the following properties.
Property Description delinea_secretId
(Mandatory)The secret ID that contains database credentials. delinea_vendorClass
(Mandatory)The wrapped Non-XA datasource class.
Examples:com.mysql.cj.jdbc.MysqlConnectionPoolDataSourceoracle.jdbc.pool.OracleConnectionPoolDataSource
delinea_comment
(Optional)If autoCommentis enabled on the secret, then add this property.URL (Mandatory) The connection URL. URL to the database. -
For JDBC drivers such as Microsoft SQL Server, PostgreSQL, DB2, Derby, and Sybase:
These drivers do not support URL-only configuration. Additional properties must be explicitly defined. com.mysql.cj.jdbc.MysqlConnectionPoolDataSourceoracle.jdbc.pool.OracleConnectionPoolDataSource- Go to Applications > JDBC > Data Source > Delinea Data Source (for example, jdbc/delineabook > WebSphere Application Server data source properties > Statement Cache Size).
- Set Statement cache size to 0 because the Delinea driver does not implement any caching-specific logic. The native driver handles caching.
After adding the properties, save your changes.
| Property | Description |
|---|---|
delinea_secretId
(Mandatory) |
The secret ID that contains database credentials. |
delinea_vendorClass
(Mandatory) |
The wrapped Non-XA datasource class.
Examples: |
delinea_comment
(Optional) |
If autoComment is enabled on the secret, then add this property. |
serverName
(Mandatory)
|
Specifies the hostname or IP address of the database server to which the JDBC driver should connect. |
portNumber
(Mandatory)
|
Specifies the port on which the database server is listening for incoming connections. |
databaseName
(Mandatory)
|
Specifies the name of the target database/schema that the application should connect to. |
After adding the properties, save your changes.
Step 3: Configuring Application Configuration File
To configure a data source configuration for your application using the Delinea JDBC Proxy Driver:
-
Go to the folder where your application is installed in WebSphere Application Server, for example:
C:\ProgramFiles\IBM\WebSphere\AppServer\profiles\AppSrv01\installedApps\WebSphereServerNode01Cell. -
Open the application configuration file.
- The file extension can be
.txt,.xml,.properties, or.config. - non-jta-data-source: Replace the native data source value with the JNDI name of the Delinea data source
(for example,
jdbc/delineabook).
- The file extension can be
- Save the changes and restart the application.
Example: Configuring a Non XA Data Source Connection
This section contains an example of the application configuration file
(persistence.xml) that defines two native data sources:
jdbc/book and jdbc/student.
This example shows how to modify the configuration file to configure a Non XA
data source connection using the Delinea JDBC Proxy Driver.
The configuration file using the native JDBC driver appears as shown below:
            <persistence-unit name="PersistenceUnit1" transaction-type="RESOURCE_LOCAL">
            <non-jta-data-source> jdbc/book</non-jta-data-source>
            <class>com.jpa.demo.Book</class>
            </persistence-unit>

            <persistence-unit name="PersistenceUnit2" transaction-type="RESOURCE_LOCAL">
            <non-jta-data-source>jdbc/student</non-jta-data-source>
            <class>com.jpa.demo.Student</class>
            </persistence-unit>
Modify the configuration file to use the Delinea JDBC Proxy Driver so that it appears as shown below:
            <persistence-unit name="PersistenceUnit1" transaction-type="RESOURCE_LOCAL">
            <non-jta-data-source> jdbc/delineabook</non-jta-data-source>
            <class>com.jpa.demo.Book</class>
            </persistence-unit>

            <persistence-unit name="PersistenceUnit2" transaction-type="RESOURCE_LOCAL">
            <non-jta-data-source>jdbc/delinestudent</non-jta-data-source>
            <class>com.jpa.demo.Student</class>
            </persistence-unit>
non-jta-data-source: Replace jdbc/book and jdbc/student
with Delinea data sources (for example, jdbc/delineabook and
jdbc/delineastudent).