Configuration
-
Log in to AWS.
-
In a separate browser tab, log in to the Delinea Platform.
-
Navigate to Discovery > Entitlement & Threat Sources.
-
Go to Create and select the AWS option. The Integrate AWS dialog opens.
-
Create AWS stack trust role:
-
In the integration dialog, select Cloud Formation Installation.
Amazon AWS opens with the CloudFormation > Stacks > Create stack page displayed. If this page is not displayed, you may not have the needed permissions. Send the link (along with a request to create a trust role) to your AWS admin.
The AWS form is prefilled with:
-
Template URL: https://authomize-cloud-formation.s3.amazonaws.com/authomize_cloud_formation.json
-
Stack name: Authomize-Trust-Role
-
Parameters: ExternalID is set.
-
-
In the Parameters section, set IncludeIAMIdentityCenter to True.
-
Skip the Permissions section.
-
Review and acknowledge the capabilities.
-
Click Create stack.
In AWS, the newly created stack is displayed in the CloudFormation > Stacks > Authomize-Trust Role page.
-
Ensure that the stack creation is complete (A), then click your username (B) to reveal the Account ID number (C):
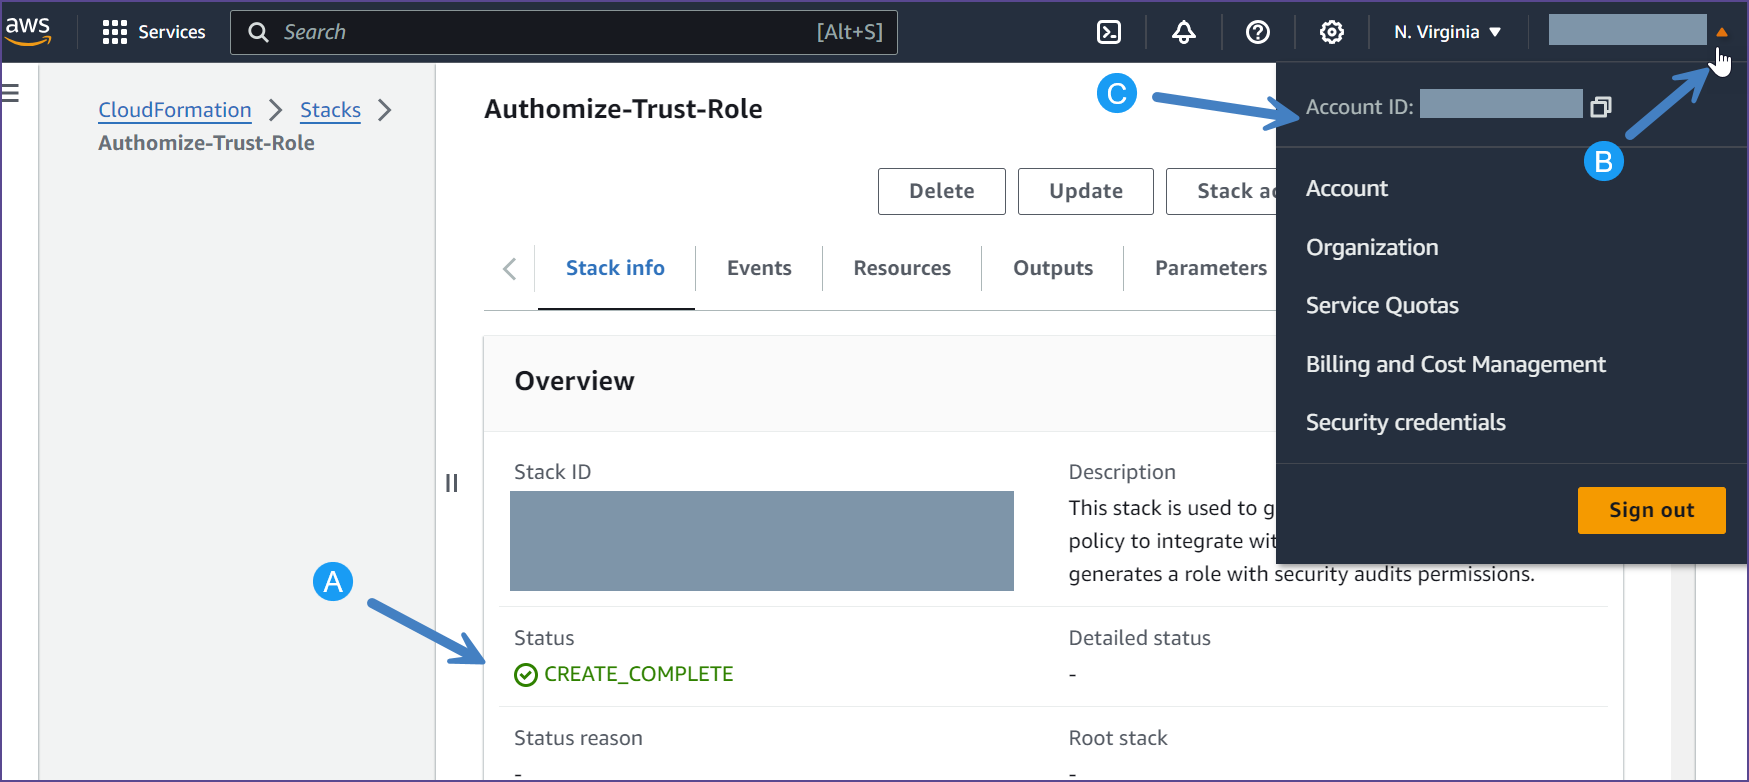
-
Copy the account ID.
-
-
Complete the integration in the Delinea Platform:
- In the Account Number field, add account numbers if you wish to focus on specific accounts, or leave empty to automatically list all active accounts under the organization. See Listing of Org Accounts for more details.
-
(Optional) To integrate AWS Identity Center or allow the system to automatically list organization account, the role must be installed on the management account and include AWS Identity Center permission.
-
Skip Assume Role.
-
Leave the Regions field empty if you want to retrieve data from all regions in your organization. If you specify the regions, the data will be retrieved only from those regions listed.
If there are multiple account numbers, enter them in comma-delimited format.
-
(Optional) You can enter a unique name for this integration.
By default, the integration will be named AWS.
-
Select Save.
The AWS option is displayed as a connected app. The synchronization process begins, and its status will be shown when it is completed.