Users
Sign into your DSV tenant. On the Home page, open the Administration drop-down to access Users.
Viewing Users
At the Administration drop-down, select Users. A table of the currently defined Users is displayed.
Use the filter icon at the far right of the table header to enable or disable columns included in the table.
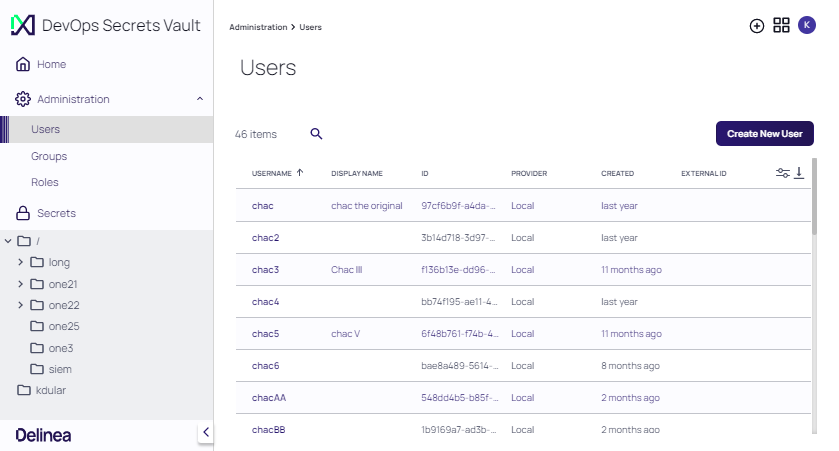
The following parameters are displayed for each User account.
| Parameter | Value |
|---|---|
| USERNAME | Local username; required; supports local authentication by username and password; need not match that used by a federated authentication provider (if present) |
| DISPLAY NAME | Locally used display name for identifying the User in DSV |
| ID | Unique identifier used for this User |
| PROVIDER | Matches the name attribute of the authentication provider in the settings section of the config |
| CREATED | When the User account was created |
| EXTERNAL ID | Identifier recognized by third-party federated authentication providers, such as AWS or ARN |
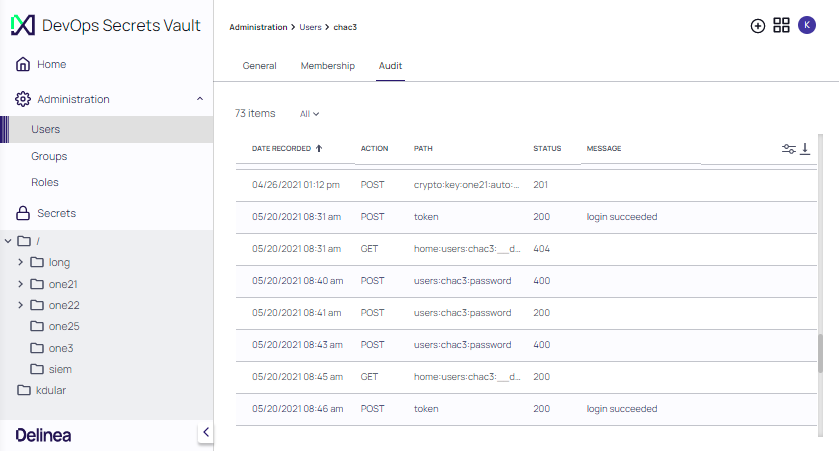
Click any User account in the table to access the User Details page for that User. The User Details page provides a Reset Password and Delete User option, as well as the ability to edit the Display Name.

By default the General tab displays for a selected user. The information on this tab presents specific login and user detail information. Click Membership to display any User Groups that the user belongs to.
Click Audit to display the audit log for the user account. Audit details include the following information:
| Parameter | Value |
|---|---|
| DATE RECORDED | The date and time an action was taken |
| ACTION | The action performed for the user as either: POST or GET |
| PATH | The path to where the user account is located |
| STATUS | The HTTP status code returned to the caller as the result of the action |
| MESSAGE | Any message text created when the action was performed |
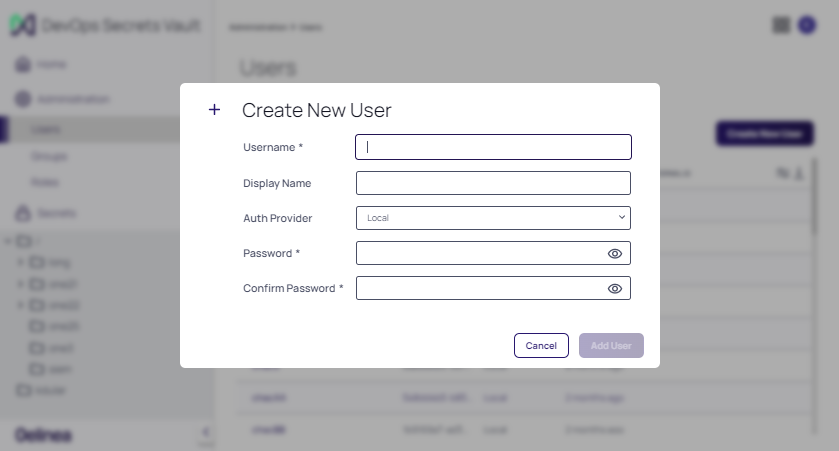
Creating Users
To create a User:
-
At the Administration > Users page, click Create User.
-
Enter values for the requested fields and click Add User. Required fields are indicated by an asterisk (*).
-
The User Details page for the newly created User is displayed.
-
Click Administration > Users to return to the Users page.
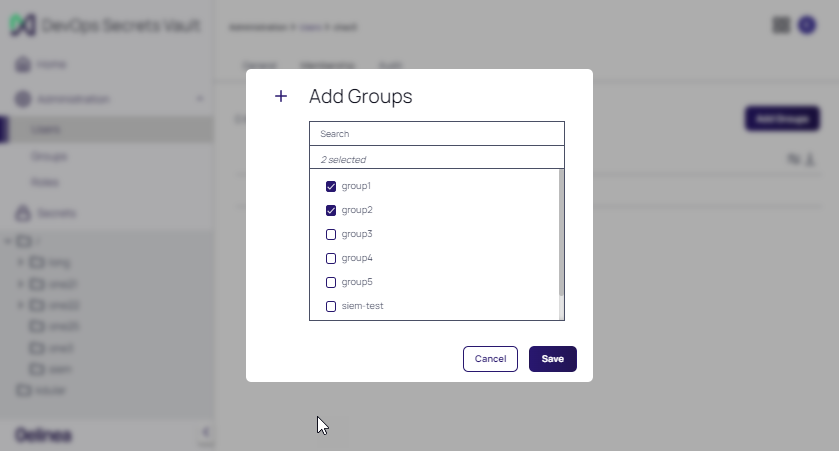
Assigning Group Membership
Any User account can be associated with a Group. A Group determines the policies and permissions enabled for the User. The Group Memberships available for selection for a User are predefined by the Administrator.
To create a Group Membership:
-
At the Administration > Users page, click the User account to be associated with a Group.
-
Click the Membership tab.
-
Click Add Groups.
-
At the Add Groups modal, select the desired Group Memberships. One or more Memberships can be selected. If Memberships already exist for a User, they can be disabled if needed. Click Save when complete.
-
The page is updated with User Group Memberships.