Roles
Sign into your DSV tenant. On the Home page, open the Administration drop-down to access Roles.
Viewing Roles
At the Administration drop-down, select Roles. A table of the currently defined Roles is displayed.
Use the filter icon at the far right of the table header to enable or disable columns included in the table. The search icon can be used to identify a specific Role for display.
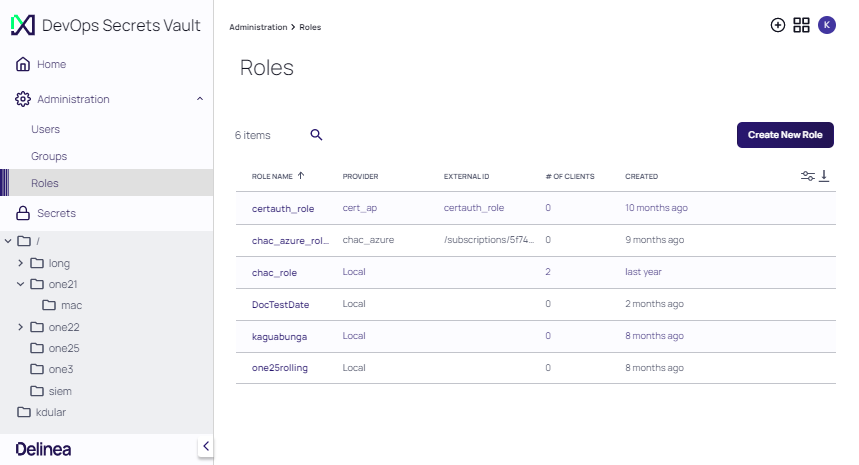
The following parameters are displayed for each Role.
| Parameter | Value |
|---|---|
| ROLE NAME | Locally used display name for identifying the Role |
| PROVIDER | The mechanism used to authenticate the Role |
| EXTERNAL ID | The name that identifies the Role in the integration |
| # OF CLIENTS | The number of clients associated with the Role |
| CREATED | The time elapsed (in months) since the role was created. Hover over the value to display the date and time the Role was created. |
Viewing Role Details
Click any Role in the table to access the Role Details page.
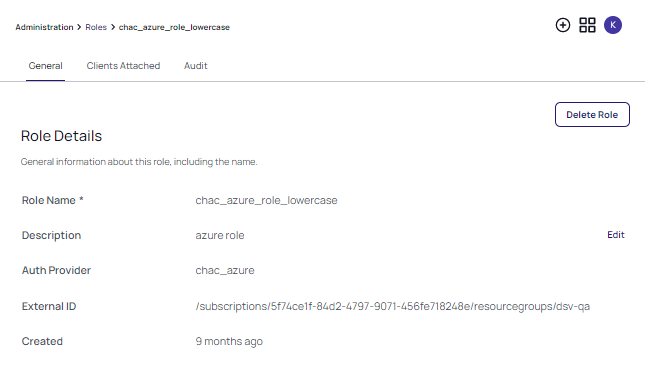
The tabs at the top of the Role Details page provides the following functionality.
| Tab | Functionality |
|---|---|
| General | Displays role details that include the name, description, authentication provider, external ID, and date created for the Role |
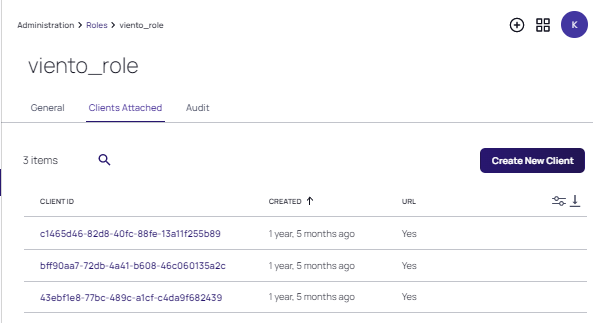
| Clients Attached | Displays the clients attached to the Role and allows filtering and searching of clients. The date displayed indicates when the client was created in the application. If the URL column indicates YES, the client link represents and active URL for login. |
| Audit | Displays all events for the given Role |
Attached Clients
With the Clients Attached tab selected, click any Client ID to view its Client Details page.
The following parameters are displayed for each client.
| Parameter | Definition |
|---|---|
| Client ID | The unique identifier assigned to the client. |
| Description | A narrative summary that identifies the client. |
| Role | The Role associated with the client. |
| URL | When enabled, login via a URL is enabled. When disabled, user credentials are required for login. |
| Client TTL | This field appears when a URL is selected. The Time To Live (TTL) is the time the client will exist. When set to 0, the client will exist indefinitely. |
| Created | A reference to when the client was created. Hover over the entry to view the creation date and time. |
Click Delete Client to remove an attached client. The client is no longer displayed on the Clients Attached list.
Click Create New Client to attach a new client, and supply the requested parameters at the Create New Client dialog.
When creating a client, a Description, Client TTL (sec), and Client Uses value is required. Client Uses is the number of times the client credential can be used. When set to 0, the client can be used indefinitely. If login is enabled with a URL, enable the URL checkbox. Click Save.
Creating Roles
The Create permission is required for an account, in order to create a Role.
To create a Role:
-
At the Administration | Roles page, click Create Role.
-
Enter a Role Name and Description for the Role. Select the Auth Provider and click Add Role.

-
The Roles page is refreshed with the newly added Role.
Deleting a Role
The Delete permission is required for an account, in order to delete a Role.
To delete a Role:
- At the Administration | Roles page, select the Role to be deleted.
- At the Role details page, click Delete Role.
- The Roles page is refreshed. The Role no longer appears in the Role list.