Okta Identity Provider Example
This example uses Okta as a OIDC identity provider.
Okta OIDC connection
- Get the callback URL from Delinea's Cloud Manager portal following the directions at Authentication:OIDC.
- Log in to your Okta Admin console.
- From the top menu bar, select Applications.
- Select Add Application.
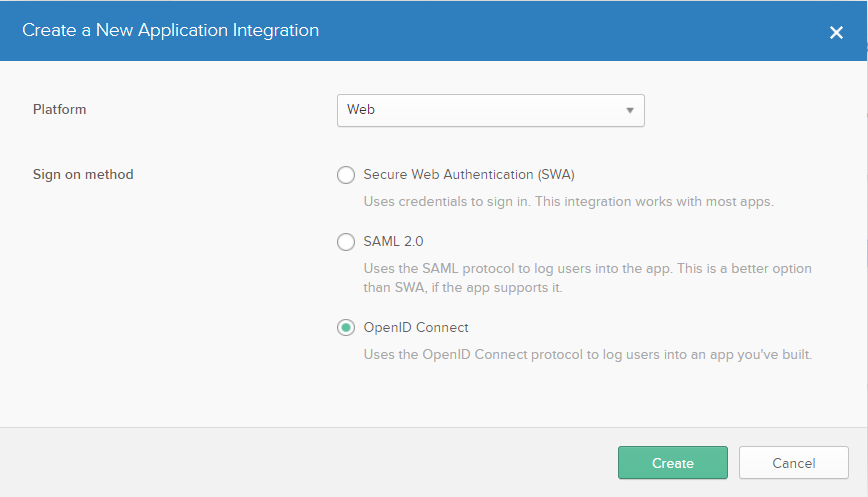
- At the top right, select Create New App. A window opens.
- For platform, select Web from the drop-down and the OpenID Connect radio button. Click Create.
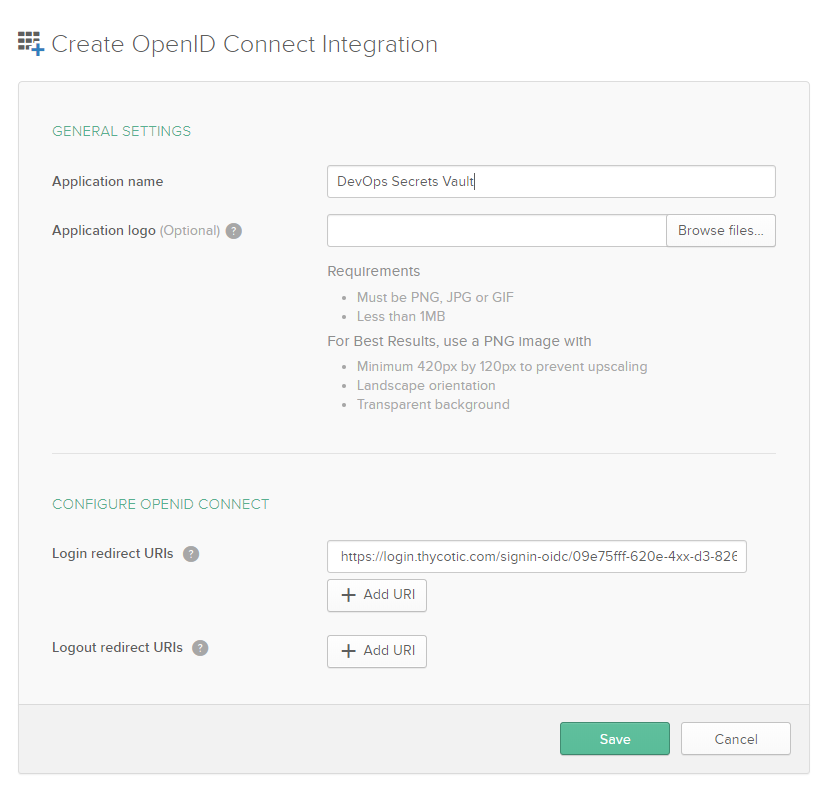
- On the resulting screen, provide an Application name and optional logo. Enter the Delinea callback URL in the box labeled Login redirect URIs. Click Save.
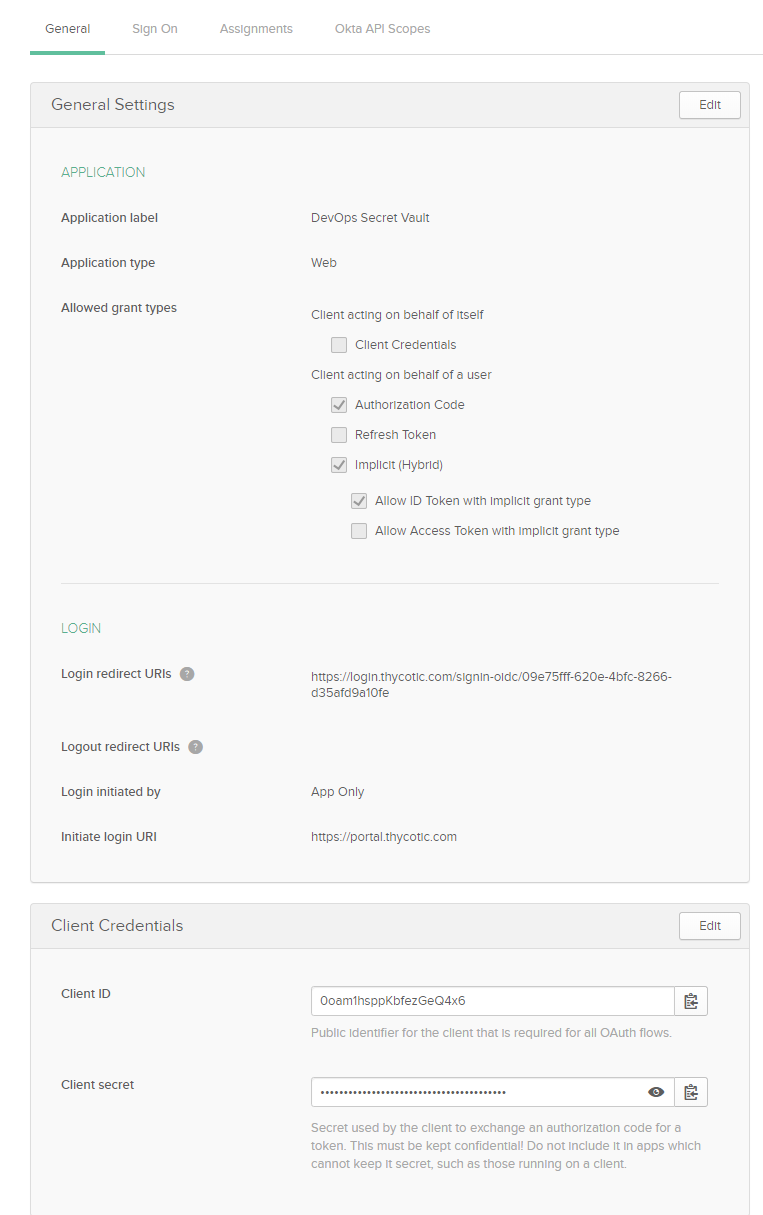
- To the right of General Settings click Edit. Check the Implicit (Hybrid) box and it will expand. Then check Allow ID Token with Implicit grant type.
- In the Initiate login URI, Okta defaults to copying the Login Redirect URI, so highlight that box and copy
https://portal.thycotic.com. Click Save. - Copy the Client ID and Client secret for entry into the Delinea Cloud portal
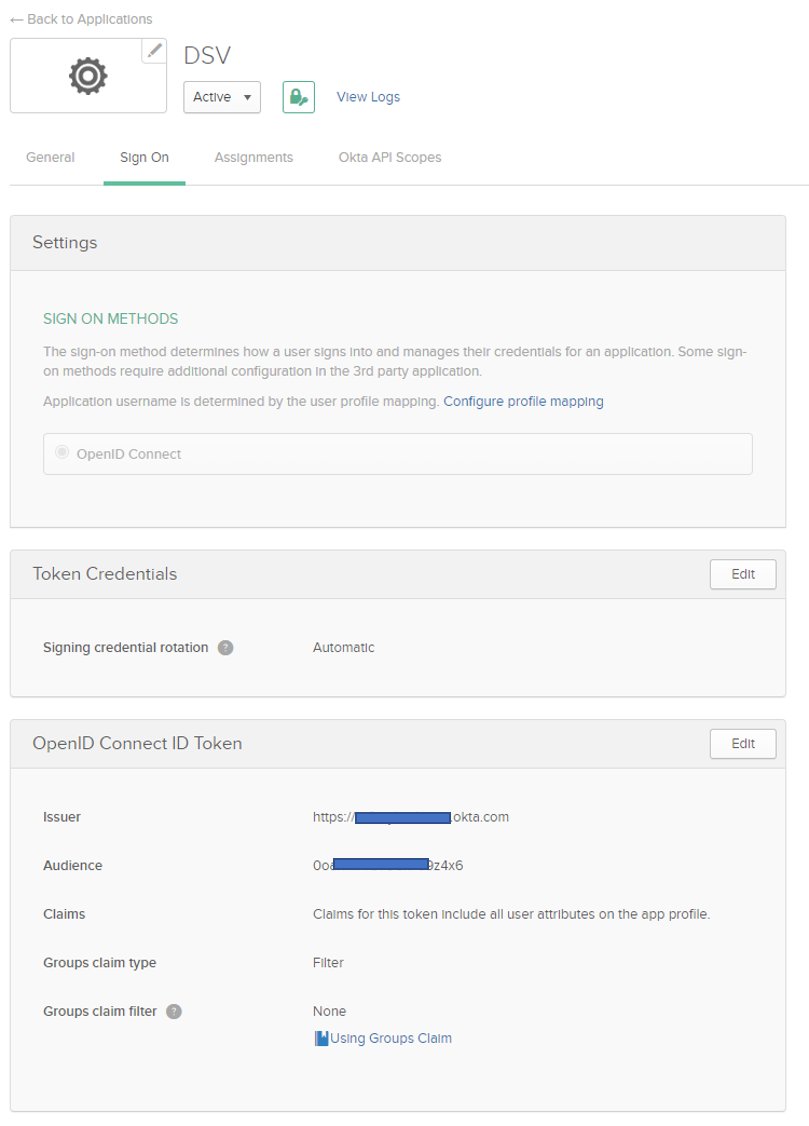
Retrieve the Issuer URL
- In the second menu bar from the top, click Sign On and in the third box down, OpenID Connect ID Token, take note of the URL by Issuer. Enter this into the Delinea Cloud portal. It will be something like
https://company.okta.comorhttps://company.oktapreview.com.
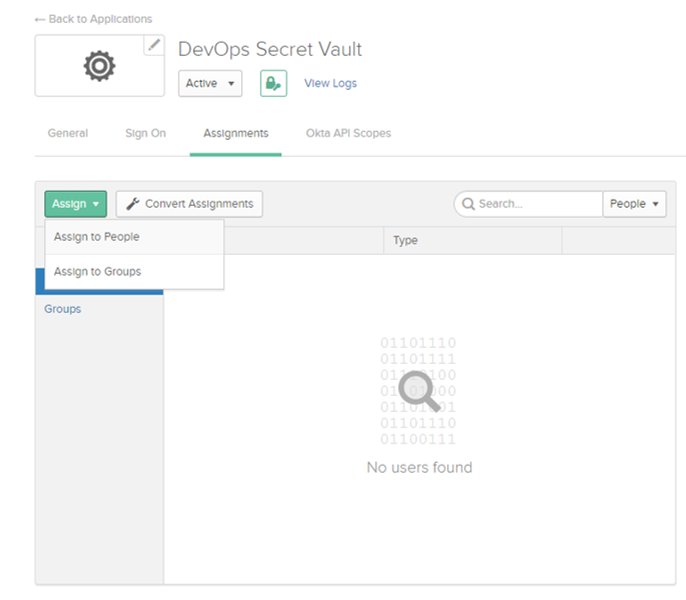
Add Okta Users and Groups to the DSV Application
- In second menu bar from the top, click Assignments
- Click Assign and when it drops down, add users and/or groups that will use DevOps Secrets Vault. Of course, you can always come back and add/remove people as needed.
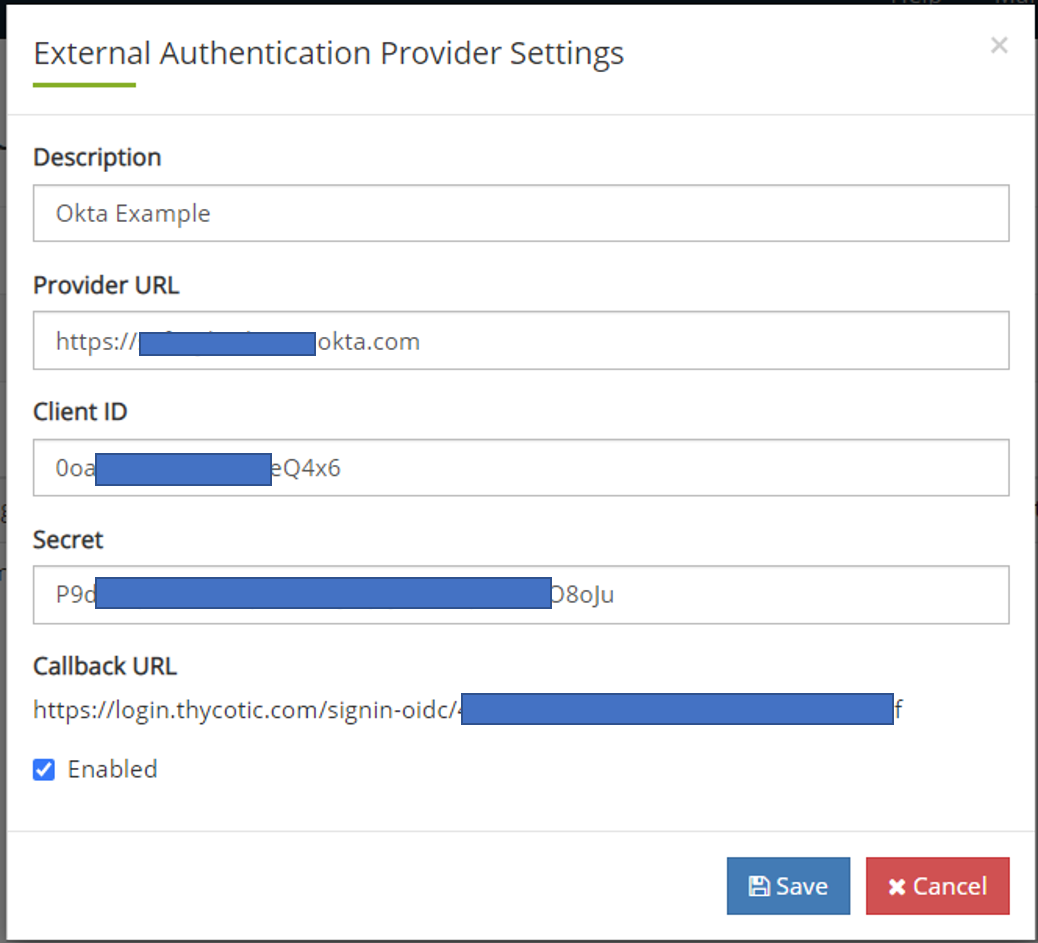
Finish the Connection on the Delinea One side
- Go back to the Delinea Cloud Manger Portal where we started. Provide a Description and the issuer/provider URL from step 11.
- Provide the Client ID and Client Secret from step 10.
- Check Enable.
- Click Save.
![]()
- Click Back to Organizations.
- Click Credentials.
- Click Edit.
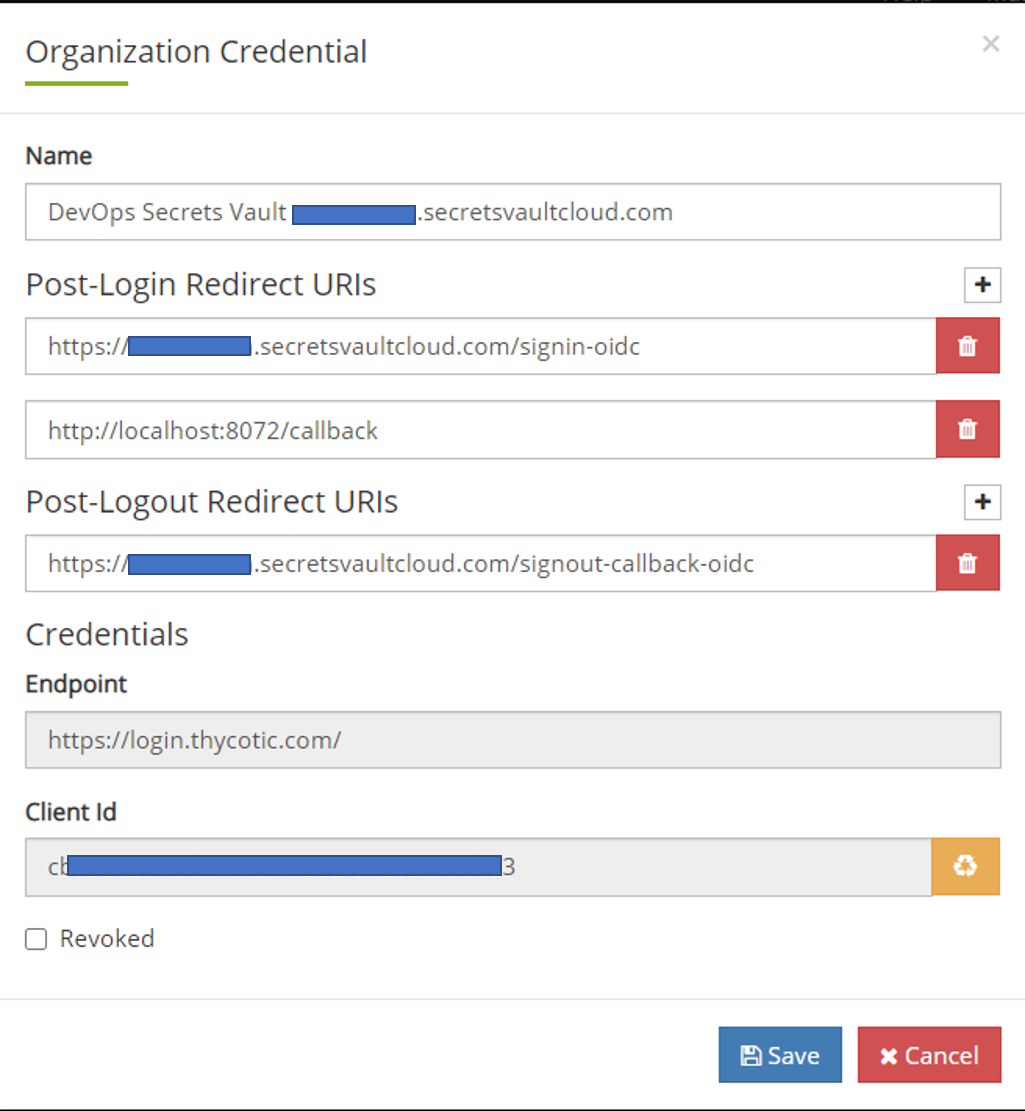
- In the dialog that appears, and to the right of Post-Login Redirect URIs, click the +. In the prompt that appears, type
http://localhost:8072/callback.
If you have already added this call back for another auth provider, then it should still be there so you can skip these last steps (18-21).
![]()