Platform Interface
The platform's user interface is designed to make all platform functions highly visible and readily accessible.
Most features that were previously under Administration now appear under Settings.
For simplicity, numbered procedures in the Delinea documentation begin with the name of the destination page where you can take action. The Global Search bar makes this navigation fast and easy.
Primary Left Navigation Menu
The options available in the left navigation menu vary depending on the services you subscribe to.
-
Home: Set up your platform, open your applications, and browse learning resources
-
Secret Server: See your secrets in various categories: all, favorites, most used, recently used, quick access, and recent folders
-
Inventory: See and manage every computer in your network at a glance
-
Insights: Session review, audit logs, Secret Server reporting, and session recording
-
Discovery: Charts and logs about your platform environment
-
Policies: Fast access to all privilege control policies
-
Identity Posture: Monitor the status of all applications compared to best practices
-
Threat Center: Configure rules to detect threats that trigger administrator actions
-
Access: Manage users, groups, roles, and identity policies
-
Marketplace: A one-stop shop for applications, integrations, downloads
-
Inbox: Notifications, system alerts, and requests
-
Settings: Administrator controls for platform setup, Secret Server, connection points, directory integrations, MFA, and security
Secondary Navigation
The secondary navigation menu slides out to the right, providing access to all functions relevant to the primary navigation item. This provides quick access with less searching and fewer clicks.
Hover over a menu item
When you hover over a primary navigation menu item, the secondary navigation slides out, instantly displaying all functions related to the primary menu item. When you move your cursor away, the secondary menu slides back behind the primary menu.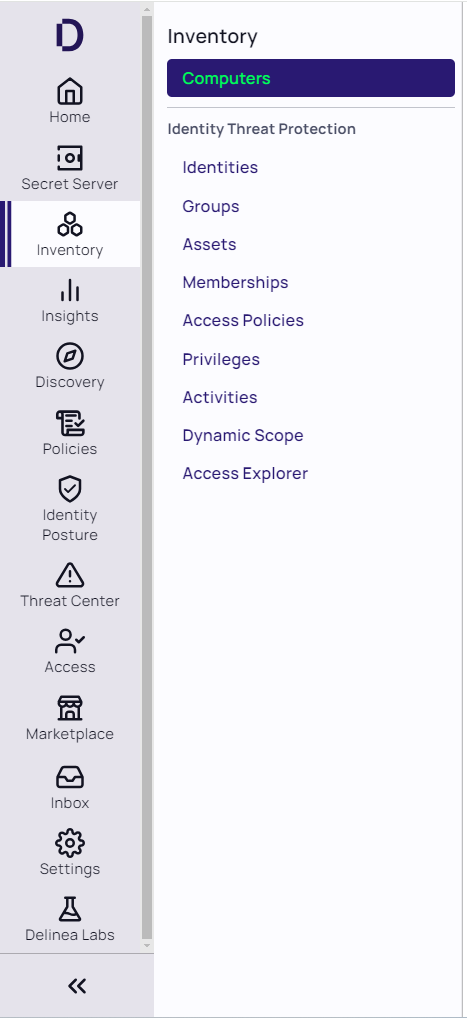
Click a menu item
When you click a primary menu item, two things happen. First, the secondary menu slides out and remains open, even if you move your cursor away. Second, the page associated with the top item on the secondary menu opens automatically to the right.
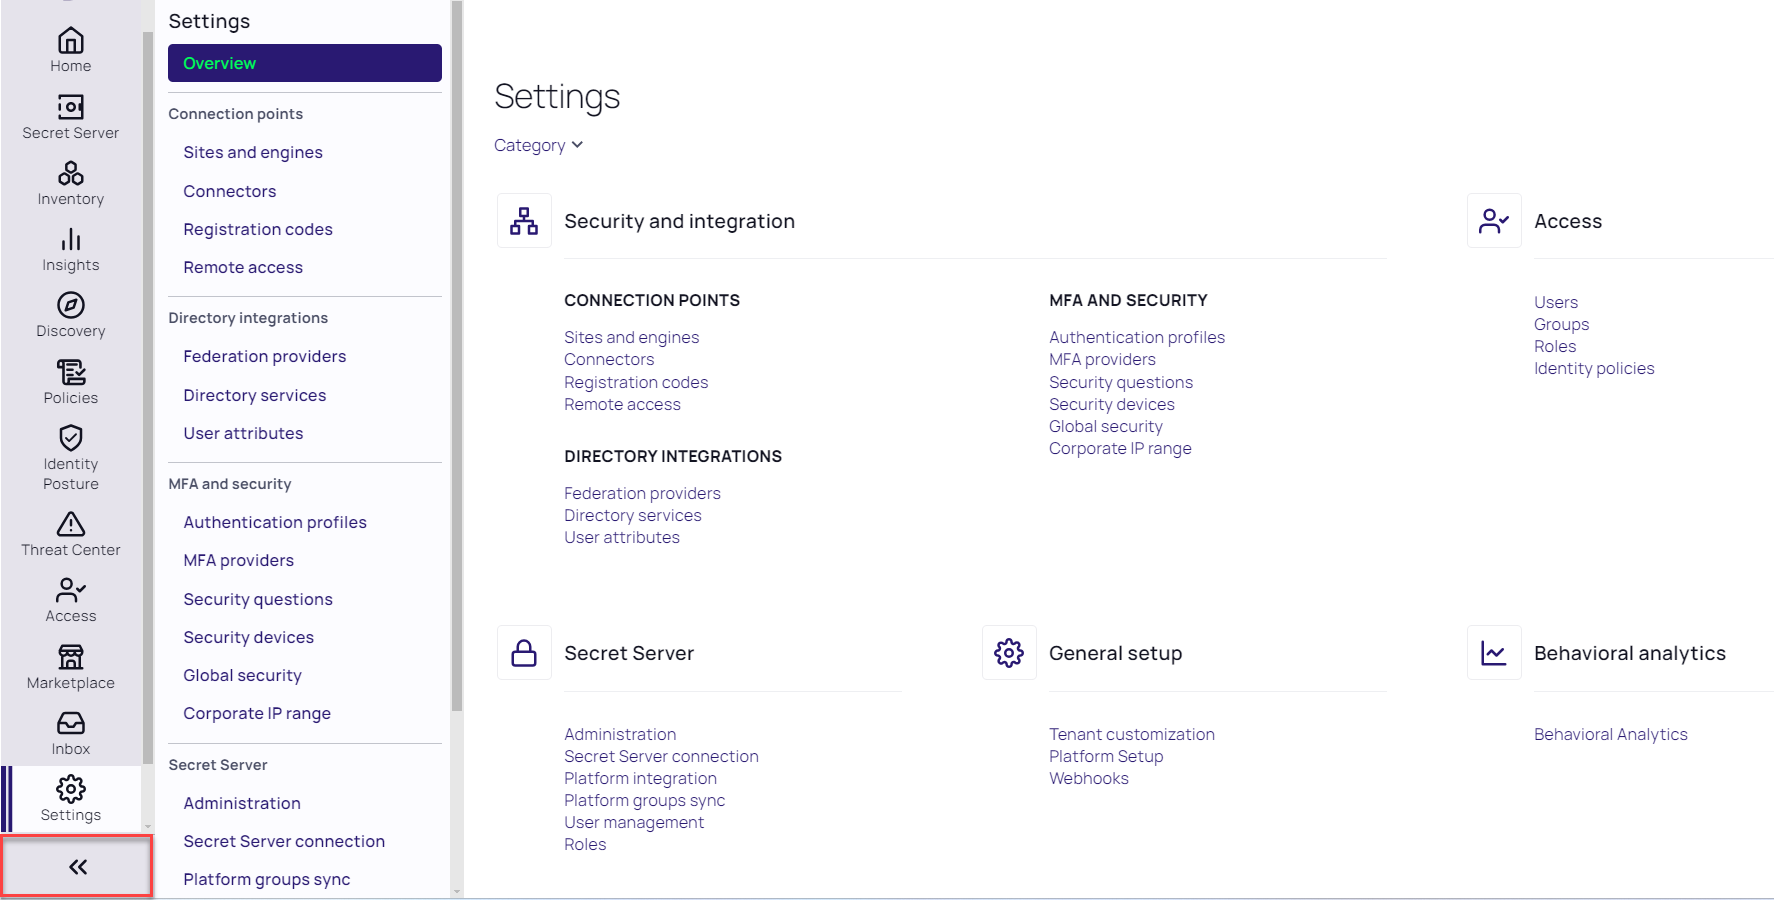
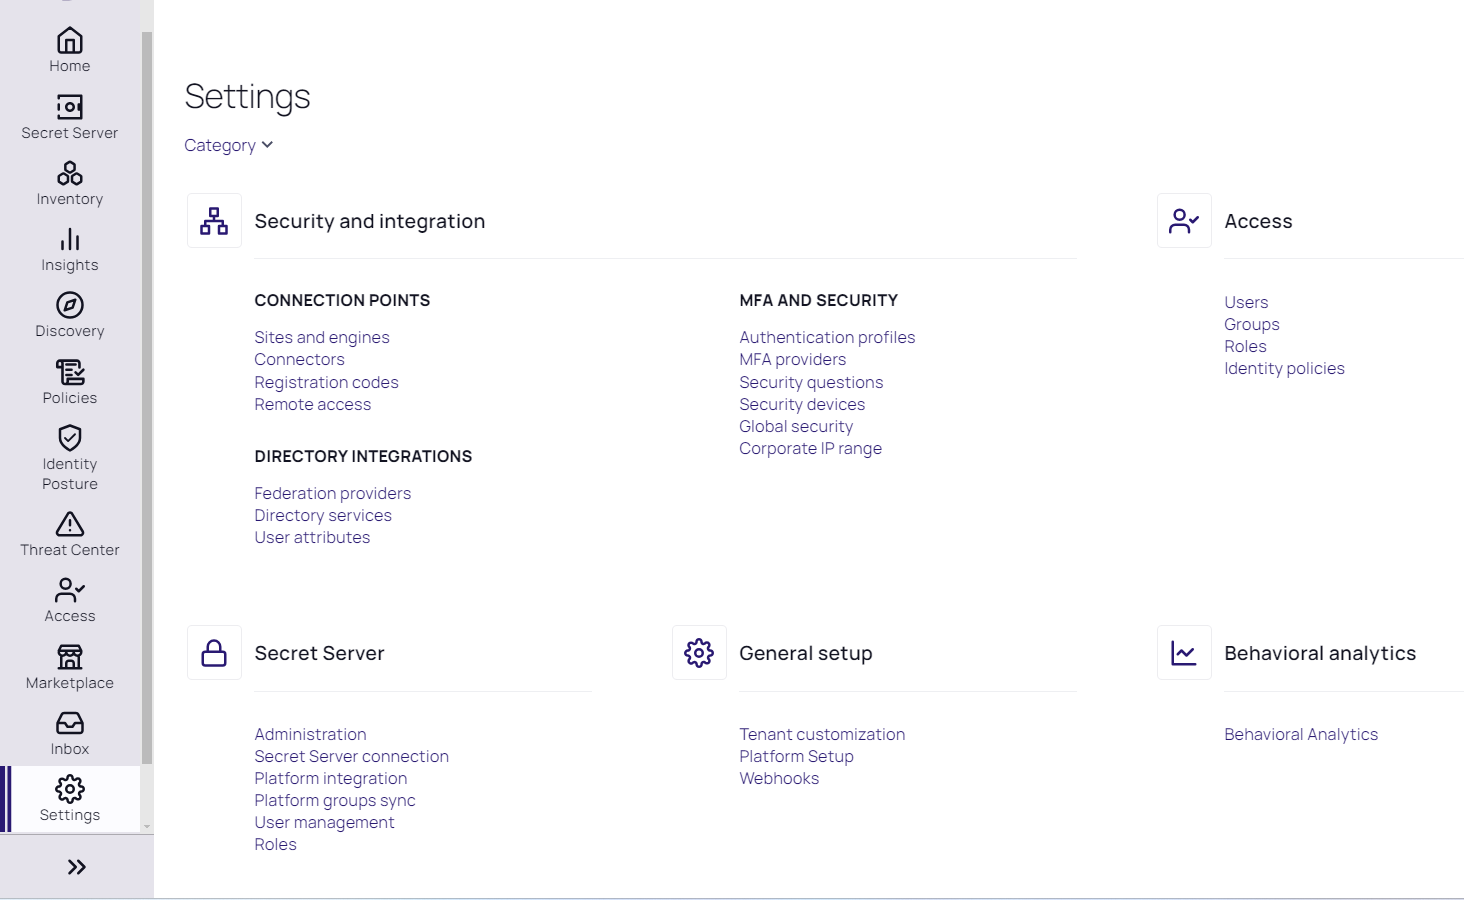
Once you've found the page you're looking for, you might not need to see the secondary menu anymore. To give you more room to see the page, click the expansion control at the bottom of the left navigation menu to slide the secondary menu back under the primary menu.
Secondary Menu Collapsed
Global Search
The platform Search bar returns results for all relevant areas of functionality and to specific items across the platform including secrets, assets, folders, and individual configuration items. When you enter a search term, a toggle button (solid purple) appears for each relevant area of functionality. 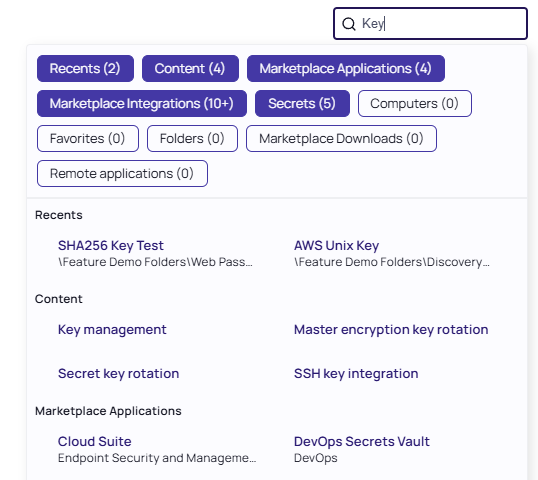
By clicking one or more toggle buttons (Secrets in the screen shot below) you can limit your search to those areas of functionality. This feature is especially helpful when multiple functions share a similar name.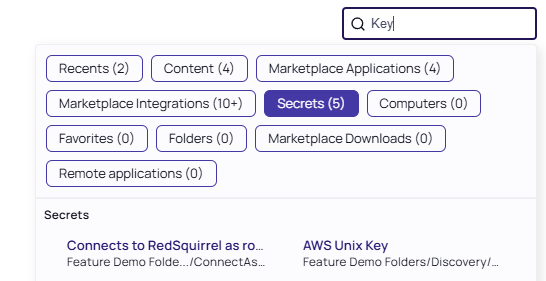
Some context-sensitive actions such as launching can be executed directly from the search results.
Favorites and Recents
This section describes Favorites and Recents, two ways you can make navigation more convenient.
Favorites
You can mark all platform configuration pages and most details pages as Favorites by selecting the star icon at the top of the page. Your favorite pages will be indexed for search, providing fast access to those pages.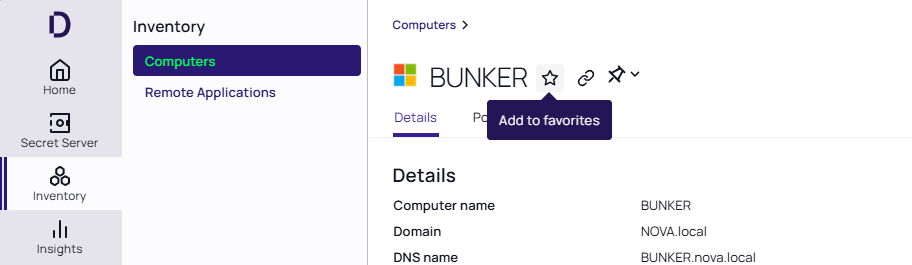
You can then access your favorited pages by clicking Home > Favorites. 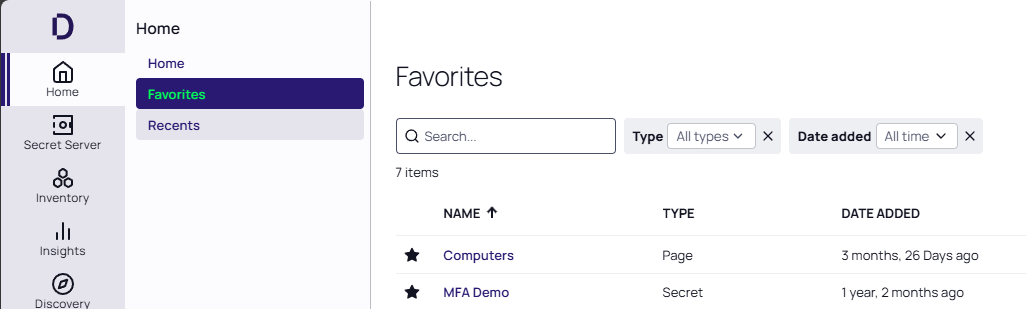
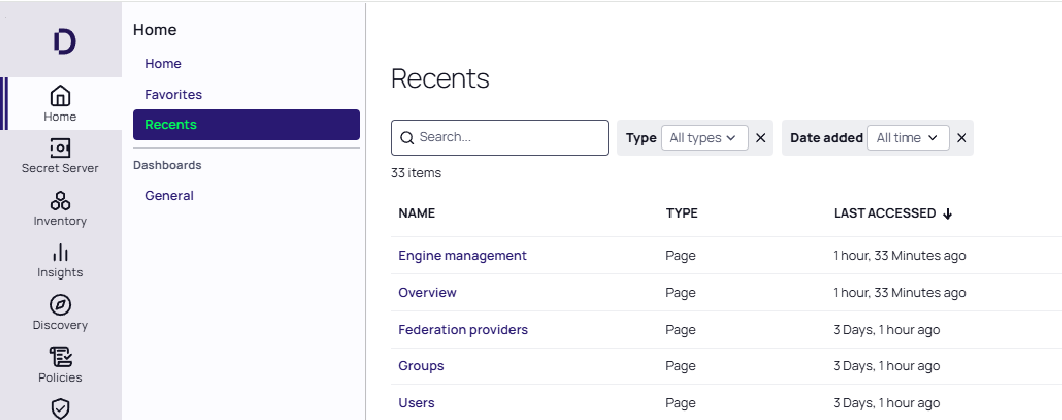
Recents
To access your recently-visited pages, click Home > Recents.
Filtering in List Pages
Many of the pages in the Delinea Platform user interface are list pages, which display a table that lists some type of objects in the platform; for example, the Computers page in the Inventory part of the user interface. By default, each list page includes a table displaying all data relevant to the page.
The list pages offer various types of filtering, depending on which page you are viewing:
-
Some list pages, such as the Collections page in the Inventories part of the user interface, have only a Search box at the top of the list. You can type a name to find one of the items in the list.
-
In most list pages, in addition to the Search box, you can also filter the table based on the properties of the listed objects. For example, in the Policies page, you can filter for policies that match based on both user (Subject) and target computer. See Using Filters.
Using Filters
In most list pages, you can choose among predefined quick filters that are commonly used for that list.
To filter a table:
-
To add filter fields, click Add filter and select from the available filter fields. (If Add filter does not appear, all the available filter fields are already selected.)
-
To remove fields, hover over a field and click X.
As you make each change to the filter fields, the displayed table is modified to match the new filter criteria.
If you have imported custom properties (shown at the end of the list), you can use them to filter. For more information on importing custom properties, see Searching by Custom Properties.
If you filter on a type of entity that can be grouped, the filter finds the entity within the group. For example, if User is selected, the filter finds the user in all user groups as well as individually. If Computer is selected, the filter finds the computer even if it's inside a collection.