Entra ID SAML/OIDC Federation
This documentation is a detailed guide for setting up single sign-on (SSO) through Entra ID, leveraging SAML 2.0 or OIDC.
The following procedures require copying and pasting information between Entra and the Delinea Platform. We recommend opening both applications before you begin, and keeping both open until you are finished.
Instead of using Entra ID federation as described in this topic, you can use Entra ID as a Registered App (native API integration). See API-Based Integration with Entra ID. You cannot use both features simultaneously on the same Entra ID tenant. Attempting to add a native registered app on a tenant that already has Entra ID federation configured returns a blocking error. For details, including the exact error message and switching instructions, see Entra ID API Integration FAQs.
You do not need to configure both OIDC and SAML applications for your integration. Depending on your organization's infrastructure and preferences, you can choose either OIDC or SAML.
Prerequisites
On the Delinea Platform, you need to be an Administrator with federation privileges.
Decide whether you will be using SAML or OIDC.
-
For SAML, see Build an Entra SAML Application and Add the SAML Provider to the Platform.
-
For OIDC, see Build an Entra OIDC Application and Add the OIDC Provider to the Platform.
Build an Entra SAML Application
-
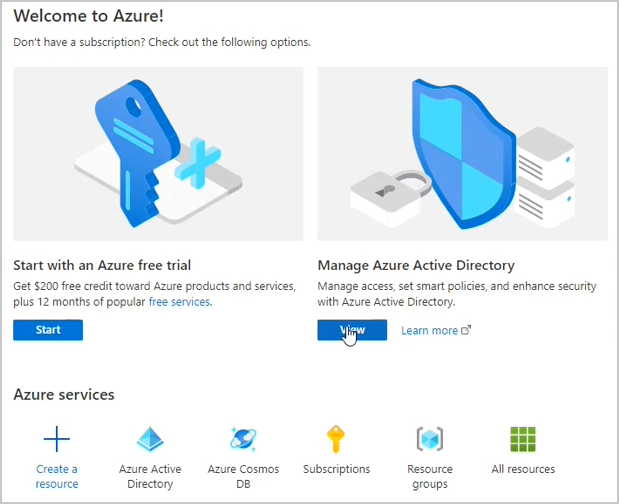
Log into the Entra ID portal at
https://portal.azure.com/. -
Under Manage Azure Active Directory, click View.
-
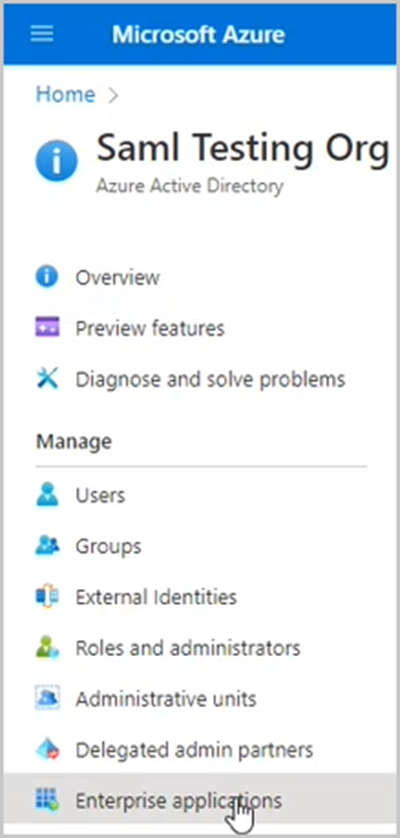
From the left panel, click Enterprise Applications.
-
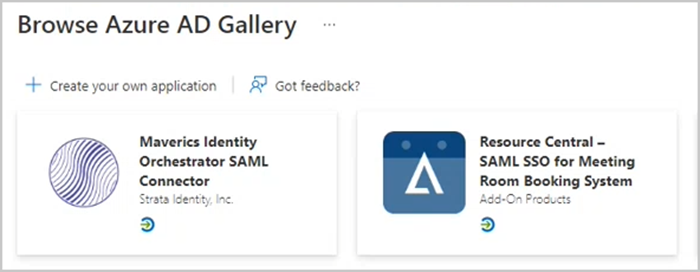
From the top row, click + New Application.

-
At the top of the Browse Microsoft Entra ID Gallery page, click Create your own application.
-
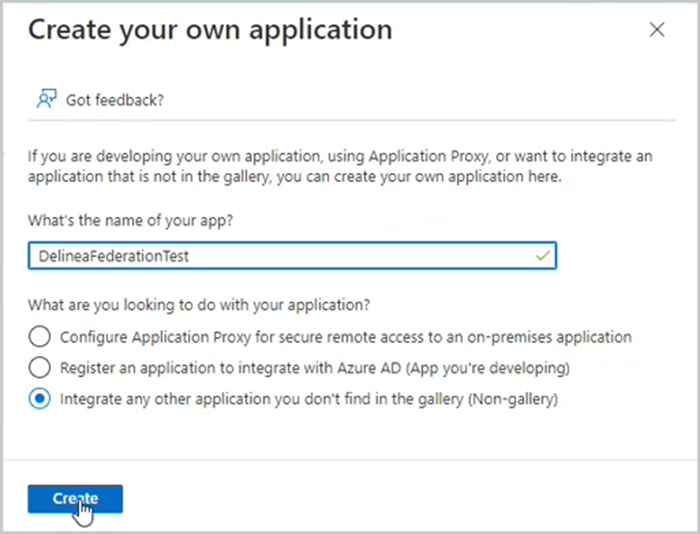
On the Create your own application page:
-
Enter a meaningful name (for example, Delinea Platform Federation).
-
Ensure this option is selected: Integrate any other application you don't find in the gallery (Non-gallery).
-
Click Create.
-
-
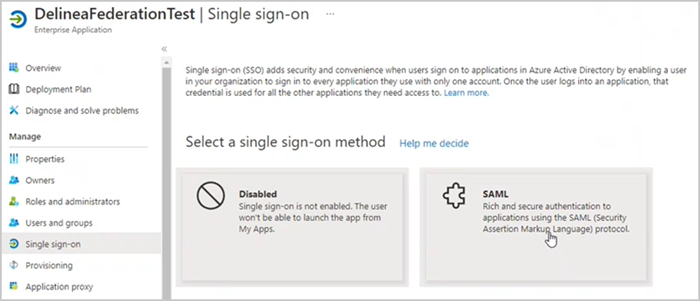
Once your application is created, click Single sign-on from the left panel.
-
Click the SAML card.
-
On the SAML-based Sign-on page, click Edit at the top right of the Basic SAML Configuration block.
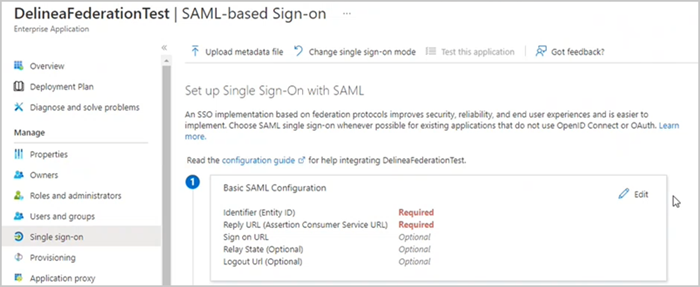
-
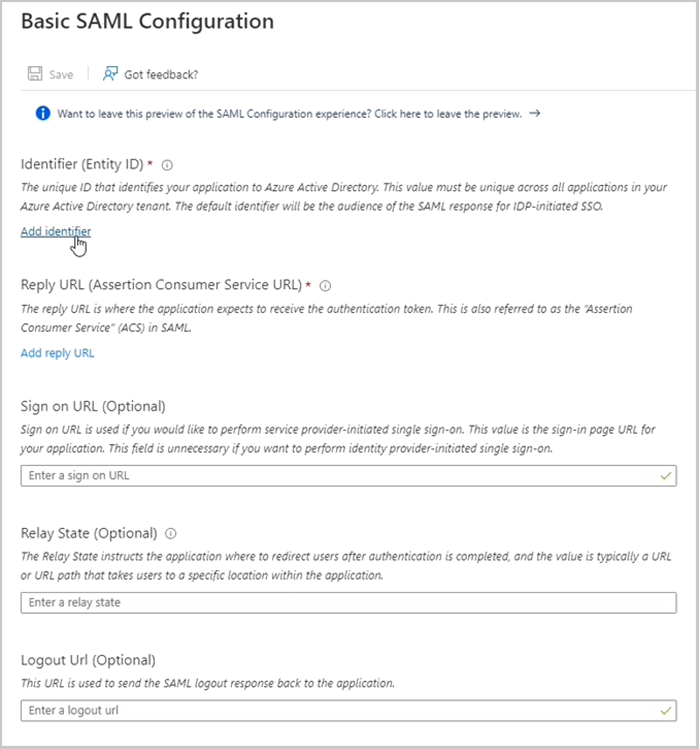
In the Basic SAML Configuration panel that appears on the right side, click Add Identifier.
-
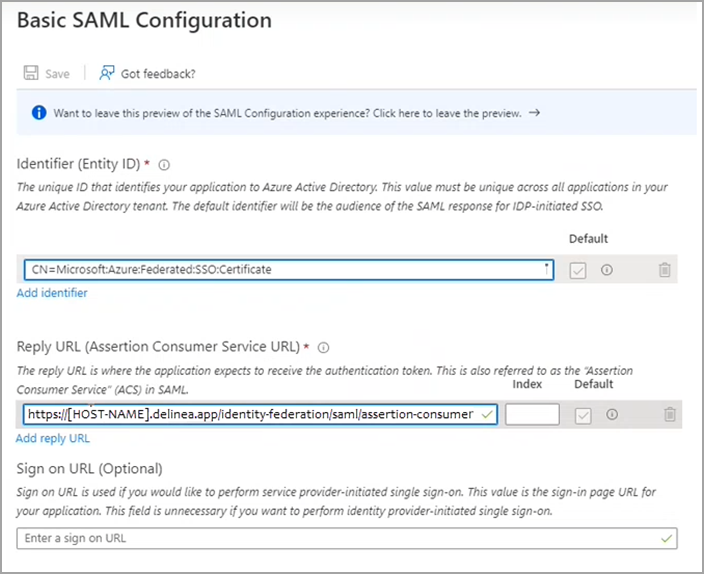
Add the following values:
-
Identifier (Entity ID) This value must be unique, for example
'CN=Microsoft:Azure:Federated:SSO:Certificate'or you may enable Customize certificate issuer sent to IDP in Advanced Settings and use that value. See Advanced Settings SAML Only. -
Reply URL (Assertion Consumer Service URL)
https://[HOST-NAME].delinea.app/identity-federation/saml/assertion-consumerReplace
[HOST-NAME]with the host name you selected when you created your tenant. -
Logout URL (Optional)
https://[HOST-NAME].delinea.app/identity-federation/saml/logout-consumerReplace
[HOST-NAME]with the host name you selected when you created your tenant. -
Click Save at the top left.
Attributes and Claims Mappings
-
Click Edit at the right side of the Attributes & Claims block.

There are four (4) claims the Delinea Platform requires:
Source | Destination (see steps 6 and 8 for details)
-
EmailAddress | email
-
Name | displayname
-
nameidentifier | user.objectid
-
upn | upn
-
-
In the Attributes & Claims dialog, click the Name claim as shown below and change the Source attribute to
user.displayname.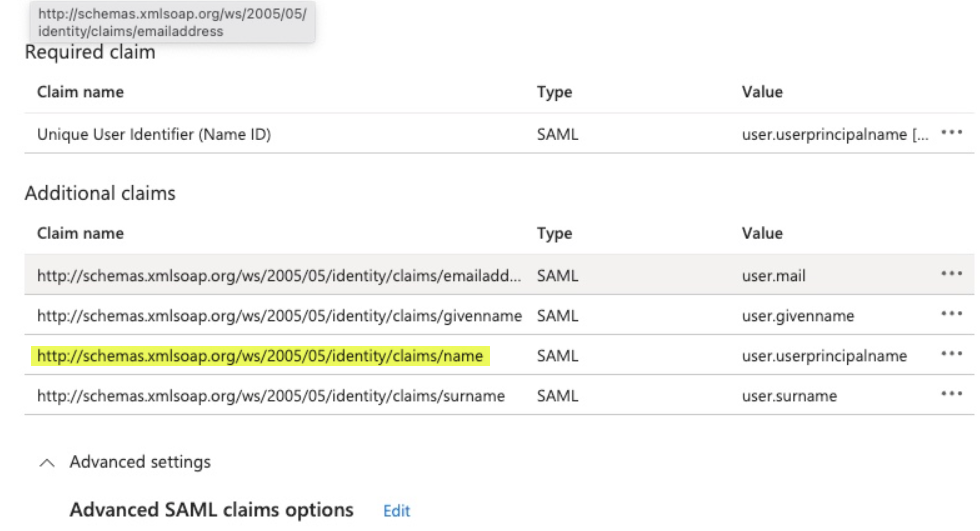
-
Click Save.
-
As needed, add the groups assigned to this application as a claim in the SAML token.
-
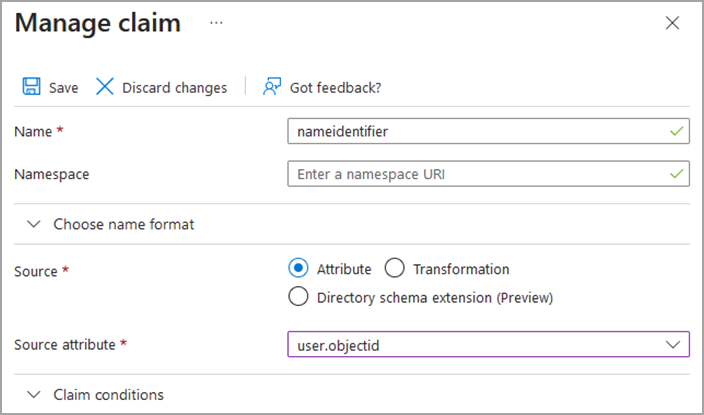
Click Add new claim.
-
On the Manage Claim page, enter the following values:
-
Name:
nameidentifier -
Source Attribute:
user.objectid
-
-
Click Save.
-
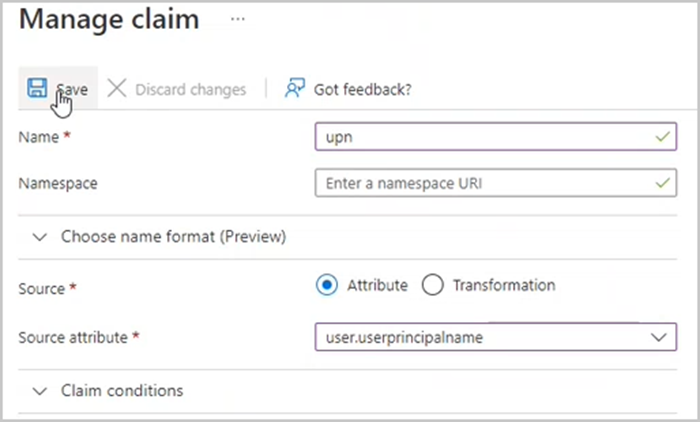
Add a second claim for the upn using the following values:
-
Name:
upn -
Source Attribute:
user.userprincipalname
-
-
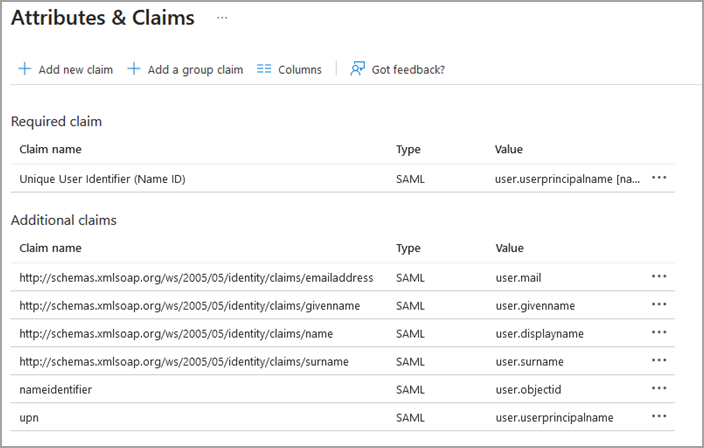
Click Save. Your final claims appear.
-
Click the SAML-based Sign-on link to go back to the SAML setup screen.

-
In the SAML Certificates block, click Download next to Federation Metadata XML and Certificate (Base64).
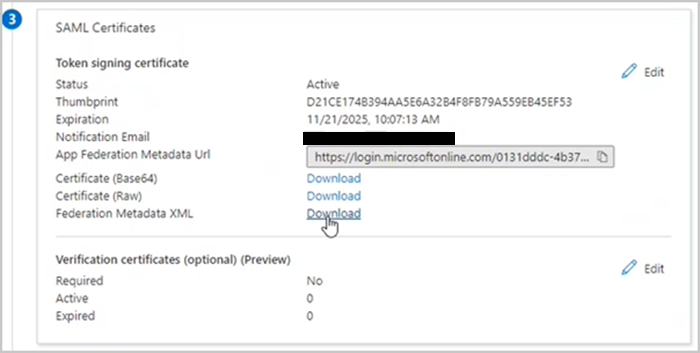
You will use these saved files in the next step to configure the Federation service in your Delinea Platform tenant.
Add the SAML Provider to the Platform
-
Log in to the Delinea Platform.
-
Navigate to the Federation Providers page.
-
Click Add Provider.
-
Select SAML from the drop-down menu. The Add Provider page opens.
Settings
In the Settings section, the first fields are automatically populated when you select the SAML provider configuration file and click Apply.
-
SAML provider configuration: Click Select file.
-
Navigate to and select the federation metadata XML file you downloaded. Apply appears above the right end of the SAML provider configuration field.
-
Click Apply. The words Uploaded successfully will appear next to SAML provider configuration, and the empty fields below will be auto-populated:
-
Name: Auto-generated from metadata
-
Protocol: SAML (auto-filled)
-
Status: Disabled
-
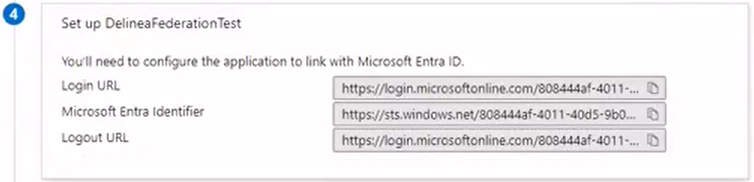
Entity ID [example: https://sts.windows.net/808444af-4011-40d5-9b0a-a9a5c95f88e9/]
-
IDP Certificate: Click Select File, then navigate to and select the Signing Certificate file you downloaded, to populate the following fields:
-
Signature
-
Algorithm
-
Thumbprint
-
Not valid before
-
Not valid after
-
Issuer
-
-
-
IDP Login URL: Paste in the Login URL copied from your application in Entra.
-
IDP Logout URL: Paste in the Logout URL copied from your application in Entra.
-
Platform Callback URL:
https://[HOST-NAME].delinea.app/identity-federation/saml/assertion-consumer. Copy the Platform Callback URL and paste into the Identifier (Entity ID) field in your new Entra application. -
Platform Logout URL:
https://[HOST-NAME].delinea.app/identity-federation/saml/logout-consumer -
Status: Select the box next to Enabled.
Advanced Settings
See Switching Federation Providers under Federation Management.
Attribute Mappings
-
EmailAddress | email
-
Name | displayname
-
nameidentifier | sub
-
upn | upn
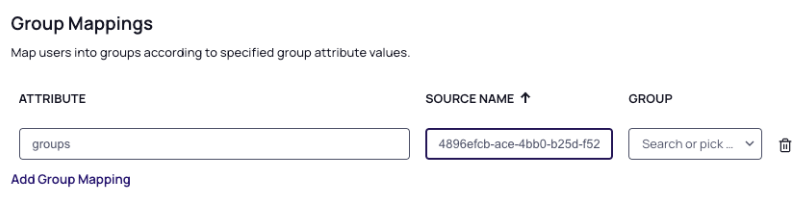
Group Mappings
-
Click Add Group Mapping.
-
Under Attribute, enter the character string 'groups' exactly as it appears between the single quotation marks, all lowercase.
-
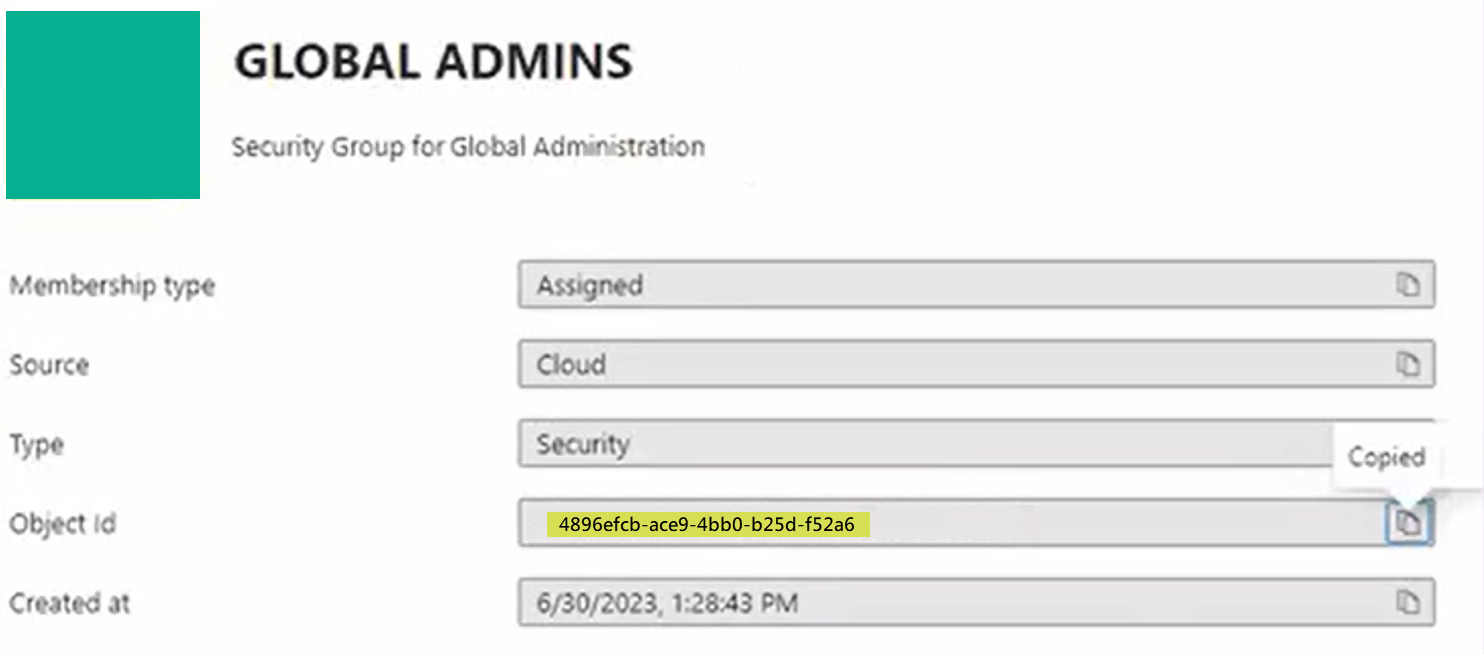
Under Source Name, enter the Object ID copied from the appropriate group on the Microsoft Entra ID Groups page.
-
From the Groups drop-down, select a group from the pull-down menu. (You can use the groups attribute to map more than one group.)
Also see Mapping Federated Groups under Federation Management.
User Mappings
See Mapping Federated Users to Active Directory.
Domains
-
Click Add Domain and enter the domain from the email addresses of the users you are including in this federation.
-
When all required fields are populated, click Save.
Build an Entra OIDC Application
If you chose not to use SAML (described in the previous section, Build an Entra SAML Application), use the following technique to build an OIDC application.
-
Log into the Entra ID portal.
-
From the Entra ID Home page, click the Entra ID icon.
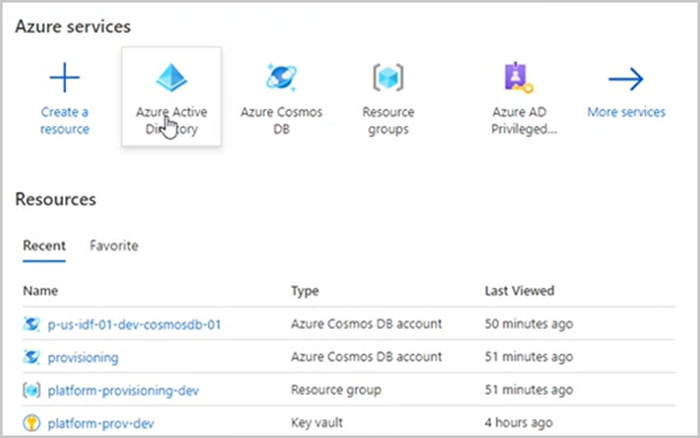
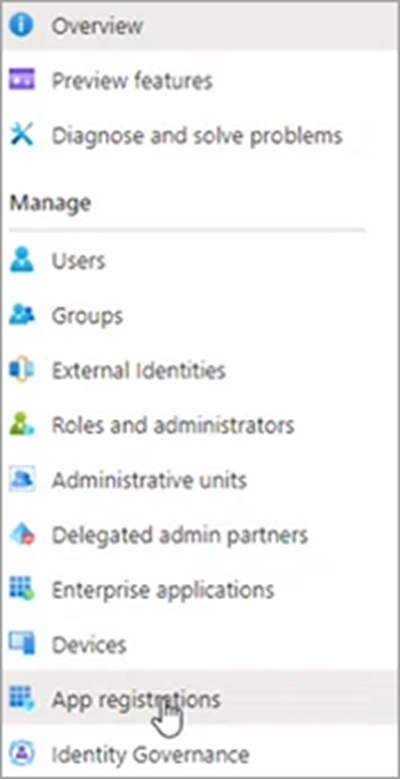
-
Once inside the Entra ID service, click App Registrations from the left navigation.
-
Along the top row, click + New Registration.
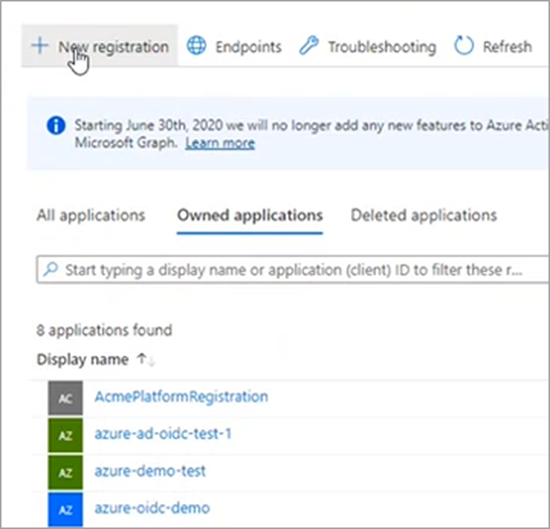
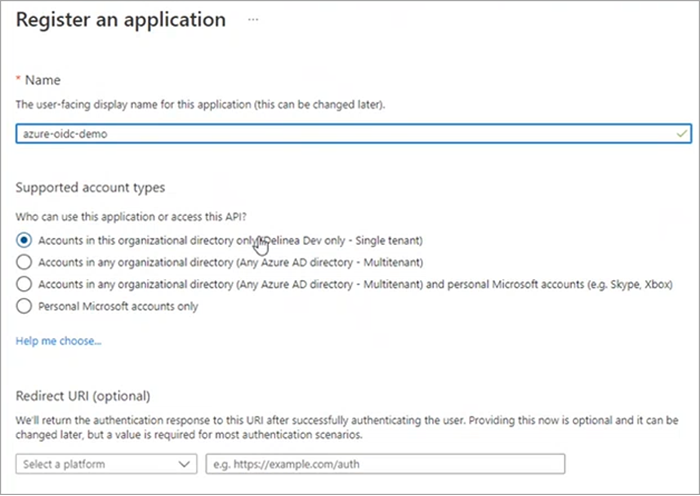
The Register an application page appears.
-
Fill out the fields as follows:
-
Name: Give the new application you are registering a name. Any descriptive name works. This name will be displayed to users by Microsoft during the first login but it does not matter to the Delinea Platform. For demonstration purposes, we will use the name
azure-oidc-testdemo. -
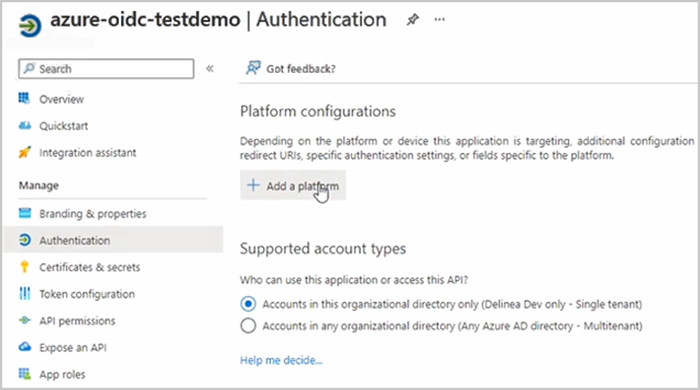
Supported account types: Click the one with Single tenant in its name. To see the difference between the account types, click Help me choose…
-
Redirect URL: This can be added in a later step.
-
-
Click Register at the bottom left.
-
From the left navigation, click Token Configuration.
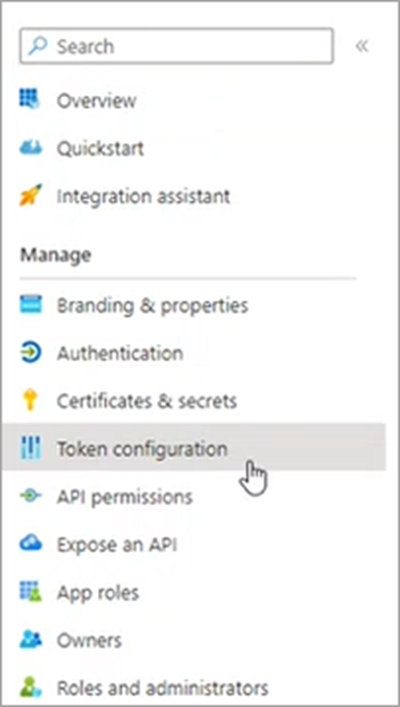
-
Click Add optional claim.
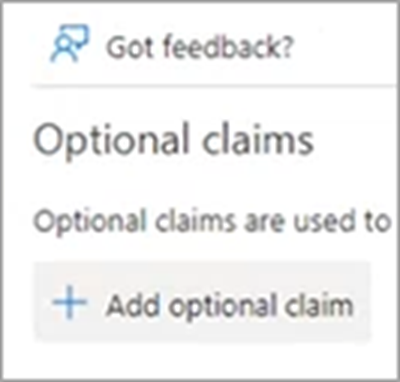
A panel opens on the right side.
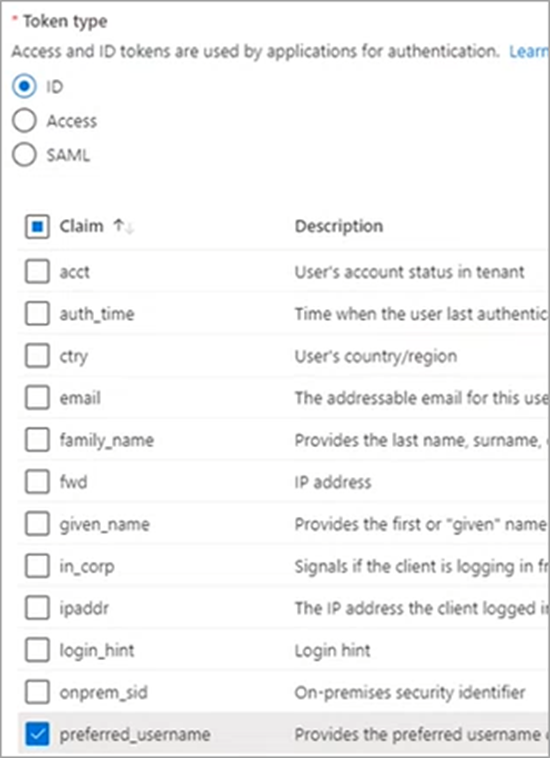
-
Under Token Type, click ID.
-
Under Claim, click preferred_username.
-
-
Click Add at the bottom left.
-
Go to Authentication tab.
-
Check the box for ID tokens (used for implicit and hybrid flows).
-
Save changes.
Add the OIDC Provider to the Platform
-
Log on to the platform.
-
Navigate to the Federation Providers page.
-
Click Add Provider.
-
Select OIDC from the drop-down menu. The Add Provider page opens.
Settings
-
Name: Enter a unique name.
-
Status: Select the box next to Enabled.
-
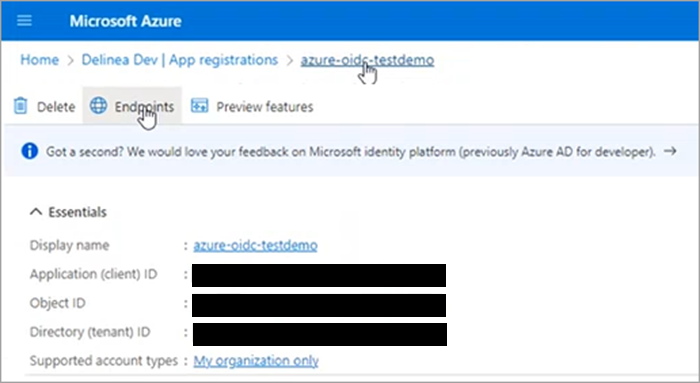
Endpoint URL: This URL is based on your Entra ID tenant ID. To retrieve your Entra ID tenant ID:
-
Return to your Entra ID app page and click Endpoints at the top of the page.
-
From the panel that opens to the right, select the URL below OpenID Connect metadata document.
-
Copy the entire URL only up to v2.0. The value will be
https://login.microsoftonline.com/[TenantId]/v2.0.
-
-
Paste the copied portion of the URL into the Endpoint URL field on the platform.
-
Client ID: Copy this value from your new Entra application page next to Application (client) ID and paste it into the Client ID field on the Platform +Add Federation Service page.
-
Client Secret:
-
Return to your new Entra application page.
-
Click Certificates & Secrets from the left navigation.
-
Click + New client secret.
-
In the panel that opens to the right, fill in the fields for Description and Expires.
-
Click Add at the bottom. A secret value is generated.
-
Copy the Secret value from the Value field.
-
Paste the value into the Client Secret field on the Platform Add Provider page.
-
-
Prompt: See Prompting for Re-authentication (OIDC only) under Federation Management.
-
Platform Callback URL: Copy the Platform callback URL and paste it into the Redirect URIs field in your new Microsoft Entra ID application.
Attribute Mappings
Some defaults are provided but can be overridden as needed. In this example we will replace the upn value with preferred_username.
-
http://schemas.xmlsoap.org/ws/2005/05/identity/claims/emailaddress | email
-
name | displayname
-
http://schemas.xmlsoap.org/ws/2005/05/identity/claims/nameidentifier | sub
-
preferred_username | upn
Group Mappings
-
Click Add Group Mapping.
-
Under Attribute, enter the character string 'groups' exactly as it appears between the single quotation marks, all lowercase.
-
Under Source Name, enter the Object ID copied from the appropriate groups on the Microsoft Entra ID Groups page.
-
Under the Group drop-down, select a group from the pull-down menu. (You can use the group attribute to map more than one group.)
Also see Mapping Federated Groups under Federation Management.
User Mappings
See Mapping Federated Users to Active Directory under Federation Management.
Domains
-
Click Add Domain and enter the domain from the email addresses of the users you are including in this federation. If you specify the Entra ID guest domain, then Entra guest users can also access the platform.
When all required fields are populated, click Save.
Add the Provider to the Platform
-
On the Entra App Registration page, click Authentication and then Add a platform.
-
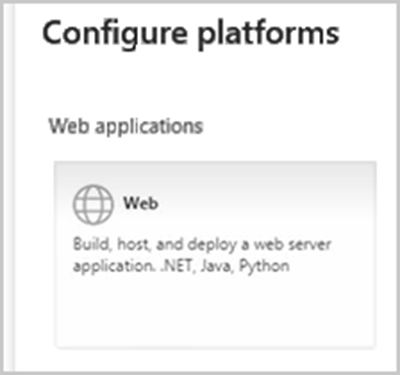
In the panel that opens on the right, click Web.
-
Under Redirect URIs, enter your Platform Callback URL from your provider page.
-
Click Configure at the bottom of the panel.
From Your Entra Application
-
Log in to your Microsoft Entra ID application and open to the Home page.
-
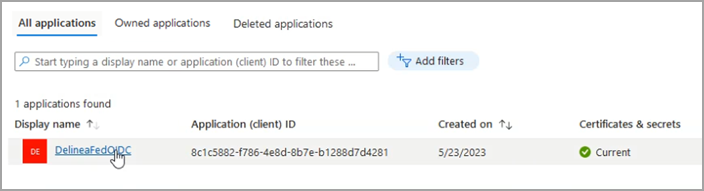
Navigate to the App Registrations page.
-
Select the All applications tab.
-
Click the appropriate SAML or OIDC federation application created by your organization.
-
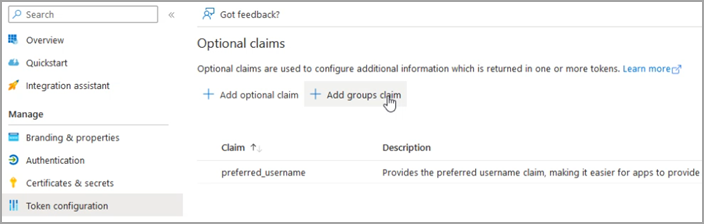
From the left menu navigation, click Token Configuration.
-
Click + Add group claim.
-
From the panel that pops up named Edit group claims, select the group types to include. We strongly recommend selecting Groups assigned to the application to ensure that only the needed groups are sent to the platform.
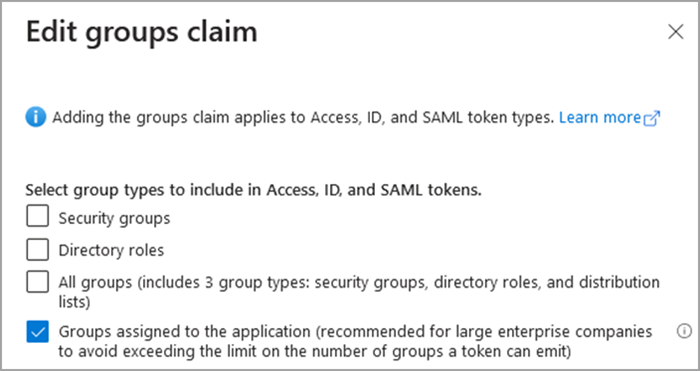
-
Click Add at the bottom.
-
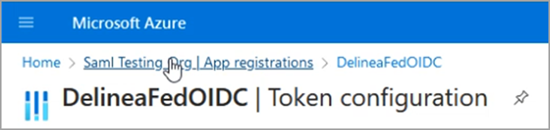
From the breadcrumb path at the top of the page, select the name of the Entra ID directory you're configuring.
-
Click Groups from the left navigation menu.
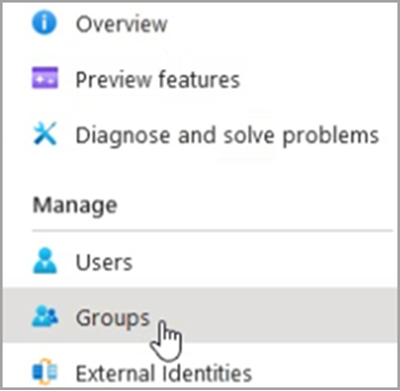
-
Select the group you are working with and copy the group's Object ID.

From the Platform
-
Log out of the Delinea Platform.
-
Log back into the Delinea Platform as a user who belongs to a Platform group mapped to a Microsoft Entra ID group.
-
Navigate to the Groups page.
-
Click a Platform group that you've mapped to a Microsoft Entra ID group, where your user should appear.
-
Click the Members tab.
-
Verify that the user you logged in as is a member of the Platform group that you mapped to a Microsoft Entra ID group.
Security Best Practices
Follow these recommendations to maintain secure federation:
Certificate management
-
Monitor token signing certificate expiration dates.
-
Rotate certificates before expiration to prevent service interruption.
-
Use automated certificate renewal when available.
-
Maintain backup certificates for failover scenarios.
Access control
-
Assign only required users to the enterprise application.
-
Use conditional access policies to enforce multi-factor authentication.
-
Restrict access based on location or device compliance.
-
Review and remove inactive user assignments regularly.
Claim configuration
-
Send only required claims in the SAML token.
-
Avoid including sensitive data in custom claims.
-
Use immutable identifiers for user matching.
-
Validate claim mappings match your security requirements.
Monitoring and auditing
-
Enable sign-in logs in Entra ID for audit trails.
-
Review failed authentication attempts regularly.
-
Set up alerts for suspicious sign-in patterns.
-
Document federation configuration changes.
Token security
-
Keep token lifetime to reasonable duration (recommended: 1 hour).
-
Enable token replay protection if available.
-
Use HTTPS for all federation endpoints.
-
Validate audience claims to prevent token reuse.