RADIUS Authentication
You can use your RADIUS server to authenticate users to the Delinea Platform.
Radius Authentication Overview
To enable RADIUS authentication, use the following steps:
- Configuring a RADIUS Server
- Configuring the Delinea Connector as a RADIUS client
- Configuring an MFA profile and identity policy for RADIUS
Configuring a RADIUS Server
You must first configure your RADIUS server to recognize the Delinea Connector as a valid client. Your procedure may differ slightly depending on the RADIUS server you are using.
In most cases you need the following information, regardless of the RADIUS server you are using:
- Hostname or IP address of the Delinea Connector
- The secret key you provide to the RADIUS server and platform
To add and configure the RADIUS server:
-
Click Settings from the left navigation, then select MFA Providers.
-
Click Add Provider.
-
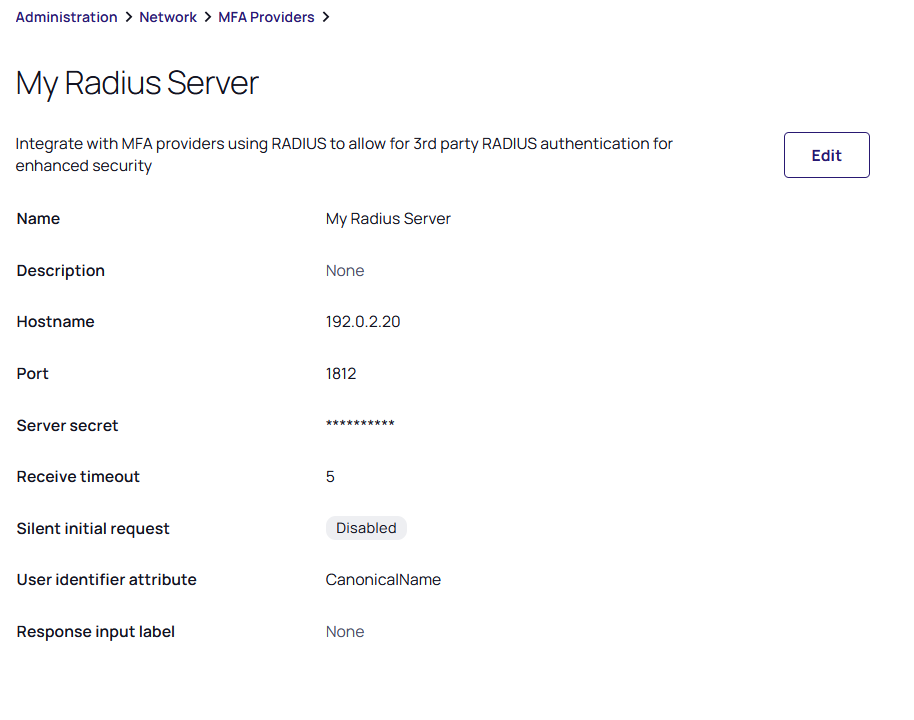
Enter the relevant information, according to the fields listed below:
-
-
Name: This field is for the server name displayed to users as one of their MFA mechanism options.
-
Hostname: The server hostname or IP address.
-
Port: Port number (default: 1812).
-
Server Secret: The secret that is shared between the RADIUS Server and the Delinea Platform. If you have entered a secret key on your RADIUS server, enter that same key here. The keys must match to enable authentication. If you are creating a new secret key, best practices recommend 22 or more characters in length.
-
Receive Timeout (seconds): Specify the receive timeout for this server. The value must be no less than 5 seconds and no greater than 55 seconds.
-
Enable silent initial request + Silent request answer: Enable this option when the RADIUS server requires a fixed answer for the initial request.
For example, when using an RSA RADIUS Server with “Enable Only Additional Authentication,” the initial request to the server is sent with a username and whatever answer is specified in the Silent request answer. -
User Identifier Attribute: This specifies the user name format sent to the RADIUS client for authentication. You can select from the default list or define your own by selecting Custom.
-
CanonicalName: The CanonicalName default attribute is a computed value and is computed differently for each user type.
-
For Active Directory users, it is set to one of the following (in this order):
- userPrincipalName – If the format is usable (not empty and does not start with “@”).
- The concatenation of sAMAccountName, a “@”, and the AD domain.
-
For Delinea Platform users, as the contents of the Name field, the UUID default attribute represents the user ID stored on the platform.
-
-
DistinguishedName: This comes directly from the identity provider.
-
Uuid: This comes directly from the identity provider.
-
EmailAddress: This comes directly from the identity provider.
-
Custom: When you define a custom attribute, the named attribute must exactly match the user attribute name in the directory service. For example, you must use “sAMAccountName” instead of “sam account name” or “mail” instead of “Mail.”
-
-
Response Input Label: This sets a custom label to use for the response input during login. This field can be up to 70 characters.
-
-
Click Add Provider.
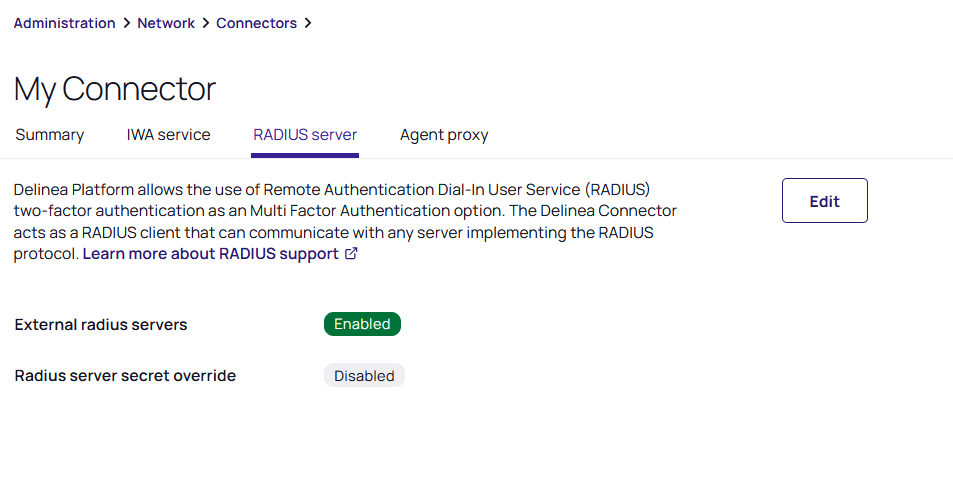
Configuring the Delinea Connector as a RADIUS Client
To configure the Delinea Connector as a RADIUS client, you need to update its RADIUS settings. To do this:
-
Click Settings from the left navigation, then select Connectors.
- Select one of the connectors listed.
-
Click the RADIUS Server tab.
-
Click Edit.
-
Enable the option for External RADIUS servers.
-
(Optional) If you do not want all your Delinea Connectors to have the same shared secret, you can override the secret here and enter a different secret. To do so, select the option to enable RADIUS server secret override.
-
Click Save.
Any change to Connector settings propagate from the platform to the Connector at an interval determined in the Connector settings under Settings update interval. See Enabling Auto-Update for the Delinea Connector.
Using Multiple Delinea Connectors as RADIUS Clients
If you have multiple Delinea Connectors enabled for use as RADIUS clients, the platform prioritizes connection with them in the following order:
- Connectors from the same IP address as the user
- If multiple Connectors are at the same IP address as the user, one is randomly chosen
- The best subnet match will then be prioritized
- If none of the above criteria are relevant, one is randomly chosen
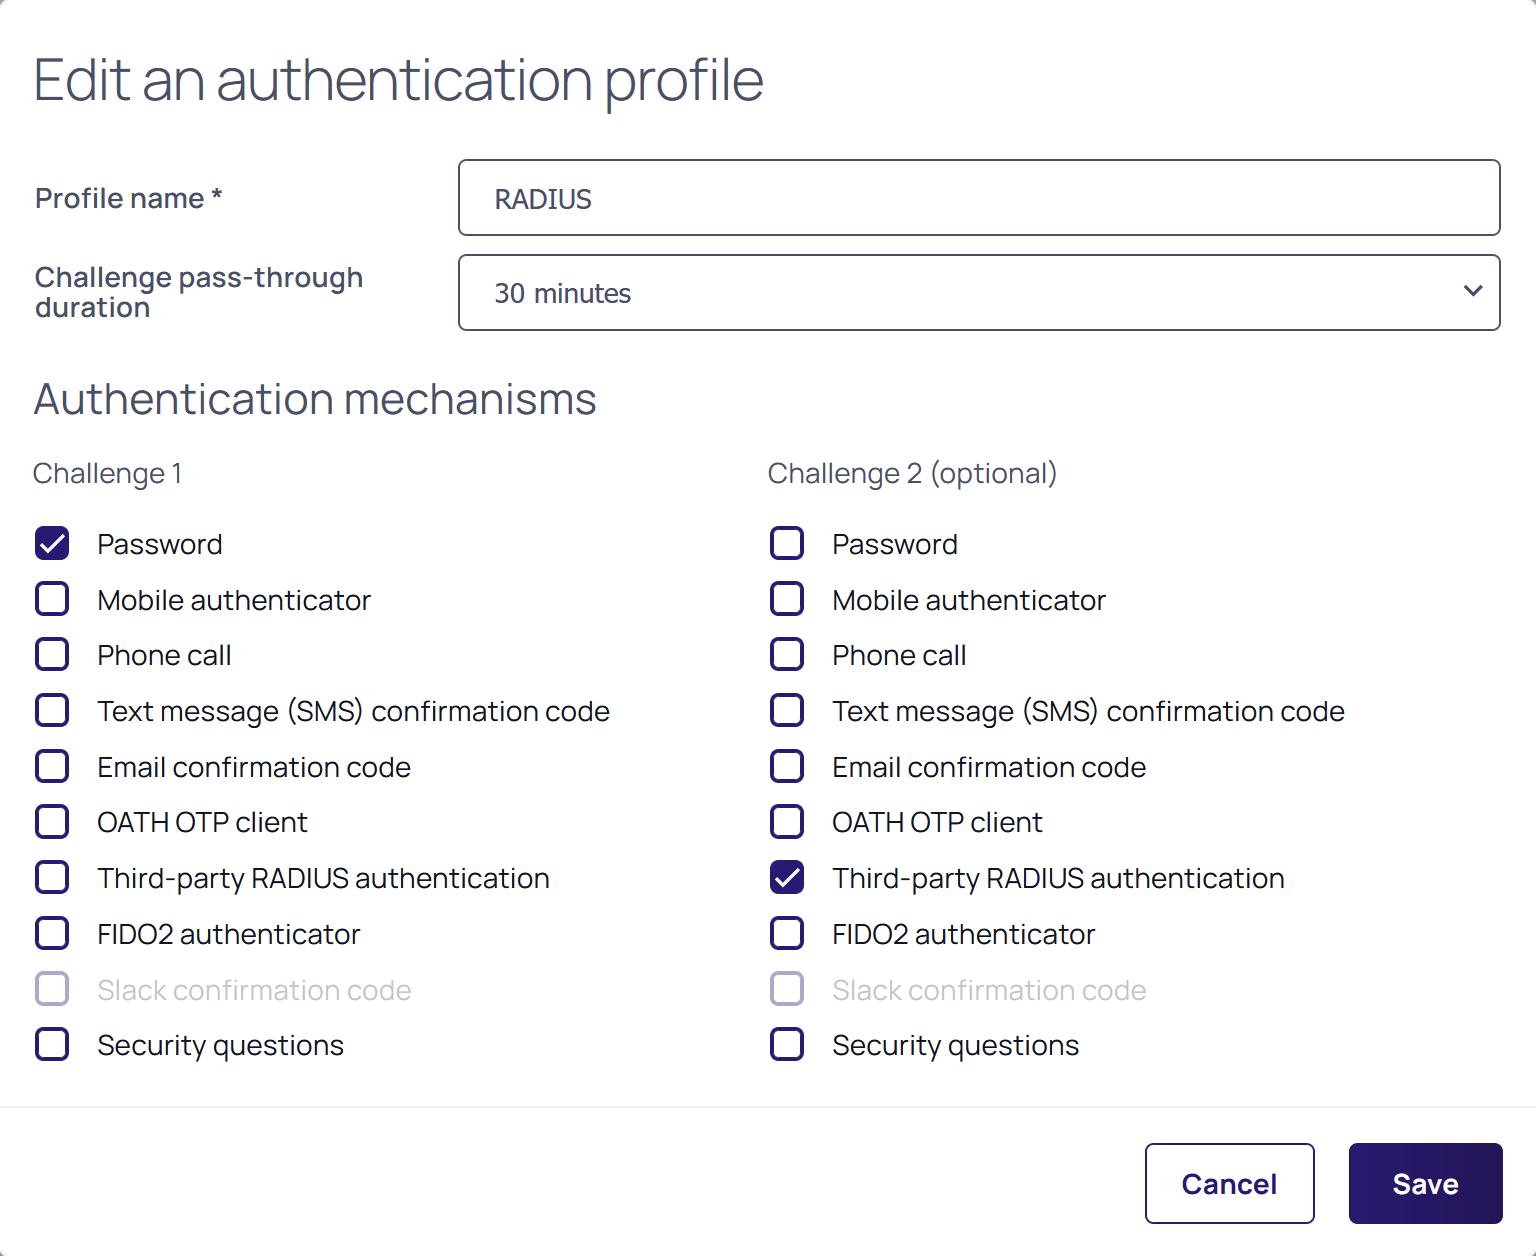
Configure a RADIUS Authentication Profile
-
Click Settings from the left navigation, then select Authentication profiles.
-
Select an existing profile or add a new one.
-
Click Edit.
-
Enter a name and description.
-
Challenge pass-through duration: Select a duration from the dropdown list. The challenge pass-through duration allows people to stay logged in during that specified time period.
-
Select the authentication mechanisms for the profile. You must select Third-party RADIUS authentication as one of the mechanisms in at least one of the challenges.
For example:
Configure a RADIUS Identity Policy
You also need to configure an identity policy to control who can log in using RADIUS and how they must do so.
-
Click Access from the left navigation menu, then select Identity policies.
-
Select an existing policy, or add a new one and select it.
-
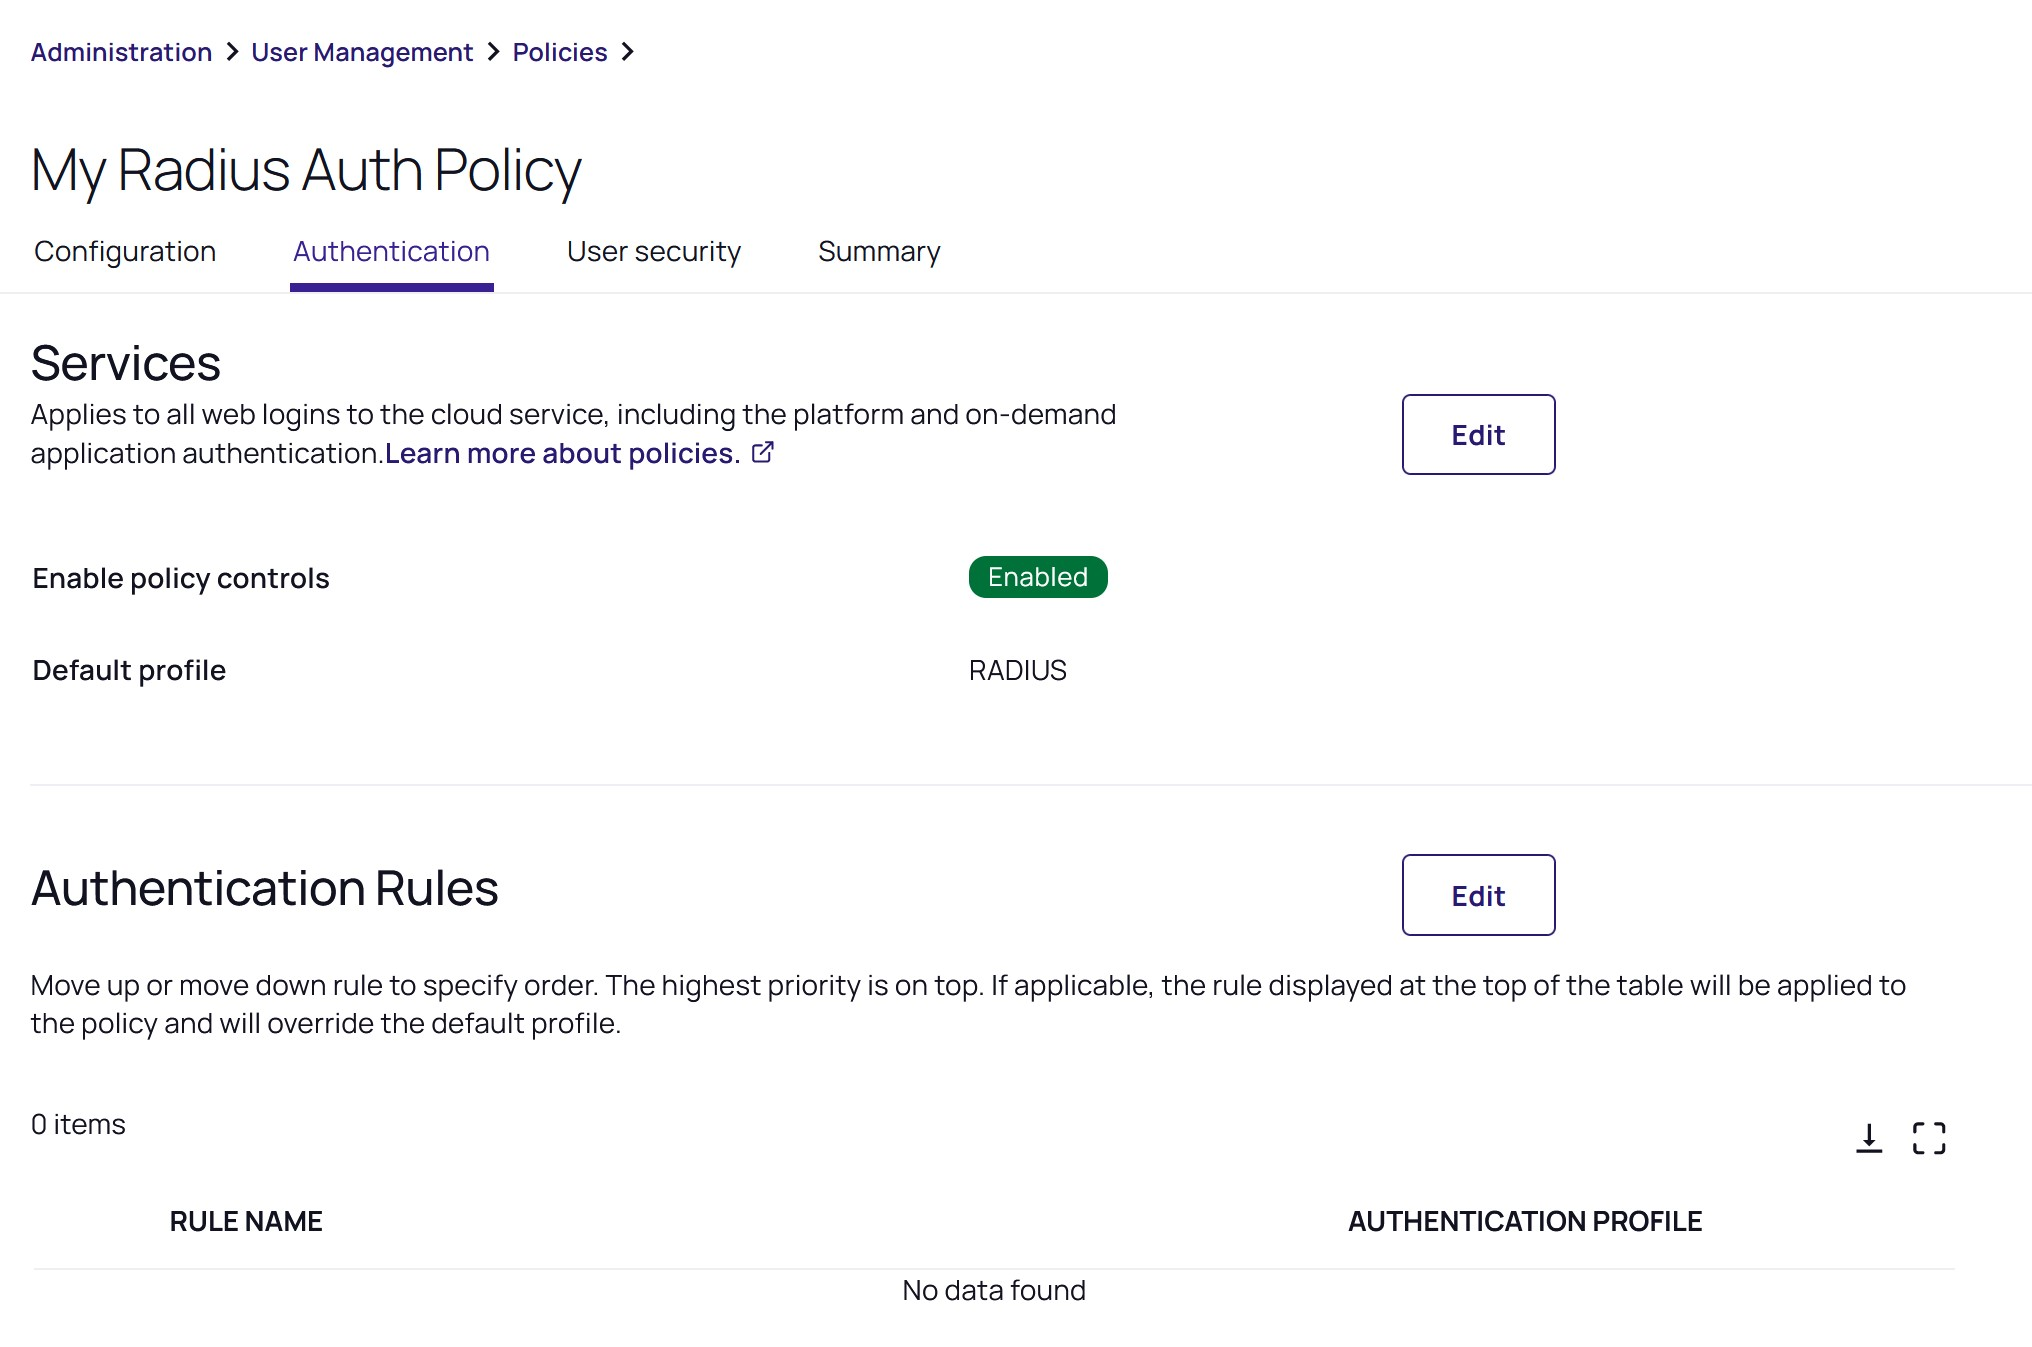
Select the Authentication tab.
-
Under Services, click Edit.
-
In Enable authentication policy controls, select Enabled.
-
In Default authentication profile, select the authentication profile you created earlier for RADIUS from the dropdown.
For example:
-
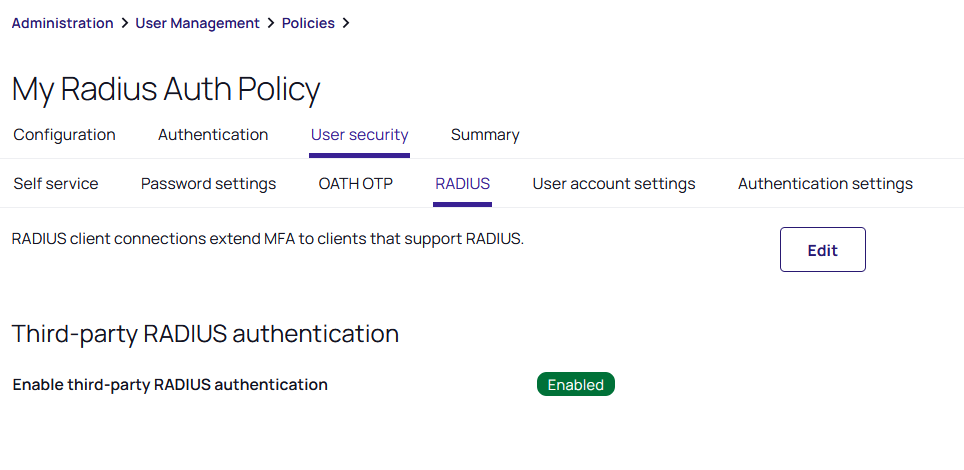
Select the User Security tab.
-
Select the RADIUS sub-tab.
-
Click Edit.
-
In Enable 3rd Party RADIUS authentication, select Enabled.
-
Click Save.
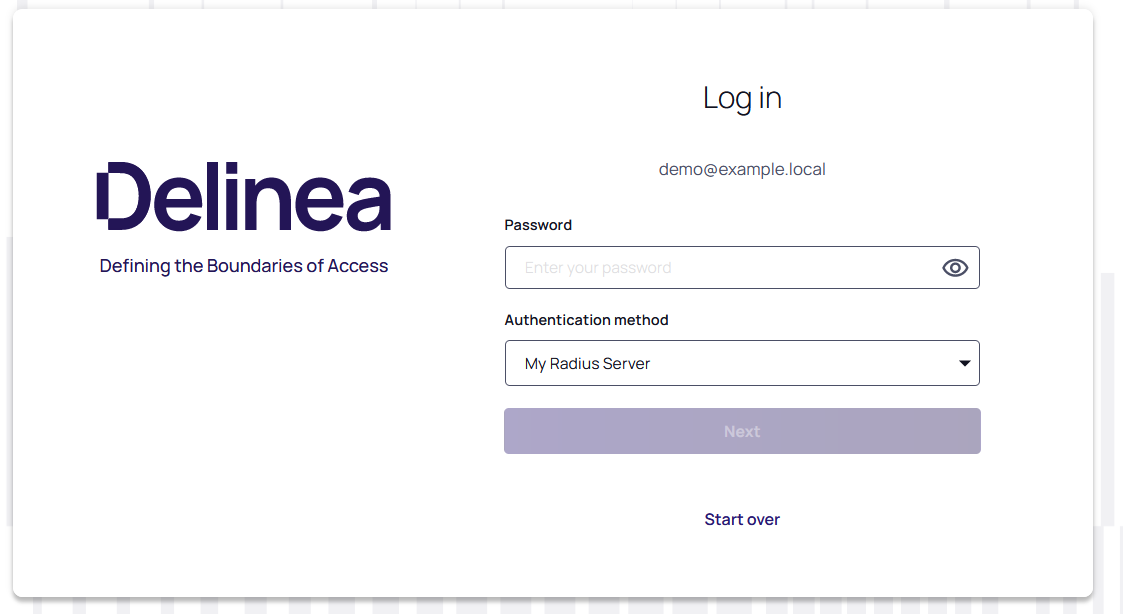
Using RADIUS Authentication
Users can access the Delinea Platform by opting for the RADIUS server authentication challenge method at the platform login prompt and then entering the passcode.
The passcode requirements may vary based on the specific authentication backend employed by the RADIUS server.
For example, here’s what it looks like at login when the service prompts a user to authenticate against the RADIUS server: