Creating Individual Directory Service Users
Initially, you might want to create individual directory service users one at a time directly in the Admin Portal. For example, you might want to add another directory service user that will be assigned to the System Administrator role or delegated to perform user management or role management tasks but not other administrative tasks.
To create user accounts one at a time
-
Log in to Admin Portal using your administrator account.
-
Click Access > Users > Add User.
-
Enter a login name and select a suffix.
A user name can be composed of any of the UTF8 alphanumeric characters plus the symbols + (plus), - (dash), _ (underscore), and . (period).
The suffix is the part of your account name that follows “@”. For example, if your account name is bob.smith@acme.com, then the suffix is acme.com. Bydefault, the suffix associated with your default account is populated. SeeHow to Use Login Suffixes for more information on suffixes.
All login suffixes are displayed in the list, including the login suffix for any Active Directory/LDAP domains you are using.
Important: If you select the login suffix for an Active Directory/LDAP domain, the account is not added to Active Directory/LDAP. The account’sSource column will indicate Privileged Access Service as the source, rather than Active Directory/LDAP.
-
Enter the email address and display name for the user.
-
Enter a password.
This is a one-time password for the user to log in to Admin Portal when you select “Require password change at next login (recommended)” in the Status settings. This password is replaced with the password created by the user.
The default minimum password requirements are:
-
8 characters
-
1 numeric character
-
1 upper case letter
-
1 lower case letter
See How to Specify User Password Complexity Requirements to change the default requirements.
-
-
Select the appropriate Status settings.
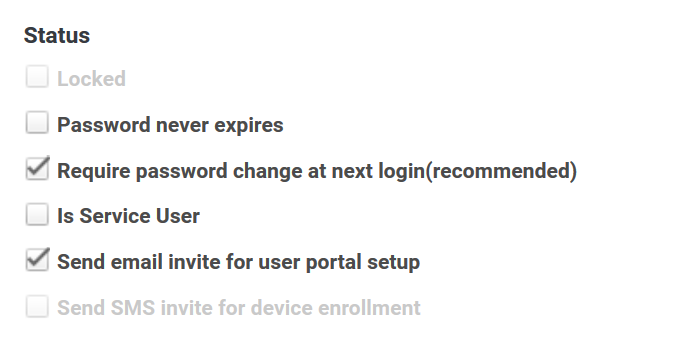
You can customize the email message sent when you invite users—see How to Customize Email Message Contents.
-
(optional) Enter the appropriate information for the Profile fields.
-
(optional) Enter the appropriate information for the Organization field.
-
Click Create User.
A notification will be sent to the newly created user using your selected method.
Using the Bulk User Import Wizard to Add Privileged Access Service Accounts
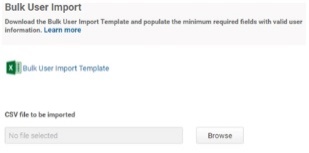
After you create the file, use the Bulk User Import wizard to create the accounts.
To add Privileged Access Service accounts using the Bulk User Import wizard:
The procedure assumes you have already created the Excel or CSV file.
-
Log in to Admin Portal
-
Click Settings > Users > Bulk User Import > Browse.
-
Navigate to the file.
-
Click Open > Next.
-
Review the entries.
The first 15 records are displayed. Use this display to ensure you have formatted the entries correctly.
-
Click Next.
The Delinea Directory - Bulk Import Report field is automatically populated with your email address. Change the address if you want the email address to go to someone else.
-
Click Confirm
After the wizard completes the import, the Privileged Access Service sends two email messages:
-
A Delinea Directory - Bulk Import Report. This email message is sent to the email account that you had specified to receive the report. It indicates how many new users were specified in the file and how many were successfully added. An explanation is provided for each failed account.
-
A Delinea Directory - New User Account. This email message is sent to each user account created. The message includes a link to the Admin Portal and a one-time password. When users open the link, they are prompted to create a new password (unless you have configured otherwise).
You can customize this letter—see How to Customize Email Message Contents.