
Dome9
Dome9 delivers full visibility, control and faster time to protection as organizations scale in AWS, Azure, and Google Cloud environments.
With Privileged Access Service, you can choose single-sign-on (SSO) access to the Dome9 web application with IdP-initiated SAML SSO (for SSO access through the Admin Portal) or SP-initiated SAML SSO (for SSO access directly through the Dome9 web application) or both. Providing both methods gives you and your users maximum flexibility.
SP-initiated SSO for Dome9 is automatically enabled when the SAML feature is activated.
If Dome9 is the first application you are configuring for SSO through Privileged Access Service, read these topics before you get started:
Dome9 requirements:
Before you configure the Dome9 web application for SSO, you need the following:
-
An active Dome9 account in the Super User role.
-
An additional user enabled for SSO and in the Super User role.
This is necessary because making the account owner an SSO user creates the risk of account lockout if there is an SSO failure. Specifying a different user as the SSO user ensures that you can always log in as the account owner, as long as you have the password.
-
A signed certificate.
You can either download one from Admin Portal or use your organization’s trusted certificate.
Configuring Dome9 for single sign-on
The following steps are specific to this application and are required in order to enable SSO. For information on optional configuration settings available in the Delinea Admin Portal, see Optional Configuration Settings.
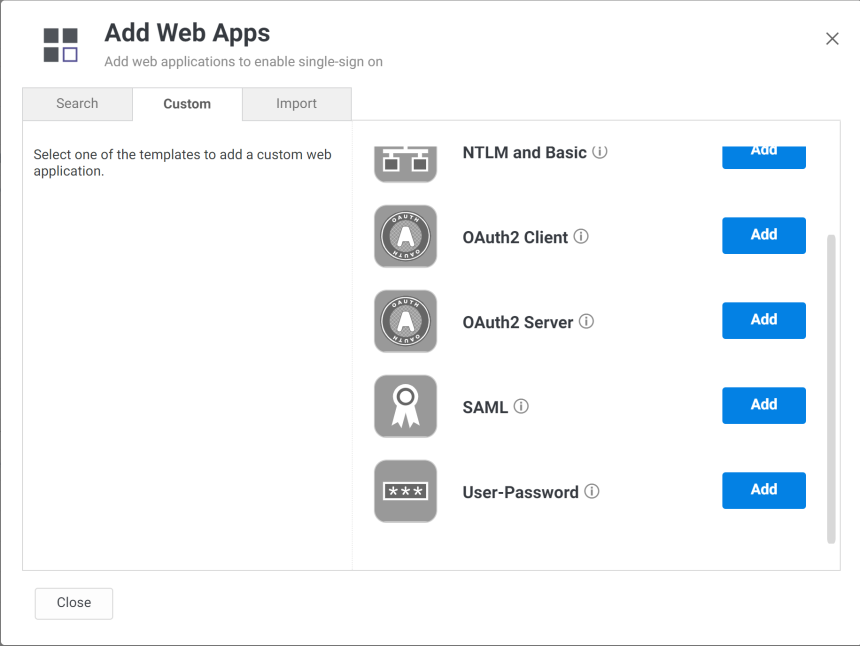
-
Add the Dome9 application in Admin Portal.
-
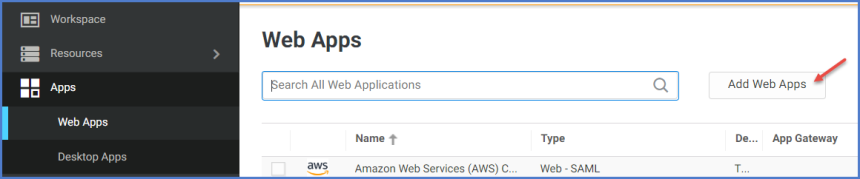
In the Admin Portal, select Apps > Web Apps, then click Add Web Apps.
The Add Web Apps screen appears.
-
On the Search tab, enter the partial or full application name in the Search field and click the search icon.
-
Next to the application, click Add.
-
In the Add Web App screen, click Yes to confirm.
-
Click Close to exit the Application Catalog.
The application that you just added opens to the Settings page.
-
Click the Trust page to begin configuring the application.
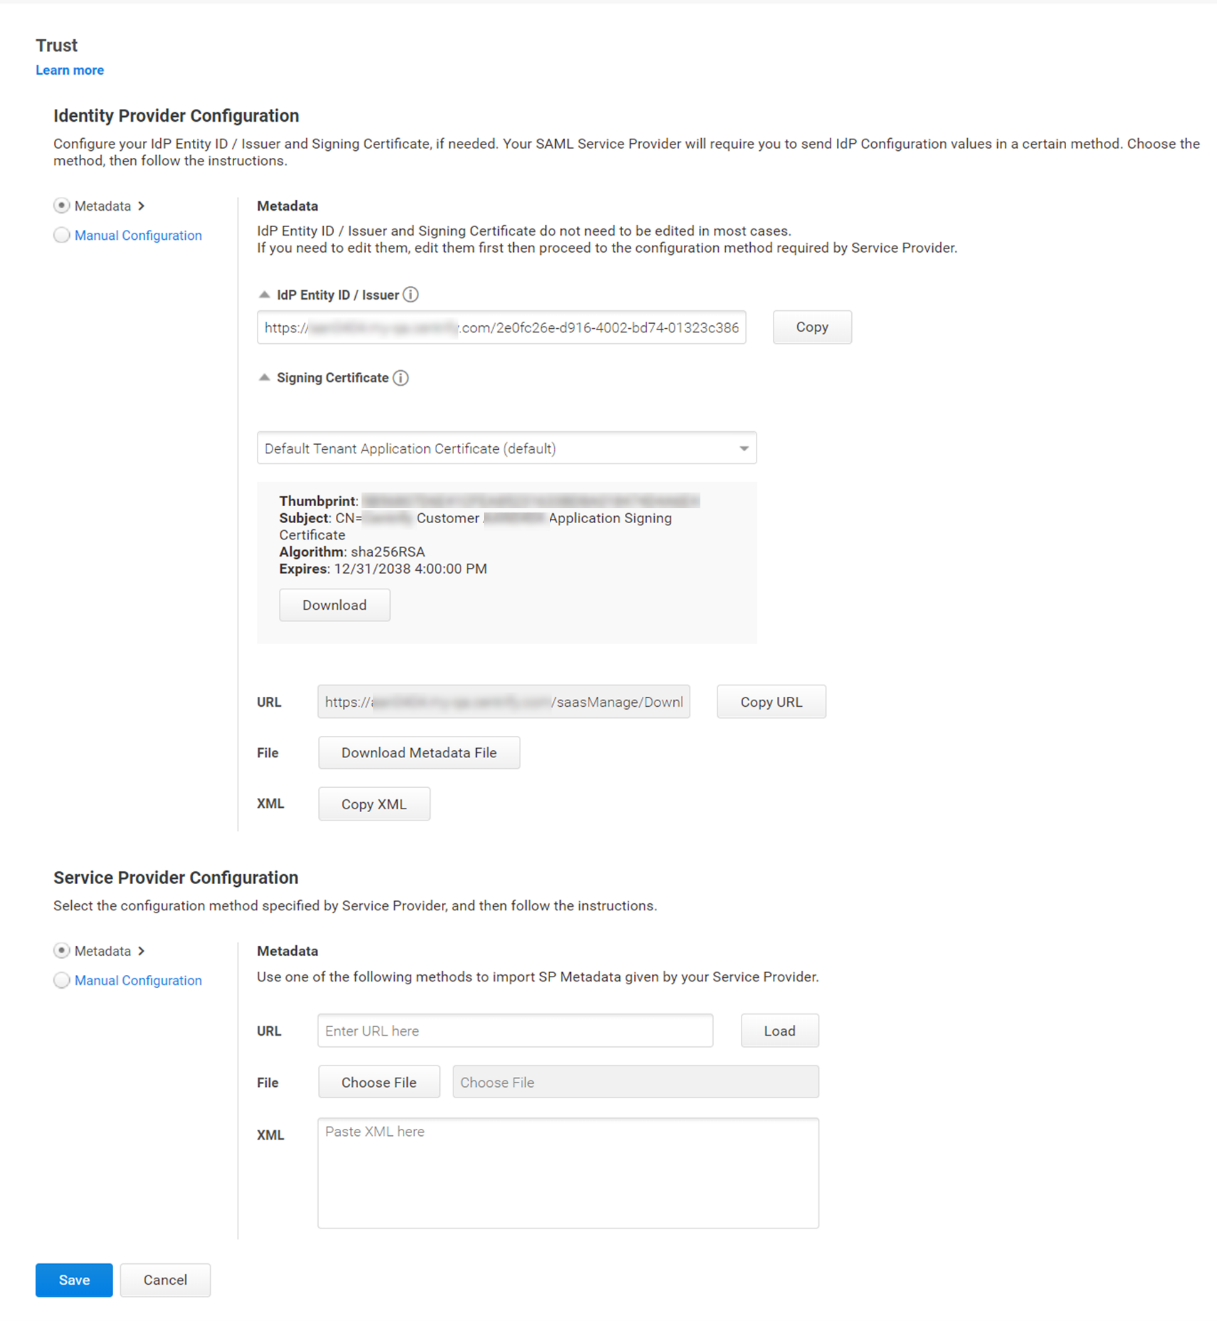
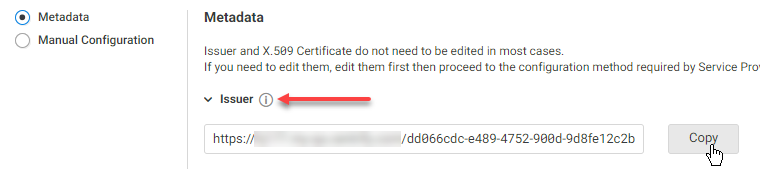
The UI is evolving in order to simplify application configuration. For example, many of the settings previously found on the Application Settings page are now on the Trust page. You might have to select Manual Configuration to expose those settings, as shown in the following example.
Any previously configured applications retain their configuration and do not require reconfiguration. If you are configuring an application for the first time, refer to the Trust page for any settings previously found on the Application Settings page.
In addition, the description of how to choose and download a signing certificate in this document might differ slightly from your experience. See Choose a Certificate File for the latest information.
-
-
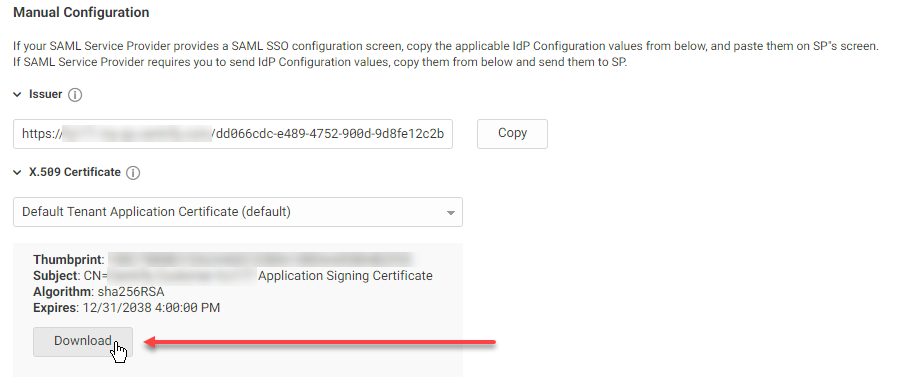
In the Identity Provider Configuration area of the Trust page, expand the certificate area and select the certificate that you want to use for the application, then click Download.
-
Open a new tab in your web browser.
It is helpful to open the Dome9 web application and the Delinea Admin Portal simultaneously to copy and paste settings between the two browser windows.
-
Go to the following URL and sign in as a super user:
https://secure.dome9.com/v2/login
-
In the Dome9 admin portal, go to Administration > Account Settings, then click SSO.
-
Click Enable.
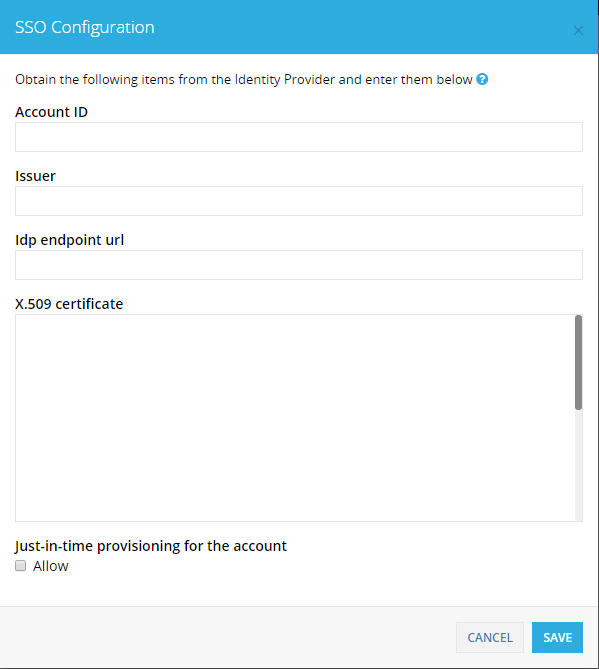
The SSO Configuration screen appears.
-
Open the certificate that you downloaded earlier in a text editor, then copy the contents and paste them into the web application's certificate field.
-
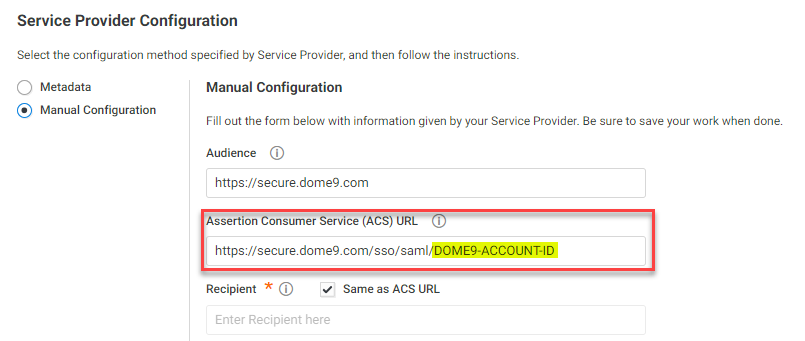
Enter a value in the Account ID field.
You can use any string as long as it does not include a period or @ symbol. You will use the Account ID later to form the ACS URL.
-
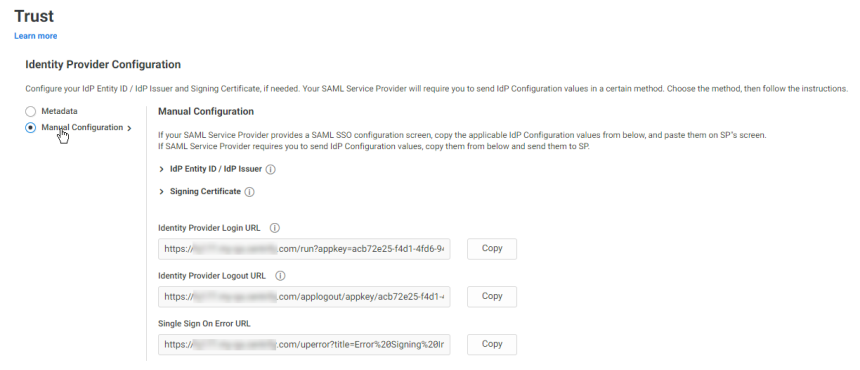
In the Identity Provider Configuration area of the Trust page, expand Issuer and then click Copy to copy the Issuer value, then paste it in the Issuer field in the Dome9 SSO Configuration.
-
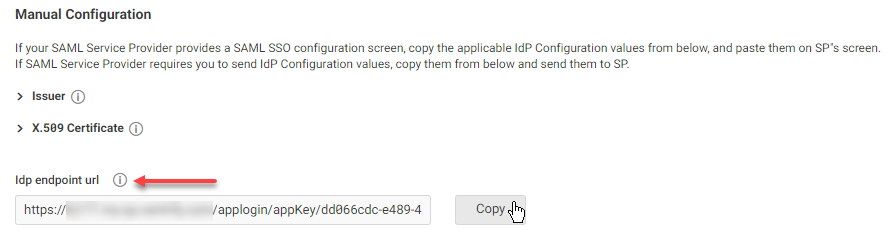
In the Identity Provider Configuration > Manual Configuration area of the Trust page, copy the Idp endpoint url value and then paste it in the Idp endpoint url field in the Dome9 SSO Configuration.
-
In the Service Provider Configuration > Manual Configuration area of the Trust page, replace the DOME9-ACCOUNT-ID portion of the ACS URL with the Account ID value you entered in the Dome9 SSO Configuration screen.
-
Deploy the application by setting permissions on the application or by adding the application to a set.
Set permissions on the application.
-
On the Permissions page, click Add.
The Select User, Group, or Role window appears.
-
Select the user(s), group(s), or role(s) that you want to give permissions to, then click Add.
The added object appears on the Permissions page with View, Run, and Automatically Deploy permissions selected by default.
-
Select the desired permissions, then click Save.

Add the application to a set.
-
Add the application to an appropriate set.
You can either create a new set or add the application to an existing set. Refer to Managing Application Sets for more information about creating and modifying application sets.
-
In the Sets section, right-click a set name, then click Modify.
-
On the Member Permissions page, click Add.
The Select User, Group, or Role window appears.
-
Select the user(s), group(s), or role(s) that you want to give permissions to, then click Add.
The added object appears on the Permissions page with View, Run, and Automatically Deploy permissions selected by default.
-
Select the desired permissions, then click Save.

-
-
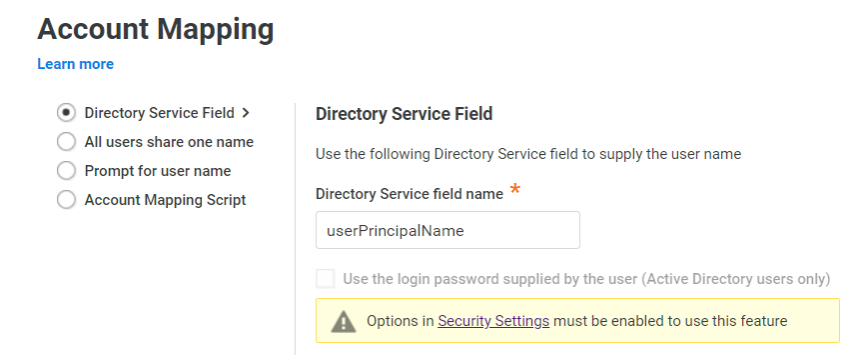
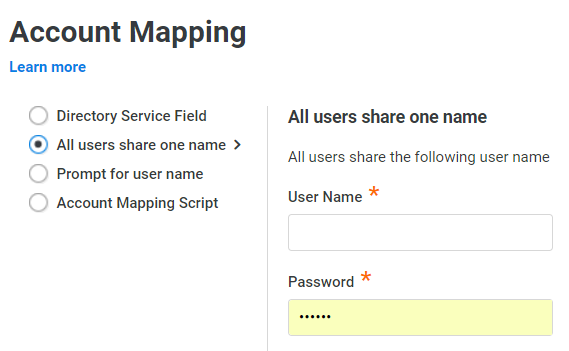
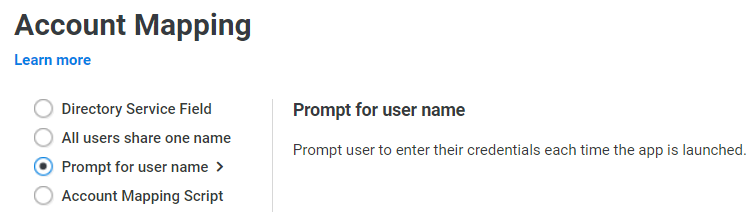
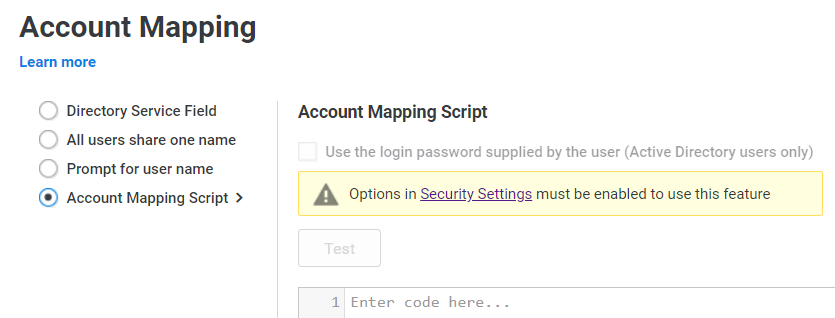
On the Account Mapping page, configure how the login information is mapped to the application’s user accounts.
Depending on your application, available options might vary slightly.
-
Directory Service Field: Use this option if the user accounts are based on user attributes. For example, specify an Active Directory field such as mail or userPrincipalName or a similar field from the Delinea Directory.
-
All users share one name: Use this option if you want to share access to an account but not share the user name and password. For example, some people share an application developer account.
-
Prompt for user name: Use this option if you want users to supply their own user name and password. This option only applies to user password application types. The first time that users launch the application, they enter their login credentials for that application. The Delinea Directory stores the user name and password so that the next time the user launches the application, the Delinea Directory logs in the user automatically.
-
Account Mapping Script: You can customize the user account mapping here by supplying a custom JavaScript. For example, you could use the following line as a script:
LoginUser.Username = LoginUser.Get('mail')+'.ad';The script sets the login user name to the user’s mail attribute value in Active Directory and adds ‘.ad’ at the end. For example, if the user’s mail attribute value is Adele.Darwin@acme.com then the account mapping script sets LoginUser.Username to Adele.Darwin@acme.com.ad. For more information about writing a script to map user accounts, see the SAML Application Scripting.
-
-
Click Save in both the Admin Portal and Dome9's SSO Configuration screen.
Dome9 Specifications
Each SAML application is different. The following table lists features and functionality specific to Dome9.
| Capability | Supported? | Support details |
|---|---|---|
| Web browser client | Yes | |
| Mobile client | No | Although Dome9 offers a mobile application, SSO is not supported. |
| SAML 2.0 | Yes | |
| SP-initiated SSO | Yes | |
| IdP-initiated SSO | Yes | |
| Force user login via SSO only | Yes | |
| Separate administrator login after SSO is enabled | Yes | |
| User or Administrator lockout risk | Yes | SSO users do not get a password; SSO failure would lockout SSO users. |
| Just-In-Time provisioning | No | |
| Multiple User Types | Yes | You might need to add users with SSO enabled. |
| Self-service password | No |