Install and Configure the Mobile Console in Privilege Manager
To configure the Mobile Console in Privilege Manager, you must:
- Install the Privilege Manager Mobile Console.
- Set the Client ID and Tenant ID.
- Configure the notification settings.
Install the Privilege Manager Mobile Console
The Privilege Manager Mobile Console needs to be installed on the same server that is running the Privilege Manager instance.
-
Navigate to your Privilege Manager setup page or select ADMIN | More... and select the Add / Update Program Features.
-
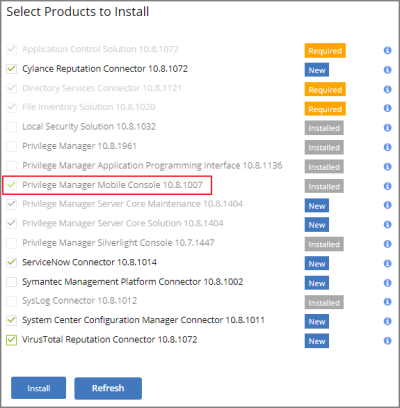
Click Select Products to Install.
-
Select Privilege Manager Mobile Console and click Install.

Once the installation completes click Home to navigate back.
Set the Client ID and Tenant ID
After you have installed the Privilege Manager Mobile Console, set the Client ID and Tenant ID.
-
Navigate to Admin | Configuration.
-
Select the Advanced tab.
-
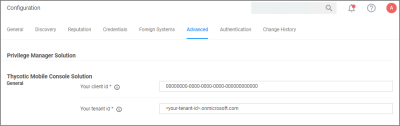
Scroll down and under Thycotic Mobile Console Solution under General enter values for:
-
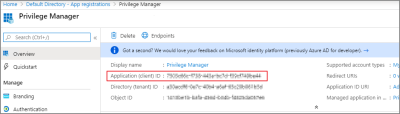
Your client id: In the Your client id field, enter the Client Id that you generated when you configured the Microsoft Azure Active Directory. In the Azure AD portal, you find this under App Registration. Look for the Application (client) ID value.
-
Your tenant id, is the DNS name of the Azure Active Directory instance. You find it on the Azure AD Home page, between the friendly name and the Azure Tenant ID, for example name.myinstance.com or MyCompanyName.onmicrosoft.com.
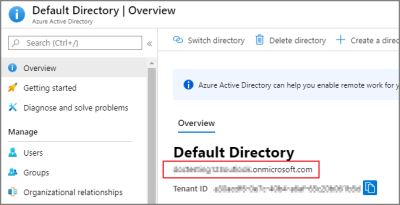
Enter that DNS in the Your tenant id field.
-
-
Click Save Changes.


Configure the Notification Settings
The notification settings for the mobile app are available via general configuration and task automation.
-
Navigate to Admin | Configuration.
-
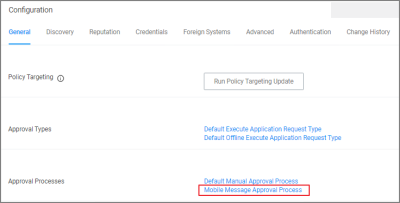
Select the General tab.
-
Under Approval Processes click Mobile Message Approval Process.
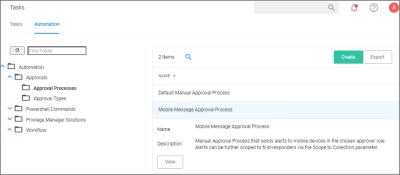
This task can also be accessed via Admin | Tasks, selecting the Automation tab and the in the folder tree Automation | Approvals | Approval Processes | Mobile Message Approval Process.
-
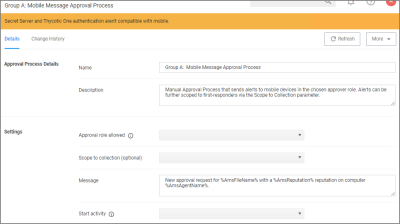
For customization, duplicate the default task. Give it a meaningful name for your environment.
-
Click Create.
-
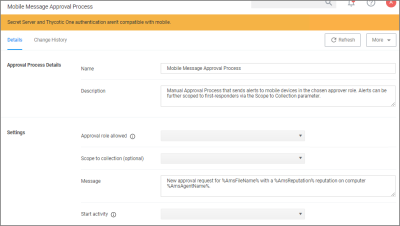
Under Settings, you specify
- Approval role allowed, which roles have approval permissions. By default the alerts for new approval requests will only be sent to mobile users in the Administrators role. You can change this setting by adding the approver role to a different role.
- Scope to collection (optional), which is an optional setting, to scope these messages to a subset of users in that role.
- Message, what message will be displayed to the approver when a approval request was triggered.
- Start activity, which is an optional setting, any activity you wish to start as part of the approval.
-
Click Save Changes.


To start sending notifications to phones, select the Default Execute Application Request Type and change the Approval Process from the Default Manual Approval Process to the Mobile Message Approval Process and save the changes.
The approval process change to Mobile Message Approval Process is only for the notification message that an approval was requested. The actual approval has to be followed through via HelpDesk interface. Currently approval requests cannot be approved via the Mobile app.
You can also send notifications based upon report data. These can be used to send alerts for suspicious activity, etc. An example of this can be found under Tasks | Server Tasks | Mobile Messaging | Mobile Message Alert for Password Disclosures on VIP Systems.

This message can be executed on a schedule to send alerts for any password disclosures on VIP Systems. VIP Systems are configured via the Monitored Computers parameter that allows you to choose a Collection of computers.
Authentication Provider Warning
The Privilege Manager Mobile Console does currently not work with Secret Server or Thycotic One as the authentication provider. If Secret Server is configured as the authentication provider in Privilege Manager, a warning message is shown on the Mobile Message Approval Process configuration page.
