Setting us a Symantec Management Platform (SMP) Integration
Privilege Manger integrates with the Symantec Management Platform (SMP) to allow the
- import of computers for use in computer groups and identifying systems that exist on the network, but don't have an endpoint agent installed yet.
- import of existing Resource Collections from SMP and use them for Privilege Manager policy targets.
- inventory of SMP Software Packages to use the package contents in Privilege Manager Application Control policies.
Create a Credential
Privilege Manager needs a username and password to access SMP. If you have not already created an appropriate user credential:
- Navigate to Admin | Configuration | Credentials.
- Click Create, to create user credentials to access SMP.
- After entering the user credentials information for SMP, click Save Changes.
Connecting to SMP
Before you can import data from SMP you need to setup a foreign systems connection in Privilege Manager for the SMP integration.
-
Navigate to Admin | Configuration and select the Foreign Systems tab.
-
Select Symantec Management Platform. If this is not listed, make sure the connector is installed by verifying via the Privilege Manager Add/Upgrade Features page.
-
Click Create.

-
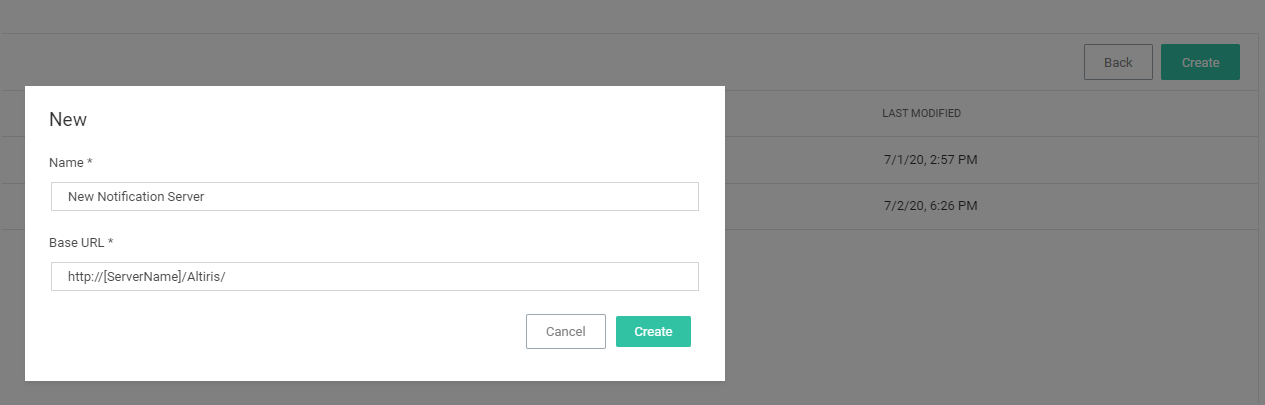
Name the Symantec Management Platform and provide the URL of the Altiris console.
-
Click Create.
-
Select the newly created SMP foreign system and click Edit.
-
Under Settings select the SMP user credential that you created in the previous procedure.
-
Click Save.
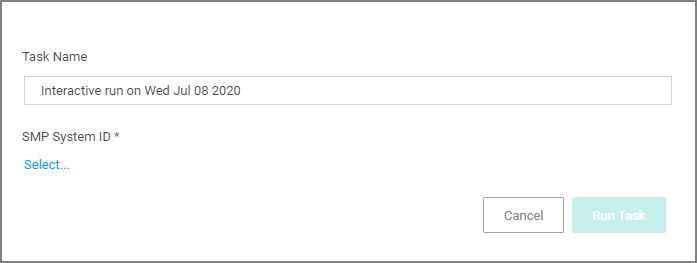
Import Computers
Before you can import collection data from SMP, Privilege Manager needs to know about computers in your SMP.
-
Navigate to Admin | Tasks.
-
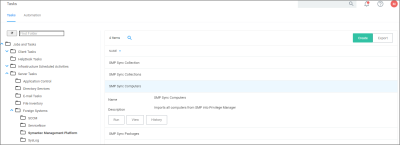
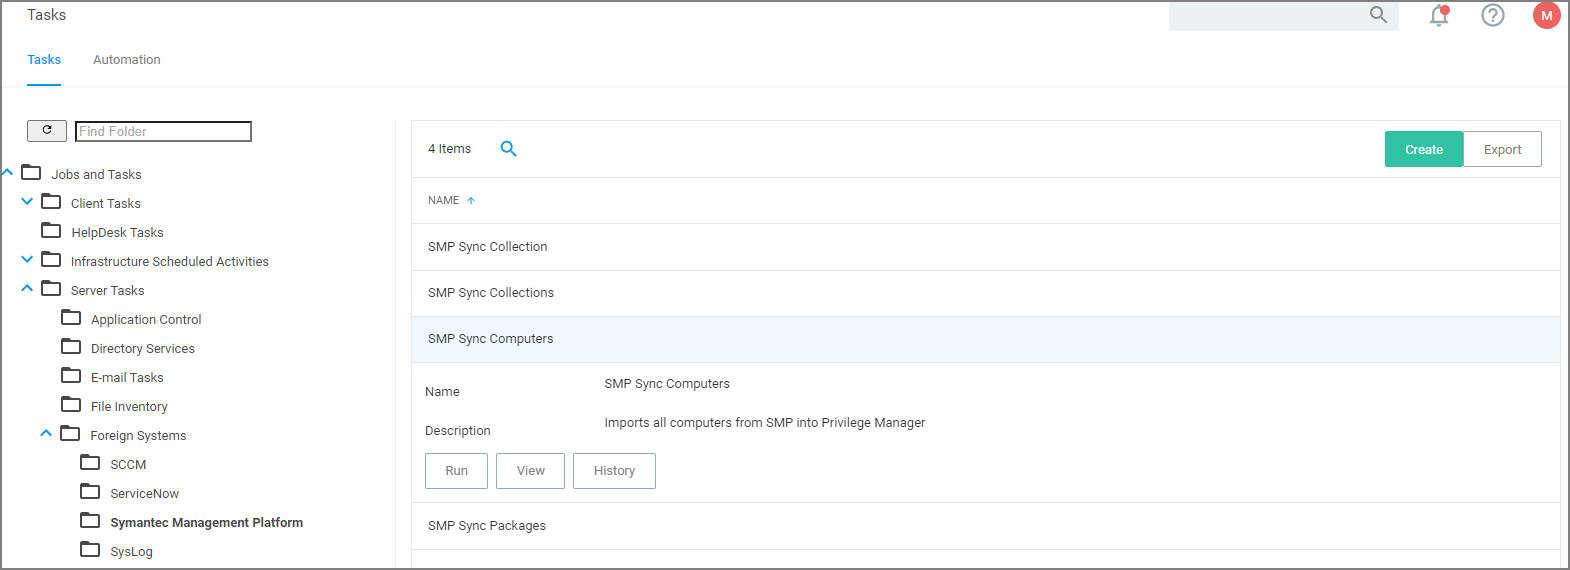
On the Tasks tab open the folder tree and select Server Tasks | Foreign Systems | Symantec Management Platform.
-
Click SMP Sync Computers.
-
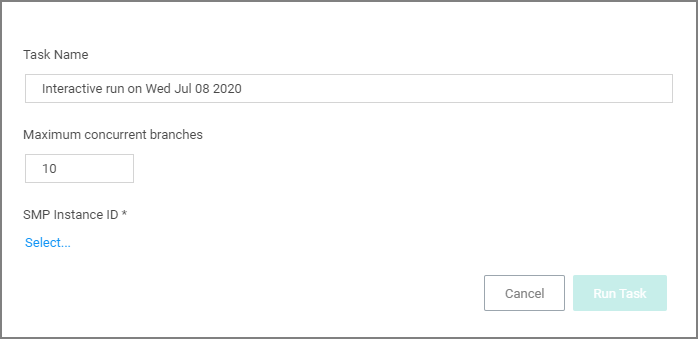
Click Run.
-
Select your SMP system via the Select... option.

-
Click Run Task.
Verify the Computers have been Imported (optional)
-
Navigate to Admin | Resources.
-
Open the Resources tab.
-
In the folder tree open Organizational Views | Default | All Resources | Asset | Network Resource | Computer.
-
Select a computer from that list.
-
Select the Known Data tab in the computer resource explorer view.
-
In the tree under Foreign Systems, you should have the Foreign System Id and SMP Platform Id data.
Create a Collection
After computers have been imported, you can create a collection to mirror an SMP collection.
-
Navigate to Resources, open the Resource Filters tab.
-
In the folder tree under Resource Filters open Collections | Symantec Management Platform.
-
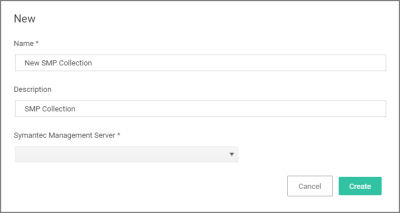
Click Create
-
Enter a Name and Description, and specify the SMP instance to connect to.
-
Click Create.
-
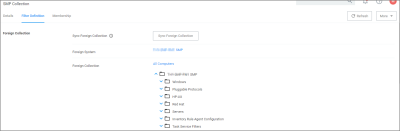
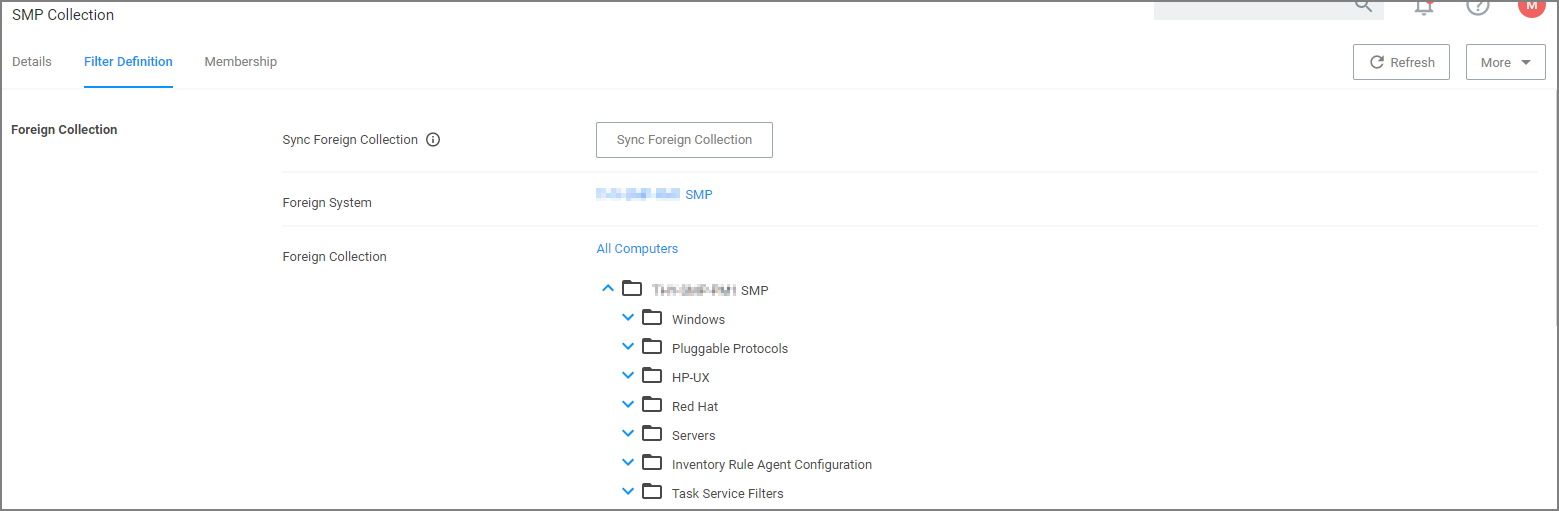
Select the Filter Definition tab and under Foreign Collection select the Collection target.
-
Click Save Changes.
-
Click the Sync Foreign Collection to update the membership immediately. The foreign collection update can also be scheduled by following the link in the help tip.
-
Select the Membership tab and then click the Update Membership tab to see the current membership of this collection.

Inventory Software Packages
Once the Foreign System has been created, an on-demand packages synchronization can be run and/or a regular synchronization schedule can be set-up via the following steps:
-
Navigate to Admin | Tasks.
-
On the Tasks tab open the folder tree and select Server Tasks | Foreign Systems | Symantec Management Platform.
-
Click SMP Sync Packages.

-
Click Run.
-
Select your SMP system via the Select... option.

-
Click Run Task.
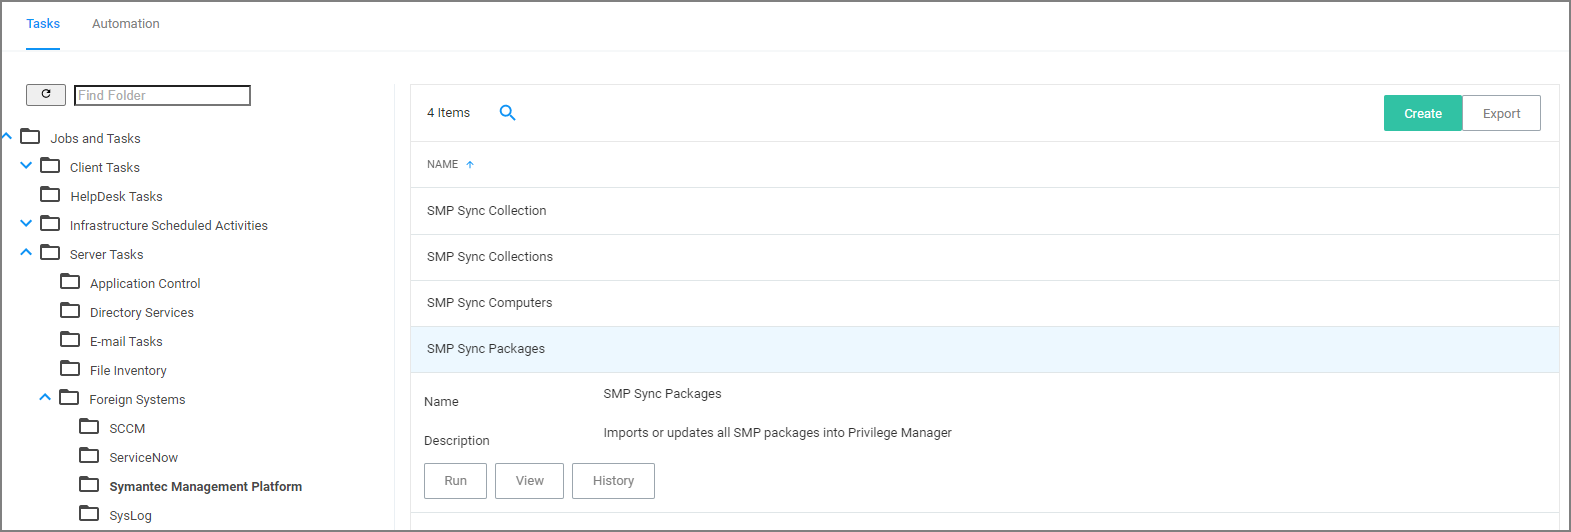
Alternatively the SMP Sync Packages task can be scheduled to regularly repeat. When viewing the task, navigate to the Schedules tab and create a new schedule.
Create a SMP Package Content Filter
After the Package Synchronization completes the SMP Packages can be used in application control policies via package content filters.
-
Navigate to Admin | Filters.
-
Click the Create Filter button.
-
From the Platform drop-down select Windows.
-
From the Filter Type drop-down scroll to Inventory Filters and select the Package Contents Filter.
-
Set the Name and Description of the filter.
-
Click Create.
-
Next to Package, click Select resource....
-
Select the package from SMP that will be targeted.
-
Set the switch Results will be to Included.

-
Navigate to the Membership tab.
-
If no items are listed in the membership table, click the Sync Package button.

Running the sync package task, causes the server to inventory the package referenced in the filter. If you have multiple filters and packages, Delinea recommends to use the Inventory Packages Referenced in Allow Lists task instead.
-
Click Save Changes.
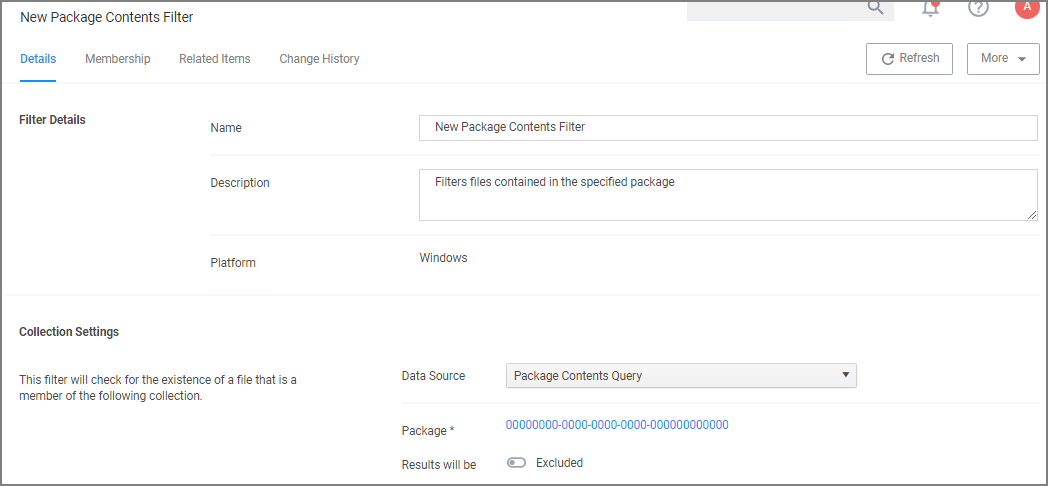

This filter can then be referenced in Application Control policies.