Setting Up Azure Active Directory Integration
If replacing an existing Azure Integration, ensure a new integration object is created (don't edit an old one). Delinea recommends recycling your Application Pools.
Setting up Azure AD integration with Privilege Manager requires steps in your Azure tenant and in Privilege Manager.
In Privilege Manager the Azure Active Directory Domain Foreign System requires the following from the Azure Portal:
- Tenant (this is the unique identifier of the Azure Active Directory instance)
- Application ID (an application registration in the directory instance)
- Client Secret (this is found in Certificates & Secrets in the Azure portal for the previously created application registration)
This documentation assumes that you are familiar with the Azure Portal and know how to navigate it in order to setup or retrieve the above information for configuration with your Privilege Manager instance.
Setting up Azure AD Integration in Privilege Manager requires these components independent of On-premises or Cloud:
- User Credential
- An Azure Active Directory Domain Foreign System
- Executing a Privilege Manager Task (Import Users and Groups)
- Creating a Scheduled Task to synchronize the users and groups on a regular basis
You do not need to have an active directory domain before you can sync with an Azure Active Directory. However, there are benefits for synchronizing on-premises Active Directory to Azure AD.
Prerequisites
Assign Azure user(s) to the Privilege Manager Administrators Role. In order for users to authenticate via Azure AD, they need to be members of various roles. There must be at least one member from your Azure Directory to be allowed to login via Azure AD before you can continue. We recommend adding yourself to ensure that you can login after the Authentication Provider is configured.
Setting up Azure AD with Privilege Manager
Steps in the Azure Portal
-
Navigate to your Azure Portal: https://portal.azure.com
-
In your Azure portal, navigate to and open Azure Active Directory.
-
Verify you are in the right tenant or use Switch Tenant to switch to another tenant in your organization.
-
Under Create select App registration.
-
Under Register an application, enter
-
an application Name.
-
select Supported account types based on your business requirements.
-
specify the following Redirect URI values using the URI of your Privilege Manager server: https://myserver.example.com/TMS/
This URI does not need to be a publicly visible address. It is only used in redirecting the browser back to the Privilege Manager web application after authentication. For Privilege Manager Cloud subscriptions, the URI should be pointed to the URI that was set up for you, for example:
https://myassignedname.privilegemanagercloud.com/Tms/ -
Click the Register button.
-
-
Navigate to your newly created application registration.
-
Enter these additional URIs in the Redirect URI field:
https://myserver.example.com/Tms/Account/Signout/https://myserver.example.com/Tms/Account/SignoutCallback/
-
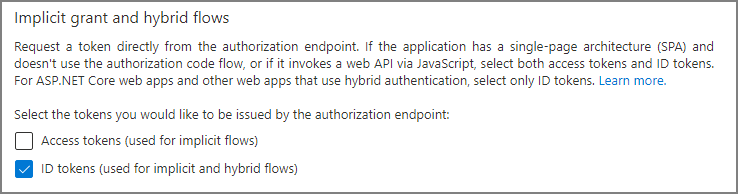
On the Platform configurations page under the Implicit grant and hybrid flows area, check the box labeled ID tokens.
-
Under Manage, select API Permissions.
-
Click the + Add a permission option to add the Microsoft Graph API.
-
As permission type, select Application permissions.
-
Expand Directory, select Directory.Read.All and click Add permissions.
If you have upgraded from a previous version of Privilege Manager (and all servers that are using this Azure integration are now at version 11.2.1 or newer), you may remove any previously added Azure Active Directory Graph API rights. This is no longer needed.
-
Under Manage, select Certificates & secrets.
-
Click + New client secret.
-
Add a Description and choose an Expires setting based on your business requirements.
-
Click Add to create the secret.
-
Use the Copy to clipboard icon to copy the newly created secret to the clipboard.
You will need the Application Id and the Client secret you copied to the clipboard in Privilege Manager to complete the setup.
Two fields are available: Secret ID and Value. Value should be used for the Client secret you copied.

Steps in your Privilege Manager Instance
Set-up Foreign Systems
-
Select Admin | Configuration.
-
Select the Foreign Systems tab.
-
Select Azure Active Directory Domains.
-
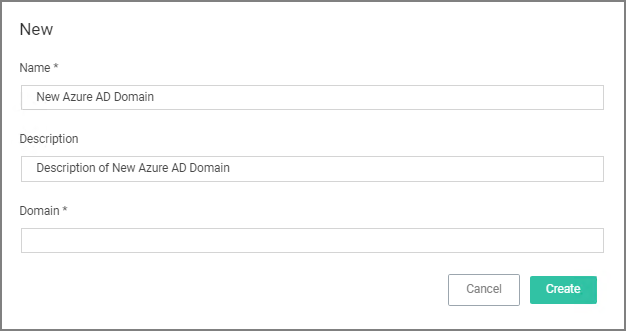
Click Create.
-
Enter a Name, Description, and Domain, which is the DNS name of the Tenant from the Azure Portal identified at the beginning of this document.
-
Click the Create.
-
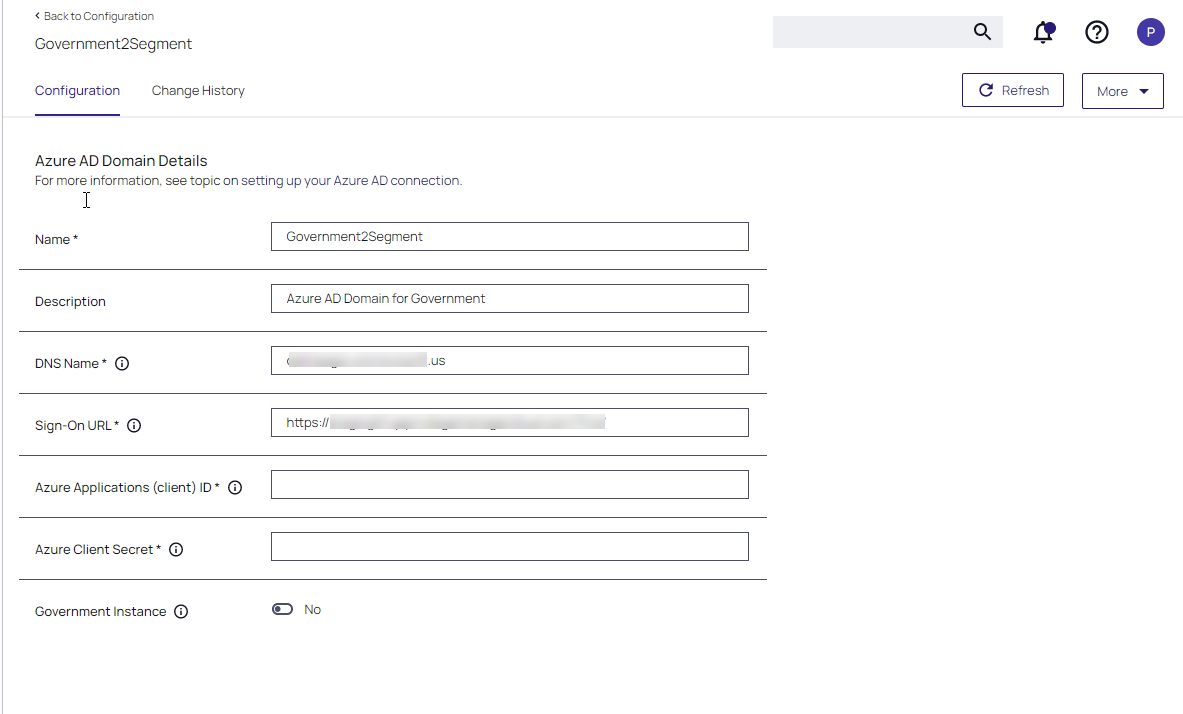
Verify the Sign-on URL is correct. This value should match what was specified in the Redirect URI option when setting up the Application Registration.
-
Enter the Azure Application (client) ID. This is the Application ID that was created when registering your application in the Azure Portal.
-
Enter the value of the secret from the Azure Portal into the Azure Client Secret field.
-
If the portal will be hosted in the US Government cloud, enable the Government Instance toggle.
-
Click Save Changes.
-
Continue to the Azure AD Authentication Provider section and click Edit.
-
Complete the three steps:
-
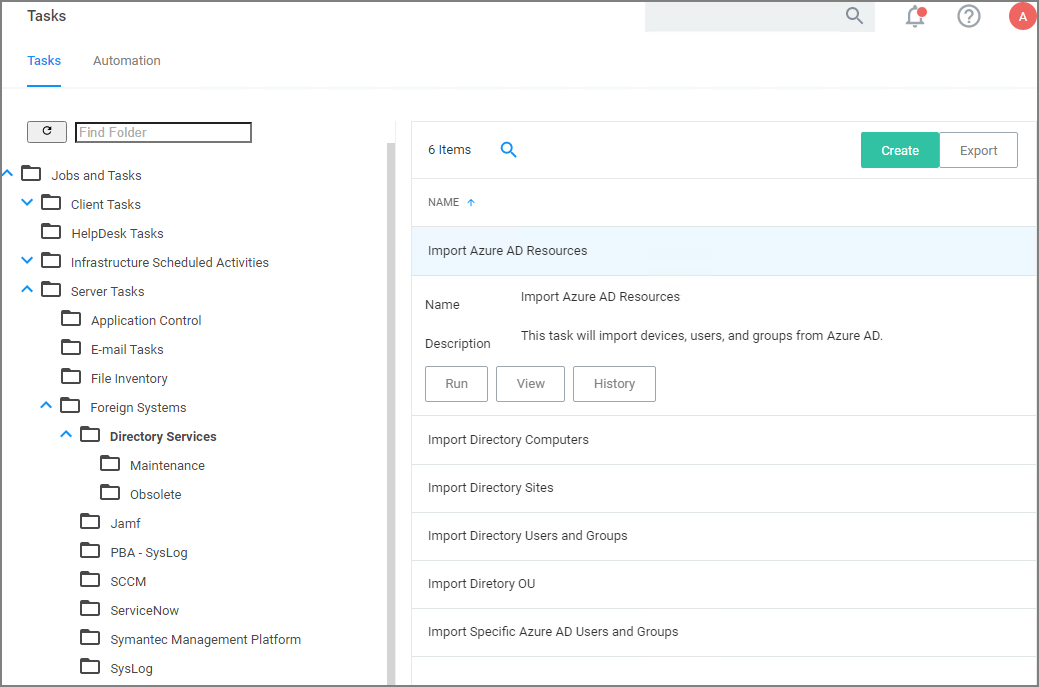
Import Users & Groups from Azure AD. This process may take a few minutes to complete, depending on the size of the directory. Privilege Manager offers various different tasks for this import:
- Import Azure AD Resources, imports ALL users and groups.
- Import Directory Computers.
- Import Directory Sites.
- Import Directory Users and Groups.
- Import Directory OU.
- Import Specific Azure AD Users and Groups, imports only the specified users and/or groups.
Refer to setup and scheduling of these tasks under the "Import Users and Groups via Privilege Manager Task" and "Create Scheduled Task for Users/Groups Synchronization" topics below.
Also refer to the Server Tasks | Foreign Systems | Directory Services for details on the Directory Services tasks.
-
Assign Azure user(s) to the Privilege Manager Administrators Role. In order for users to authenticate via Azure AD, they will need to be added as members of various roles. There must be at least one member from this Azure Directory allowed to login via Azure AD before you can continue. We recommend adding yourself to ensure that you can login after the Authentication Provider is configured.
-
Set as Authentication Provider.
-
-
Click Save Changes.
Viewing Imported Users and Groups
You may verify and browse the users and groups that are expected to be imported from Azure Active Directory.
You must add users to a Privilege Manager role before they will have any meaningful access. Support for group/role assertions is planned for a future release.
- In Privilege Manager, navigate to Admin | Resources.
- Expand Organizational Views.
- Expand Default.
- Expand All Resources.
- Expand Security Principal.
- Select Domain Users. You should see a list that contains imported Azure AD users.
- Select User Group. You should see a list that contains imported Azure AD groups (other groups may exist in the list as well).
Import Users and Groups via Privilege Manager Task
This step was performed initially as part of setting up the Azure AD directory. To re-import users and groups, you can perform that operation again to pick up changes that may have occurred in the directory, such as new users that have been added or group membership changes. To run this manually:
-
Navigate to Privilege Manager | Admin | Tasks.
-
Expand Jobs and Tasks.
-
Expand Server Tasks.
-
Select Directory Services.
-
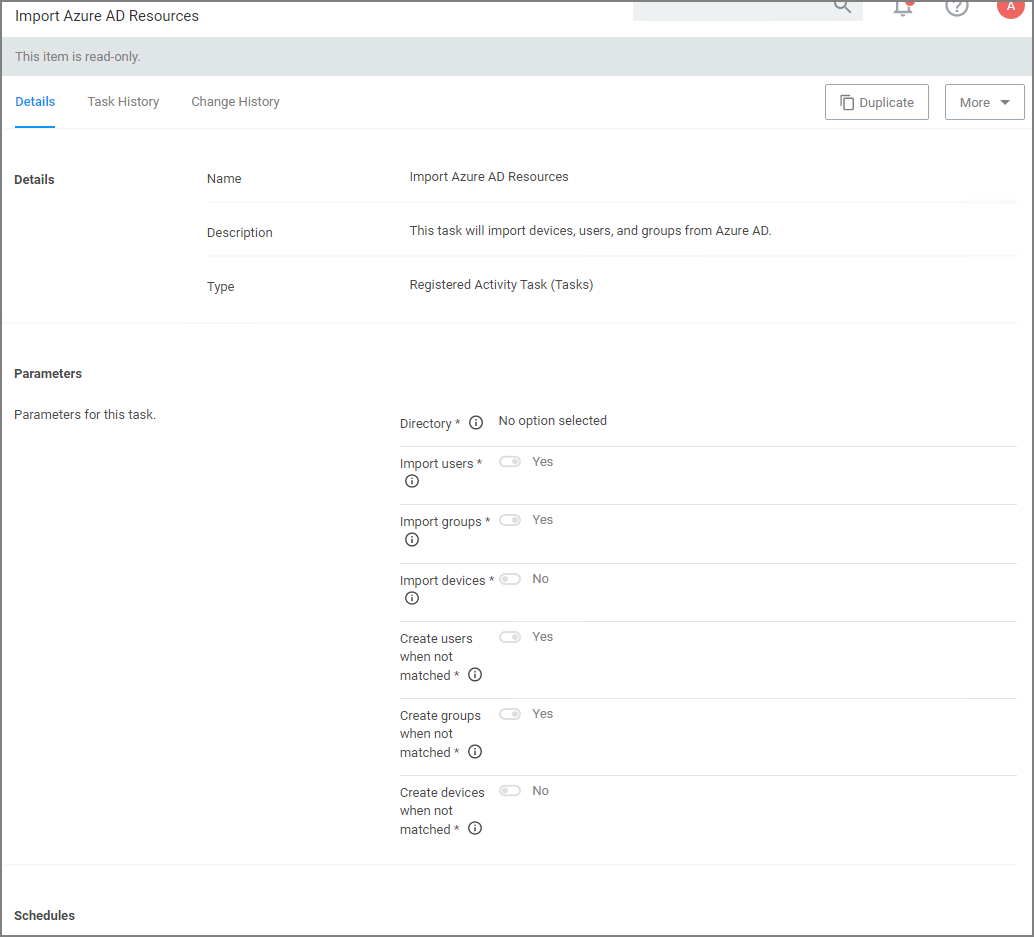
Click on Import Azure AD Resources to import devices, groups, and/or users based on a selected resource.
-
Click Run, then Select Resource and select from the available resources.
-
Select the Azure Active Directory Domain you previously created.
- Enable Import Devices.
- Enable Import Groups.
- Enable Import Users.
-
Click Run Task.
If you only want a subset of the directory to be imported, enable select and enable only the resources you wish to import at this point.
Create Scheduled Task for Users/Groups Synchronization
To schedule this operation to happen on a regular schedule:
- Navigate to Privilege Manager | Admin | Tasks.
- Expand Jobs and Tasks.
- Expand Server Tasks.
- Select Directory Services.
- Click on Import Azure AD Resources to import devices, groups, and/or users based on a selected resource.
- Click View.
-
In the Schedules tab, click New Schedule to create a new schedule.
- On the Schedule tab, define the desired schedule.
- On the Parameters tab, select the Azure Active Directory resource that you created earlier and make selections for importing devices, users, and groups.
- Click Save Changes.