Installing with a SUSE Repository
To install the agent in a SUSE container, you create a repository, verify the connection, and then install the agent package.
If you have used a Delinea repository before, it's recommended that you first delete the
old repositories in the /etc/zypp/repos.d/*centrify* directory.
Before you install the agent, run the adcheck utility to make sure that your environment is ready.
In the following code examples, be aware of the following formatting:
-
$ at the beginning of a line indicates a non-privileged user, so some commands will need
sudo. -
# at the beginning of a line indicates a privileged user, such as
root, sosudoisn't needed. -
\ at the end of a line indicates a line break for documentation formatting purposes only; you don't need the line break if you run the command in one line.
Configuring a SUSE Repository
-
Create a new SUSE repository.
You can manually create the repository or you can use a setup script to create the repository automatically.
Note: For the
baseurlparameter, enter your repository URL token in place ofURLTOKEN. -
To create the SUSE repository configuration file automatically from a script, run the following command:
Copy$ curl -1sLf \
'https://repo.delinea.com/URLTOKEN/rpm-suse/setup.rpm.sh' \
| sudo -E bash -
To create the SUSE repository configuration file manually, create a file with the following information:
Copy# cat /etc/zypp/repos.d/centrify-rpm-suse.repo
[centrify-rpm-suse]
name=centrify-rpm-suse
enabled=1
autorefresh=1
baseurl=https://repo.delinea.com/URLTOKEN/rpm-suse/rpm/any-distro/any-version/$basearch
type=rpm-md
repo_gpcheck=1
gpgcheck=1
gpgkey=https://downloads.centrify.com/products/RPM-GPG-KEY-centrify -
Refresh the cache.
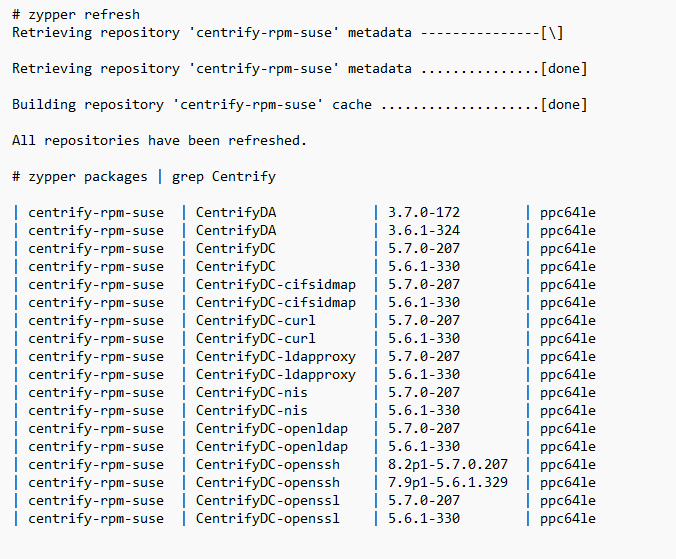
Copy# zypper refresh -
Verify the connection to the repository.
Copy# zypper packages |grep centrifyYou should see output similar to the following:
Installing the Agent
To install the Server Suite Agent for *NIX rpm package:
-
Run the following command:
Copy# zypper install CentrifyDC
Uninstalling the Agent
To uninstall the Server Suite Agent for *NIX rpm package:
-
Run the following command:
Copy# zypper remove CentrifyDC