Creating New Workflows
Task 1: Access the Workflow Designer
-
Search for Workflow. The Workflows page appears.
-
Select the Create Workflow button. The Create Workflow popup appears.
-
Type in the Workflow name and Description (optional) text boxes, then choose a Workflow type.
-
Click the Create Workflow button. The Workflow Designer tab loads with the warning that the workflow needs to be activated (enabled) for it to work.
A new workflow has only one empty step by default.
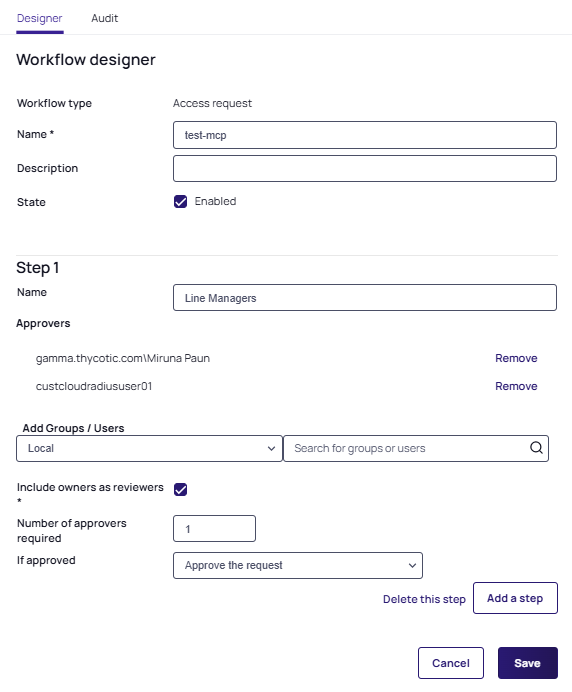
Task 2: Set up the First Step
-
On the workflow Designer tab, click to select the State checkbox as Enabled.
-
(Optional) Change the default text for Step 1 in the Name text box, for example "Line Managers".
-
In the Add Groups / Users dropdown list, select the domain where you want to get your approvers from.
-
Type the name of the user or group you desire as an approver in the unlabeled search box to the right. Options appear in the dropdown.
-
Click the desired user or group. The user is added to the Approvers section automatically, under the Step 1 name field.
-
Repeat as desired.
-
(Optional) To automatically include the owner of the secret the template is assigned to, select the Include owners as reviewers checkbox:
-
If you wish to have multiple approvers required on the step, edit the Number of approvers required text box. Otherwise, leave it set to the default 1.
-
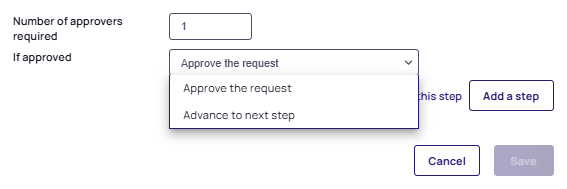
Click the If approved dropdown list to select what to do next:
-
Once selected, click Save.
Task 3: (Optional) Add More Steps
-
Select the Add a Step button. A new step appears.
-
Repeat the process mentioned in Task 2, keep adding steps as needed.
-
Click the Save button to create or save the workflow. The template exits editable mode.