Configuring SSH Proxies for Launchers
Launchers using an SSH connection can alternatively use Secret Server as a proxy rather than the launcher connecting directly to the target system from the machine it is being launched from.
When proxying is enabled, all RDS sessions are routed through Secret Server. You can configure your SSH server to only accept connections from the proxy, thus forcing all connections through Secret Server. All proxied traffic can be recorded for security and auditing. You can enable or disable proxying for individual launchers. You can also do this using a secret policy.
In Secret Server Cloud, the distributed engine service also supports acting as a proxy for session launchers for greater network flexibility and offloading connections from the Secret Server instance.
To configure this:
-
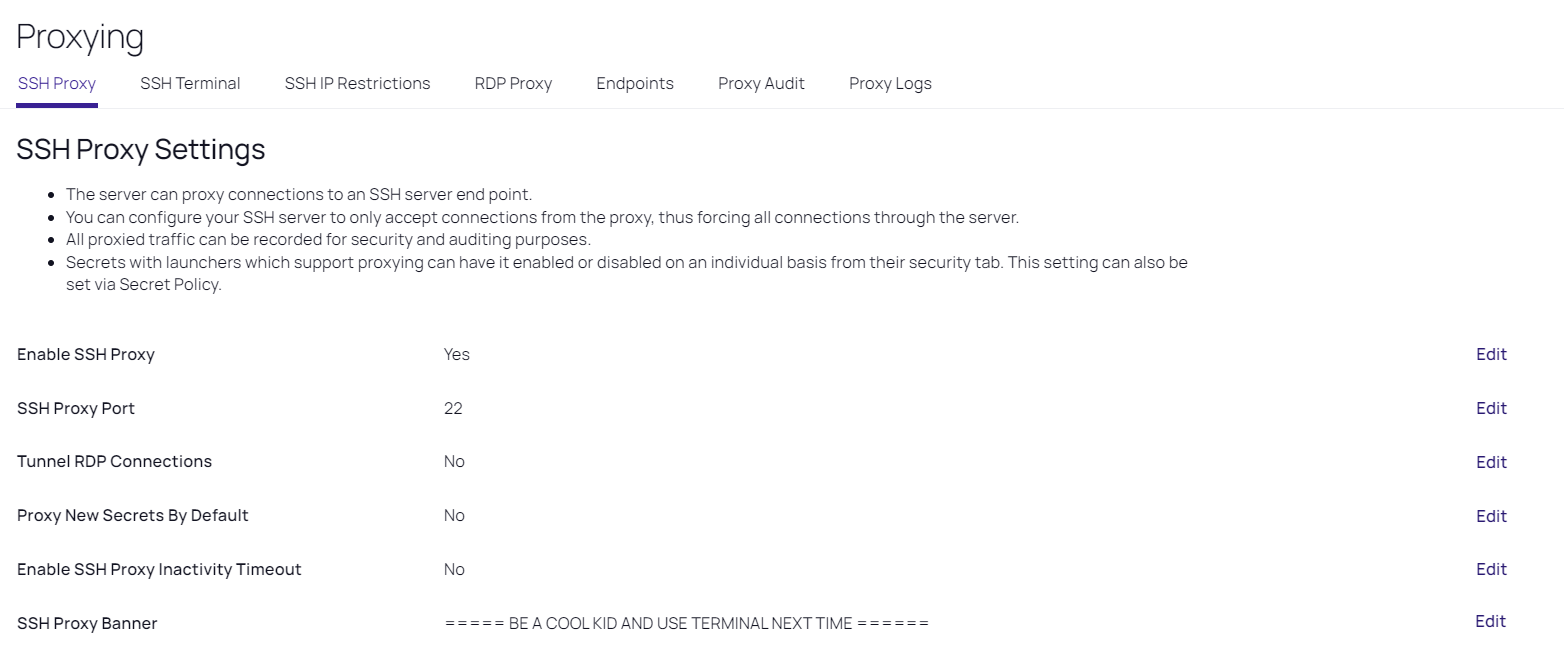
Select Admin > Proxying. The SSH Proxy tab of the Proxying page appears:
-
Scroll down and click the desired Edit links to enter your SSH proxy configuration settings.
The SSH Proxy Settings are:
- Enable SSH Proxy: Enable or disable SSH proxying.
- SSH Proxy Port: The port to proxy through. Changing this setting closes all active SSH proxy connections.
- Tunnel RDP Connections: SSH Tunneling allows Remote Desktop Sessions to be proxied using the same proxy configuration settings. If enabled, RDP launchers will tunnel through a SSH Proxy if possible. This option predates the RDP Proxy which is now recommended instead.
- Proxy New Secrets by Default: Enable proxying for applicable secrets when you create them.
-
Enable SSH Proxy Inactivity Timeout: Enable the SSH connection timeout - the period of inactivity after which the SSH will terminate the connection (15 minutes by default).
- SSH Proxy Banner: Users connecting through SSH proxy see this text banner. This is not the same as the SSH Terminal Banner.
- Hide Passwords from SSH Keystroke Capture: By default proxying records keystrokes. This disables that.
-
Regular Expression to Find Password Prompts: Specify regular Expression to find password prompts here. Note that modifying this field can slow down SSH Proxy output if regular expression is improperly formatted.
-
Send Window Title Change Command on Startup: Enable to change client window title to $USERNAME@$HOST.
- SSH Proxy Host Fingerprint: The Secret Server SSH private key. Select ECDSA or RSA to generate the related SSH Proxy Host Key.
- Days to Keep Operational Logs: Number of days to store operational audit logs.
The SSH Block List Settings: SSH Proxy can block incoming clients that connect and fail to authenticate. Enable to select the following settings:
-
Enable Block Listing: Block incoming SSH proxy clients that connect and fail to authenticate.
-
Auto Block Max Attempts: How many times authentication can fail before the connection is blocked.
-
Auto Block Max History: How many times overall authentication can fail before the connection is blocked.
-
Auto Block Time Frame (minutes): If you hit the maximum attempts within the time frame specified here, they are added to the block list. For example, if I have these settings set to five attempts and 30 minutes, if I fail to authenticate five times within 30 minutes I will be added to the list, but if I fail five times over five hours I would not be added to the list.
Once the period has passed, the address must still be manually removed from the blocked list.
Client Override IP Address Ranges: IP address ranges that you can configure to always allow or always block the incoming connection. Click the Add link to add one.
-
Range: Enter the IP address range, for example: 192.168.3.12, 192.168.42.147-192.168.42.194, 192.168.3.52/22.
-
Client Type: Select Allow List or Block List.