Google Cloud Platform Discovery
Overview
Secret Server can manage Google Cloud Platform (GCP) service accounts and VM instances. This feature allows users to run discovery to pull and manage VM Instances, as well as import and manage GCP service accounts.
Configuration
Task 1: Creating GCP Service Accounts
These are special accounts created in GCP to make authorized API calls for Compute Engine and other GCP applications.
Secret Server uses the GCP service account to make authorized API calls to GCP to pull projects, zones, instances, service accounts and service account keys.
To create the service account:
-
Click the IAM & Admin dropdown list in the left menu in GCP and select Service Accounts. A list of service accounts appears.
-
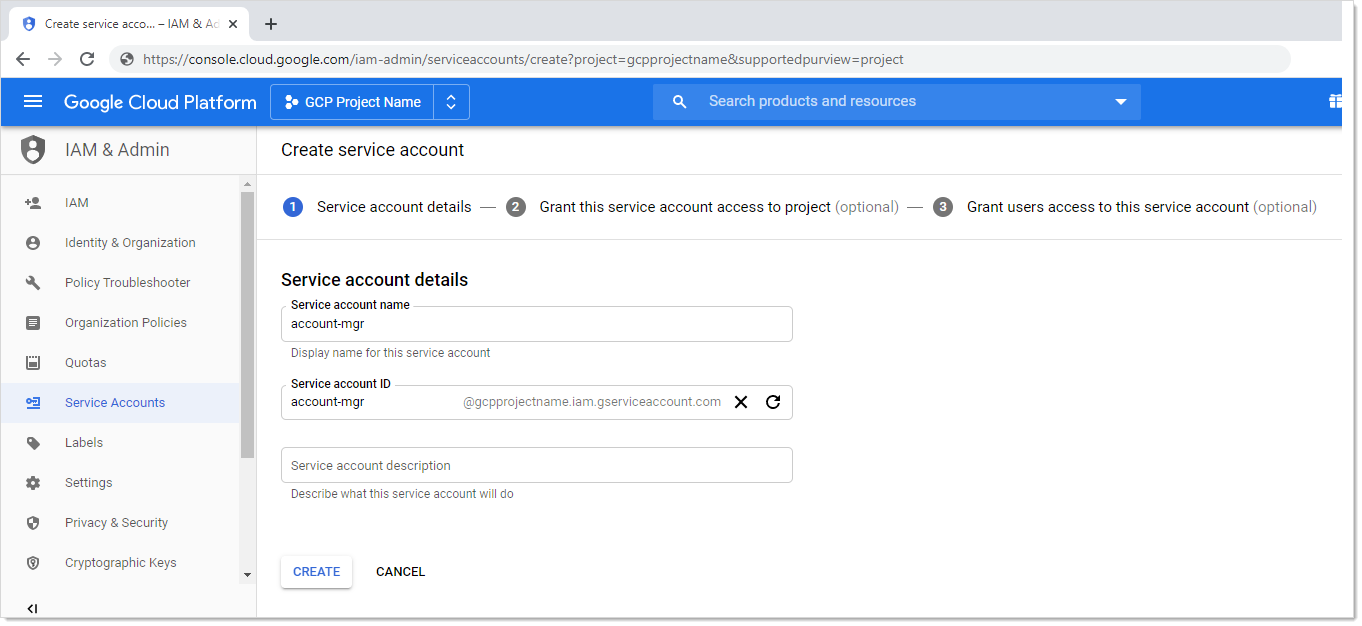
Click the + Create Service Account button. The "Service account details" page of the Create Service Account wizard appears:
-
Type the service account name in the Service Account Name text box.
-
Start to type the service account ID name and select the service account in the Service Account Name text/list box.
-
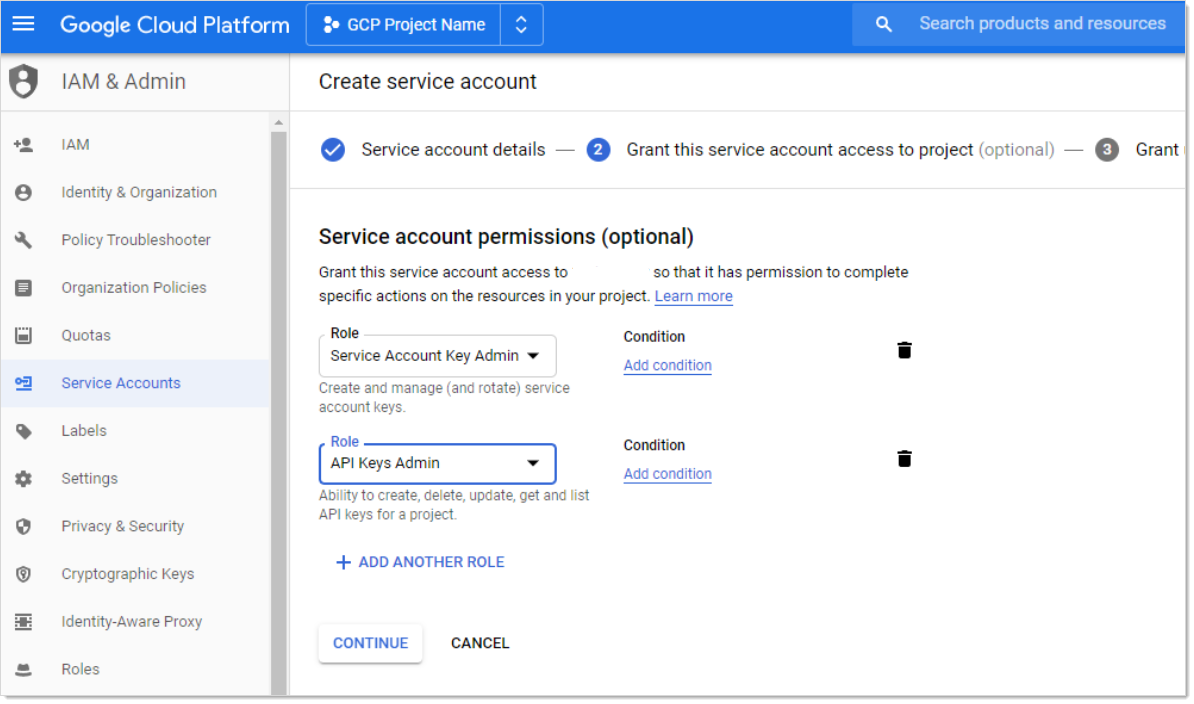
Click the Create button. The "Grant this service account access to project (optional)" page appears:
-
Click the Role list box and select Service Account Key Admin.
-
Click the + Add Role button to add another role.
-
Click the new Role list box and select API Keys Admin roles.
-
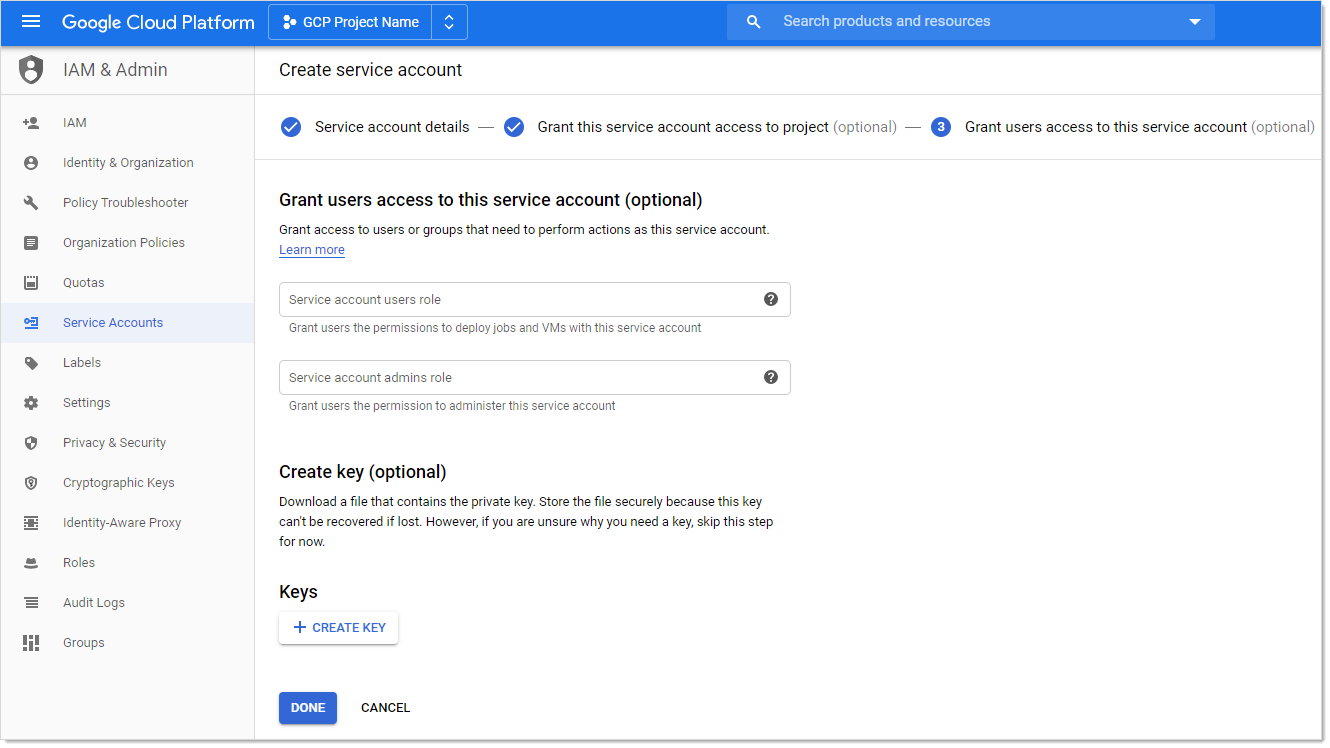
Click the Continue button. The "Grant users access to this service account (optional)" page appears:
-
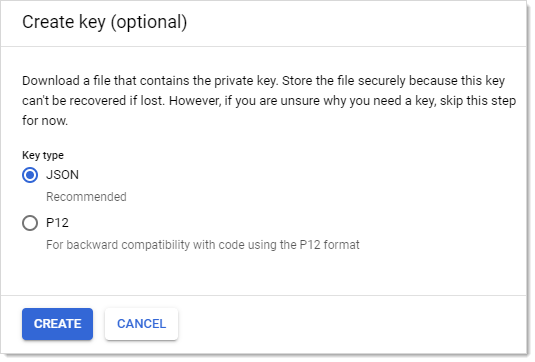
Click the + Create Key button in the Keys section. The "Create key (optional)" popup appears:
-
Click to select the JSON selection button.
-
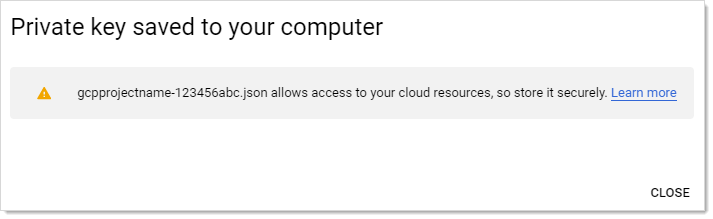
Click the Create button. This creates and downloads a JSON private key file. A confirmation popup appears:
-
Click the Close button in the bottom right. The service account is created, and its JSON private key is on your computer.
Task 2: Setting GCP Permissions
GCP permissions are IAM permissions from the IAM & Admin section of GCP. Without the proper permissions, GCP discovery, RPC, and heartbeat may not function properly.
For the service accounts to have access to a project, you must add the service account IAM permissions in each Project. If you did not add the permissions when you created the service account, you need to add the IAM permissions in the project they were created in as well.
Discovery
To run discovery in Secret Server, the GCP service account needs the "project viewer" read only permission, which can list projects, zones, service accounts, and instances.
To add the permission In GCP:
-
Click the IAM & Admin dropdown list in the left menu in GCP and select IAM. The "Permissions for project…" page appears.
-
Click the Add button. The "Add member to…" page appears.
-
Type the service account email address in the Members text box.
-
Click the Roles dropdown list to select Project > Viewer (you can also type it).
-
Click the Add button. The new member appears in the table on the "Permissions for project…" page.
RPC/Heartbeat
To run RPC/Heartbeat in Secret Server, the service account needs the "service account key admin" permission, which can create, delete, and rotate service account keys.
To add the permission In GCP:
-
Click the IAM & Admin dropdown list in the left menu in GCP and select IAM. The "Permissions for project…" page appears.
-
Click the Add button. The "Add member to…" page appears.
-
Type the service account email address in the Members text box.
-
Click the Roles dropdown list to select Service Account Key Admin (you can also type it).
-
Click the Add button. The new member appears in the table on the "Permissions for project…" page.
Task 3: Creating a GCP IAM Service-Account Secret
Secret Server now has a build in GCP IAM Service Account Key template.
Create a new secret (see Creating Secrets for details):
-
Navigate to Admin > All secrets, and click Cretae secret. The Create New Secret page appears.
-
Select Google IAM Service Account Key as the template. Another Create New Secret page, tailored to GCP, appears.
-
Click No Folder Selected to select a folder for the new secret.
-
Type the secret's name in the Secret Name text box.
-
Type the service account email address (use client_email from the JSON private key file) in the Email text box.
-
Type the private key ID (use private_key_id from the JSON private key file) in the Private Key ID text box.
-
Click the Change button to upload the JSON private key file you created earlier.
-
Click the Create Secret button.
Task 4: Creating an RPC/Heartbeat Password Changer
Secret Server can check if a service Account key is valid and can rotate the Service Account key. This should work the same as any other RPC or Heartbeat. RPC and Heartbeat must be enabled
RPC/Heartbeat can be tested from the Password Changers page
-
In Secret Server, go to Admin > Remote Password Changing.
-
Click Options and select Configure Password Changers from the dropdown. The Password Changers Configuration page appears.
-
Click the Google IAM Service Account Key link. The Google IAM Service Account Key page appears.
-
Test the heartbeat: Click the Test Action button in the Verify Password Changed Commands section. The Test Action popup appears.
-
Ensure that the JSONPRIVATEKEY text box is populated. The others are optional.
-
Click OK. The popup goes away. If successful, the Password Verify was Successfull message appears on the previous page.
-
Test RPC: Click the Test Action button in the Password Change Commands section. The Test Action popup appears
-
Ensure that the JSONPRIVATEKEY and Email text boxes are populated. The others are optional.
-
Click the OK button. The popup goes away. If successful, the Password Successfully Changed message appears on the previous page.
-
Test RPC with admin credentials: Click the Test Action button in the Password Change By Admin Credentials Commands section. The Test Action popup appears.
-
Ensure that all text boxes are populated except JSONPRIVATEKEY, Admin Email, and Admin PRIVATEKEYID, which are optional.
-
Click the OK button. The popup goes away. If successful, the Password Successfully Changed using Admin Credentials mesaage appears on the previous page.
Task 5: Creating a GCP Discovery Source
Secret Server now has a built-in GCP discovery source wizard that creates the scanners to pull the projects, zones, service accounts. To create a GCP discovery source:
-
In Secret Server, go to Admin > Discovery.
-
Under the Sources tab, click Create and select GCP (Google Cloud Platform) from the dropdown. The GCP Discovery Source wizard Overview page appears.
-
Type the name of the GCP discovery source in the Name field.
-
Select the related site from the Site dropdown.
-
Leave GCP (Google Cloud Platform) as is in the Source type field.
-
Click No secret selected to select the related secret from the list, or Create new secret to create a new secret in the Secret section.
-
When done, click Save, and in the Add flow popup select GCP for the flow, and check the related options if prompted:
-
GCP Service Accounts: This is an account scanner that scans each project and pull all of the GCP Service accounts.
-
GCP Windows Machines: This is a machine scanner that scans each project and pulls all of the GCP Windows OS VM instances.
-
GCP Non-Windows Machines: This is a machine scanner that scans each project and pulls all of the GCP Non-Windows OS VM instances.
When done, click Add.
-
Viewing Discovery Scanners for the GCP Discovery Source
To view these scanners:
-
In Secret Server, go to Admin > Discovery.
-
Under the Sources tab, click the discovery source name link in the table. The Discovery Source page for it appears.
-
Select the Scanners tab, which lists the scanners.
Instance Custom Filter
This option is only available for the instance scanners. The Custom Filter Setting can be used to include or exclude instances using a filter expression on the name, label, or any other field allowed by GCP. The filter must:
-
Be a string, number, or Boolean value
-
Use these comparison operators: =, !=, >, or <
-
Use parentheses ( ) around each filter
-
Combine different filters using AND or OR (all caps). For example:
(name="instanceName") AND (labels.key="value")
Other useful filters:
Status:
status="StatusValue"
StatusValue can be Running or Terminated
Zone:
zone=https://www.googleapis.com/compute/v1/projects/{ProjectName}/zones/{ZoneName}
Importing Service Accounts
From the Discovery Network View, Secret Server can import Service Account keys and automatically take over the account. This import process will create a new Secret for the Service Account key, delete the associated key, create a new key, and save the json private key file with the Secret, so this can be easily managed by Secret Server.
To Import a Service Account
-
Go to Admin > Discovery.
-
Select the Network View tab.
-
In the Item type filter select Service accounts from the dropdown.
-
Click to select the related Service Account(s) to import, and click Import.
-
The Import accounts and dependencies wizard begins:
-
Scan Template: Windows Service by default and can't be changed.
-
Site: Select the related site from the dropdown.
-
Dependency Template: Select Windows Service.
-
Dependency Privileged Account: Click No secret selected to select the related secret.
-
Windows Services: Restart on Change: Check to enable.
-
When done, click OK.
-
-
When the Bulk progress pop up is completed, click Close.
GCP APIs
Overview
To make API calls to GCP, you need to enable the following APIs to use GCP discovery in Secret Server. More information can be found on the GCP Getting Started page. The APIs are:
-
Cloud Resource Manager API: Used for managing GCP resource containers, such as Projects.
-
Compute Engine API: Used for managing GCP instances (virtual machines).
-
Identity and Access Management (IAM) API: Used for managing identity and access control for GCP resources, such as service accounts.
Enabling GCP APIs
In GCP:
-
In GCP, click the APIs & Services menu item and select Library. The Library page appears.
-
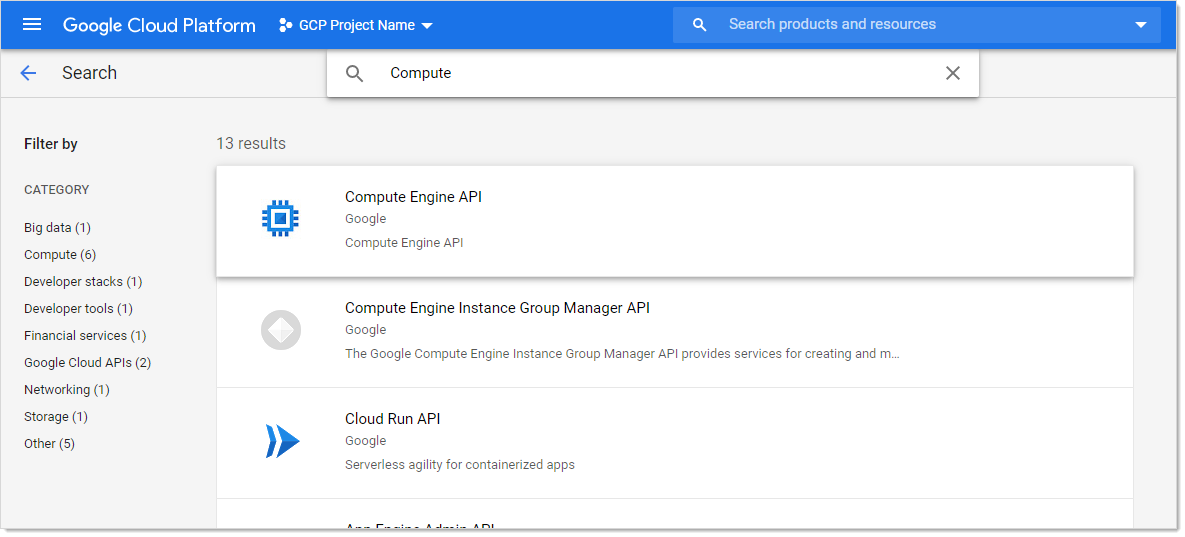
Type the name of the API in the Search text box and press <Enter>. Matching APIs appear:
-
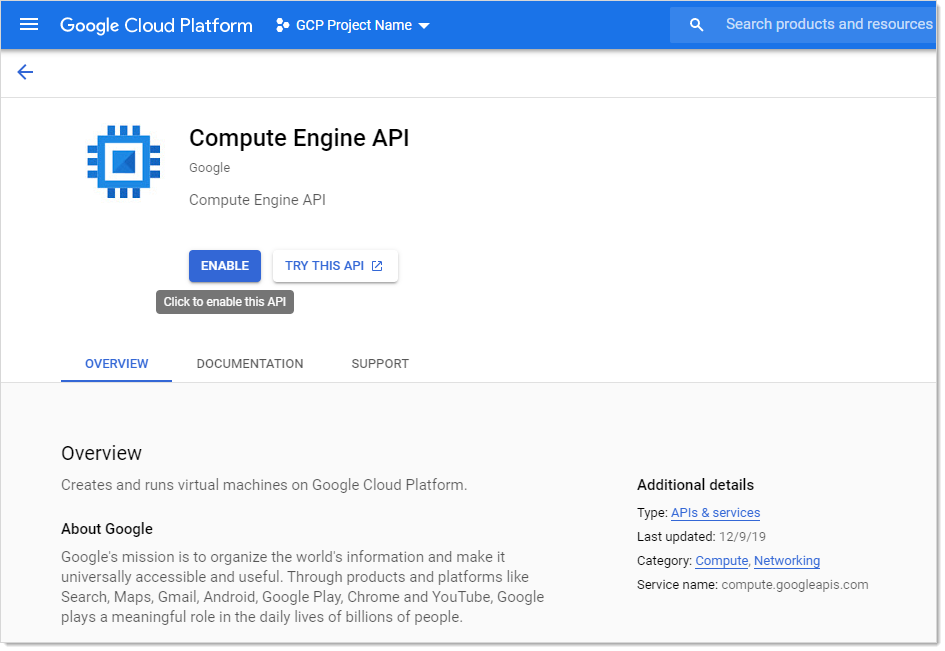
Click the button for the desired API. That API's page appears:
-
Click the Enable button.
Errors and Solutions
Create Keys Failed: Access Denied
Error
Create Keys Failed: AccessDenied, Google.Apis.Requests.RequestError Permission iam.serviceAccountKeys.create is required to perform this operation on service account projects/-/serviceAccounts/discovery-me@gcpprojectname.iam.gserviceaccount.com. [403] Errors [ Message[Permission iam.serviceAccountKeys.create is required to perform this operation on service account projects/-/serviceAccounts/discovery-me@gcpprojectname.iam.gserviceaccount.com.] Location[ - ] Reason[forbidden] Domain[global] ]
Likely Cause
The service account used to rotate the key does not have necessary permission to perform this task.
Solution
-
Go to the GCP console.
-
Select IAM > Permissions.
-
Select the service account.
-
Add the Service Account Key Admin permission.
-
Once the service account has permission:
- In Secret Server, select the secret to rotate.
- Stop the current rotation.
- Try the operation again.
Create Keys Failed: Maximum Number of Keys on Account Reached
Error
Create Keys Failed: ArgumentError, Google.Apis.Requests.RequestError Maximum number of keys on account reached. [429] Errors [ Message[Maximum number of keys on account reached.] Location[ - ] Reason[rateLimitExceeded] Domain[global] ]
Likely Cause
The rotated service account has reached the maximum number of keys allowed. GCP maximum is 10 keys.
Solution
-
Go to the GCP console.
-
Select IAM > Permissions.
-
Remove the unused keys.
-
Once the service account has less than 10 keys, in Secret Server:
- In SS, select the secret to rotate.
- Stop the current rotation.
- Try the operation again.
Discovery Consumer: Syncing OUs Failed
Error
DiscoveryConsumer: Synchronizing Organizational Units failed for [Our Google Cloud]! Error: An issue was encountered during the scan. Google.Apis.Requests.RequestError Access Not Configured. Compute Engine API has not been used in project 123456 before or it is disabled. Enable it by visiting https://console.developers.google.com/apis/api/compute.googleapis.com/overview?project=123456 then retry. If you enabled this API recently, wait a few minutes for the action to propagate to our systems and retry. [403] Errors [ Message[Access Not Configured. Compute Engine API has not been used in project 123456 before or it is disabled. Enable it by visiting https://console.developers.google.com/apis/api/compute.googleapis.com/overview?project=123456 then retry. If you enabled this API recently, wait a few minutes for the action to propagate to our systems and retry.] Location[ - ] Reason[accessNotConfigured] Domain[usageLimits] ] , -2146233088
Likely Cause
The discovery service account used for has access to a GCP project that has not been set up or is disabled.
Solution
-
Go to GCP console.
-
Go to Compute Engine > VM Instances.
-
Set up the compute engine
Discovery Consumer: Syncing Machines Failed
Error
DiscoveryConsumer: Synchronizing Machines failed for [GCP Discovery Source]! Error: An issue was encountered during the scan. Google.Apis.Requests.RequestError Invalid value for field 'filter': 'filtername="value"'. Invalid list filter expression. [400] Errors [ Message[Invalid value for field 'filter': 'filtername="value"'. Invalid list filter expression.] Location[ - ] Reason[invalid] Domain[global] ] , -2146233088 Exception Caught: Google.Apis.Requests.RequestError Invalid value for field 'filter': 'filtername="value"'. Invalid list filter expression. [400] Errors [ Message[Invalid value for field 'filter': 'filtername="value"'. Invalid list filter expression.] Location[ - ] Reason[invalid] Domain[global] ] Attempting GCP scan for Instances Parameters are valid. Checking for permissions to list Projects.. Has permissions to list Projects.. Starting scan..
Likely Cause
The instance scanner custom filter is not valid.
Solution
-
In Secret Server, go to the GCP discovery source.
-
Edit the instance scanner.
-
Update the "custom filter" setting.
Discovery Consumer: Machine Scan Completed but Computers Failed Authentication
Error
DiscoveryConsumer: Synchronizing Machines failed for [GCP Discovery Source]! Error: An issue was encountered during the scan. Google.Apis.Requests.RequestError Invalid value for field 'filter': 'filtername="value"'. Invalid list filter expression. [400] Errors [ Message[Invalid value for field 'filter': 'filtername="value"'. Invalid list filter expression.] Location[ - ] Reason[invalid] Domain[global] ] , -2146233088 Exception Caught: Google.Apis.Requests.RequestError Invalid value for field 'filter': 'filtername="value"'. Invalid list filter expression. [400] Errors [ Message[Invalid value for field 'filter': 'filtername="value"'. Invalid list filter expression.] Location[ - ] Reason[invalid] Domain[global] ] Attempting GCP scan for Instances Parameters are valid. Checking for permissions to list Projects.. Has permissions to list Projects.. Starting scan..
Likely Cause
The instance scanner custom filter is not valid.
Solution
-
In Secret Server, go to the GCP discovery source.
-
Edit the instance scanner.
-
Update the "custom filter" setting.
Invalid Grant: Account Not Found
Error
An issue was encountered during the scan. Error:"invalid_grant", Description:"Invalid grant: account not found", Uri:"", -2146233088
Likely Cause
The service account does not exist in GCP. There may be a typo or it was deleted.
Solution
-
Go to GCP console.
-
Create a service account to use. See Task 1: Creating GCP Service Accounts.
Request Error: Caller Does Not Have Permission
Error
An issue was encountered during the scan. Google.Apis.Requests.RequestError The caller does not have permission [403] Errors [Message[The caller does not have permission] Location[ - ] Reason[forbidden] Domain[global]], -2146233088
Likely Cause
The service account does not have permissions in IAM.
Solution
-
Go to GCP console.
-
Select IAM.
-
Click the Service Account menu item to create a service account with the desire permissions. See Task 1: Creating GCP Service Accounts and Task 2: Setting GCP Permissions.