Entra ID Discovery
Overview
Secret Server can scan Microsoft Entra ID for Roles and Users. Users can be exported as secrets of the Entra ID User Account template.
Configuration
Setting permissions:
-
Create an App Registration in Entra ID:
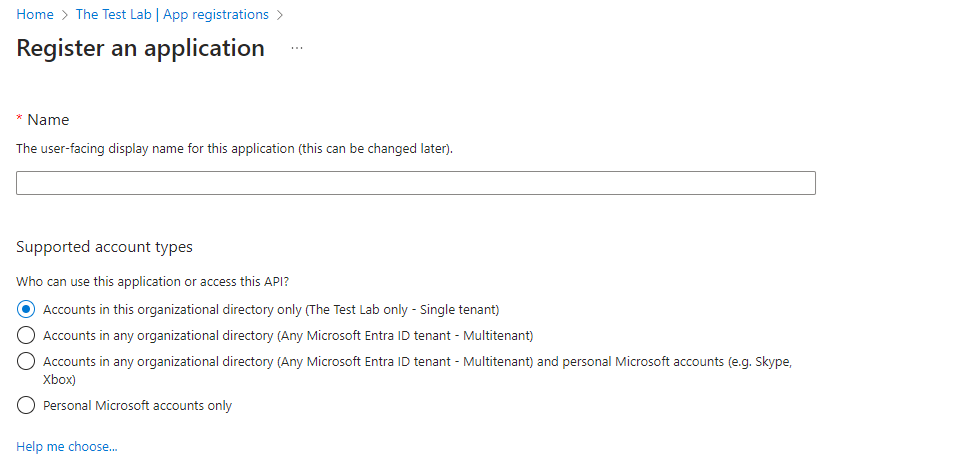
-
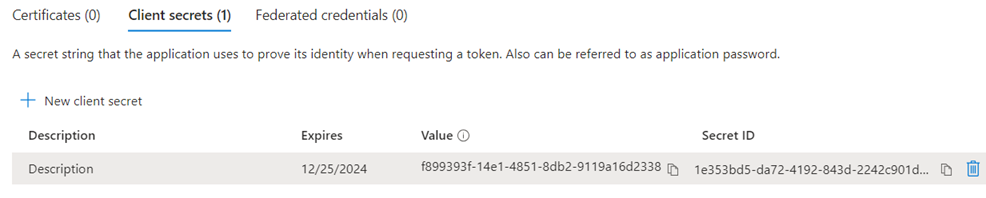
Add a client secret to the registration:
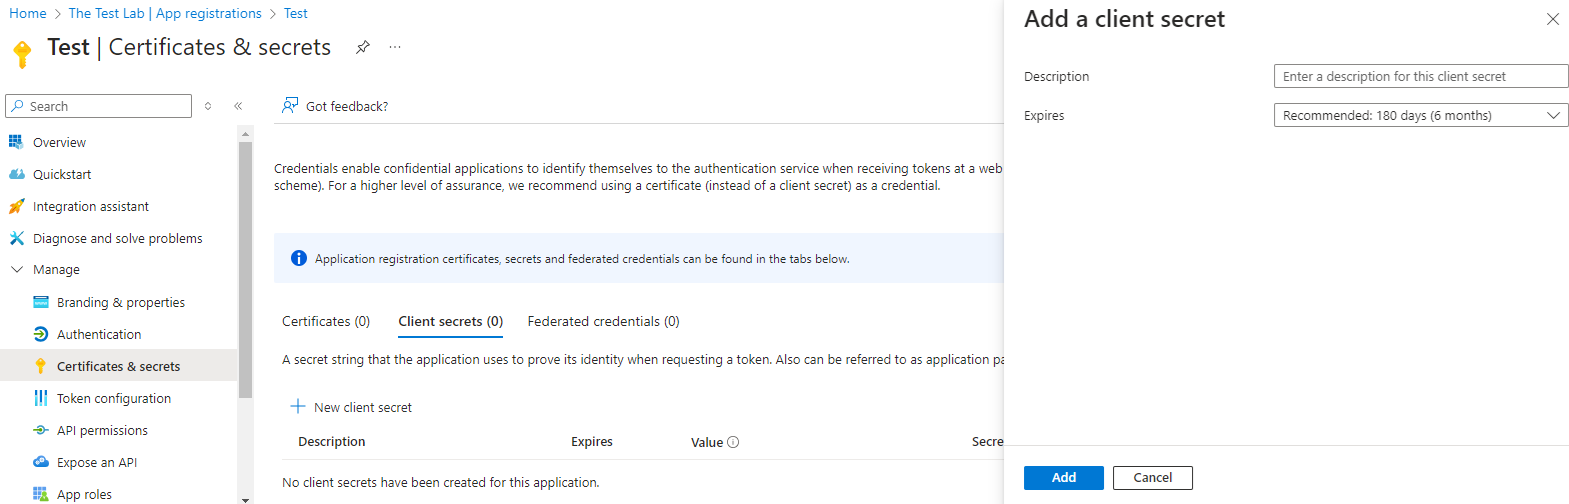
-
Once the client secret is created, the following data will appear. Copy the data in the Value column immediately—it will not be displayed again:
-
Grant API Permissions for the registration. Click Add A Permission to add each permission. The minimum required permissions for discovery are:
- EntitlementManagement.Read.All
- RoleManagement.Read.Directory
- User.Read.All
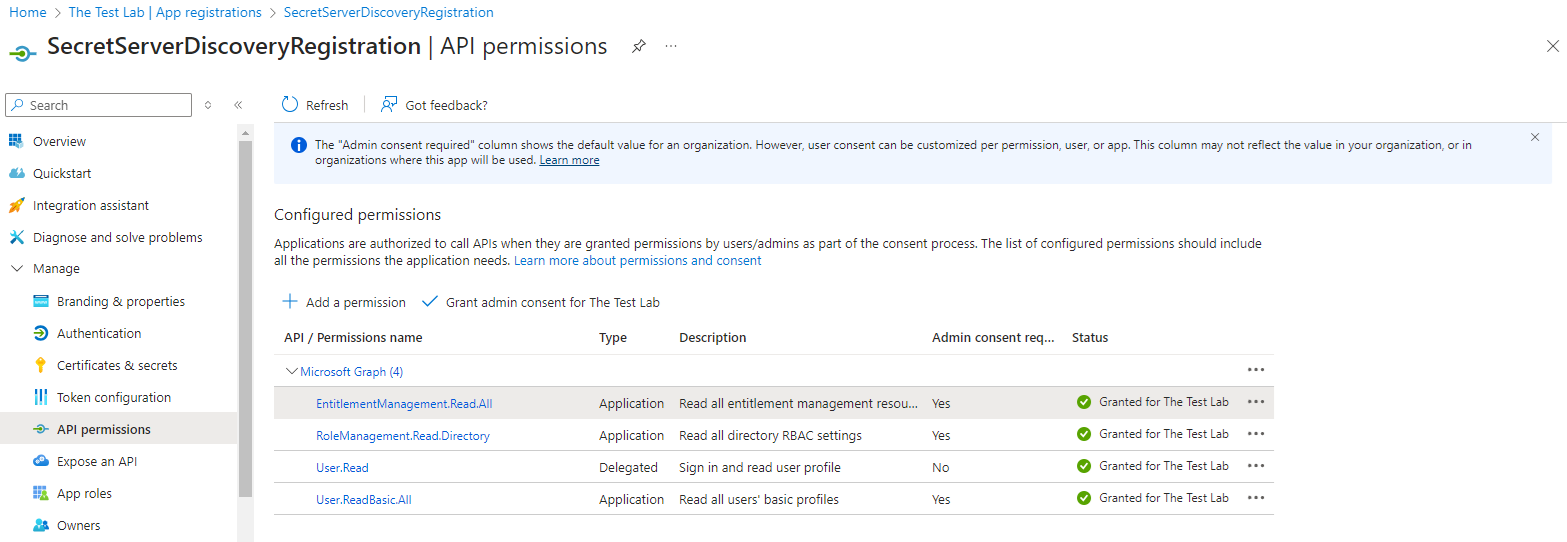 Permissions must be added as Application Permissions not Delegated Permissions.The Application Registration may have permissions granted by default in addition to the ones listed above. These should have no impact on Discovery.If you want to use the same Application Registration for password changing you will also need the User.ReadWrite.All and UserAuthenticationMethod.ReadWrite.All permissions.
 - Map the appropriate fields to an Azure Application Registration secret in Secret Server:
Azure Portal:

Secret Server:
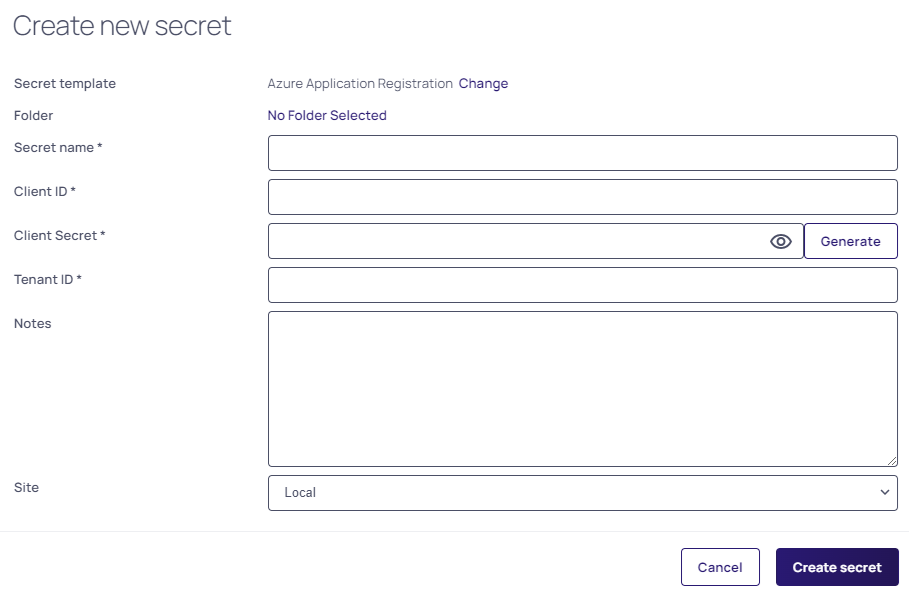
- When mapping the fields from Entra ID to the new secret, note the following:
- Application ID maps to Client ID.
- Directory ID maps to Tenant ID.
- The Client Secret is the value generated in Step 2.
-
In your Secret Server instance, create a new Discovery Source using the Azure Application Registration Secret:

-
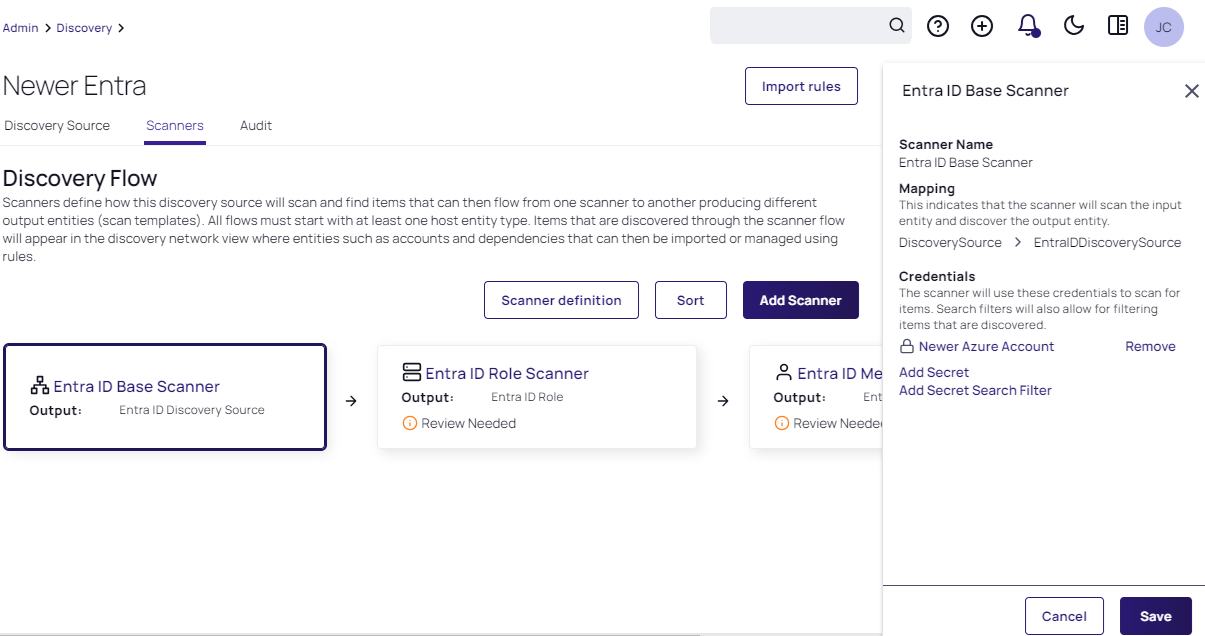
By clicking Save you are automatically prompted to add the scanner flow for Entra ID to the Discovery Source:

- For each scanner set the Azure Application Registration as the credential secret:
Scanning
Entra ID Roles can be obtained by running a Discovery Scan. To scan for Users, run a computer scan. Once scanning is complete you can view the role assignments for a user by clicking on their name in the Discovery Network View tab, or you can view user assignments for a role by clicking on the role name.