Configuring SAML Okta
Creating the Application Integration
-
Log into your Okta instance using an administrative account.
-
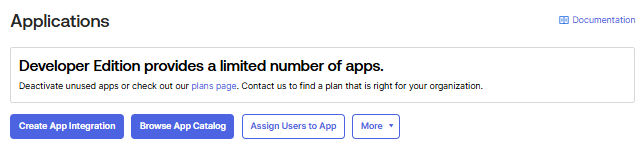
From the left-hand menu, click Applications > Applications.
-
Select Create App Integration:
-
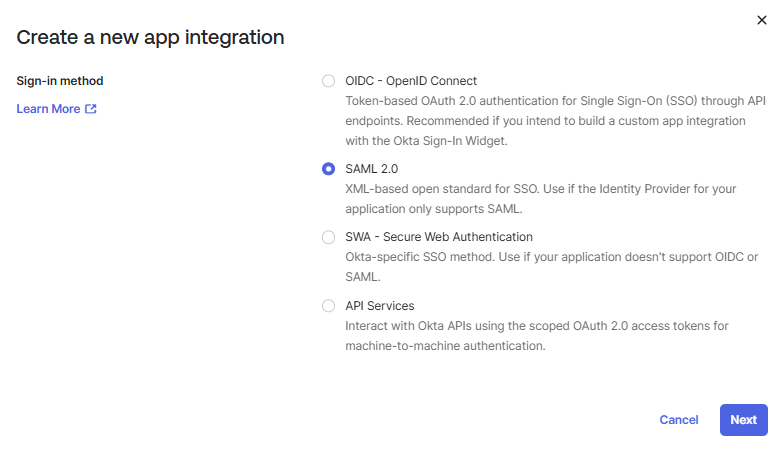
In the Create a new app integration pop-up, select SAML 2.0, and click Next:
-
The Create SAML Integration page loads.
-
In the General Settings tab, type the preferred name (for example, SecretServer) in the App name field, and click Next.
The App name field is the only required input on this screen. -
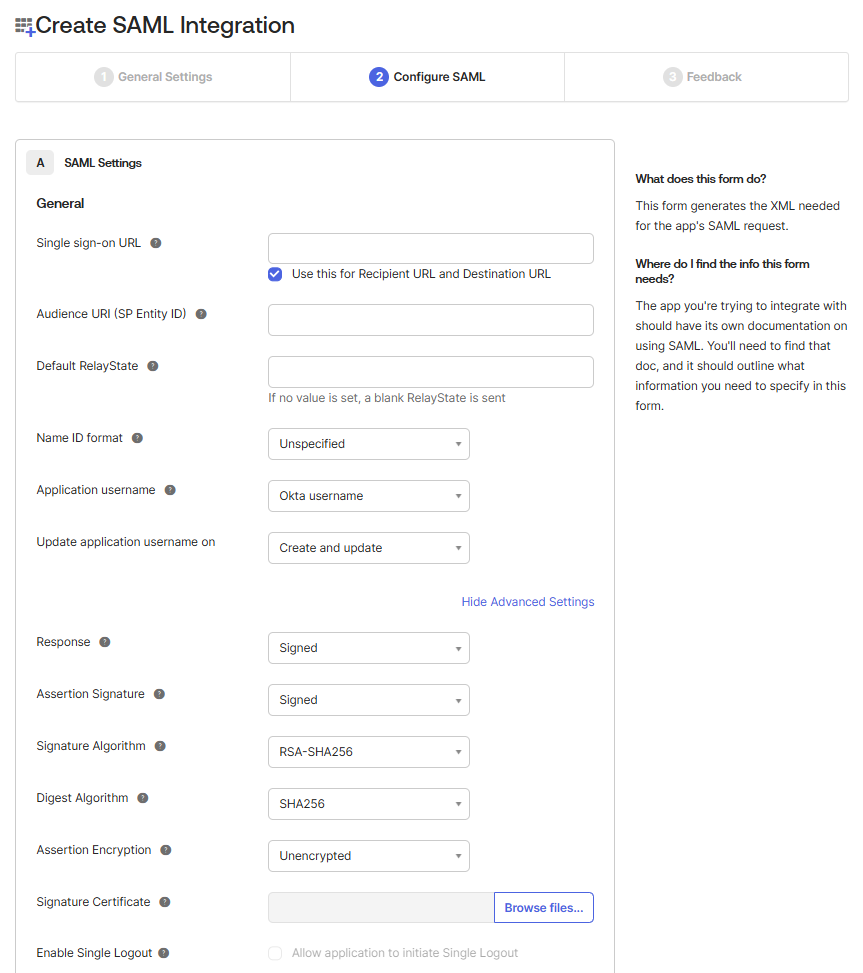
In the Configure SAML tab, in the A SAML Settings section, under General fill in the following mandatory fields:
-
Single sign-on URL: your [SecretServerInstanceName] URL.
For example: https://[YourSecretServerInstance.com]/saml/assertionconsumerservice.aspx
-
Make sure the Use this for Recipient URL and Destination URL checkbox is selected.
-
Audience URI (SP Entity ID): SecretServerServiceProvider.
-
Default RelayState: leave the field blank.
-
Name ID format: select Unspecified from the dropdown list.
-
Application username: select Okta username from the dropdown list.
-
-
Click Show Advanced Settings . A plethora of settings will load.
-
Look for the Signature Certificate option:
-
Click Browse files... to locate your public key
.cerfile.The public key (".cer") can be extracted using several methods, including OpenSSL, the Windows keychain, or through PowerShell. For a straightforward approach, you can use the following PowerShell command:
Copy(Get-PfxCertificate -FilePath C:\Path\To\Your\File.pfx).GetPublicKey().The file corresponds to the .pfx file uploaded to your Secret Server instance. See Configuring SAML Single Sign-on for details on configuring SAML SSO and uploading Certificates. -
Once chosen, the
.cerfile displays in the Signature Certificate field. -
Select the Enable Single Logout checkbox below the Signature Certificate field:

-
Configure the Single Logout (SLO) Settings as follows:
-
Single Logout URL: your [SecretServerInstanceName] followed by the URL string: /saml/sloservice.aspx.
Example: https://[YourSecretServerInstance.com]/saml/sloservice.aspx
-
SP Issuer: SecretServerServiceProvider
-
-
Click Next.
-
(Optional) In the Feedback page, provide feedback.
-
Select Finish. The "SecretServer" integration has now been created.
Required SAML Claim Attributes for Secret Server
When configuring Okta as the SAML Identity Provider for Secret Server, ensure the following claim attributes are included in the SAML assertion:
-
NameID: This is the primary identifier for the user. It should match the username format in Secret Server. For AD-synced users, this is typically SecretServerUsername@ADsyncDomain or ADsyncDomain\SecretServerUsername. For local users, it should be the Secret Server username.
-
Format: The NameID format should be set to "Unspecified".
-
Application username: Set to "Okta username" in the Okta SAML settings.
Example Attribute Mapping
-
NameID:
-
Okta Setting: Okta username
-
Secret Server Expectation: Secret Server username
-
Notes: Format should be "Unspecified". Must match the username in Secret Server.
-
-
Audience URI (SP Entity ID)
-
Okta Setting: SecretServerServiceProvider
-
Secret Server Expectation: SecretServerServiceProvider
-
Notes: Must match the SP Entity ID configured in Secret Server.
-
-
Single sign-on URL
-
Okta Setting: https://[YourSecretServerInstance.com]/saml/assertionconsumerservice.aspx
-
Secret Server Expectation: Assertion Consumer Service URL
-
Notes: Use for both Recipient and Destination URL in Okta SAML settings.
-
-
Application username
-
Okta Setting: Okta username
-
Secret Server Expectation: Secret Server username
-
Notes: Set to "Okta username" in Okta SAML settings.
-
Downloading the IDP Metadata File
-
In your Okta instance access Applications > Applications, and click on the Active option under Status.
-
Select the SAML app you previously created "SecretServer". The app opens on the Assignments tab.
-
Select the Sign On tab.
-
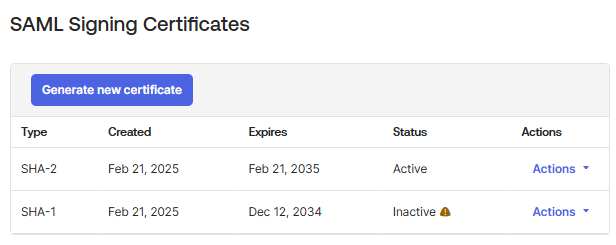
Go to the SAML Signing Certificates section and look for the certificate marked Active in the status column.
-
Select the Actions dropdown menu for that certificate and click View IdP Metadata:
-
Once the IdP metadata page loads displaying the XML file, right-click the page and select Save As or Save Page As (depending on the browser).
-
Save the XML file as
metadata.xml. You will need this file to create the new SAML Identity Provider in Secret Server.
Configuring SAML in Secret Server for Okta
-
Log into Secret Server.
-
Access Settings > Configuration > SAML > Identify Providers.
-
Select the Create New Identity Provider button.
-
In the Identity Provider popup, select the Import IDP from XML Metadata option from the dropdown. The Import file option appears.
-
Click the Change link to import the Okta metadata XML file you saved earlier.
-
Click OK.
Verifying the Integration
Ensure that the integration works by testing the SAML login process. Users should be able to log into Secret Server using their Okta credentials without being prompted for additional login information. This setup will allow you to use Okta as the Identity Provider for SAML-based single sign-on in Secret Server, streamlining user authentication and enhancing security.