Setting the Logging Levels
Overview
Secret Server Web nodes and distributed engines log levels are remotely configurable and collectable. This feature is especially useful for large systems with many nodes and engines.
Configuration for the web nodes is found on the Server Nodes configuration page, alongside role settings. Configuration for distributed engines is found in the Distributed Engine configuration page. Log levels include: All, Debug, Info, Warn, Error, Off, and Not Set (the default). Previously, manual configuration file changes were required. "Not Set" relies on the configuration files for the logging level, which was the previous default behavior.
The diagnostic feature for collecting logs is improved and now gathers logs from all nodes and engines.
This feature is at Admin > Server Nodes and Admin >
Setting the Logging Level
Secret Server Web Servers
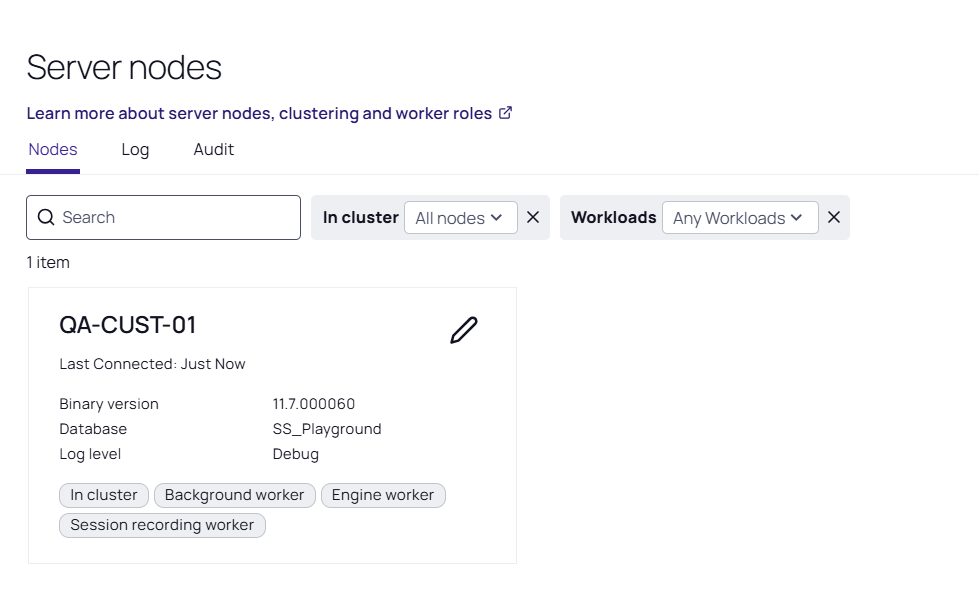
For Web servers, you can set the log Level for web server nodes from the Server Nodes page:
-
Navigate to the Server Nodes page.
-
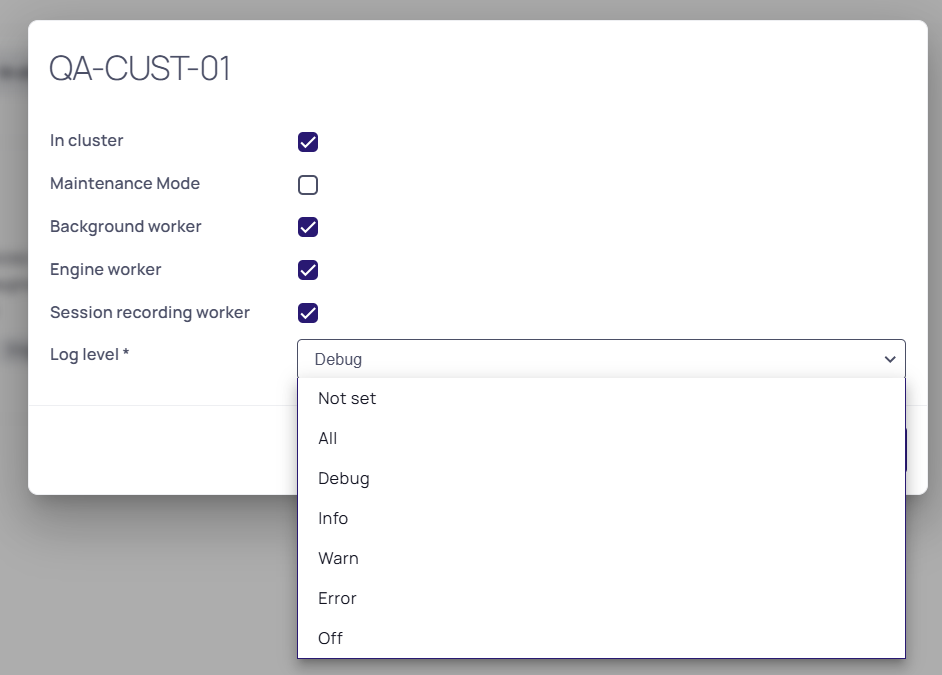
Click the edit icon next to the server you want to change. The settings become editable.
-
Click the Log Level dropdown list to select the desired level.
-
Click the save icon on the far right to save the change.
Distributed Engines
Similarly, for distribution engines:
-
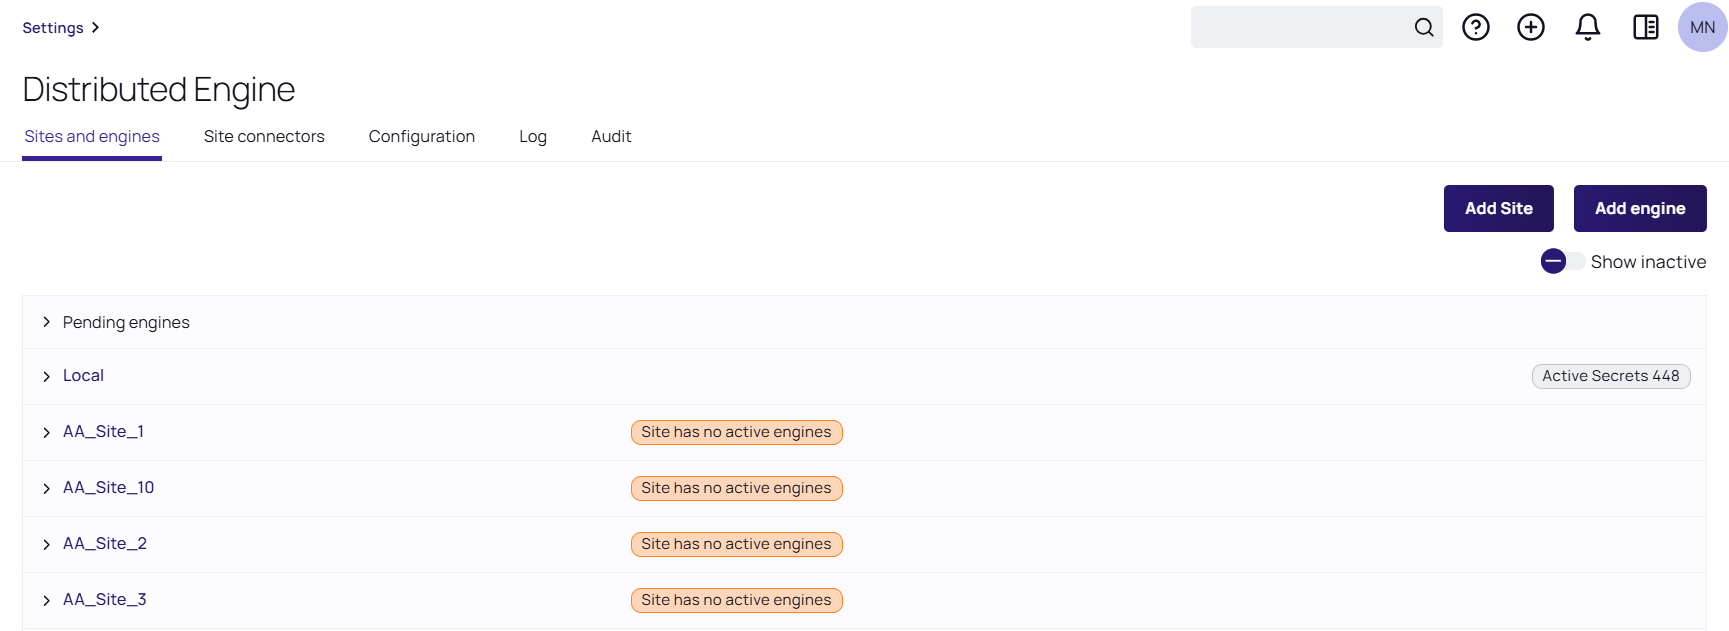
Navigate to the Distributed Engine.
-
Hover the mouse pointer over the desired engine. Three dots appear on the far right.
-
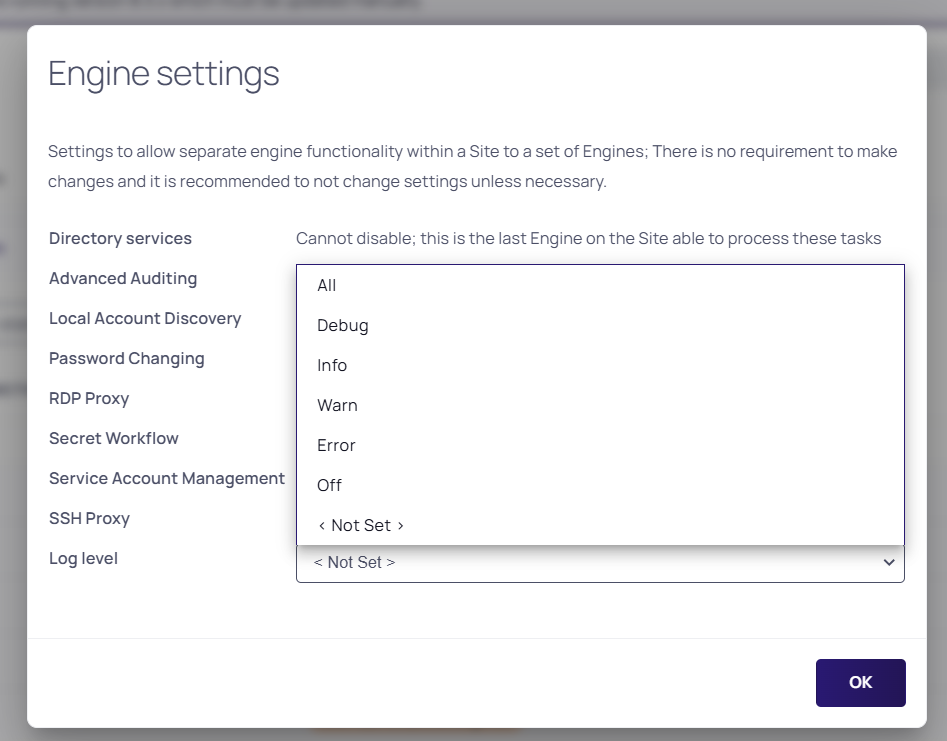
Click the dots icon and select Show Settings. The Engine Settings popup page appears:
-
Click the Log Level dropdown list to select the desired level.
-
Click the OK button to save the change.
Setting the Logging Level when a Node is Down (No Access to UI)
To manually change the logging level when a web node is down and there is no access to the UI, you can follow these steps:
-
Locate the Configuration File:
-
Access the server where Secret Server is installed.
-
Navigate to the web application’s root directory, typically found at C:\inetpub\wwwroot\SecretServer.
-
-
Edit the web-log4net.config file:
-
Open the web-log4net.config file in a text editor.
-
Use the find function (Ctrl + F) to locate the
<log4net>section. -
Modify the Logging Level:
-
Find the line with
<level value="INFO" />or the current logging level. -
Change the value to the desired logging level, such as
<level value="DEBUG" />. -
Ensure that the line is uncommented by removing any surrounding
<!-- and -->.
-
-
-
After making the changes, restart the IIS service to apply the new logging configuration. This can be done by running
iisresetin the command prompt. -
Verify the Changes:
-
Check the logs to ensure that the new logging level is capturing the desired information.
See Enabling Debug Mode in System Logs for more details.
-