Assigning Users to Groups
You are viewing documentation for an older version of Secret Server. If you are using Secret Server Cloud visit the current version of this documentation here. If you are using Secret Server On-Premises choose the version that matches yours from this list.
For release dates, end-of-support timelines, and upgrade guidance, see the Secret Server Product Lifecycle page.
For release dates, end-of-support timelines, and upgrade guidance, see the Secret Server Product Lifecycle page.
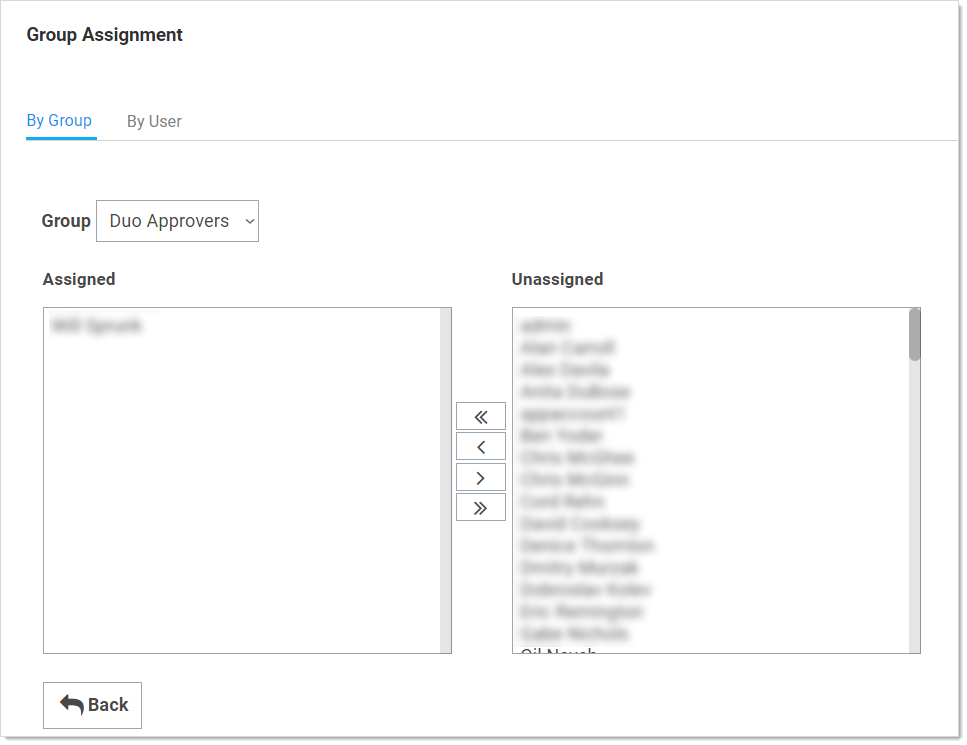
On the Group Assignment page, users can be added and removed from the group.
-
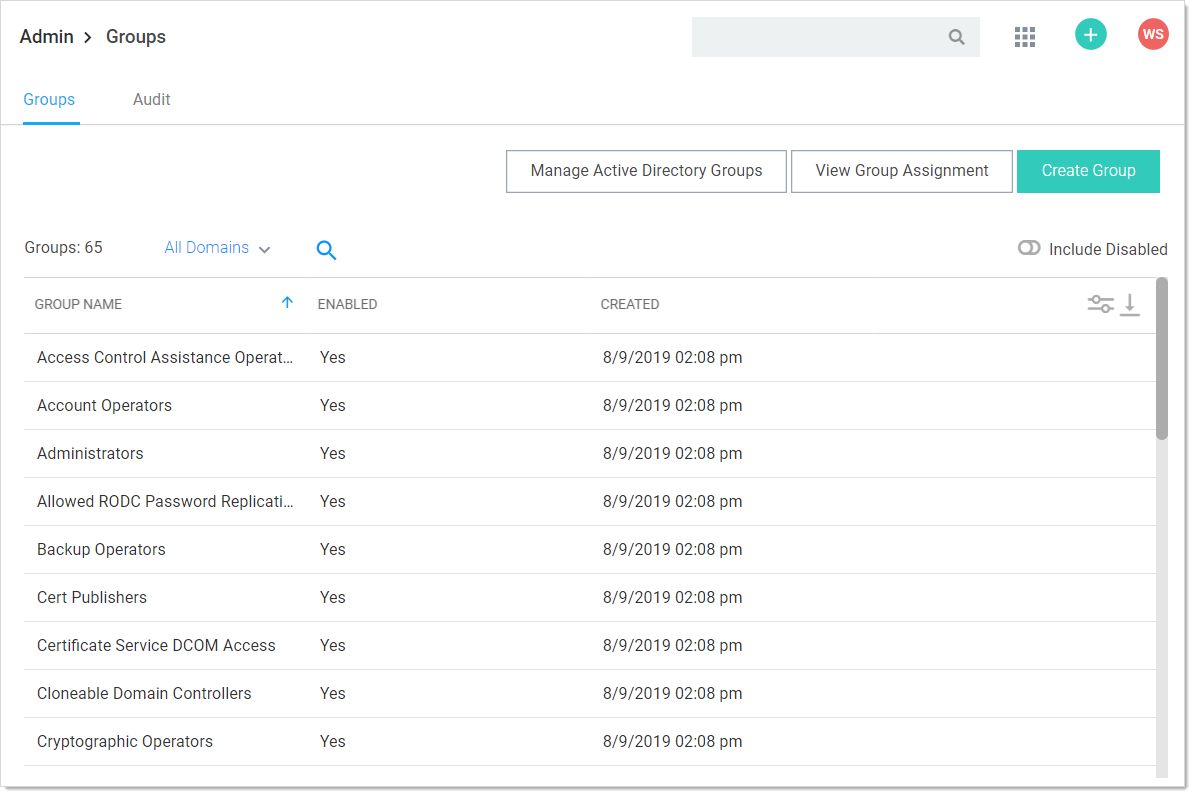
Navigate to the Groups page:
-
Click the View Group Assignment button. The Group Assignment page appears:
-
Use the arrow buttons to move users into and out of the current group. When you have finished with your changes, click the Save Changes button and your new group members are added.
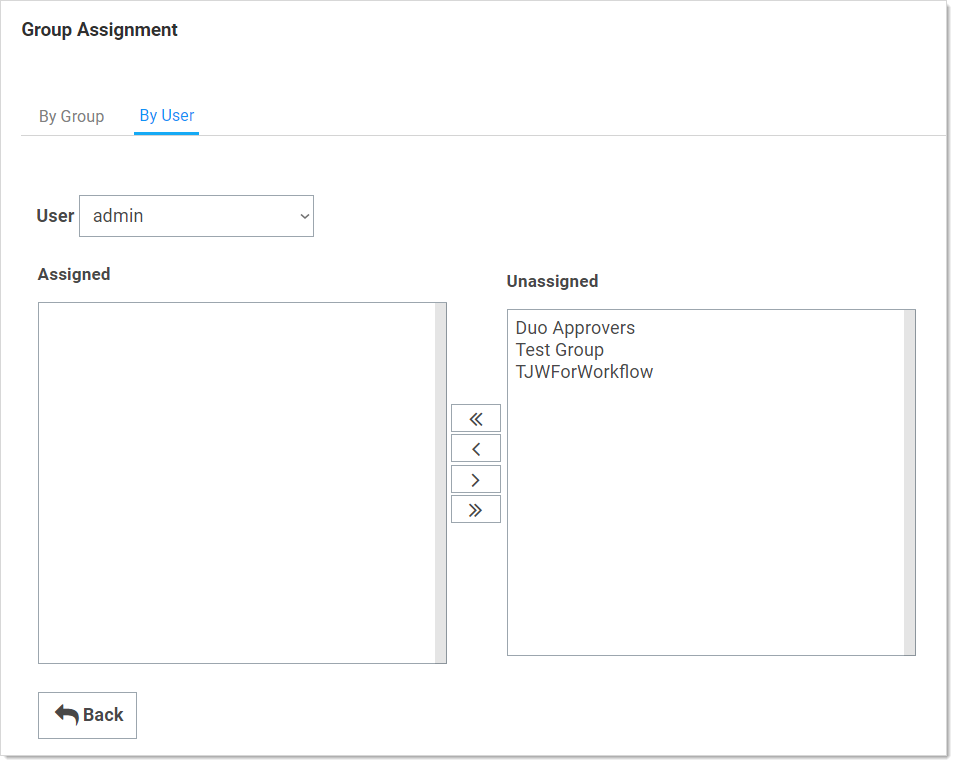
Alternatively, you can click the By User tab and manage the groups for a single user:
If the group was created using Active Directory synchronization, this group is not be editable. See Active Directory.