Secret Template List Fields
For release dates, end-of-support timelines, and upgrade guidance, see the Secret Server Product Lifecycle page.
You can view the latest version of the Secret Server documentation here.
Overview
With secret template list fields, administrators can create new lists that can be shared by multiple secrets. Clicking on an existing list goes to the details page for that list where the user can set the list's name, description, and the options available in the list.
You can optionally group list options by category, which make using very large lists easier. For instance, a list of machines might have the machines categorized by function, such as "Web Server" or "Database Server." You could also use categories for locations, such as "London," "New York," or "Tokyo."
List categories are displayed on the secret and on the launcher dialog with the options sorted alphabetically within categories, which are also sorted alphabetically. Options can be duplicated in multiple categories and will show up in each one. In addition to manually adding categories and options, you can upload a file containing the list options. Teams (Admin > Teams) – The team details page
Adding a New List Field
Task 1: Create the List
-
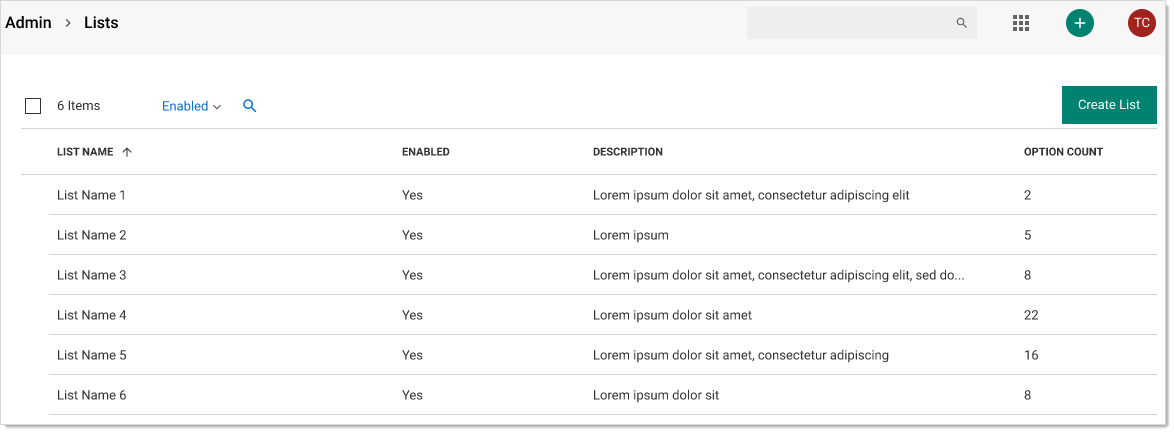
Go to Admin > Lists. The List page appears:
-
Click the Create List button. The Create List popup appears:

-
Type the name in the Name text box.
-
(Optional) Type a description in the Description text box.
-
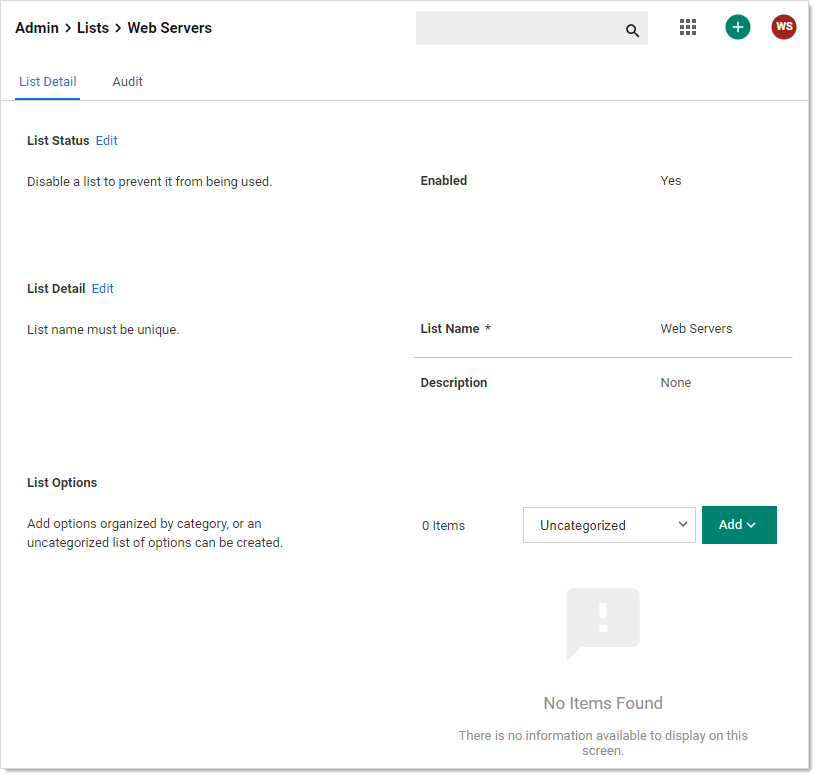
Click the Save button. The configuration page for the new list appears:
-
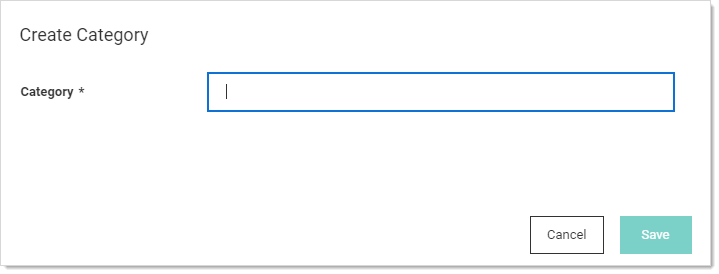
Click the Add button in the List Options section and select Create Category. The Create Category popup appears:
 If you want a list with no categories, choose Uncategorized for category, and follow these same instruction for adding options.You can also create categories from a comma-delimited list in a text file. Select the Add button and select Add from File. This can be either a list of options, one option per line, or a list of comma-delimited values in the format option,category with one pair per line. Files can also combine these formats, and any line without a comma will be treated as a option without a category.
 -
Type the name for the category in the Category text box. We typed "Manhattan."
-
Click the Save button. The category name now appears in the dropdown list:

-
Add another category the same way. We added "Albany."
-
Click the dropdown list to select a category you just added. We chose "Manhattan." A table appears below the dropdown list:
Note that there is no option (list item) listed.
-
Click the Add button and select Create Option. The Create Option popup appears:
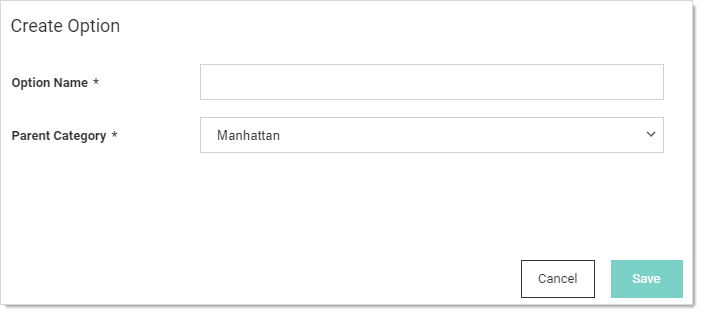
-
Type the name for the Option in the Option Name text box. We typed "Web Server."
-
Click to select the category the new option will belong to in the Parent Category dropdown list. We selected "Manhattan."
-
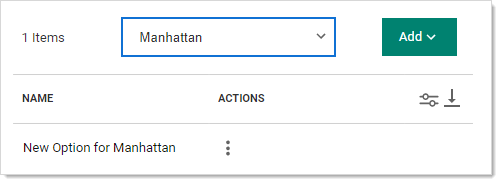
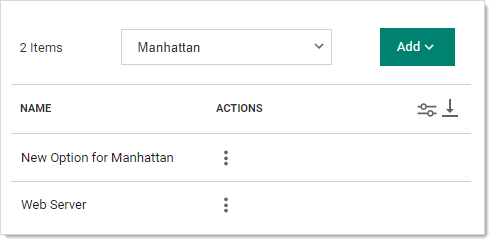
Click the Save button. The new option appears in the list:
-
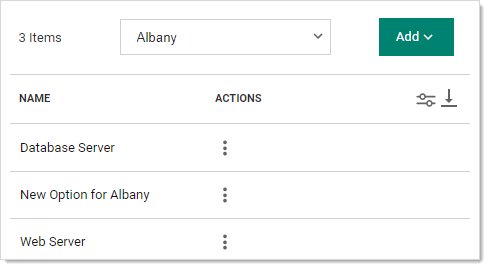
Add another option the same way. We added "Database Server."
-
Repeat the process for the Albany category. The list new table looks like this:
-
For future reference, click the three vertical dots button in the Actions column for one of the options. Three actions appear:
- Update Option: Rename the option
- Move to Category: Move the option to another category in the same list
- Delete Option: Remove the option from the category.
For now, we will not use any of them.
-
You now have a new categorized list available for secrets (via a secret template with the list).
If you ever want to view past changes to a list or category, click the Audit tab for the list.
Task 2: Create a Template Using the List
-
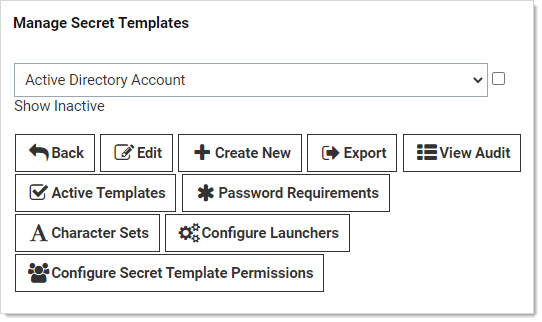
Go to Admin > Secret Templates. The Manage Secret Templates page appears:
-
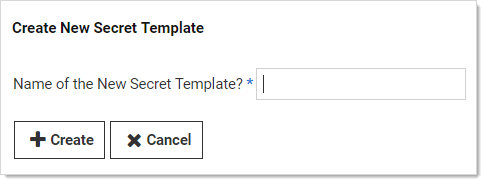
Click the Create New button. The Create New Secret Template page appears:
-
Type the template name in the Name of the New Secret Template? text box. We typed "Acme Server Template."
-
Click the Create button. The Secret Template Designer page for that new template appears:

-
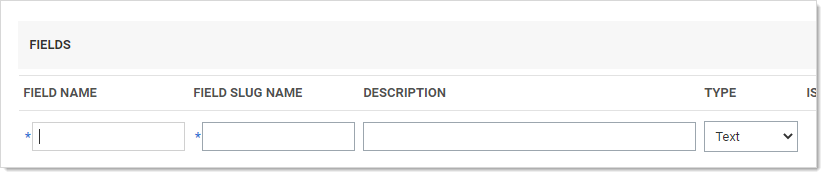
Go to the Fields section:
-
Complete the following steps for
-
Type
My Server Listin the Field Name text box for the first (and currently only) field. -
Click the Type dropdown list for the field and select List.
-
Click to select the Is Required check box.
-
Click the + on the far right of the table row.
-
Type
Passwordin the Field Name text box for the second field. -
Click the Type dropdown list for the field and select Password.
-
Click to select the Is Required check box.
-
Click the + on the far right of the table row.
-
Type
Usernamein the Field Name text box for the third field. -
Click the Type dropdown list for the field and select Text.
-
Click to select the Is Required check box.
-
Click the + on the far right of the table row.
-
Type
Computerin the Field Name text box for the forth field. -
Click the Type dropdown list for the field and select Text.
-
Click to select the Is Required check box.
-
Click the + on the far right of the table row.
-
Type
Domainin the Field Name text box for the fifth field. -
Click the Type dropdown list for the field and select Text.
-
Click to select the Is Required check box.
-
Click the + on the far right of the table row.
-
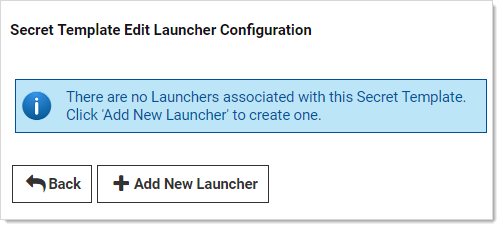
Click the Configure Launcher button. The Secret Template Edit Launcher Configuration page appears:
-
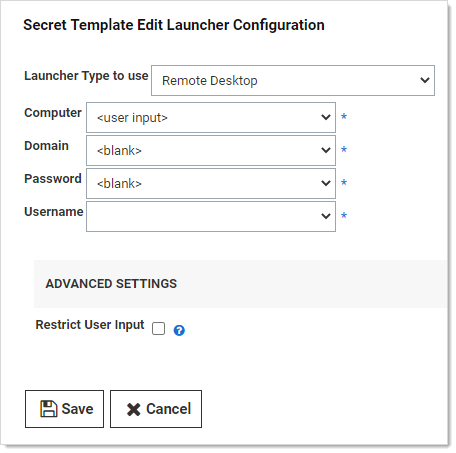
Click the Add New Launcher button. The Secret Template Edit Launcher Configuration page appears:
-
Click the Launcher Type to Use dropdown list and select Remote Desktop.
-
Click each of the four following dropdown lists and select the matching value.
-
Click to select the Restrict User Input check box. A new section appears:
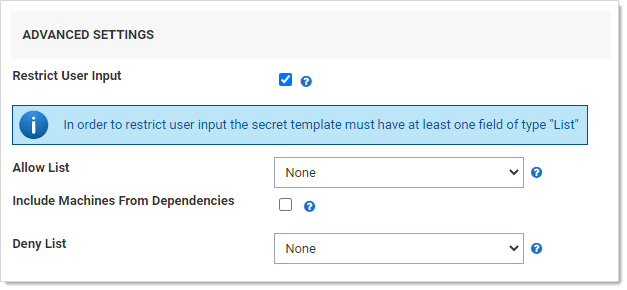
-
Click the Allow List dropdown list to select My Server List.
-
Click the Save button.
-
Click the Home button in the main menu to return to the Secret Server dashboard.
Task 3: Create a Secret
-
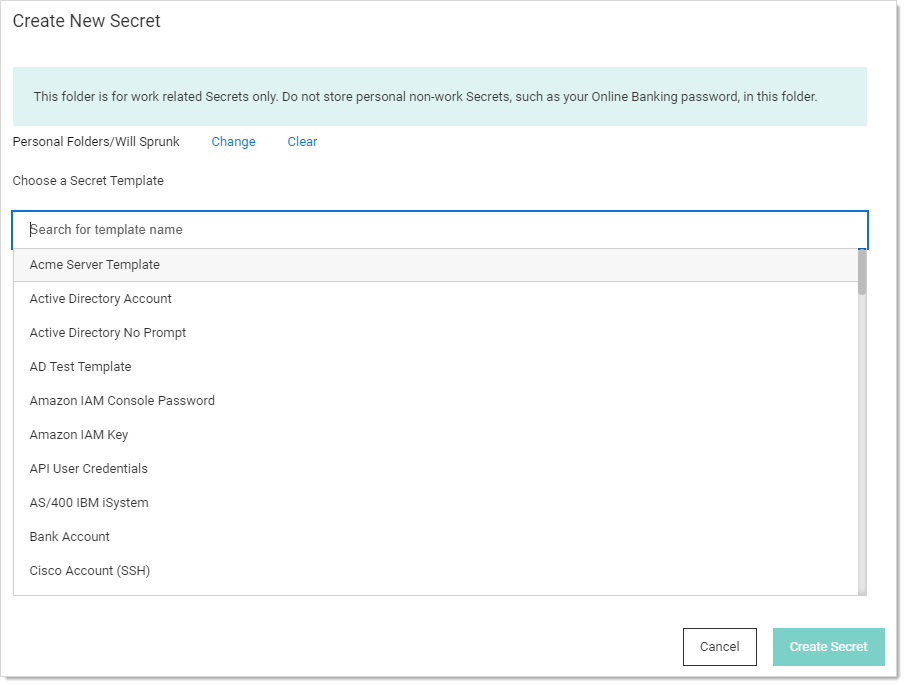
Click the + next to Secrets on the main menu to create a new secret based on the template you just created. The Create New Secret popup appears:
-
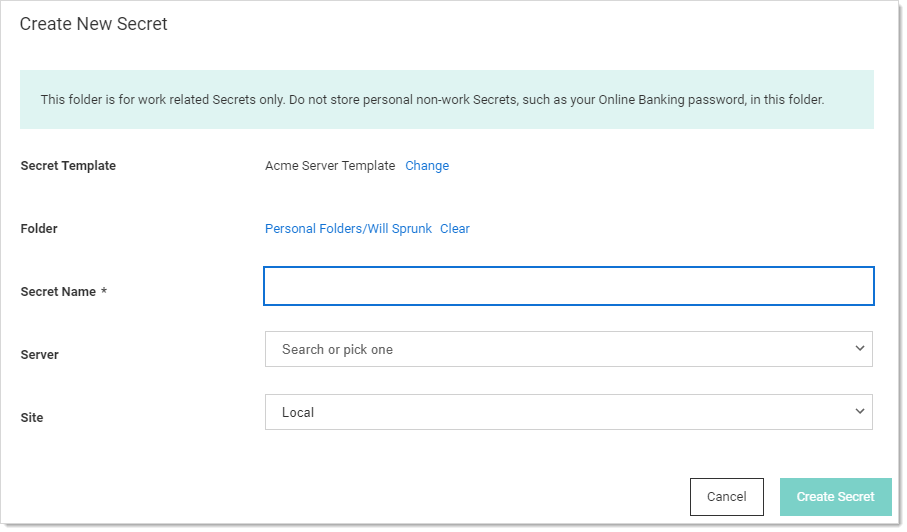
Click the secret template you just created in the Choose a Secret Template list. Another Create New Secret popup appears:
-
Note that one of the dropdown lists has the same name as the list field you created earlier. Click it, and you see the list categories you created. The list is available for that secret's launcher. In addition, you can use a list to provide the allow and deny lists for restricted user input based on the user's selection of the list in the secret.