Configuring SAML Single Sign-on
SAML Overview
Secret Server allows the use of SAML Identity Provider (IDP) authentication instead of the normal authentication process for single sign-on (SSO). To do this, Secret Server acts as a SAML Service Provider (SP) that can communicate with any configured SAML IDP.
In the diagram below, Secret Server acts as the service provider. Any configured SAML IDP can be used for this process and there are several well tested providers, including OKTA, OneLogin, Azure ADFS, and Microsoft ADFS.
Figure:Secret Server as a SAML Identity Provider

Prerequisites
Licensing and Version
Secret Server Professional Edition or higher, upgraded to version 10.5 or later. To install a new SAML license, go to Admin > Licenses > Install New License.
.NET Framework 4.6.2+
To use SAML 2.0, you must install .NET Framework 4.6.2 or higher on your Web server. This allows Secret Server to use Microsoft's "next generation" CryptoNG API for signing SAML requests, instead of being limited to the much older CryptoAPI. This is often necessary to use modern SSL certificates and is strongly recommended as a security best practice.
To download and install the latest version of .NET Framework: See Microsoft .NET Framework 4.8 offline Installer for Windows for the latest version as of when this topic was written. If you have already installed Secret Server on the same Web server, you have already done this.
Administer Configuration SAML Role Permission
The "Administer Configuration SAML" role permission is required to configure SAML settings (no specific permission is required to access Secret Server via SAML). To grant a user this permission from an administrator account:
-
Go to Admin > Roles. The Roles page appears.
-
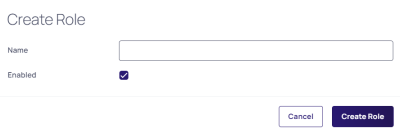
Click the Create Role button. The Create Role window appears:
-
Type the name, such as
SAML, in the Name text box. -
Click to select the Enabled check box.
-
Click Create Role. The role is created and the role page is now opened.
-
Under the Permissions tab, click the Edit button.
-
Select All next to the search box, select Administer Configuration SAML from the list, and click Save.

-
Under the Assignments tab, click Edit, select All next to the search box, select the users that you would like to assign to the role, and click Save.


Setting up Secret Server
-
Navigate to Admin > Configuration.
-
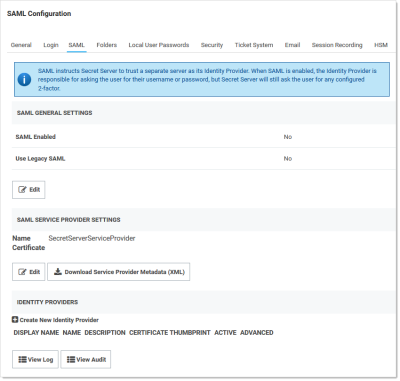
Click the SAML tab:
-
Click the Edit button in the SAML General Settings section.
-
Click to select the SAML Enabled check box.
-
Click the Save button.
-
Once you have SAML setup on our identity provider, then under General Settings, click Edit, then check the SAML Enabled checkbox. Save changes.
-
Click the Edit button in the SAML Service Providers section.
-
Type a name for your Secret Server service provider, such as
SecretServerServiceProvider, in the Name text box. -
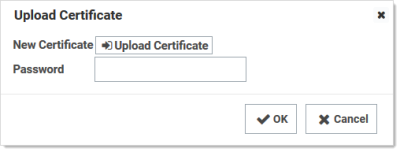
Click the Select Certificate link. The Upload Certificate popup appears:
-
Click the Upload Certificate button to upload the certificate used for Secret Server's HTTPS configuration.
What type of certificate can be used?
-
The uploaded SAML certificate requires a
.pfxfile format. -
For on-premises instances: The uploaded certificate should match the one used for Secret Server's HTTPS configuration, or it can be created as a self-signed certificate using Generating a Self-Signed Certificate for Scripts.
-
For Secret Server Cloud users: Generate your own certificate using the same PowerShell script.
Run the referenced PowerShell script as an administrator on a machine with .NET 4.5 or above and replace the variables in the script as directed. Your certificate is created in the directory from which you run the script. The subject name on the certificate is irrelevant, though for on-premises instances it typically matches the URL of the instance.
-
-
Locate your certificate
.pfxfile and select it. -
Click the Open button. The new certificate appears.
-
Type the access password for the private key of the certificate in the Password text box.
-
Click the OK button. The certificate is uploaded and tested, and the popup disappears. The certificate now appears in the SAML Service Provider Settings section.
If you have an outdated version .NET Framework (earlier than 4.6.2), you may see an error recommending you upgrade to fix the error. Reload the certificate after you do so. -
Click the Save button.
-
Click on Download Service Provider Metadata (XML) to download the
SecretServerSAMLMetatdata.xmlfile. This file is needed when setting up SAML on your Identity Provider. -
Set up your Identity Provider using the
SecretServerSAMLMetadata.xmlfile from the previous step. -
Click the Create New Identity Provider link. An Identity Provider popup appears.
-
Click the Import IDP from XML Metadata button.
-
Navigate to your
SecretServerSAMLMetadata.xmlfile and select it. This is used for uploading into your IDP, which varies by provider. Follow instructions in the following section.. -
Click the Open button.


Setting up IDPs
IDP setup varies by provider. Go to the TDP Integration site for instructions for your provider.
SecretServerUsername@ADsyncDomain orADsyncDomain\SecretServerUsername. If using SLO, ensure that the NameID is set correctly in the IDP as an outgoing claim for the Secret Server Service Provider. If a user has different sAMAccountName and userPrincipalName in Active Directory, custom rules in the IDP can be created.Lockout Workaround
Locked Out? Here's how you get around SSO. If during the configuration process for SAML you lock yourself (as an administrator or a user) out of Secret Server, you can log on Secret Server without using the SSO workflow by using this URL string:
[YourSecretServerInstanceName]/login.aspx?preventautologin=true
The role permission needed for this is "Bypass SAML Login," which admins have by default.