Setting up Internet Connected Clients
On-premises Privilege Manager instances need to use an Azure Service Bus for internet connected clients. The Azure Service Bus is a subscription service that external agents can connect to and use to communicate with an internal Privilege Manager Server (TMS) instance.
Note: Cloud customers don't need to use the Internet Connected Clients set-up, because their clients can already connect to the internet-based cloud instance.
With Privilege Manager 10.7 and up, TLS 1.2 is supported.
This page is broken up into three sections:
- Azure Service Bus Queue Configuration
- Setting up the Service Bus as a Foreign System in Privilege Manager
- Configuring the Agents to use the Service Bus (if this is a new agent installation, the Agents can be pointed directly at the Service Bus namespace URL)
Azure Service Bus Queue Configuration
Delinea requires a Service Bus relay for remote communication. For this a Service Bus Queue needs to be created, follow the procedure as outlined by Microsoft here in Quickstart: Use Azure portal to create a Service Bus queue.
- In the Azure Service Bus portal go to the Shared access policies page.
- Find the policy called RootManageSharedAccessKey. If you don't have one yet, create one by that name and select the Manage option and save it.
- On the RootManageSharedAccessKey policy you can see the Primary Key field. Make note of where this is. We have use it in a step down below.
- Next, navigate to the Queues page and create a new queue.
- Do not check any of the options, using the defaults is fine. Take note of the queue name you gave it.
Next you will need to follow the instructions below to create a credential for the Service Bus and add the Service Bus as a foreign system in Privilege Manager.
Setting up the Service Bus Foreign System
The Azure Service Bus requires a Foreign Systems configuration in Privilege Manager. To configure a Service Bus instance with a custom URL and credentials follow these steps:
-
In the DelineaPrivilege Manager Console, click Admin | Configuration.
-
Click the User Credentials tab.
-
Click Create.
-
Enter a Name, for example Azure Service Bus Credential.
-
Set the Account name to RootManageSharedAccessKey.
-
Set the Password to the value of the Primary Key obtained during the Azure Service Bus configuration procedure step 3 under "Azure Service Bus Queue Configuration" above.
-
Click Save Changes.
-
-
Navigate to Admin | Configuration and select the Foreign Systems tab.
-
Click the Azure Service Bus option.
-
Click Create.
-
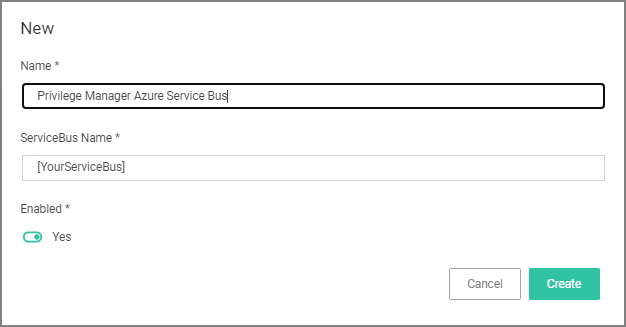
Enter a Name, for example Privilege Manager Azure Service Bus.
-
Set the ServiceBus Name to the namespace of the Service Bus from the Azure Portal. To find this value, open the Azure Portal, locate the Service Bus that is being used for this integration (refer to the intro above). Go to the Properties page and locate the Name property (generally, this is the same name as the instance you just located in the list of Service Bus instances).
-
Set the Enabled switch to No for now.
-
Click Create.
-
Set the credential to the credential created in step 3 of this procedure (Azure Service Bus Credential).
-
Leave the URL field as is (and ignore the fact that it's called URL – it's just the Service Bus name).
-
Make sure the URI matches the first part of the namespace created in Azure.
-
Set the QueueName to the same queue name created above in step 4 under "Azure Service Bus Queue Configuration".
-
Set the Queue Policy Name to RootManageSharedAccessKey.
-
Set the Queue Policy Secret to the Primary Key as obtained in step 3 under "Azure Service Bus Queue Configuration" above.
-
Click Save Changes.
-
Enable the Service Bus, set Enabled switch to Yes.
-
-
To verify everything is working correctly, open your browser and point it to the ServiceBus worker service:
- On-Premises:
https://yourinstance.privilegemanager.com/Tms/ServiceBus/WorkerService.svc
Wait for the page to respond.
- On-Premises:
Configuring Agents to Use the Service Bus
When setting the URL for Agent communication, Internet connected clients need to use the Service Bus URL created above.
Note: For new installations, the agents can be set up to communicate with the service bus during the initial installation process when the TMSURL and installation codes are provided, refer to Bundled Install.
Using regedit
- Open the Registry Editor (regedit).
- Navigate to HKEY_LOCAL_MACHINE | SOFTWARE | Policies | Arellia | AMS.
- Right click BaseURL and select Modify.
- In the Edit String dialog box, change the BaseURL to your Privilege Manager (TMS) Address based on the Azure Service Bus Queue configuration, for example
https://[your company].servicebus.windows.net/, which in our example ishttps://testing.servicebus.windows.net/ - Close the Registry Editor.
- Restart the Agent service.
Using PowerShell
To modify the TMS address via PowerShell, run this command as Administrator:
The script will then ask you to type in the fully qualified domain name of the server, enter the Azure Service Bus Queue URL, for example https://[your company].servicebus.windows.net/, which in our example is https://testing.servicebus.windows.net/.