macOS Application Approval Process via Sudo Plugin
The macOS sudo plugin provides the means to run an application elevated via Terminal.app on macOS systems running Catalina or newer macOS versions and the SYSEX Privilege Manager agent on the workstation. The sudo plugin also provides user feedback via Terminal when the request is approved or denied.
When an application policy requires approval, the user will initially be presented with the defined approval action text along with the following message in Terminal Enter your response, or type Ctrl+D to cancel:, this allows the user to cancel out of the approval process and the command will not be run. For the approval workflow, the user has to enter a response text for the approval. Once the approval has been submitted the user is presented with a message in Terminal Waiting for approval... (Ctrl+C to cancel). The application execution is blocked until the approval comes in. If the request is approved, the application runs. If it is denied, the process exits. If the user cancels, the command will not run.
Not supported on endpoints running the KEXT agent.
Example: Elevate systemsetup Command
The following policy is configured to elevate the systemsetup command after an approval when run via sudo.
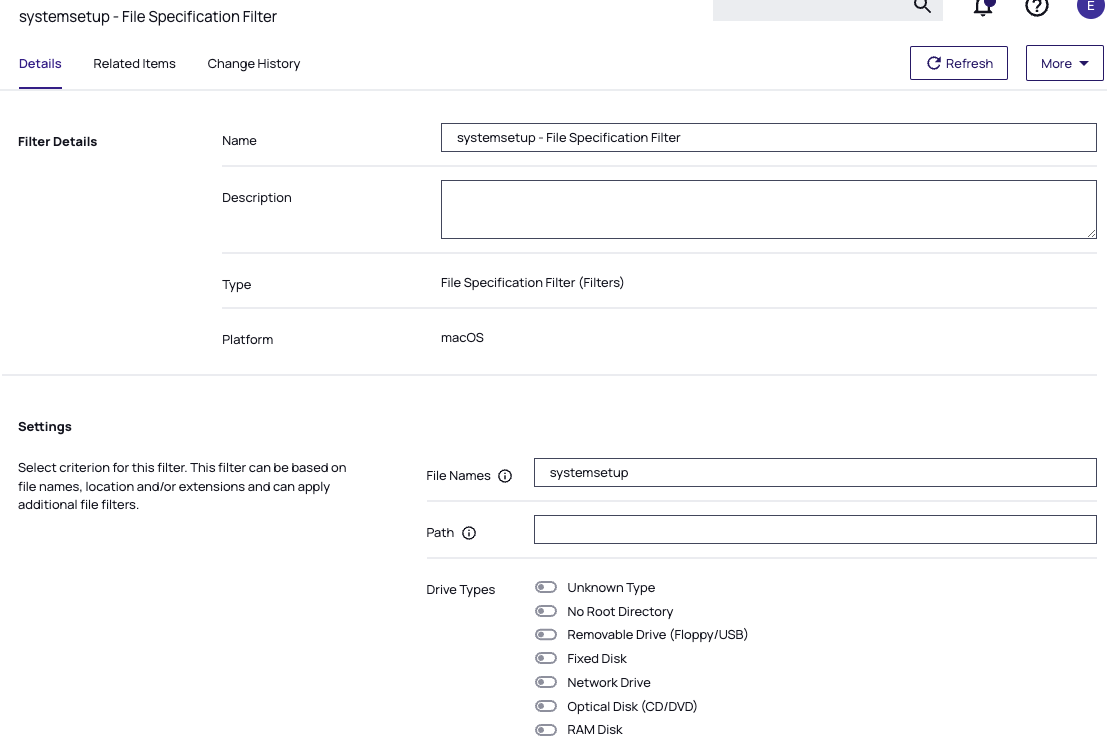
Create a systemsetup File Specification Filter
This filter will specify the applications targeted.
-
Navigate to Admin | Filters.
-
Click Create Filter.
-
From the Platform drop-down, select macOS Computers Filters.
-
From the Type drop-down under File Filters (macOS), select File Specification Filter.
-
Name the filter and provide a description to reflect the purpose, for example systemsetup - File Specification Filter.
-
Click Create.
-
Under Settings | File Names, enter systemsetup.
-
Click Save Changes.
Creating the Command Line Approval Action
This action will be added under the Actions section of the policy.
-
Navigate to Admin | Actions.
-
Click Create Action.
-
From the Platform drop-down, select macOS Computers Actions.
-
From the Type drop-down, select Command Line Approval Message.
-
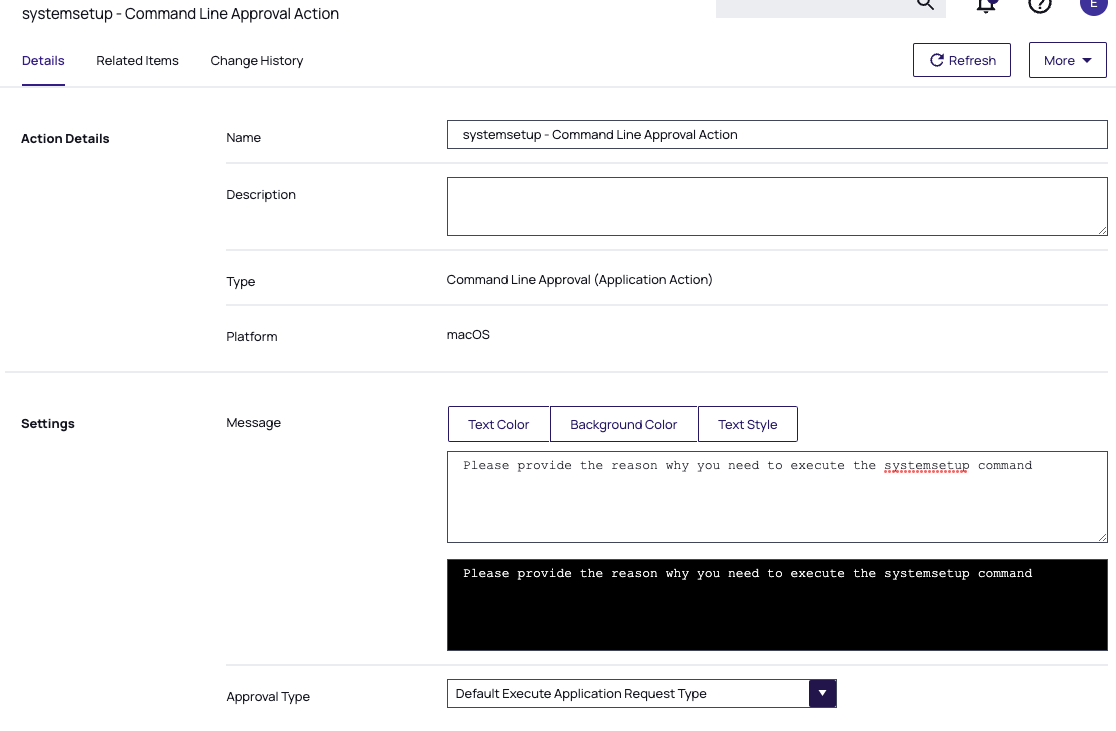
Name the action and provide a description to reflect the purpose, for example systemsetup - Command Line Approval Action.
-
Click Create.
-
Under Settings | Message, provide a message that will be displayed to the user before they are required to enter their reason, for example Please provide the reason why you need to execute the systemsetup command.
- Under Settings you can also set the Text Color, Background Color, and Text Style that is presented to the user when entering the approval process.
-
From the Approval Type drop-down, select Default Execute Application Request Type.
-
Click Save Changes.
Creating the Systemsetup Command Line Approval Policy
-
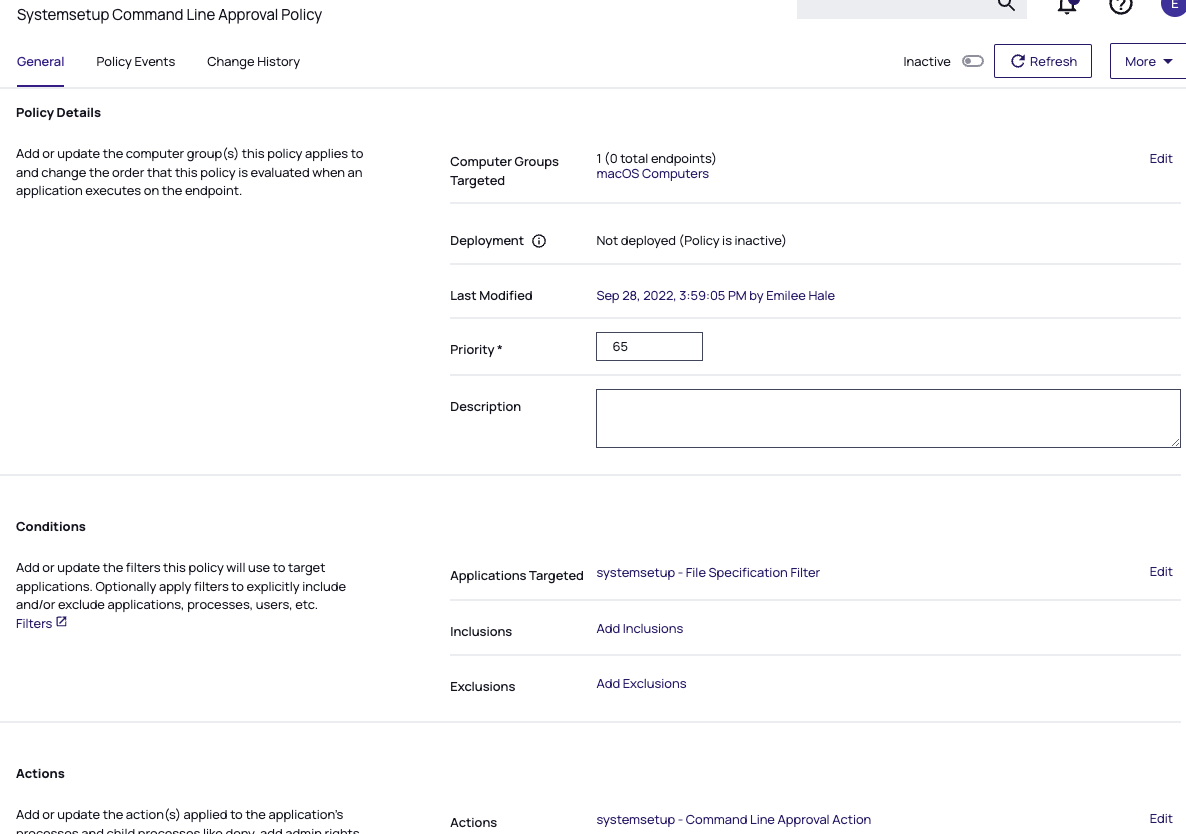
Navigate to your macOS computer group and select Application Policies.
-
Click Create Policy.
-
Select the option Skip the wizard, take me to a blank policy.
-
Name the policy, for example Systemsetup Command Line Approval Policy.
-
Click Create Policy.
-
Under Conditions | Applications Targeted, click Add Application Target.
-
Search for and add the systemsetup - File Specification Filter previously created.
-
Click Update.
-
Under Actions, click Add Actions.
-
Search for and add the systemsetup - Command Line Approval Action previously created.
-
Search for and add the built-in Run as Root action.
-
Click Update.
-
Click Save Changes.
-
Enable the Policy.
Workstation Interaction
-
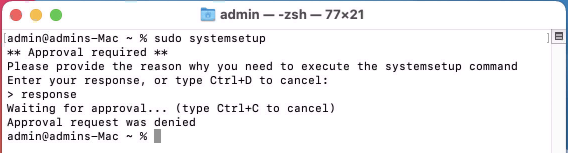
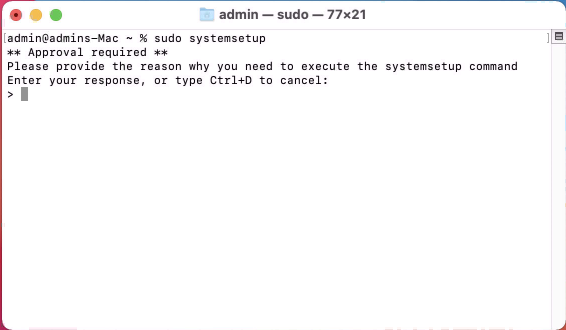
At the macOS endpoint, open Terminal.app and run systemsetup via sudo. The Approval required message opens:
-
Enter the approval reason and hit the Enter key.
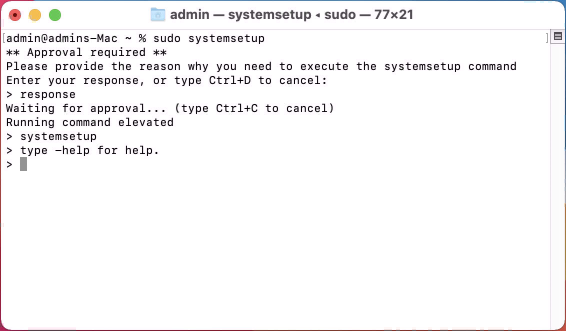
In the Terminal, Waiting for approval... (Ctrl+C to cancel) is displayed and the approval request is submitted. You will be notified of any status change via the Terminal.app.
Privilege Manager Console Interaction
-
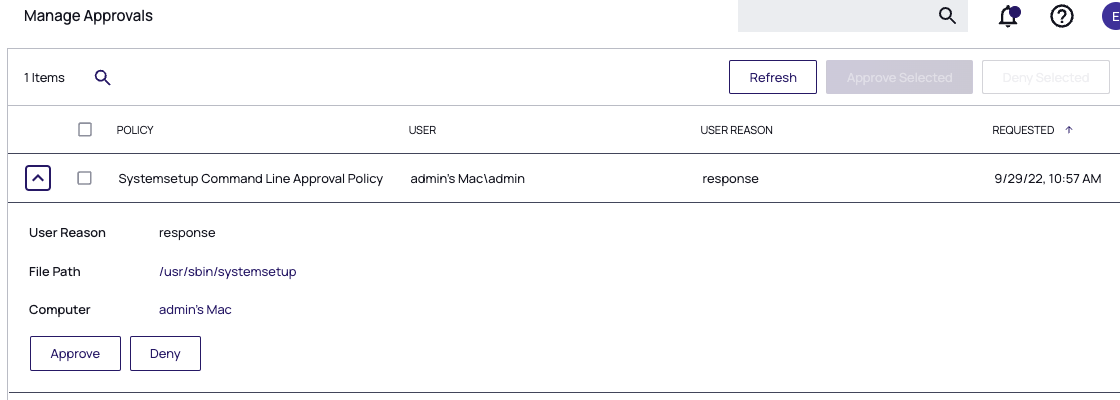
As an approval supervisor, navigate to Admin | Manage Approvals.

-
If no approval requests are listed, click Refresh.
-
Expand the approval you want to either approve or deny.
-
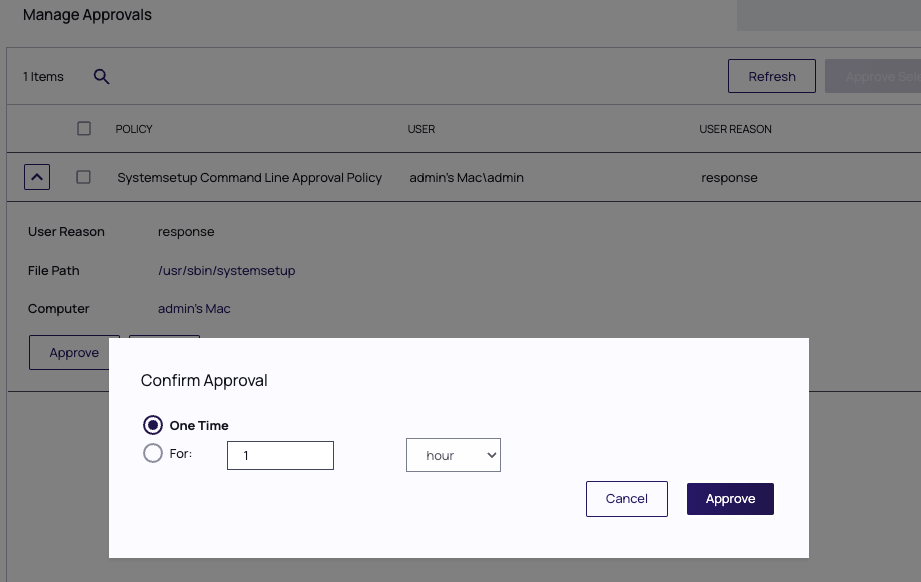
Click Approve.
-
On the Confirm Approval modal, choose to either issue a One Time or a timed approval. The default opens to One Time.
-
Click Approve
Workstation Interaction
Following Approval
Following an approval, Terminal writes Running command elevated and shows other process messages.
Following Denial
Following a denial, Terminal writes Approval request was denied and shows other process messages.