Windows Registry Inventory
The Windows Registry Inventory task executes a client command to create a Windows Registry Inventory.
-
Navigate to Admin | Tasks.
-
On the Tasks tab under Jobs and Tasks, click on Client Tasks.
-
Click Create.
-
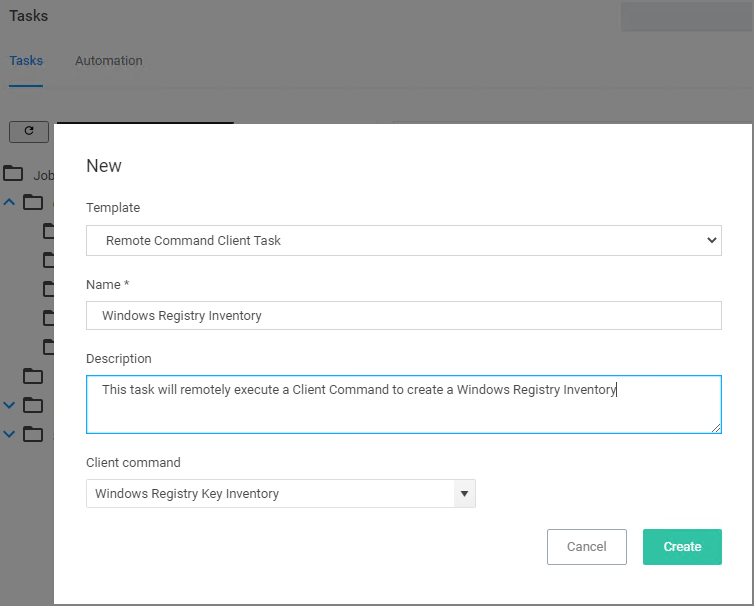
From the Template drop-down, select Remote Client Task.
-
From the Client command drop-down, select Windows Registry Inventory.
-
Copy the command name to paste it into the Name field or enter a name to reflect your use case.
-
Modify the description.
-
Click Create.
Customizing the Windows Registry Inventory Task
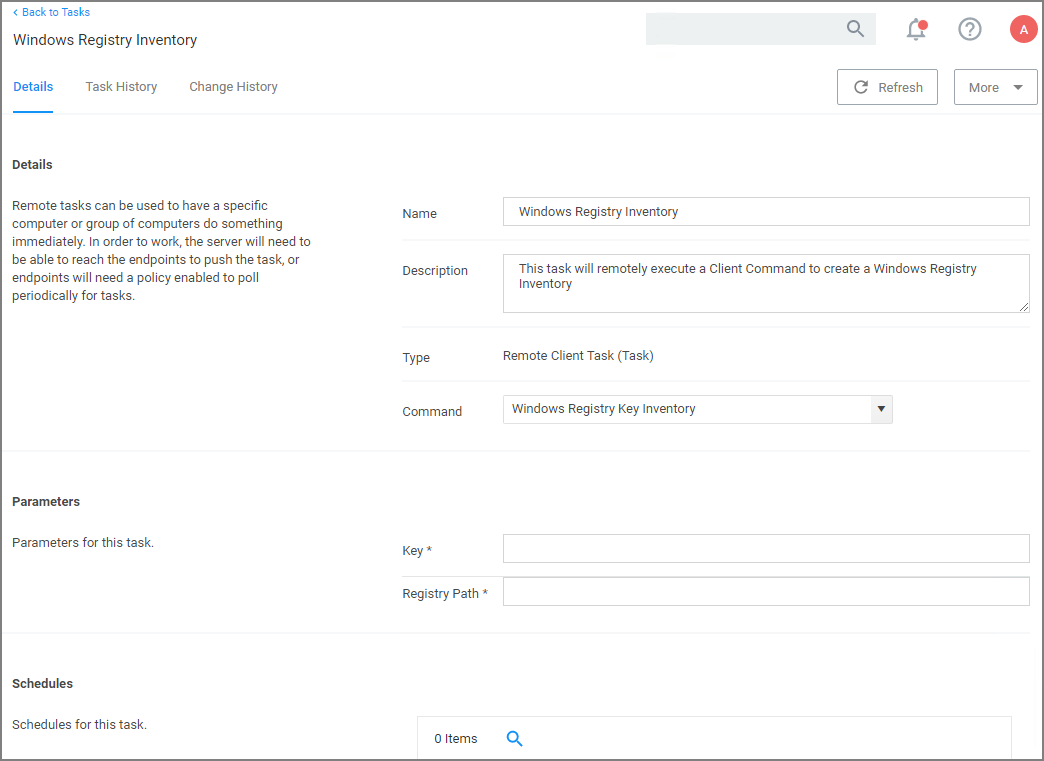
To be able to run the task, the key and registry path information needs to be provided. There are two options to run the task, via:
-
the Windows Registry Inventory page or
-
Run Task under the task quick view list:
Using the Windows Registry Inventory page
-
On the Windows Registry Inventory task page under Parameters, enter the Key information, e.g.
Media. -
Enter the Registry Path, e.g.
HKEY_LOCAL_MACHINE\SOFTWARE\Microsoft\Windows Mail. -
Click Save Changes.
-
From the More drop-down, select Run Task.
-
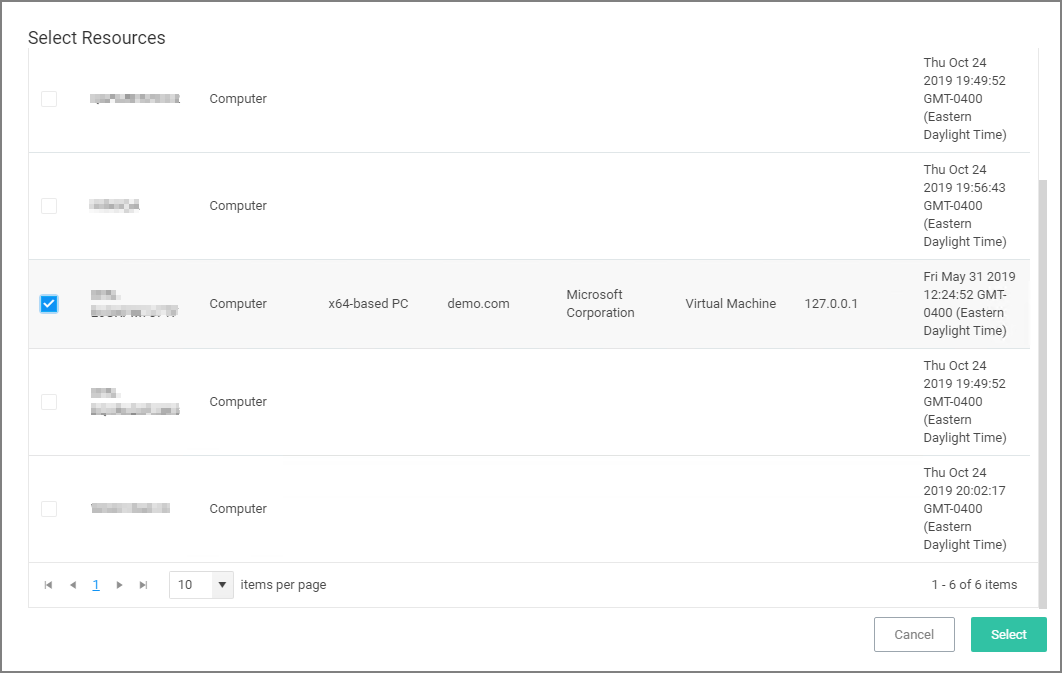
Add any number of resources you want to target with this task.
Note: Do not run this task for macOS or Unix/Linux agent endpoints, only select agent endpoints on Windows systems.
-
Click Run Task.

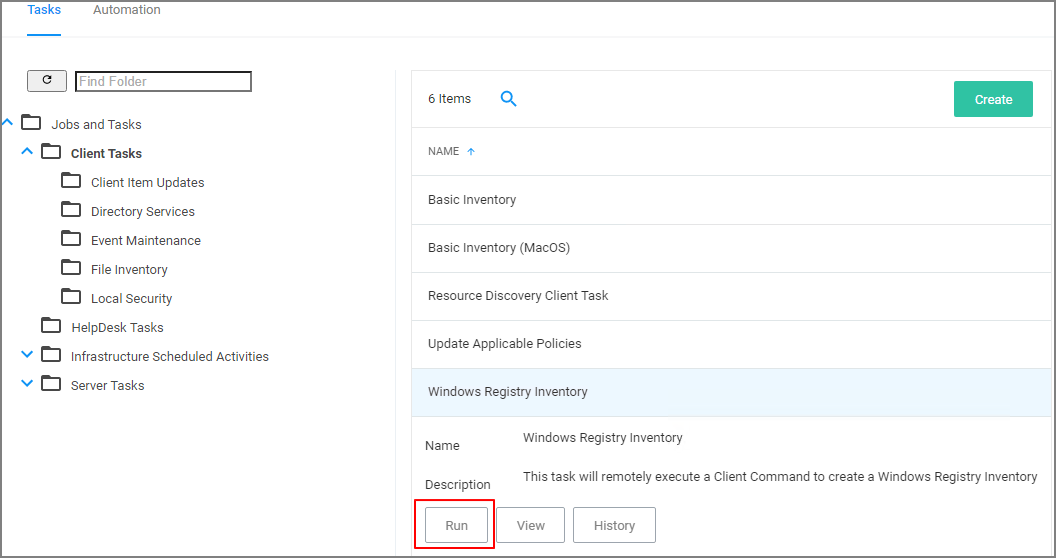
Using the Quick View List Options
-
Select your Windows Registry Inventory task from the task list.
-
Click Run.
-
Add any number of resources you want to target with this task.
Do not run this task for macOS or Unix/Linux agent endpoints, only select agent endpoints on Windows systems.
-
Enter the Key value.
-
Enter the Registry Path value.
-
Click Run Task.
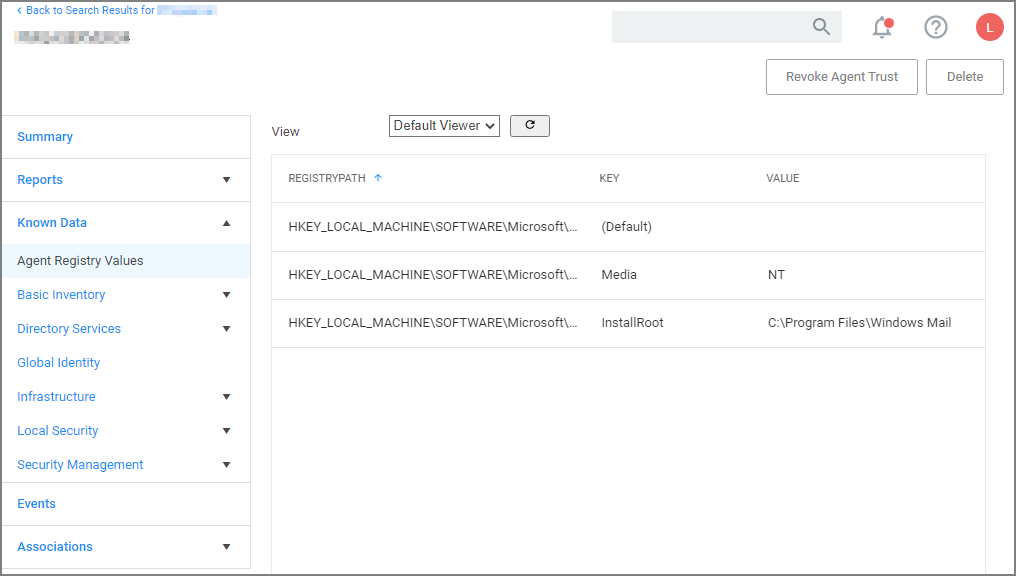
View the Results
The results of the task execution can be viewed via either Agent Reports or Known Data in the Resource Explorer:
-
Navigate to Admin | Agents | Agent Reports (tab) | Agent Registry Keys By Computer Name:

-
Navigate to the Computer Resource page and select Known Data | Agent Registry Values: