Messaging and Webhooks
Follow this process to configure an elevation policy for an approval request message action.
Prerequisites
-
Ensure that your Privilege Manager instance is installed correctly and is operational.
-
You must have Privilege Manager administrative access to configure API users, credentials, and you are able to integrate the system with webhooks.
-
Privilege Manager Server version 12.0.5 or higher is required.
Configuration
-
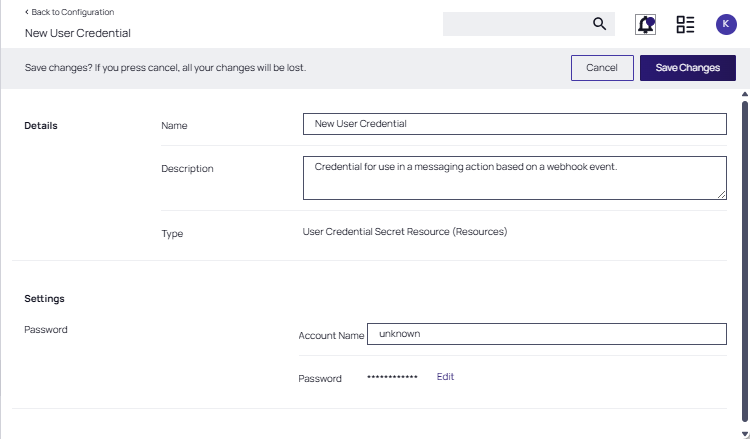
Set up a user credential.
-
Select Admin | Configuration, then select the Credentials tab.
-
At the New User Credential page, select Create.
-
Provide a Name and Description.
-
At the Type pull-down, specify User Credential Secret Resource (Resources).
-
Provide an Account Name and Password.
-
Click Save Changes.
-
-
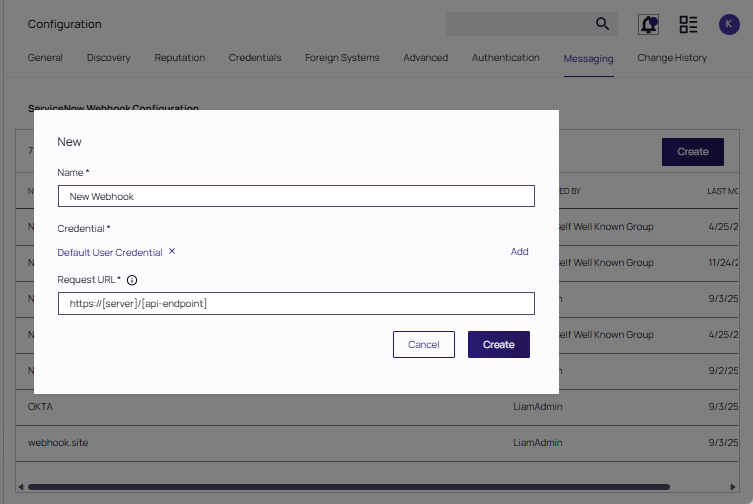
Set up a webhook event.
-
Select Admin | Configuration, then select the Messaging tab.
-
At the Messaging page, select Create.
-
Provide a Name and verify that the desired credential is selected.
- Provide the Request URL for the endpoint that will receive the messages from Privilege Manager. This may be an invoke URL or something else, depending on the system you are integrating with. Click Create.
-
On the New Webhook page, provide a description for the webhook. Set the Webhook Event drop-down to the generic System Approval Request Event and ensure that the webhook is Enabled.
For ServiceNow instruction, refer to the instructions in the Integrations documentation.
-
-
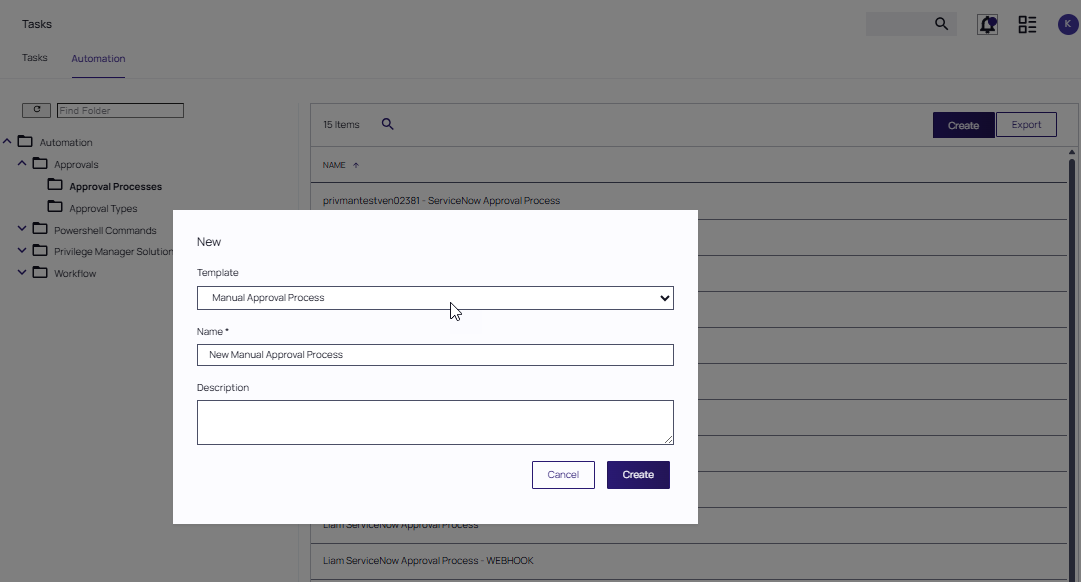
Create an approval process.
-
Select Admin | Tasks. Select the Automation tab and navigate to Automation | Approvals | Approval Processes. Click Create.
-
Select the Manual Approval Process Template and provide a Name and Description for the approval type. Click Create.
-
-
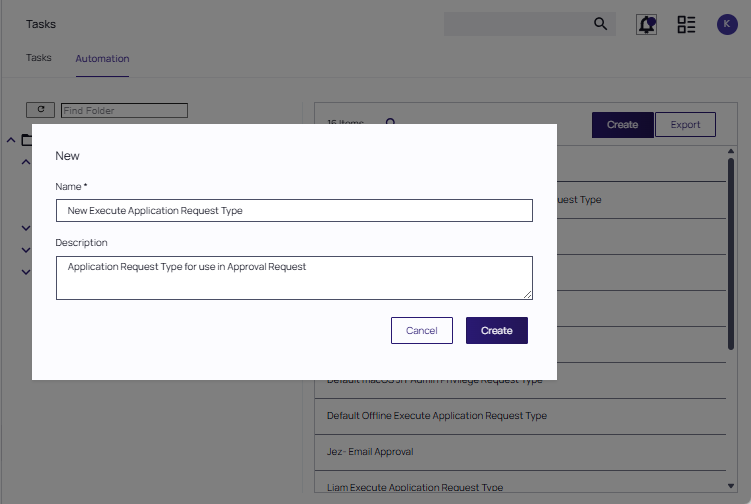
Create an approval type that will be used in the message for your policy.
-
Select Admin | Tasks. Select the Automation tab and navigate to Automation | Approvals | Approval Types. Click Create.
-
Provide a Name and Description for the Approval type.
- At the Request Type page, set File Specific to Yes.
- At the Process Handler drop-down, select the previously created approval process.
-
Click Save Changes.
-
-
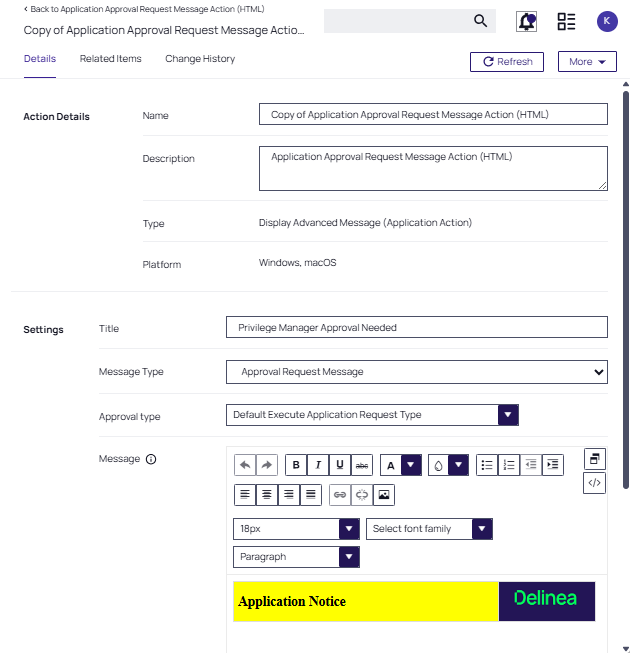
Navigate to Admin | Actions and select the Application Approval Request Message Action (HTML).
-
On that page, click Duplicate and provide a new name for the action. Click Create.
On the Settings section of the new Application Message Action page, specify the Message Type as Approval Request Message and select the Approval Type you previously created.
-
-
Locate the existing elevation policy.
-
In the Actions section, select the previously created Application Approval Request Message Action (HTML).
-
Click Save.
-
Set the policy toggle to Active to enable the policy.
-