Simple Mail Transfer Protocol (SMTP)
Setting up an SMTP Connection
Simple Mail Transfer Protocol (SMTP) is the Internet standard for email transmission. Often organizations use an SMTP Server — or a server that is specifically dedicated to transmitting email messages via TCP Port 25 — and in order to send email alerts with Privilege Manager policies, you must ensure that your email server is connected to Privilege Manager.
SMTP in Cloud Environments: Starting with version 10.7.1 of Privilege Manager Cloud, the SMTP foreign system is automatically configured with the email server information as provided during the cloud instance set-up. The information can be added/changed following the initial set-up.
To set up the connection, follow these steps:
-
Navigate to Admin | Configuration.
-
On the General tab, select Default Execute Application Request Type.
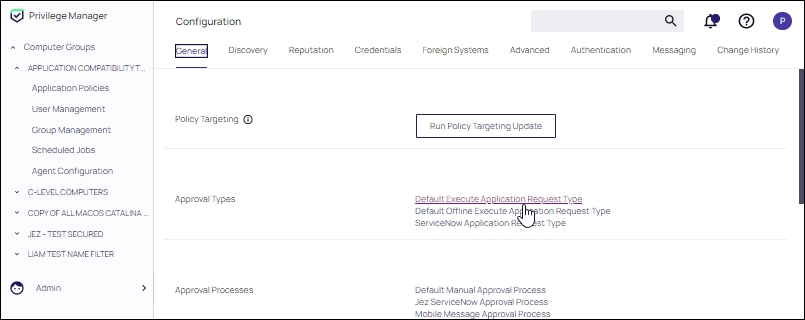
Provide information for the request type at the Default Execute Application Request Type page, then click Save Changes.

-
On the Foreign Systems tab, click SMTP Server, then Create.
-
Add the Name of your SMTP Server and the base URL (ex: smtp://[hostname]:[port]), then Create.
Next, in order to begin email alert notifications for a policy, you will need to assign a Task for the job. The Setting Up Email Alerts information below is just one example of tasks that can be configured for automated email notifications.
Configuring the Email Approval Process Policy
Prerequisites
Prior to creating a new Email Approval Process policy, the following items must be present, or configured if not present:
-
Approval Process
-
Approval Type
Creating an Approval Process
-
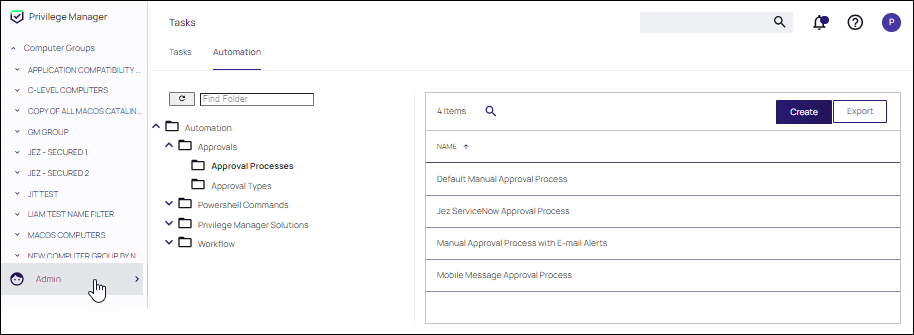
From the left navigation panel, select Admin | Tasks and select the Automation tab. In the Automation tree, open Approvals | Approval Processes. Ensure that you have an Approval Process that can be added to the request form.
-
If an Approval Process is not present, click Create .
-
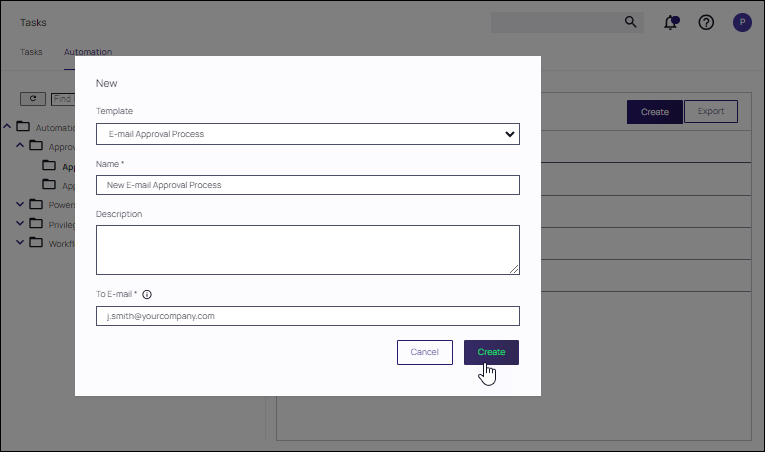
Select E-mail Approval Process at the Template pull-down.
-
Supply a Template, Name, Description, and Email Address that will receive the email request for approval.
-
Click Create.
-
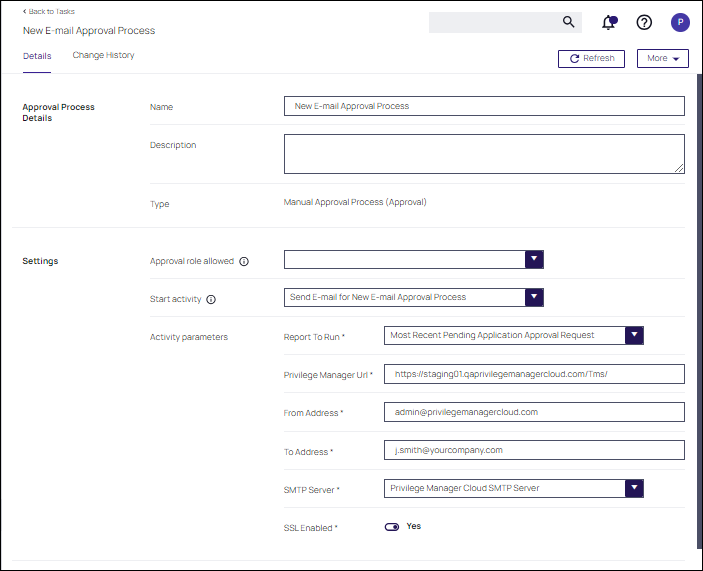
At the new E-mail Approval Process, the only parameter that required editing is the To Address. Supply an email that will be notified for approval.
-
Ensure that Report To Run is set to Most Recent Pending Application Approval Request.
-
Start activity should reflect the Approval Process configured.
-
For Privilege Manager cloud, do not edit From Address. This has been configured for you. For on-premises applications, this is dependent on your SMTP setup.
Creating an Approval Type
-
From the left navigation panel, select Admin | Tasks and select the Automation tab. In the Automation tree, open Approvals | Approval Types.
-
Ensure that you have an Approval Type that can be added to the request form. If an Approval is not present, click Create .
-
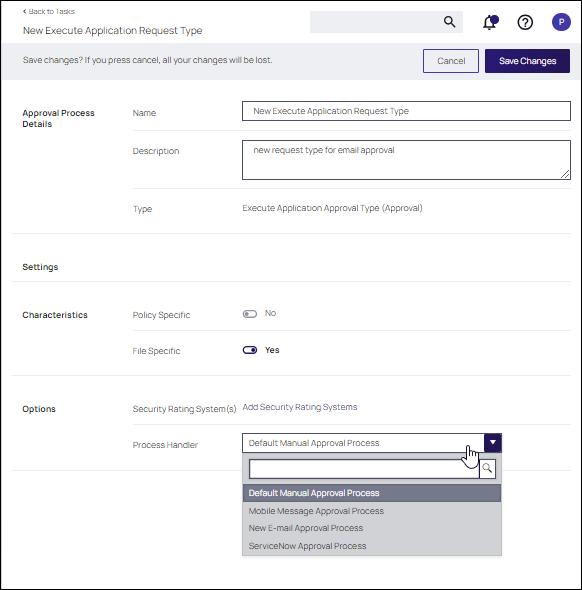
Ensure that the following parameters are set at the Application Request Type:
-
Options: Specify the Process Handle you created for the Application Request Type.
-
Characteristics: Enable File Specific.
-
Process Handler: Specify the E-mail Approval Process.
-
-
Click Create.
Creating the Application Policy
-
First, locate the Approval Request Form Action that will be used in the policy. Select Admin | Actions and select the Approval Request Form Action.
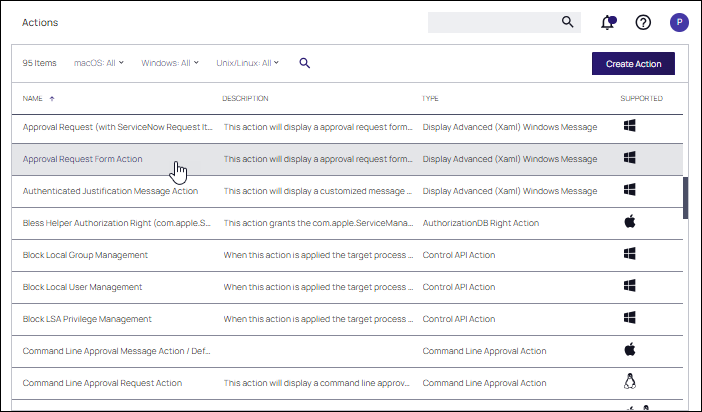
-
At the Approval Request Form, click Duplicate Supply a name for the duplicate form, then click Create.
Delinea recommends renaming the Approval Request Form Action something specific and recognizable. For example, "Email Approval Request Form Action." The Approval Type should reflect the Approval Type configured previously. In this example, Email Execute Application Request Type.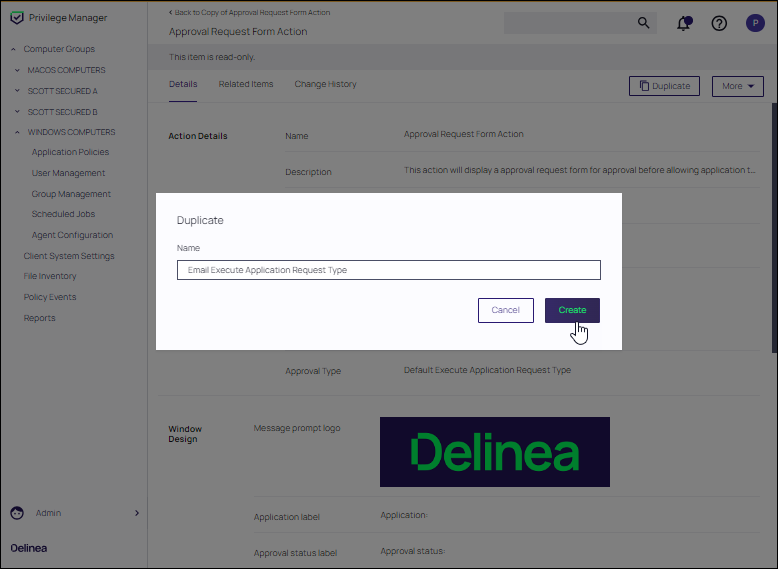
-
Navigate to the Application Policies for your computer group. Select the Application Policy that will be configured for the process. If one does not exist click Create and refer to Creating Policies.
In this example, the User Access Control (UAC) Override Policy Approval by Email is selected.
In the Actions field, add the Email Approval Request Form Action.
Click Save Changes.