Setting up a Cylance Integration
Cylance is an Artificial Intelligence Based Advanced Threat Prevention Solution for enterprise environments. Privilege Manager (v10.5+) integrates with Cylance to help you proactively act on any unknown applications that run in your environment to prevent potential malware attacks. The steps below walk through how to setup a Cylance Integration in Privilege Manager and then create an example policy to begin using Cylance intelligence in action across your environment.
Keep in mind that while the Cylance integration provides insight into threat analysis, ultimately you can use Privilege Manager policies to act or react in whatever way makes most sense to your organization.
Cylance Connector Installation Steps (On-Premises Only)
-
Open a browser on your Privilege Manager Web Server, browse to
https://[YourInstanceName]/TMS/Setup/. -
On the Currently Installed Products screen, choose Install/Upgrade Products.
-
Select the Thycotic Cylance Reputation Connector option.
-
Click Install and accept the End User License Agreement. You will see your Installation Progress. Click on “Show install Logs” link to check for any errors
If the installation of Cylance initially fails, redirect to https://[YourInstanceName]/TMS/Setup/ and click the Repair button next to the Cylance Product.
-
Once the Installation is successful, click Home.
Configuring the Cylance Connector
-
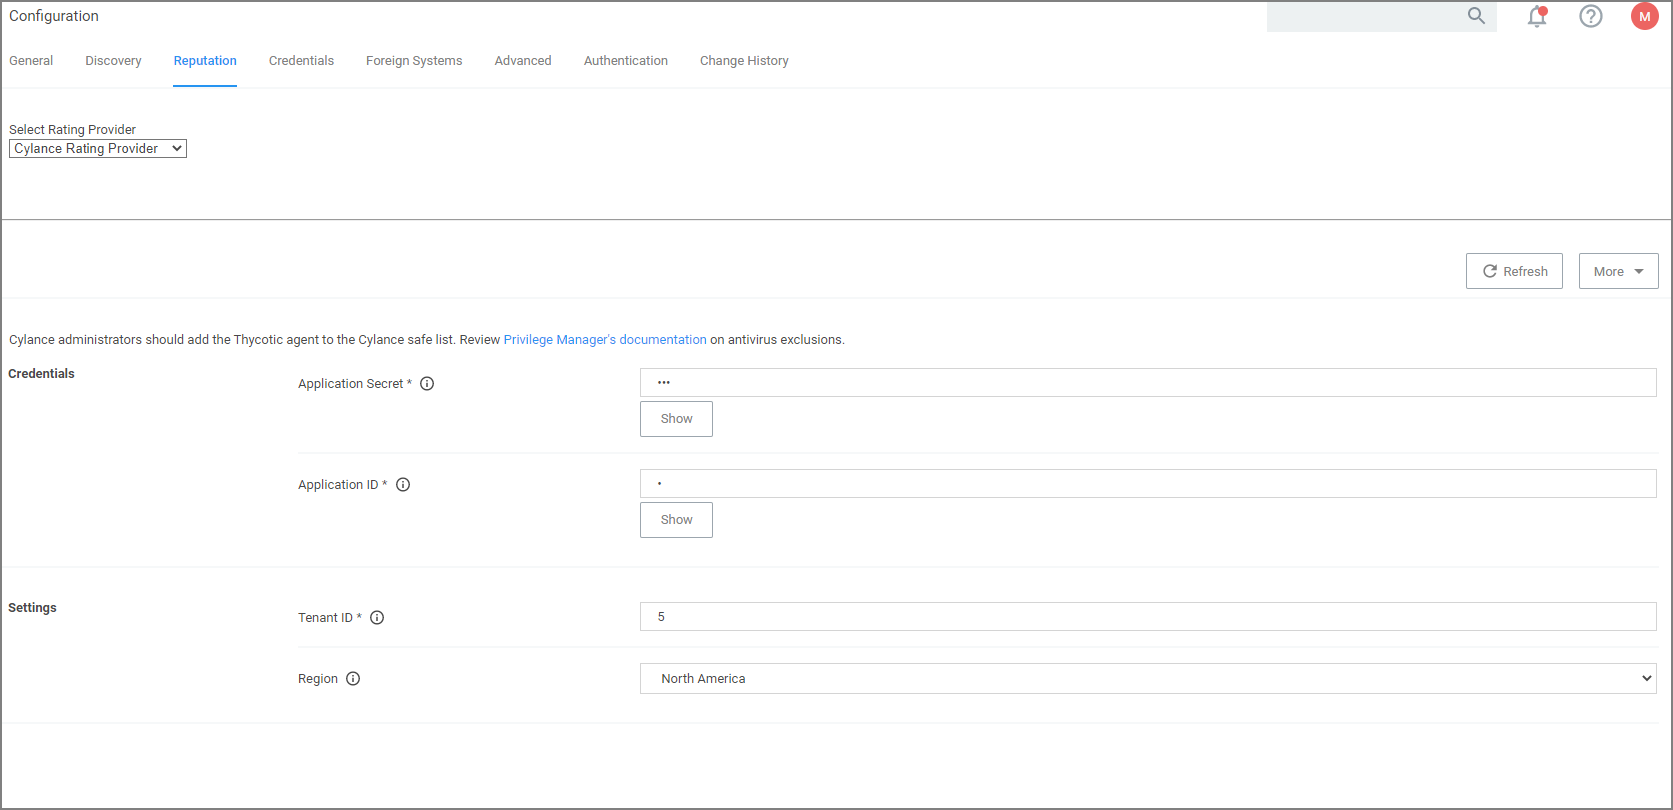
Navigate to Admin | Configuration and select the Reputation tab.
-
From the Select Rating Provider drop-down, select Cylance Rating Provider.
-
Enter the required Credentials and Settings details. These details can be found in your Cylance account (login at protect.cylance.com).
- In our Cylance account, navigate to Settings and select Integrations. You find the Tenant Id on the right side of the Custom Applications area.
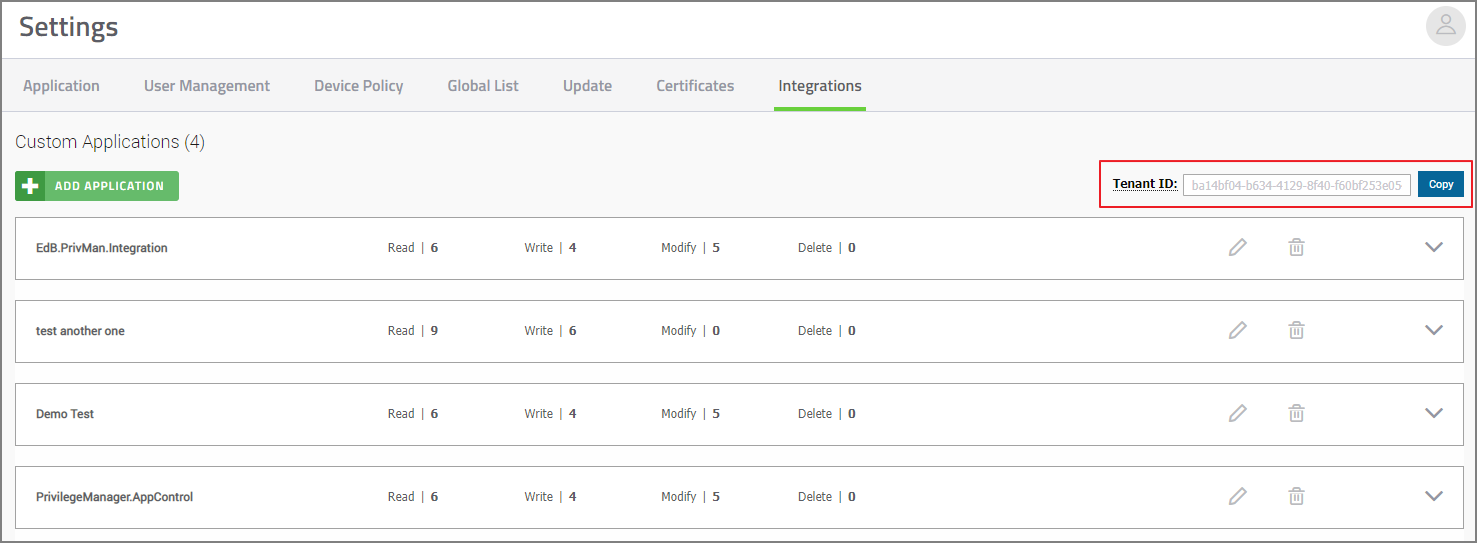
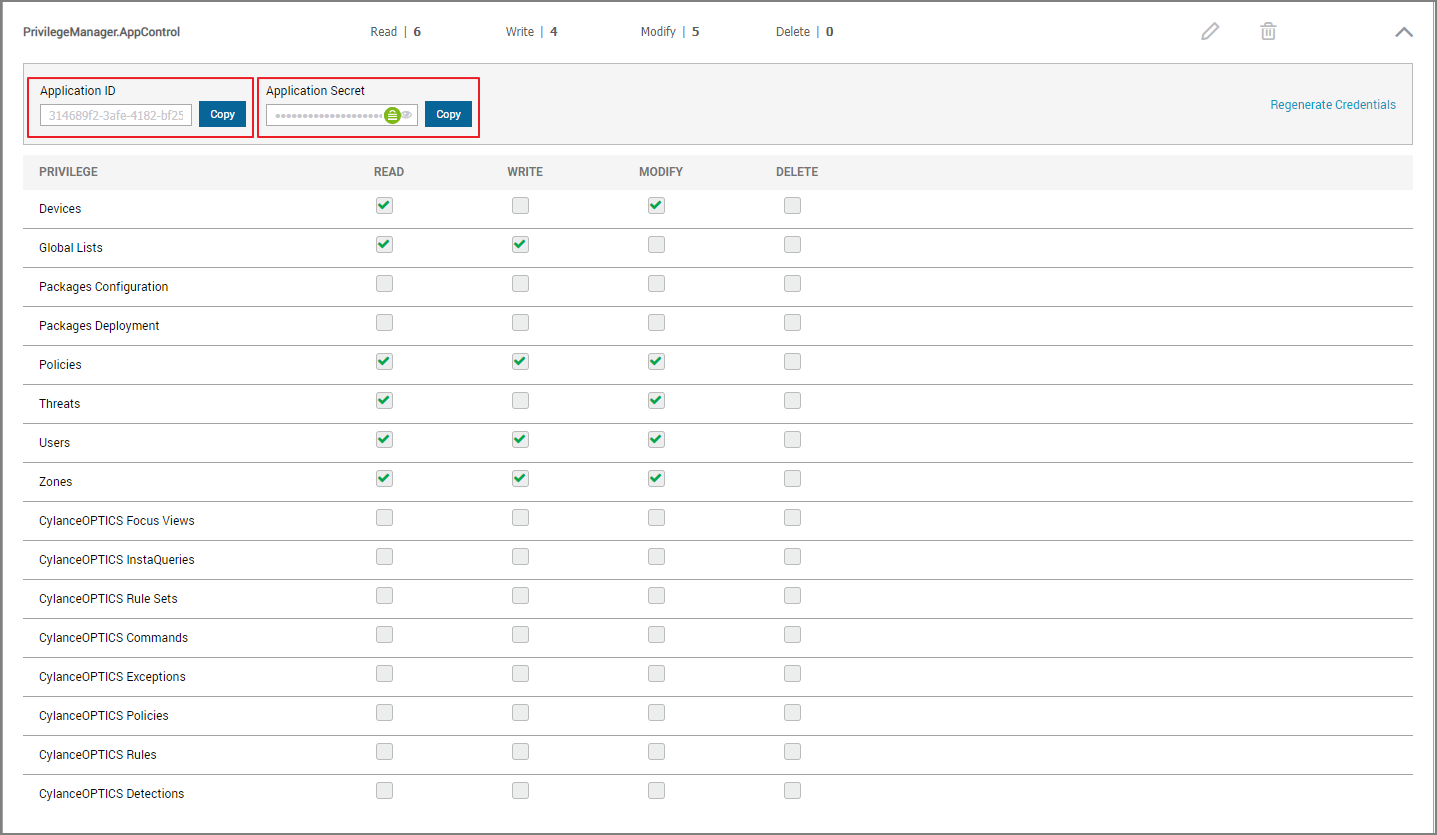
- Select your Privilege Manager integration from the Custom Application list. You find the required Application ID and Application Secret on the left side of the page.
- In our Cylance account, navigate to Settings and select Integrations. You find the Tenant Id on the right side of the Custom Applications area.
-
Once the Cylance details are entered in Privilege Manger, click Save Changes.
Create a Cylance Security Rating Filter
-
Navigate to Admin | Filters.
-
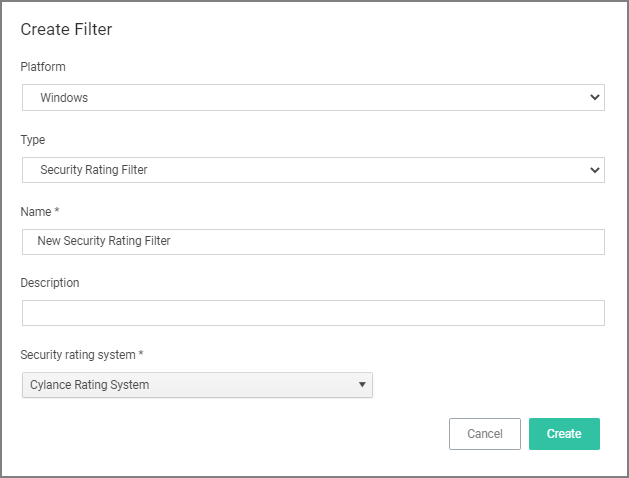
Click Create Filter.
-
From the Platform drop-down select either Windows or macOS.
-
From the Filter Type drop-down select Security Rating Filter.
-
Name the policy and add a Description.
-
From the Security Rating System drop-down, select Cylance Rating System.
-
Click Create.
-
Click Create.
-
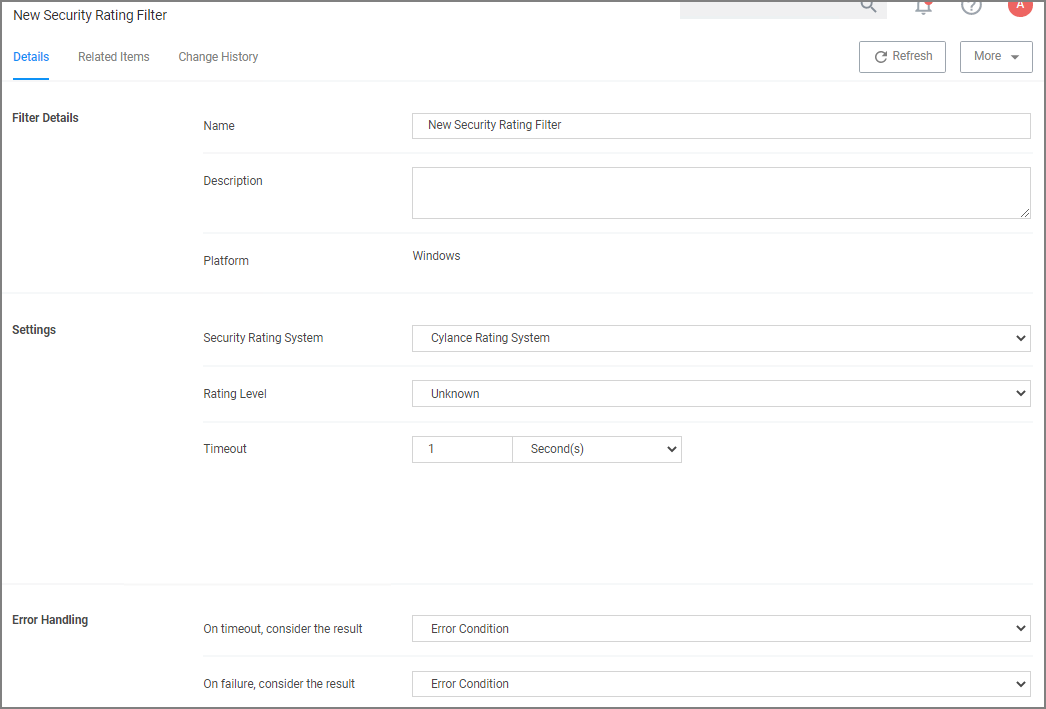
Select the Rating Level you wish to apply. You can also specify a Timeout value and Error Handling conditions on timeout and/or on failure, the options are:
- Matched
- Not Matched
-
Click Save Changes.
Create a Cylance Policy
Use the Application Policies wizard to create a policy that uses the Cylance Security Rating filter created in the steps above.