Using a Service Account to run the IIS App pool
Delinea recommends setting up a domain service account that can both:
- access the Delinea product's SQL database
- run the IIS Application Pool(s) dedicated to your Delinea product
The service account created in this KB should NOT be the same account that is created during the installation of SQL and used to manage SQL as a whole.
To set up this service account correctly you will need to:
- Create a service account in Active Directory that will be dedicated to your Delinea product (Domain).
- Grant the service account access to the SQL Server database (Database).
- Assign the service account as Identity of the Application Pool(s) in IIS (Web).
- Grant folder permissions for the service account on two folders (Web).
- Configure User Rights Assignment to the service account (Domain AND/OR Web).
Creating a Domain Service Account
-
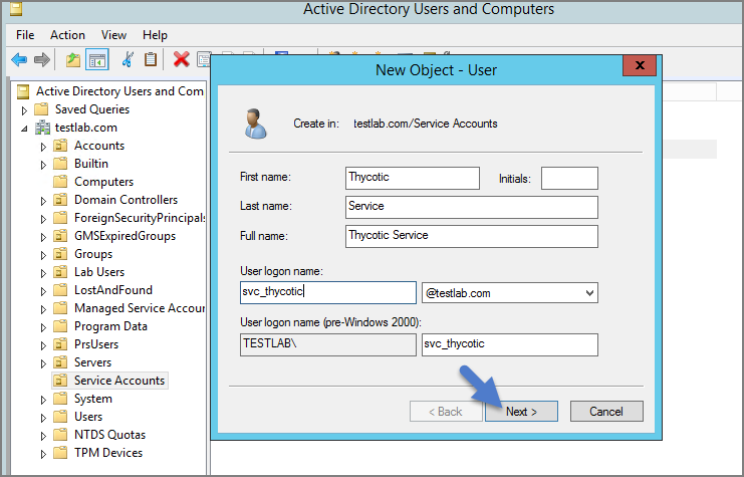
Open the Active Directory Users and Computers link from Administrative Tools.
-
Right-click the directory where you want to assign this account (i.e., testlab.com > Service Accounts).
-
Click New and User.
-
Add a name and logon name for the service account.
-
Click Next.
-
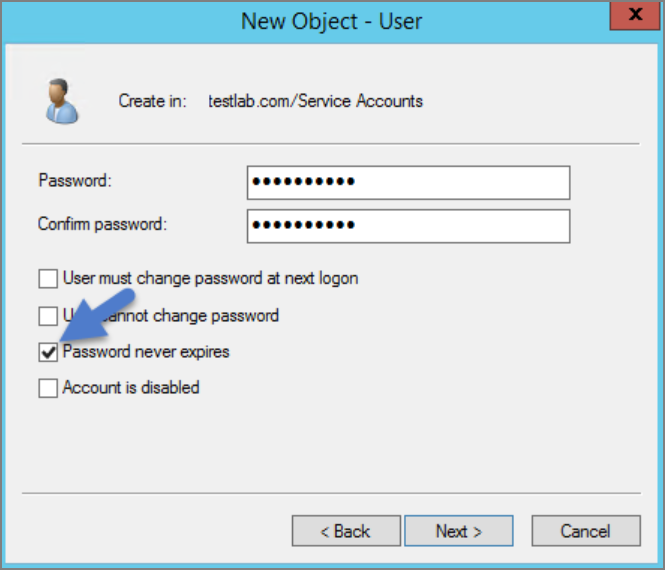
Enter a password.
Uncheck "User must change password at next login if checked.” Check Password never expires or the account could lock you out of Privilege Manager.
-
Click Next.
-
Click Finish. This account can now be given access to the database server and the application server.
Granting Access to SQL Database
You must have SQL installed on your database server before completing these steps:
-
Using SQL Management Studio (on your database server), connect to your Delinea product's SQL Database using an Administrator account.
-
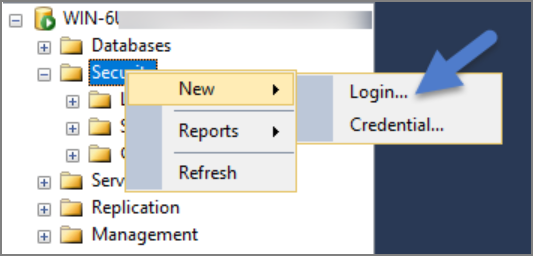
Right-click on the Security node (Ensure this is the top most Security node under the instance and not under the database name itself).
-
Click New and Login.
-
Ensure Windows Authentication radio button is selected.
-
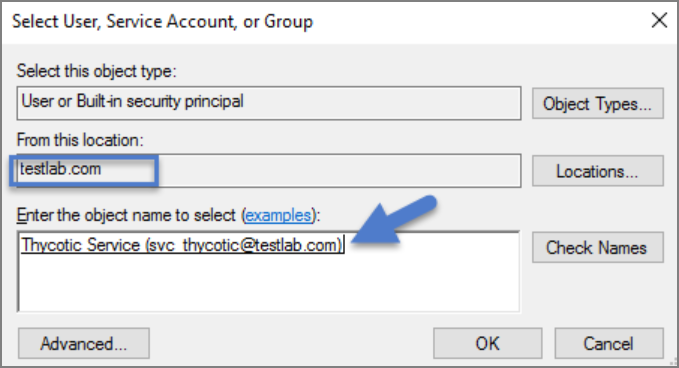
On the New Login page click Search… Ensure that your domain/AD server is selected as the location.
-
In the “Enter the object name to select” box enter the Login name created for your Delinea service account (e.g., “svc_thycotic”). Click Check Names and select the correct account.
-
Click OK.
-
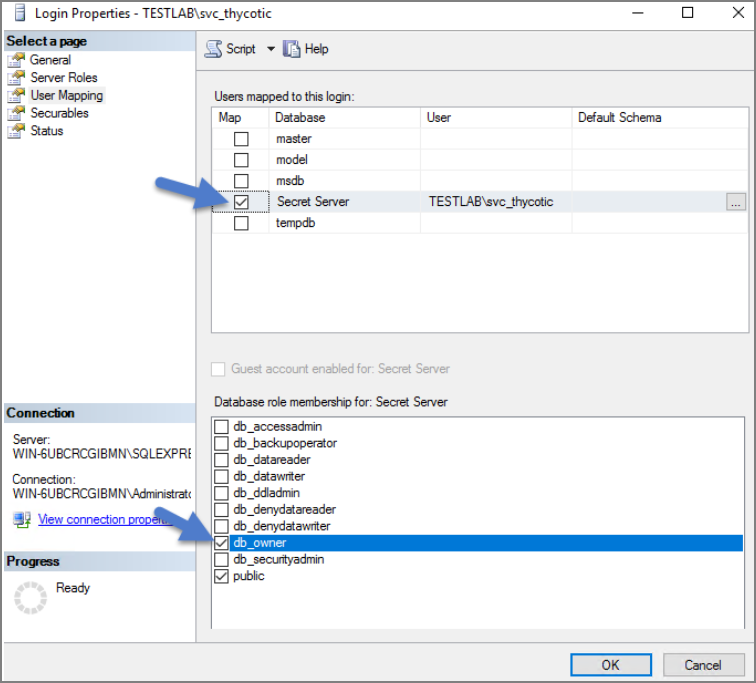
If you have already created the database for your Delinea product, under User Mappings select the database and check the box to grant the db_owner permission (example pictured below). OR - If you have not yet created the Database, Under Server Roles select db_creator
-
Click OK.
Assigning Identity of Application Pool(s) in IIS
-
Open IIS on your web server Search | inetmgr.
-
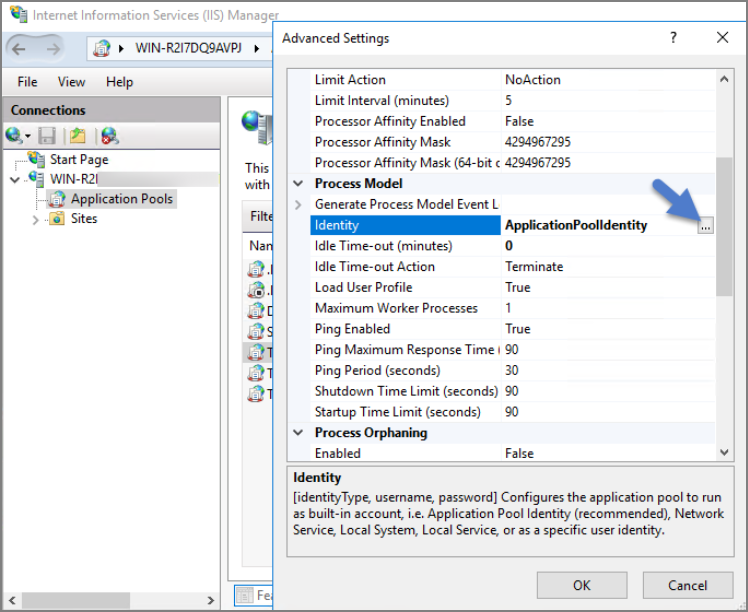
Locate the application pool(s) that your Delinea product is using, right-click Advanced Settings.
-
The Identity box in the Process Model section, click the three dots on the right of the box.
-
Select the Custom Account radio button.
-
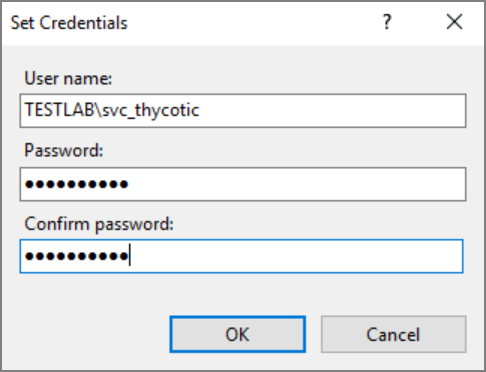
Click Set and enter your service account's name and password.
-
Click OK.
You will need to perform this step for multiple application pools for Privilege Manager.
Granting Folder Permissions
You must have the Delinea product application files installed (on your web server) before completing this section.
Following the steps below you will need to give the service account Modify access to two folders:
- C:\Windows\TEMP
-
The folder where your Delinea product's application files are located
(i.e., C:\inetpub\wwwroot\SecretServer)
You must have the Delinea Product Application Files installed on your web server before completing these steps.
-
Open C:\inetpub\wwwroot\TMS and right-click the folder you are modifying.
-
Click Properties | Security | Advanced.
-
Click Add and then select a principal.
-
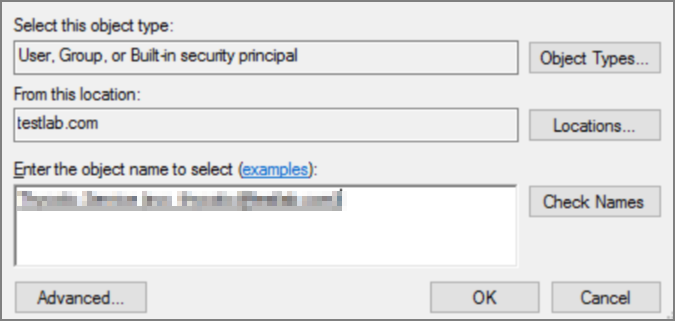
Ensure the domain machine is listed as the Location and type the service account under the “Enter the object name to select” box, click Check Names and Enter network credentials for accessing your domain machine.
-
Click OK.
-
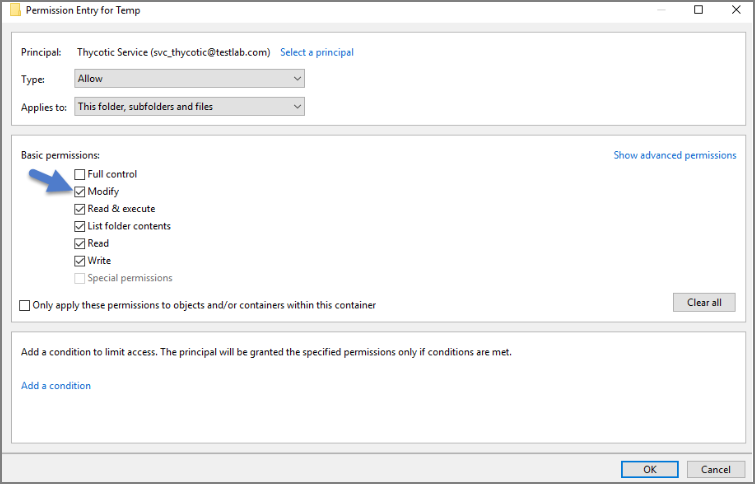
Click the Modify checkbox.
Your service account should now have Modify, Read & execute, List folder contents, Read, and Write permissions for this folder.
-
Click OK, then Apply.
If a Windows Security pop-up appears, click Yes. The service account will now be able to access this folder.
The application folder only needs Write and Modify permissions during the installation or during an upgrade. You can remove these once the installation process is complete.
Configuring User Rights Assignment
The following settings are required for DelineaPrivilege Manager to function:
-
Log on as a batch job
-
Impersonate a client after authentication
You can adjust these settings either
- At the Domain level using Group Policy
- Locally on your IIS Web Server using the Local Security Policy Console
Setting User Rights Assignment on the Domain
-
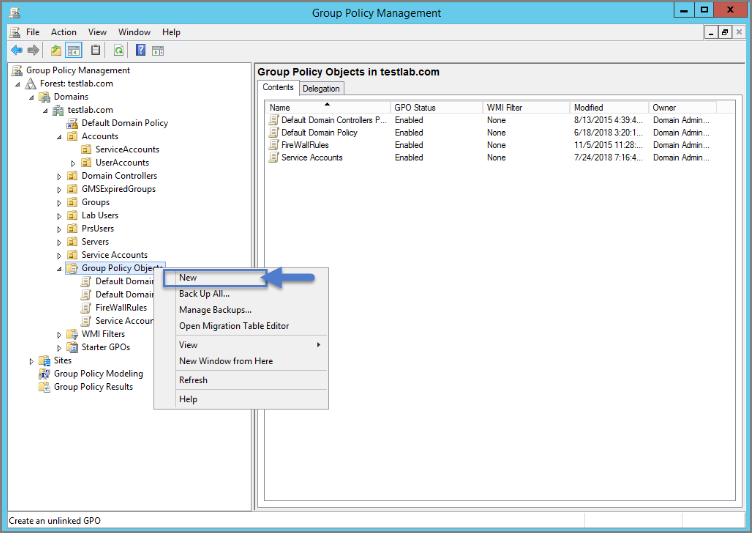
Open Group Policy Management Console and right-click your preferred GPO container (i.e. Group Policy Objects).
-
Click New.
-
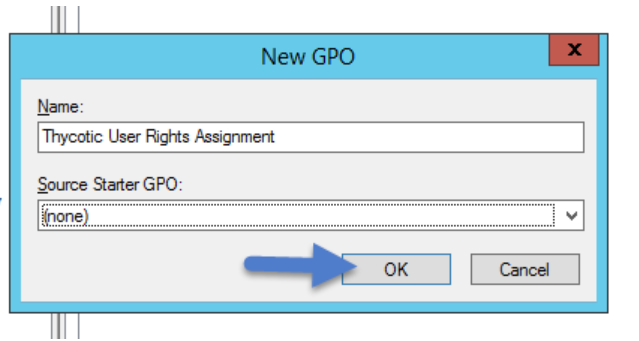
Name the new GPO (i.e., Delinea User Rights Assignment).
-
Click OK.
-
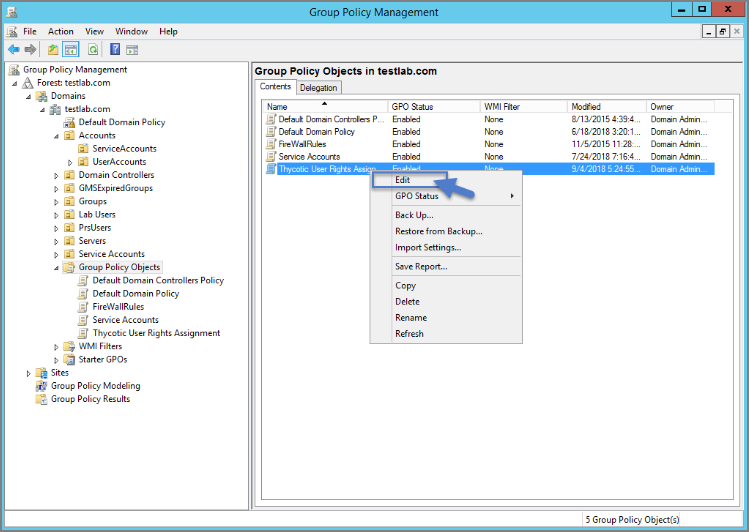
Right-click new GPO.
-
Click Edit.
-
Expand Computer Configuration | Policies | Windows Settings | Security Settings | Local Policies.
-
Click User Rights Assignment.
-
Right-click Log on as a batch job and click Properties.
-
Ensure that the Define these policy settings box is checked
-
Click Add User or Group.
-
Add your Delinea Service Account.
-
Click OK, then Apply.
-
Grant Impersonate a client after authentication permission to the service account under "User Rights Assignment" the same way "Log on as a batch job" was assigned above.
-
Link your new GPO to the OU where your Delinea product machine accounts exist (web + database servers).
This will overwrite any configuration in the local security policy. Utilizing the local security policy is a safer option if you are not sure about your usage across your domain.
Setting User Rights Assignment Locally
-
On the web server hosting IIS and your Delinea Application files.
-
Open Local Security Policy Console (Run as administrator).
-
Expand Local Policies | User Rights Assignment.
-
Right-click Log on as a batch job | Properties | Add User or Group.
-
Select your Delinea Service Account and then click OK.
-
Do the same to set Impersonate a client after authentication.
If you get a Service Unavailable after applying "Log on as a batch job" permissions, try updating your group policy settings:
- Open the Command Console.
- Type in gpupdate /force.
- Restart the Windows Process Activation Service.