Managing Vendor Entitlements with Federation
How to get anadditional claim with OIDC federation (including Native EntraID integration).
Requirements
-
A configured Delinea Platform
-
Working OIDC based federation
-
This can be either “plain” OIDC or Native EntraID integration which is based on OIDC.
-
An attribute which one would like to map. This can be either an existing property available for claims mapping or a custom property defined in Entra. This is however out of scope of this document.
-
For demonstration purposes, the user property called department will be used.
Adding a New Claim to EntraID App Registration
Unlike SAML-based federation, adding a new claim using OIDC-based federation is not actually configured on the app registration, but on the Enterprise App corresponding to the App Registration.
-
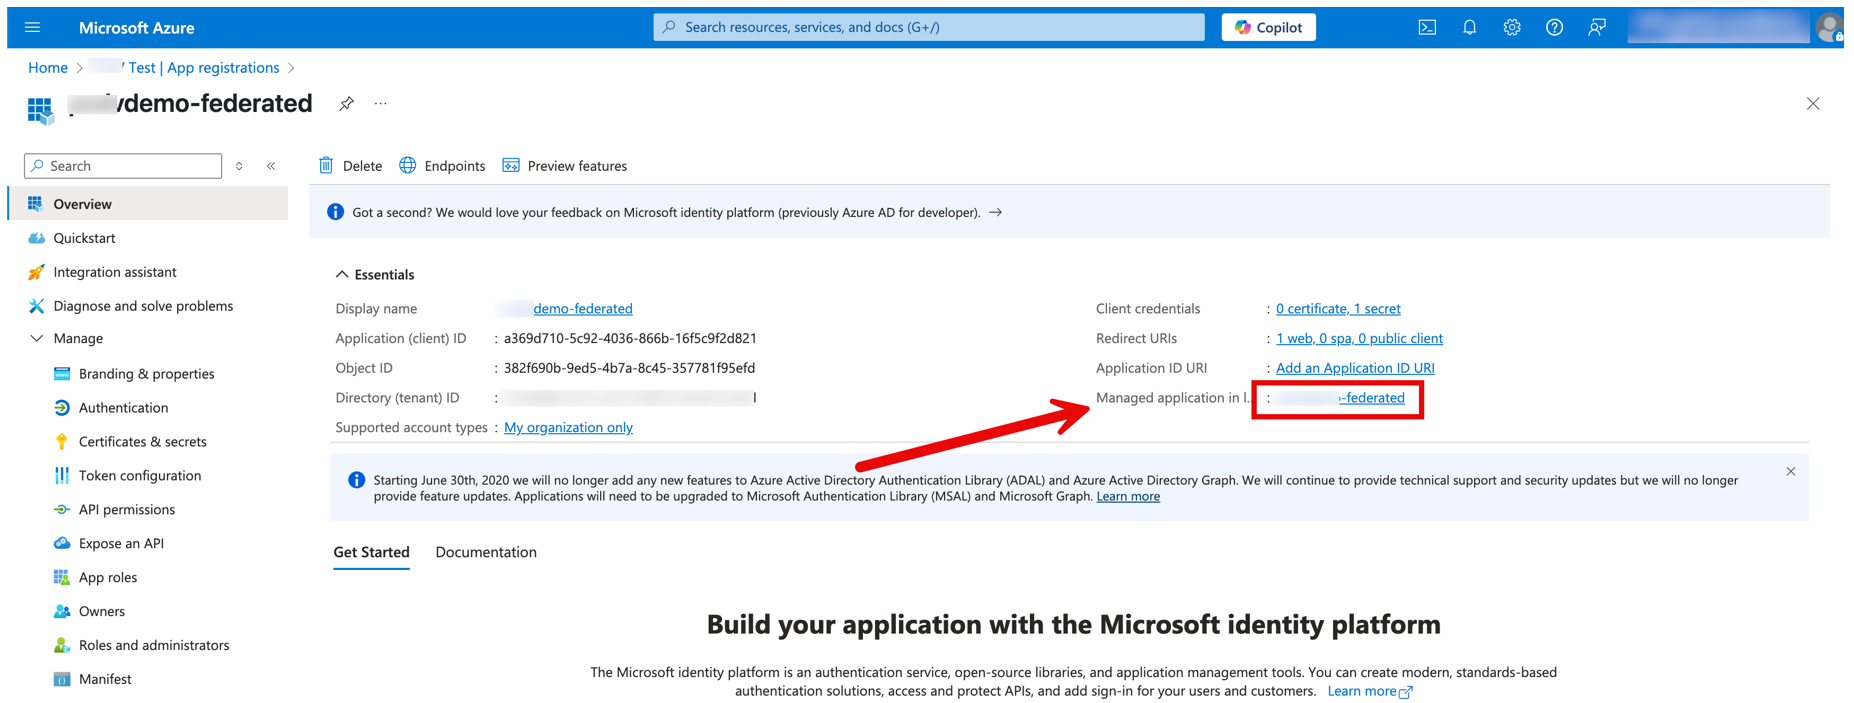
In Entra ID, browse to the App Registration that is used for the OIDC integration.
-
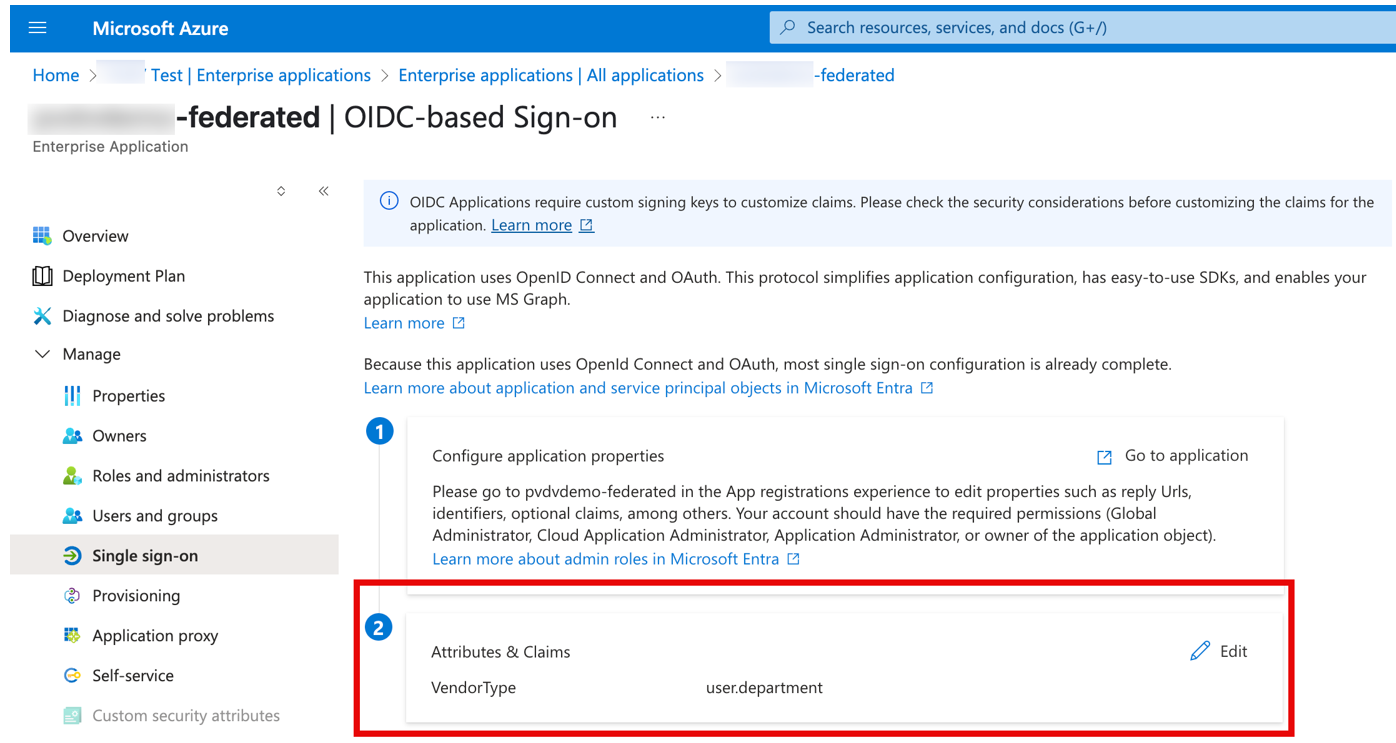
Navigate to the corresponding Enterprise App labeled as Managed application as shown.
-
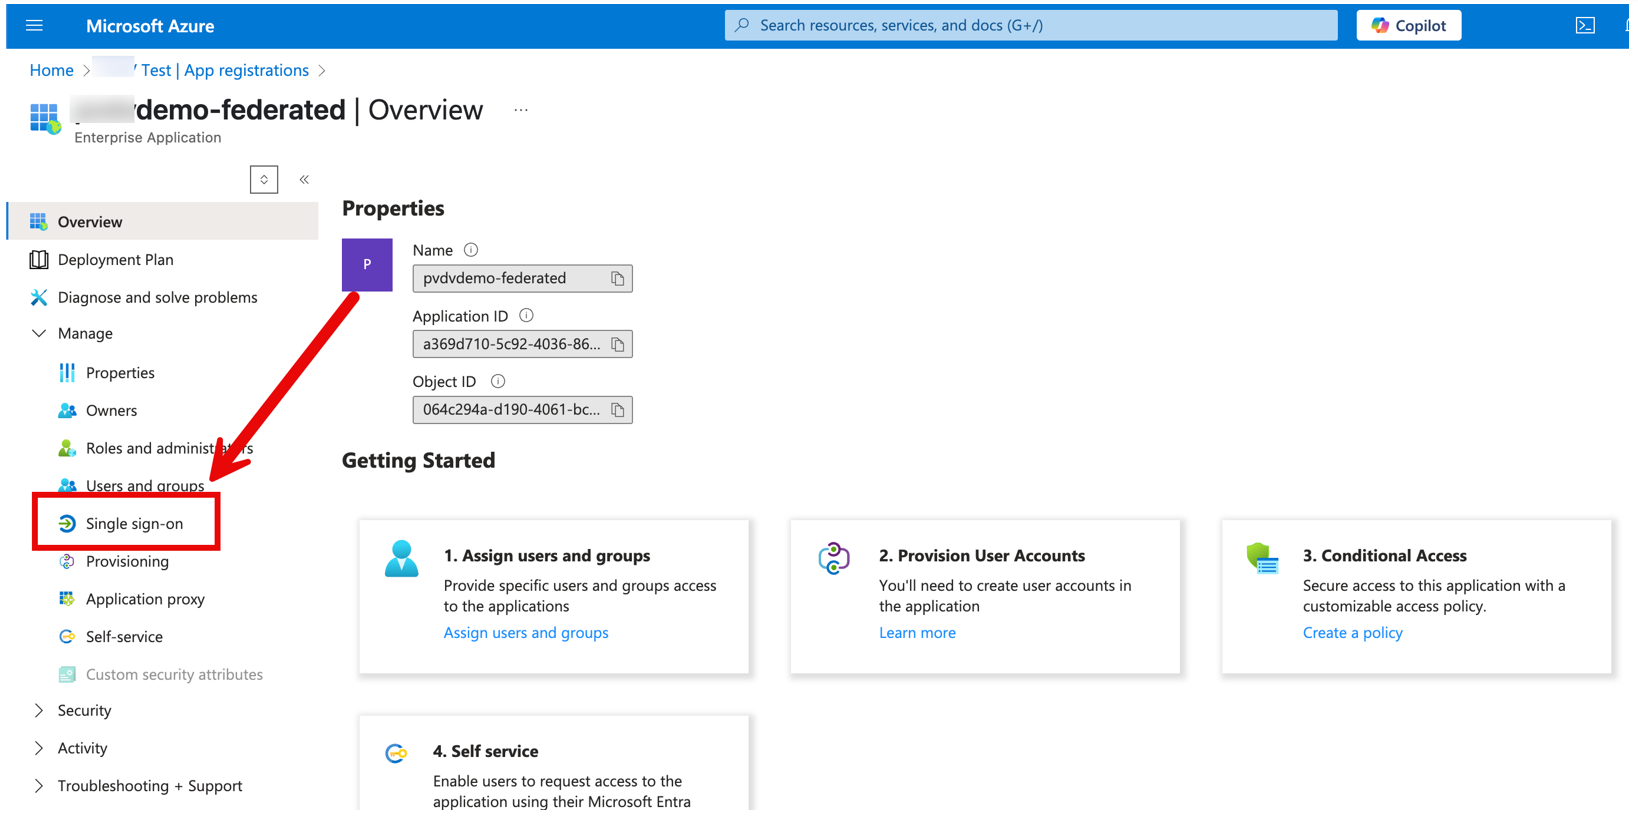
When on the Enterprise Application page, select Single Sign-On from the menu on the left.
-
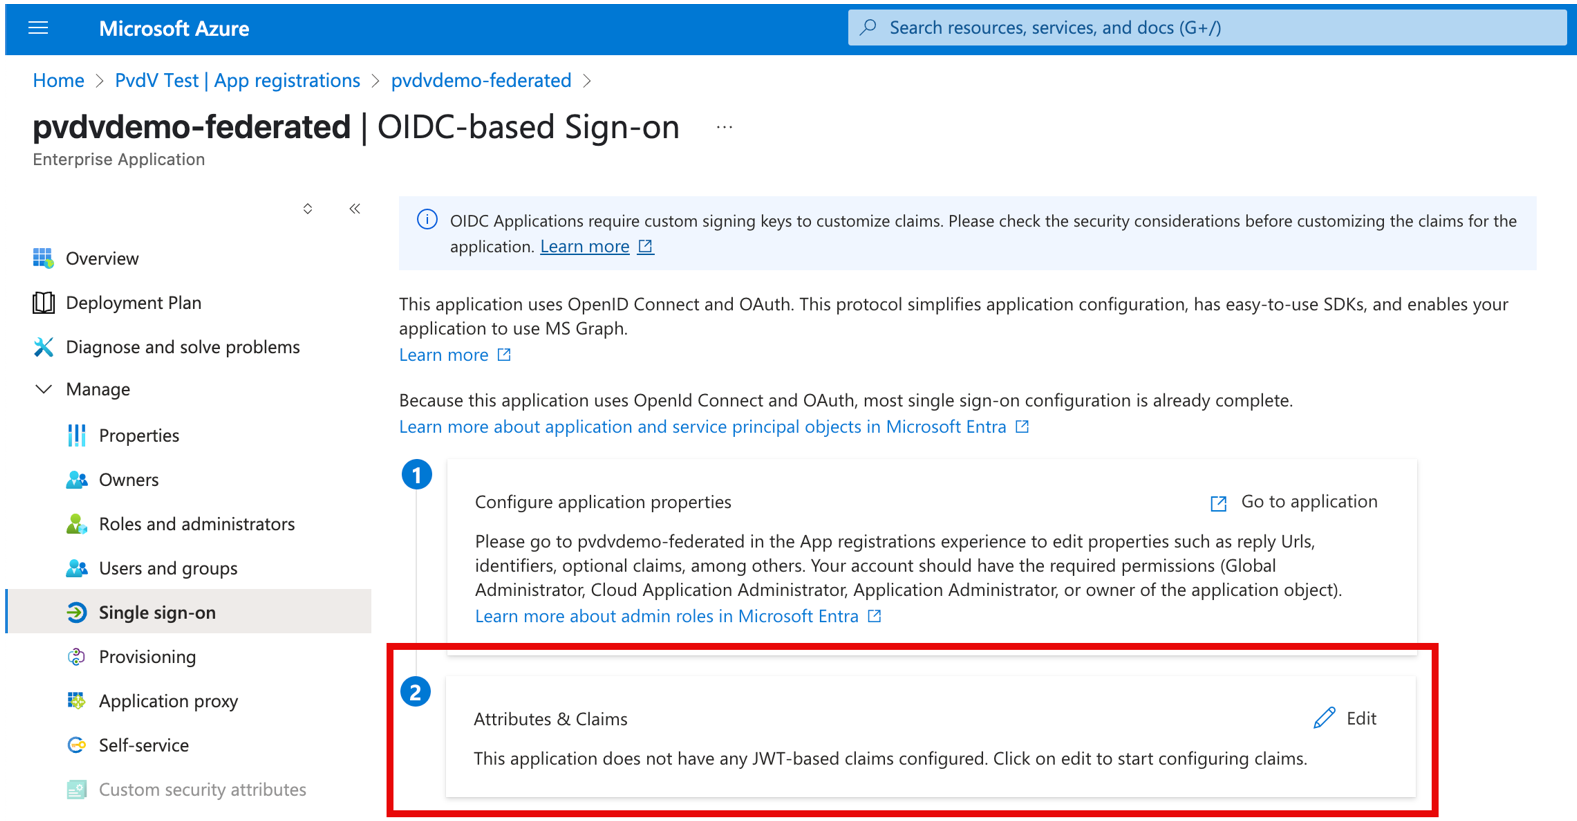
This should now allow for adding additional claims by selecting Edit on the Attributes and Claims section.
-
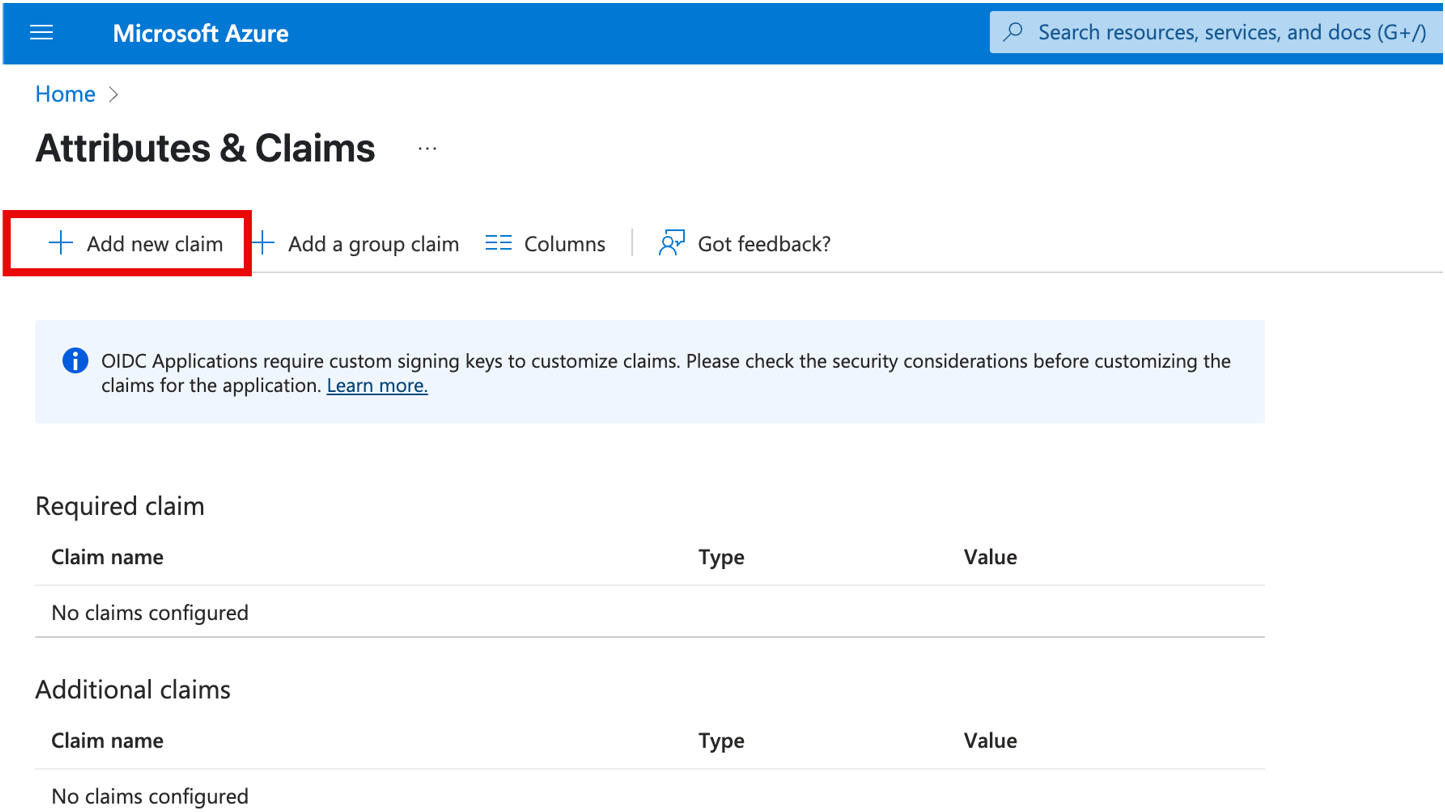
Select to add a new Claim.
-
Give the claim a name, this name is important to note down, as this will be the claim name which will be send to Delinea Platform and needs to have the value of Vendor or Employee.
-
In the example below, the name will be VendorType.
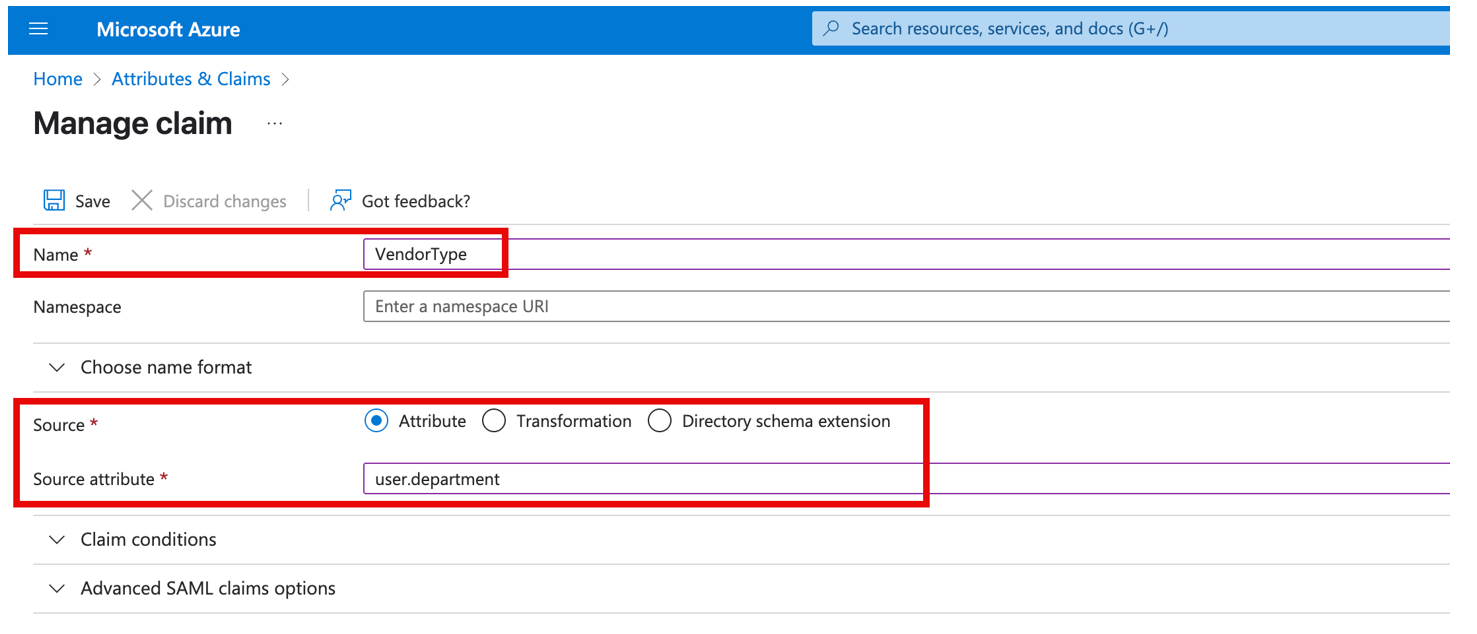
-
User.department in the example above, is a build-in field which also can be modified through the user properties page in EntraID. Note: Not all fields on the user properties page can be used as claims. One can also create custom properties / attributes but as per start of this document, this is out of scope of this document.
-
Following saving the new claim, the single sign on page of the enterprise app should now show this claim.
-
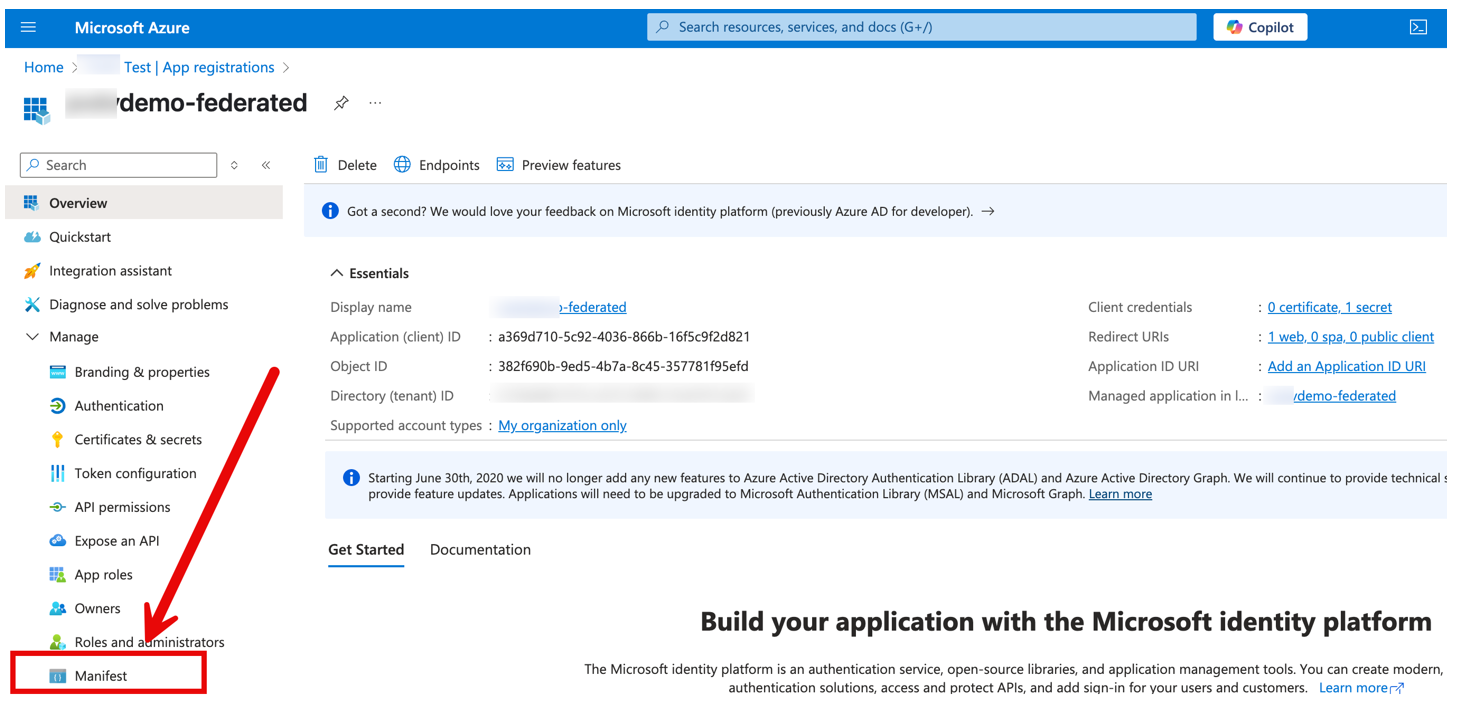
Now that the claim exists, the app registration needs to be reconfigured to allow mapped claims to be included I the response, as by default this is not allowed.
-
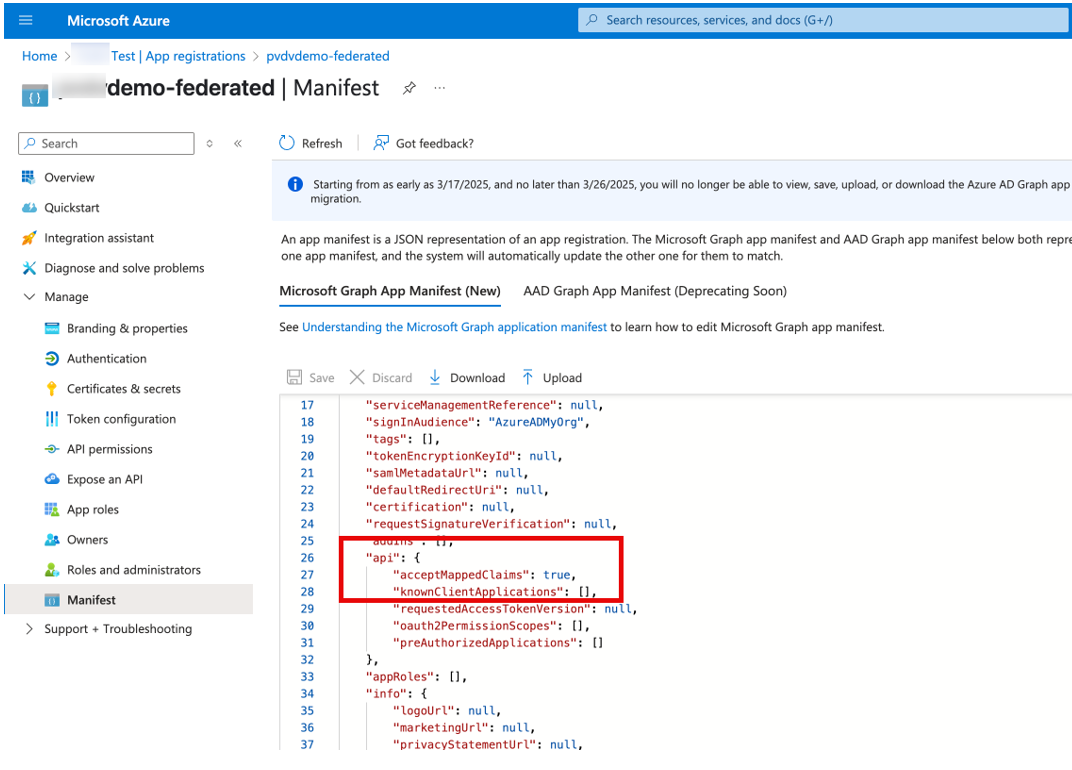
To configure this, browse back to the app registration and select the Manifest option in the menu.
-
In the manifest document, find the parameter: acceptMappedClaims and set the value to true.
-
This concludes the configuration required on Entra ID side. Now to reconfigure Delinea Platform to map the incoming claim to the correct field on the platform.
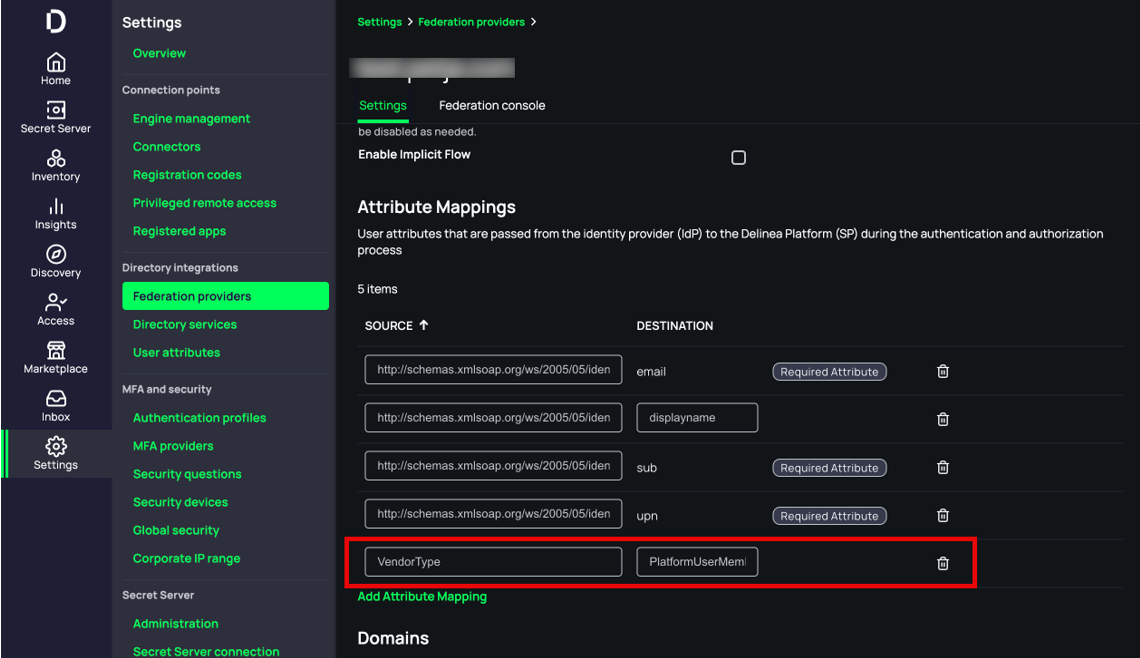
Configuring Attribute Mappings in Delinea Platform
-
Login to Delinea Platform and locate the federation settings under Settings > Federation Providers.
-
Select the respective federation provider to enter the configuration of this federation provider.
-
Select the edit button in the top right corner
-
Scroll down to Attribute Mappings and add an Attribute Mapping
-
The source field needs to match the Claim Name configured in the earlier step, in the example provided we used the name: VendorType
-
The Destination field name needs to be: PlatformUserMembershipType
-
This results in a configuration like the following:
-
Store the configuration by clicking the save button.