Verification
This section provides steps to verify that the integration between Okta and the Platform via SCIM Cloud provisions users and groups for the supported use cases.
Use Case: Provision Users
Complete the following procedure to verify that new users in Okta are automatically created in the Platform through an automatic provisioning process.
You push Okta users to the Platform by assigning those users to the Platform SAML app integration you created in Okta.
Verification steps in Okta
-
Navigate to Applications → Applications.
-
Select the Platform SAML application.
-
Go to the Assignments tab.
-
In the upper-left corner, select Assign and then select Assign to People.
-
Next to the users that you want to assign, select Assign.
-
In the Assign <app name> to People dialog box for each user, review the user details and ensure that all required attributes are populated. Select Save and Go Back.
-
Select Done.
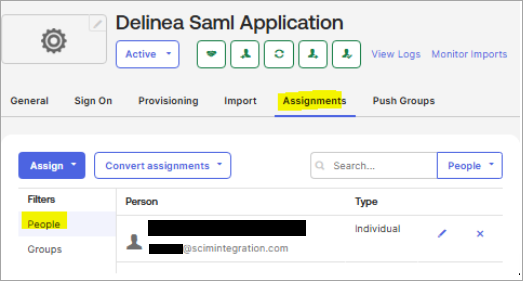
The assigned users are listed on the Assignment tab.
-
Go to the Provisioning tab and navigate to Reports → System Log.
-
Look for events with type
application.provision.user.push_new.Each event should show:
-
Target: The user who was provisioned.
-
Outcome:
SUCCESS. -
Details: The HTTP response from the Platform (should be
201 Created).
-
If you see FAILURE in Outcome, expand the event to see the error. For common failure HTTP responses at this stage, see Okta SCIM Endpoint Reference for the Platform.
Verification steps in the Platform
-
Log in to the Platform.
-
Search for users.
-
On the Users page, verify that the new user accounts were created with Created status.
-
On the user details page of each user, verify that the username, display name, email address, and other user attributes are correct.
Use Case: Provision Groups
Complete the following procedure to verify that new groups in Okta are automatically created in the Platform.
Before provisioning groups, make sure that the group push prerequisites are met. For more information, see Group Push prerequisites in the Okta documentation.
Verification steps in Okta
-
Navigate to Applications → Applications.
-
Select the Platform SAML application.
-
Go to the Push Groups tab.
-
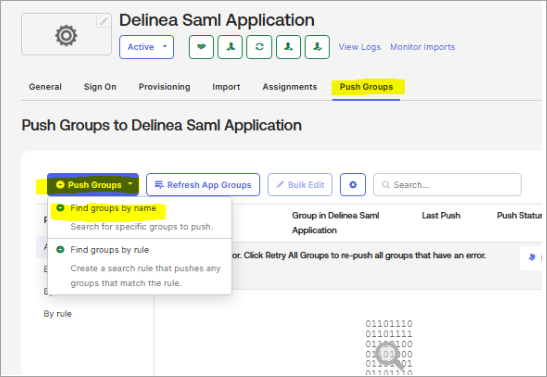
In the upper-left corner, select Push Groups and then select Find groups by name.
-
Search for the required Okta group and select it.
-
Select Save.
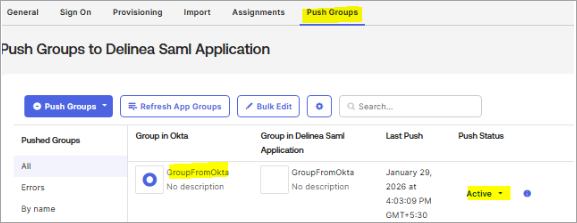
The group appears on the Push Groups tab. After the group is successfully pushed to the platform, Push Status for the group changes from Pushing to Active.
Verification steps in the Platform
-
Log in to the Platform.
-
Search for groups.
-
On the Groups page, verify that the new group was created.
-
Verify that the name of the group and its members match the group name and membership in Okta.
Use Case: Change Group Membership
Complete the following procedure to verify that changes in a group’s membership (members added to or removed from the group) in Okta are automatically reflected in the Platform via SCIM.
Before synchronizing changes in group membership, ensure that the users that you want to add to the group already exist in the Platform.
Before pushing group membership changes to the Platform, make sure that the group push prerequisites are met. For more information, see Group Push prerequisites in the Okta documentation.
Verification steps in Okta
-
Navigate to Directory → Groups.
-
Select the required group.
-
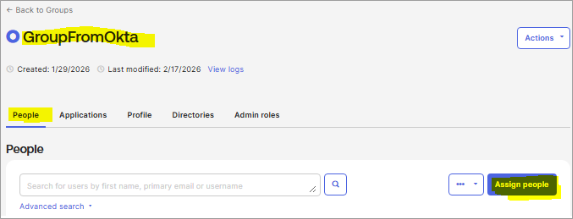
Go to the People tab and select Assign people.
-
Search for the user that you want to add to the group and select the + icon next to the username to assign the user.
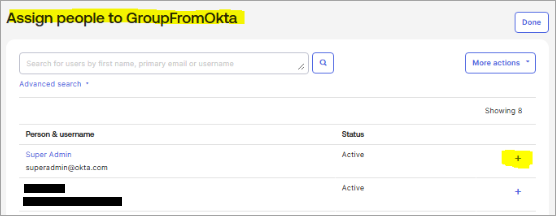
The changes in group membership are synchronized to the Platform.
Verification steps in the Platform
-
Log in to the Platform.
-
Search for groups.
-
On the Groups page, find the group.
-
Verify that the Members tab of the group details page reflects the changes in the group membership.
Use Case: Deprovision Users
When you deactivate a user in Okta, that user is deprovisioned. The following behavior occurs:
-
The user is unassigned from the Platform SAML app integration in Okta.
-
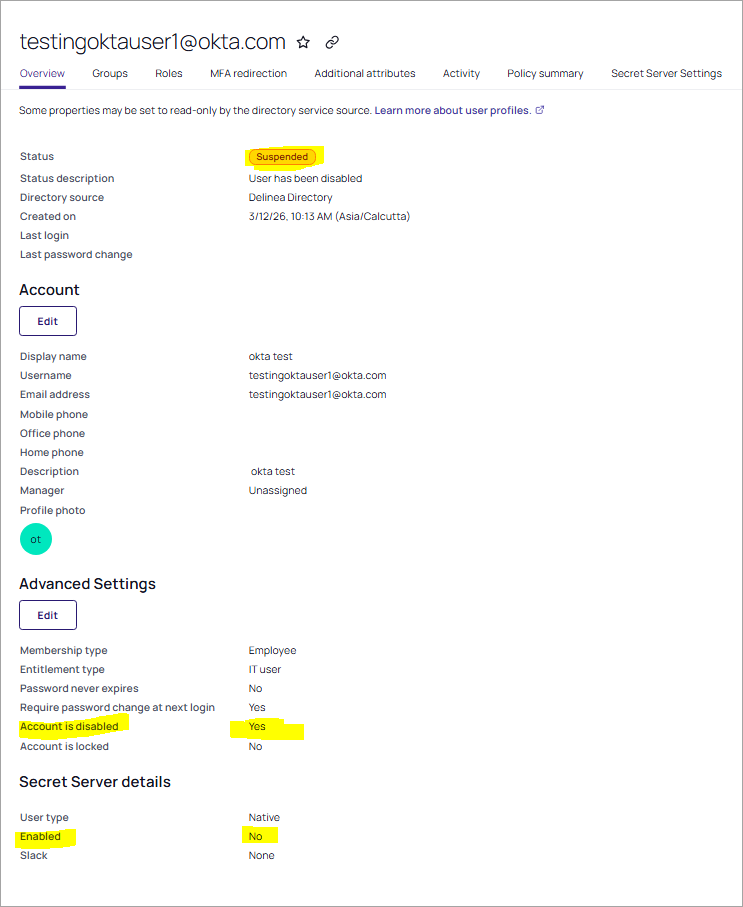
The status of the user account changes to Suspended and the user account is disabled in the Platform.
When you reactivate a user in Okta and re-assign the Platform SAML app integration to the user, the user is enabled in the Platform, and the user status is set to Active.
Complete the following procedures to verify the behavior that occurs when a user is deactivated and when the user is re-activated.
Deactivating a User
Verification steps in the Okta
-
Navigate to Directory → People.
-
Enter the user name in the Search field and click the user name.
-
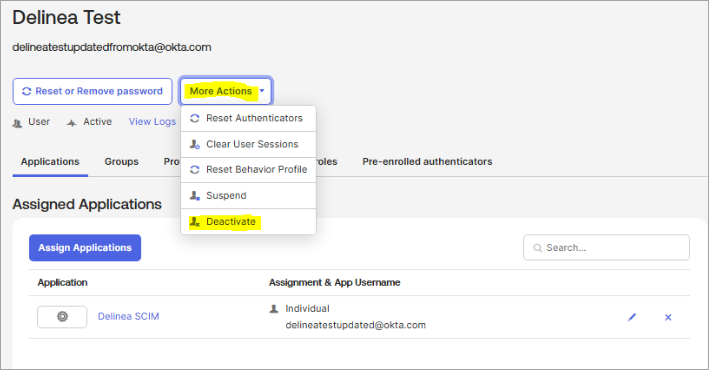
Select More Actions and then select Deactivate.
-
In the Deactivate Person dialog box, select Deactivate.
-
In the confirmation popup, select Deactivate.
-
Go to Applications → Applications.
-
Select the Platform SAML application.
-
Navigate to Assignments > People.
-
Verify that the user was removed from the list of users assigned to the application.
-
Navigate to Provisioning → Reports → System Log.
-
Look for an event with type
application.provision.user.deactivate.The event should show the target user and an outcome of SUCCESS.
Verification steps in the Platform
-
Log in to the Platform.
-
Search for users.
-
On the Users page, verify that the status of the user account is Suspended.
-
Verify that on the user details page, Account disabled is set to Yes.
Deleting a deactivated user in Okta does not result in the same user being deleted in the Platform. The user deactivation removes the user’s assignment in the Platform SAML application so deleting the user does not trigger user deletion in the Platform.
Re-Activating a User
Verification steps in the Okta
-
Navigate to Directory → People.
-
Enter the user name in the Search field and click the name of the deactivated user.
-
Select Activate and then select Activate in the Activate Person dialog box.
-
Complete the steps in Use Case: Provision Users to re-assign the Platform SAML application to the user.
Verification steps in the Platform
-
Log in to the Platform.
-
Search for users.
-
On the Users page, verify that the status of the user account is Active.
-
Verify that on the user details page, Account disabled is set to No.
Use Case: Deprovision a Group
When you unlink a group from the Platform SAML application in Okta, that group gets deprovisioned and is deleted in the Platform.
Complete the following procedure to verify that a group is deprovisioned.
Verification steps in Okta
-
Navigate to Applications → Applications.
-
Select the Platform SAML application.
-
Go to the Push Groups tab.
-
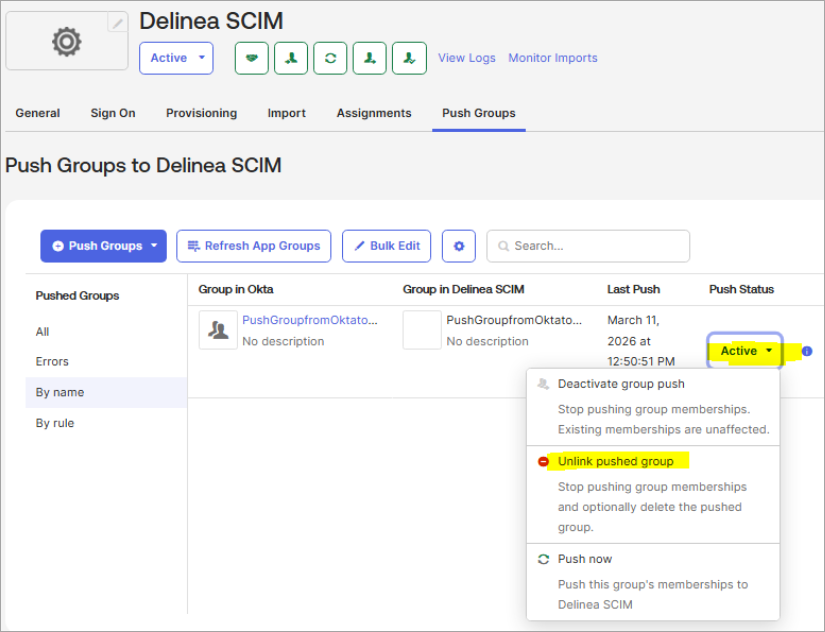
For a group with Active in Push Status, select the drop-down arrow to the right of Active and select Unlink pushed group.
-
In the confirmation popup, select Delete the group in the target app and then select Unlink.
The group is removed from the Push Groups tab.
Verification steps in the Platform
-
Log in to the Platform.
-
Search for groups.
-
Verify that the group was removed from the Groups page.
Use Case: Update User Profiles
Complete the following procedure to verify that changes to a user’s attributes (for example, a user’s display name) in Okta are automatically reflected in the Platform via SCIM.
Manage identity changes from Okta rather than directly in the Platform to avoid sync issues.
Verification steps in Okta
-
Navigate to Directory → People.
-
Search for and select the user that is assigned to the Platform SAML app integration.
-
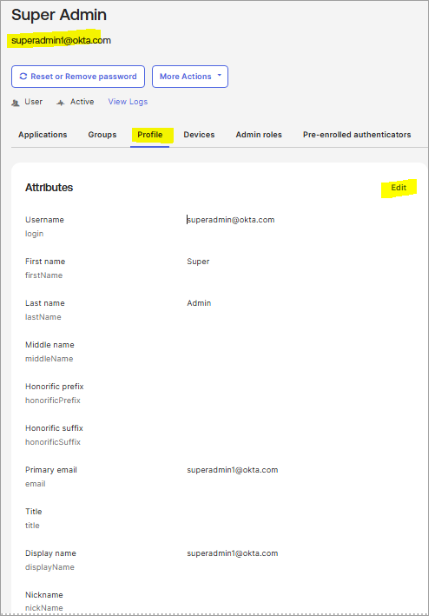
Go to the Profile tab and select Edit.
-
Update the required details (for example, Display name or Primary email).
The Username field is the unique identifier (
userName) and is treated as immutable. If the username is updated in Okta, the existing user account in the Platform is automatically suspended, and a new account is created with the updated username. Never update the Username field after initial user creation. -
Select Save.
The updated user attributes are automatically synchronized to the Platform.
Verification steps in the Platform
-
Log in to the Platform.
-
Search for users.
-
On the Users page, find the user account and verify that the user account is in Active status.
-
Verify that the user details page reflects the changes in the user attributes.


