Configuration
The configuration steps differ depending on whether you are integrating the Delinea Platform with SailPoint Identity Security Cloud (ISC) or SailPoint IdentityIQ (IIQ).
Before proceeding, you must complete the Delinea Platform SCIM Connector configuration. This includes creating the SCIM service account, assigning the required custom role and permissions, and validating OAuth 2.0 token retrieval.
Complete the following steps in the Delinea Platform:
-
Step 1: Configure SCIM Connector for the Delinea Platform.
-
Step 2: Review the recommended best practices to confirm that your configuration follows recommended guidelines for authentication, synchronization, permissions, filters, and connectivity.
-
Step 3: Review the FAQ for answers to common questions about SCIM Cloud Connector Configuration and Troubleshooting.
Once these steps are completed, follow the section below that matches your SailPoint deployment.
Delinea Platform supports integrations with SailPoint Identity Security Cloud (ISC) or SailPoint IdentityIQ (IIQ)
Configure SailPoint Identity Security Cloud (ISC)
Follow these steps to create and configure the SCIM 2.0 source in SailPoint ISC:
-
Log in to Sailpoint Cloud Instance.
-
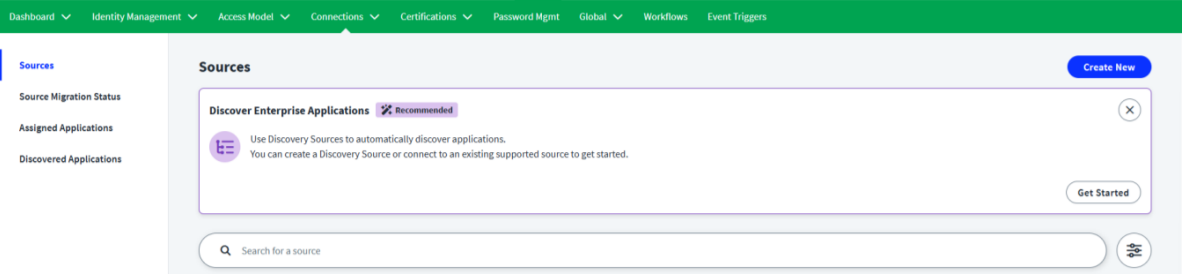
Navigate to Admin > Connections > Sources > Create New.
-
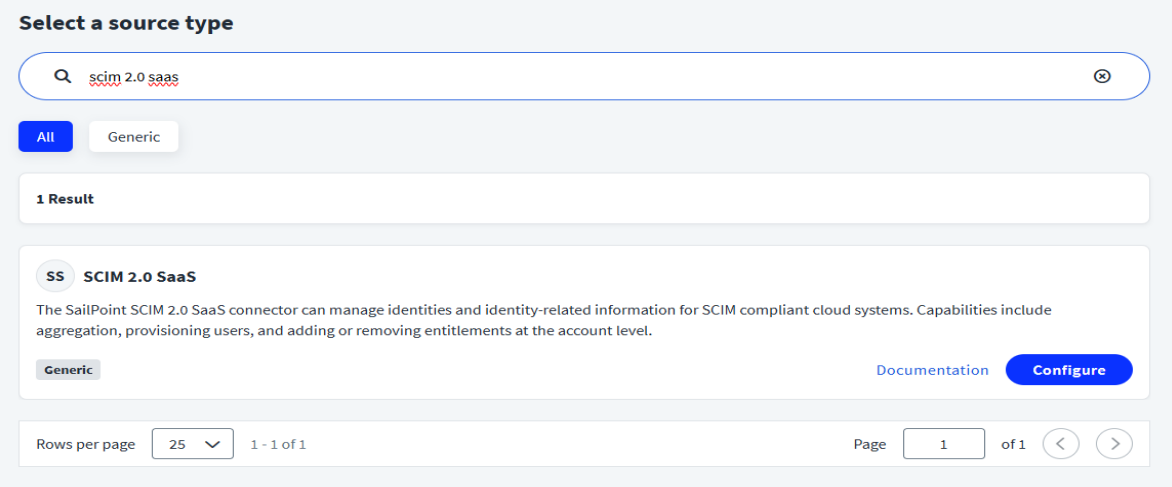
In the Search for a source field, type SCIM 2.0 SaaS and then select Configure for the SCIM 2.0 SaaS displayed source.
-
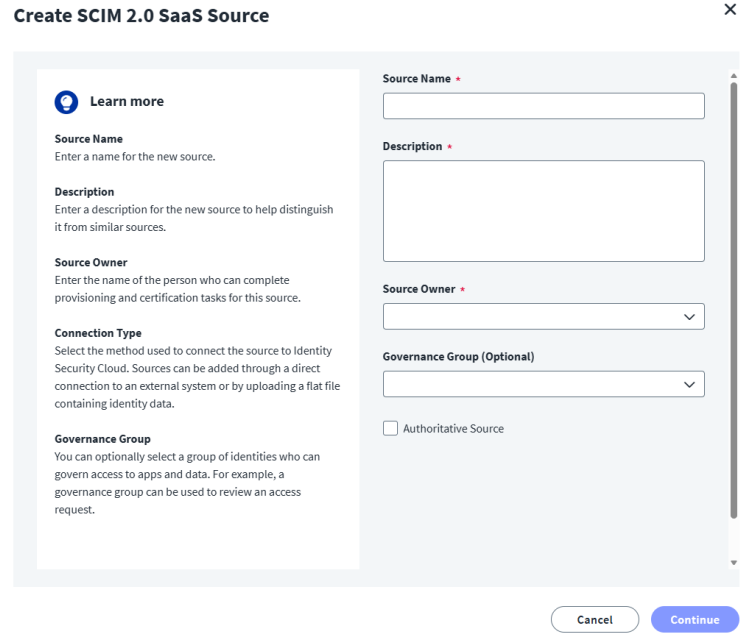
Enter the connection details:
-
Once you are done, select Continue. The Connection Settings page opens
-
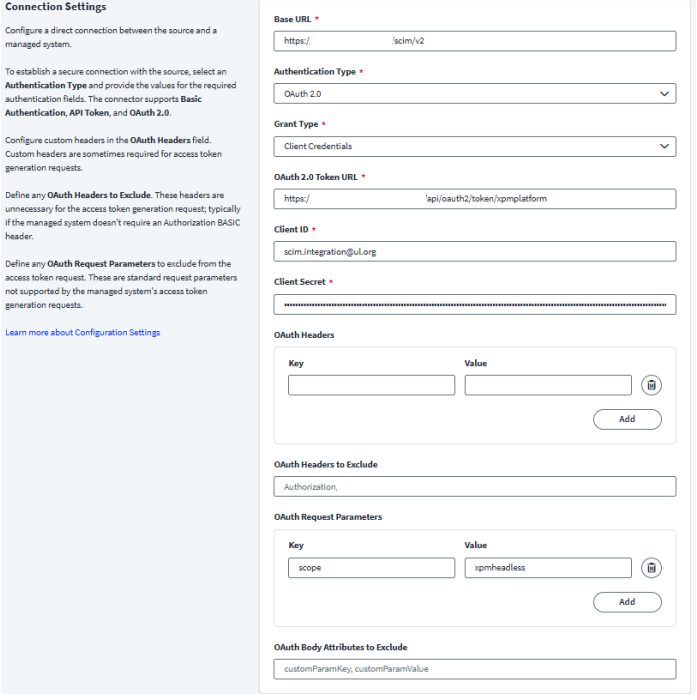
Complete the following fields:
-
Base URL: https://<your-tenant>.delinea.app/scim/v2
-
Authentication Type: OAuth 2.0
-
Grant Type: Client Credentials
-
OAuth 2.0 Token URL: https://<your-tenant>.delinea.app/identity/api/oauth2/token/xpmplatform
-
Client ID: Delinea Platform SCIM service account username
-
Client Secret: Delinea Platform SCIM service account password
-
-
Configure OAuth request parameters:
-
Key: scope
-
Value: xpmheadless
-
-
Save the source.
Configure SailPoint IdentityIQ (IIQ)
Follow these steps to create and configure the SCIM 2.0 source in SailPoint IdentityIQ:
Step 1: Create and Configure the SCIM 2.0 Source in SailPoint
-
Once the role and user has been created in Platform go to SailPoint, and navigate to Setup > Sources > Add New Source > SCIM 2.0.

-
Enter the following connection details:
-
In the Host URL field add the SCIM url: https://tenantname.delinea.app/scim/v2.
This is the base SCIM endpoint for your Delinea Platform tenant. SailPoint uses this URL to retrieve users, groups, and permissions via SCIM.
-
Select the OAuth 2.0 checkbox in the Authentication Type field.
This determines how SailPoint authenticates to the Delinea Platform. Delinea Platform requires OAuth 2.0 token-based authentication.
-
In the Grant Type field select Client Credentials from the dropdown. This grant type is used for service accounts and non-interactive system authentication.
-
In the OAuth 2.0 Token URL field, enter the Delinea Platform OAuth token endpoint: https://tenantname.delinea.app/identity/api/oauth2/token/xpmplatform
This is the Delinea Platform endpoint where SailPoint requests an access token using the client ID, secret, and scope.
-
In the Client ID field enter Delinea Platform SCIM service account username.
-
-
In the Client Secret field, enter the password for your SCIM service account.
-
In the Source Setup navigation menu, click Additional Settings.
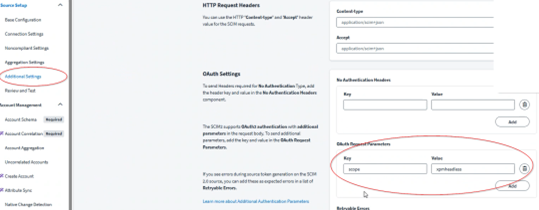
-
Scroll to the OAuth Request Parameters section.
-
Click Add and enter the required
-
Key: scope
-
Value: xpmheadless
-
-
Click Add, then Save the Source.
Step 2: Configure SailPoint IdentityIQ Application
Step 1: Create Application
-
Log in to your SailPoint instance using administrative credentials.
-
Navigate to Applications > Application Definition.
-
Select Add New Application to begin creating a new integration.
-
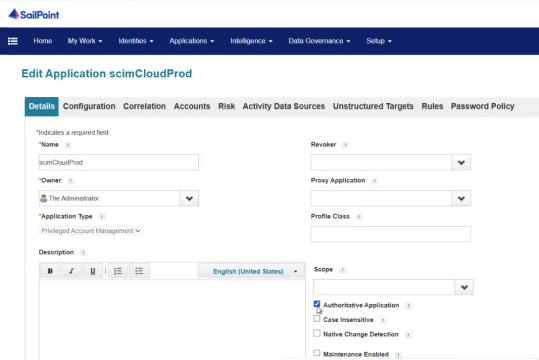
In the Details tab, fill in the required fields:
-
Name: Enter a descriptive name for the application (e.g., scimCloudProd).
-
Owner: Select the appropriate SailPoint administrator from the dropdown.
-
Application Type: Select Privileged Account Management from the dropdown.
-
Select the Authoritative Application checkbox.
-
-
After selecting Authoritative Application, additional tabs will appear: Configuration, Correlation, Risk, Activity Data Sources, Unstructured Targets, Rules, Password Policy.
This SCIM Cloud application will later be referenced when creating the sync tasks (Account Aggregation, Group Aggregation, Target Aggregation).
Step 2: Configure SCIM Settings
-
Select the Configuration tab and go to the Settings sub-tab.
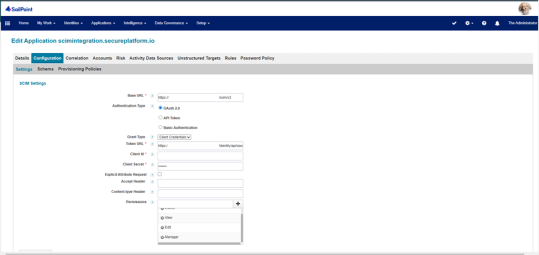
-
In the Base URL field, enter your Delinea Platform SCIM URL. (your domain.delinea.app/scim/v2)
-
In the Authentication Type field, select the OAuth 2.0 checkbox.
-
In the Grant Type field, select the Client Credentials from the dropdown list.
-
In the Token URL field, enter the
This is the static OAuth 2.0 token URL that SailPoint uses to request access tokens.
-
In the Client ID field, enter the Delinea Platform SCIM service account username.
-
In the Client Secret field, enter the Delinea Platform SCIM service account password.
-
Assign these permissions:
-
Owner
-
Edit
-
Add Secret
-
View
-
-
Click Test Connection and ensure the connection is successful.
-
Click Save to commit your configuration.
No additional permissions should be granted beyond the list above. This configuration ensures that the application maintains the intended access control and aligns with the defined security requirements.
Step 3: Add Unstructured Target
-
Navigate to the Unstructured Targets tab.
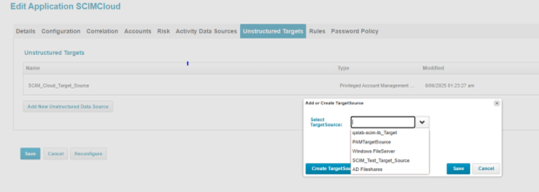
-
Select Add New Unstructured Data Source if a target does not already exist.
-
Either select an existing target source from the dropdown or click Create Target Source to create a new one.
-
In the Select Target Source field select a SCIM target from the dropdown.
-
In the Unstructured Target Configuration page, verify the following SCIM settings are filled:
-
Base URL: same as used above.
-
Authentication Type: OAuth 2.0
-
Grant Type: Client Credentials
-
Token URL:
-
Client ID / Secret: SCIM service credentials.
-
Correlation Rule: Select PAM Account Mapping Correlation Rule.
-
Target Source Type: Privileged Account Management Collector.
-
-
Select Save to save the data source.
-
Select Next, then save again to save the application.
To verify the SCIM target linkage:
-
Return to the main Application page and open your SCIM Cloud application again.
-
Go to the Unstructured Targets tab.
-
Verify that your target (for example, scimCloudProd-TargetSource) appears in the list with Type = Privileged Account Management.
-
This confirms that the SCIM data source is successfully linked to the application.
Step 3: Configure Refresh Token
-
Log in to SailPoint Debug Mode using
http://<your-instance>.sailpointtechnologies.com:8890/identityiq/debug. -
From the Debug page, open the Object Browser Grid and select Application from the dropdown menu.
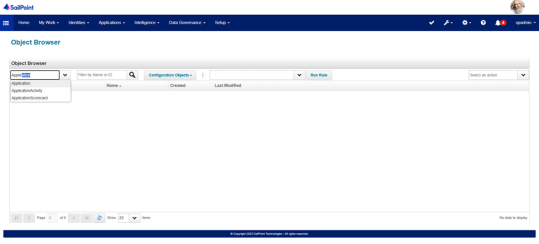
-
Select the SCIMCloud application to open the Object Editor.
-
Scroll to the XML configuration section in the Object Editor and locate the <Map> entries.
-
Add a
<entry key="retryableErrors">section in the XML to define retriable errors (e.g., Unauthorized, 401, 401 Unauthorized), based on the example below:Copy<entry key="retryableErrors">
<value>
<List>
<String>Unauthorized</String>
<String>401</String>
<String>401 Unauthorized</String>
</List>
</value>
</entry> -
Add your refresh token securely in the appropriate XML field to enable token refresh.
-
Click Save in the Object Editor to apply the changes.
-
Re-run an aggregation task and observe Task Results.
-
Confirm that the connector automatically retries and refreshes the token as defined in your XML configuration (added in Debug Mode).
-
Return to the application configuration and click Test Connection to confirm retry and refresh functionality.
Step 4: Create Sync Tasks
-
Log in to SailPoint with administrative credentials.
-
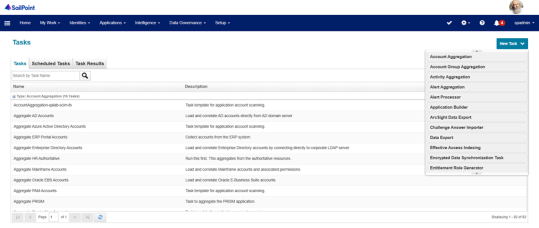
Navigate to Setup > Tasks.
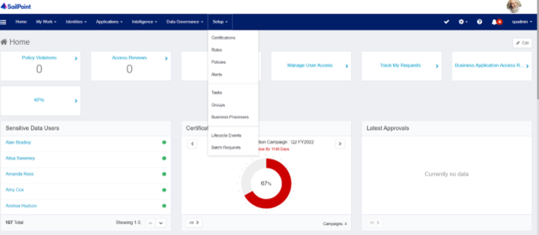
-
Select New Task to expand it and select the following task types one by one:
-
Select Account Aggregation to sync users.
-
Select Account Group Aggregation to sync groups.
-
Select Target Aggregation to sync permissions.
-
-
In the Name field, type a descriptive name for each task (e.g., SCIM-Cloud-UserSync, SCIM-Cloud-GroupSync, SCIM-Cloud-PermissionSync).
-
In the task details:
-
Select your SCIM application (e.g., scimCloudProd).
-
Leave other options as default unless additional rules are required.
-
-
Click Save to finalize each task.
-
Confirm that the tasks automatically pull users, groups, and permissions from Delinea Platform into SailPoint.
-
You can execute the task in the background if you are confident that the information is correct and there is no need for manual verification.
-
To do so, right-click on the name of a task and select Execute in Background.
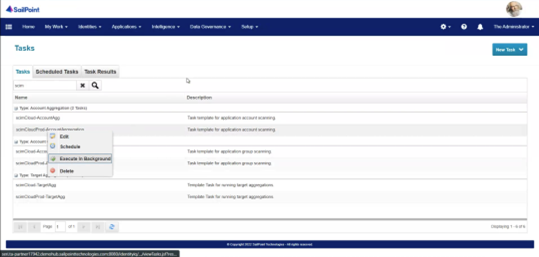
-
Alternatively, right-click the task and select Edit. Once you have verified the accuracy of the information, select Save and Execute.
-
-
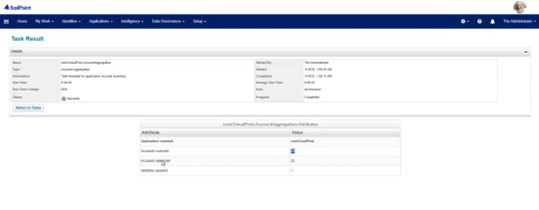
After the task was successfully executed in the background, you can verify the status of the tasks in the Task Results tab.
-
Repeat for all tasks (Account, Group, and Target).
-
Confirm that each task appears as expected and is ready to run.
After completing the SCIM configuration and saving your application:
- Go to Applications > Application Definition.
- Select the SCIM application you configured.
- Click the Accounts tab.
- Confirm that the synchronized user and group accounts from the Delinea Platform appear here.
This view allows you to verify that the application is correctly aggregating data through the SCIM connector.
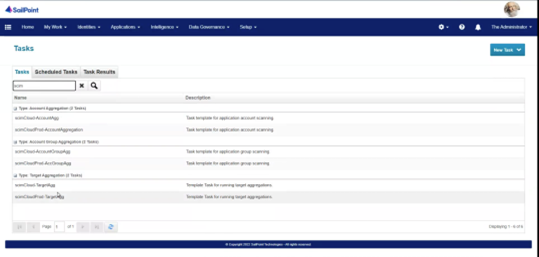
After completing configuration and creating your sync tasks, verify that each task ran successfully.
-
In SailPoint, navigate to Setup > Tasks > Task Results.
-
Locate your SCIM tasks (for example, scimCloudProd-AccountAggregation, scimCloudProd-TargetAgg).
-
In the Result column, confirm that each task shows Success with a green checkmark.
-
If any task shows Fail, review the error details and confirm that:
-
The SCIM application configuration is correct.
-
The Client ID, Secret, and Token URL are valid.
-
The Delinea Platform endpoint is reachable.
-
-
Once all tasks show Success, the integration is verified and functioning as expected.