Roles and Permissions
Delinea Platform's role-based access control system precisely manages resource access, so you can authorize users with the exact permissions they need.
Unified Roles and Permissions in Secret Server and Platform
For new customers of Delinea Platform and Secret Server, all roles and permissions are centrally managed within the platform.
As of November 8, 2023, all newly provisioned customers on Delinea Platform experience a unified roles and permissions system. All Secret Server roles and permissions are managed centrally within Delinea Platform.
-
Delinea Platform serves as the authoritative source for role permissions within Secret Server. All Secret Server permissions are displayed under Platform permissions.
-
Secret Server user, group, and role management are no longer accessible under Secret Server Settings.
Access to Secret Server requires the Secret Server Access permission.
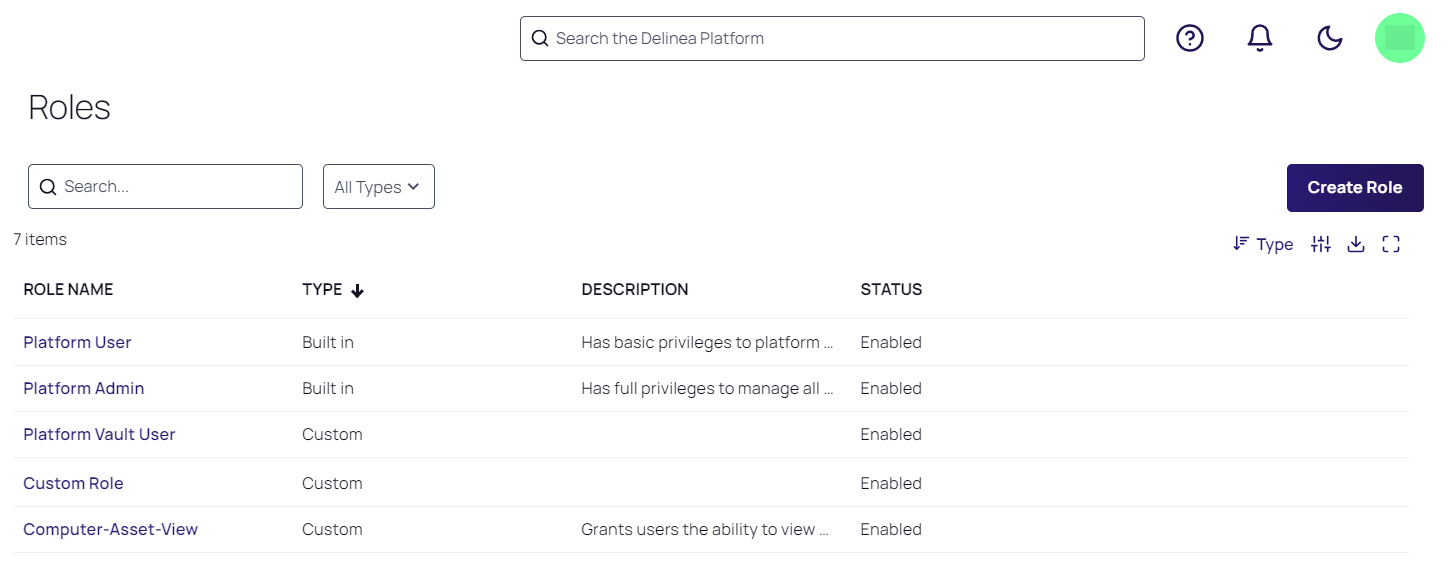
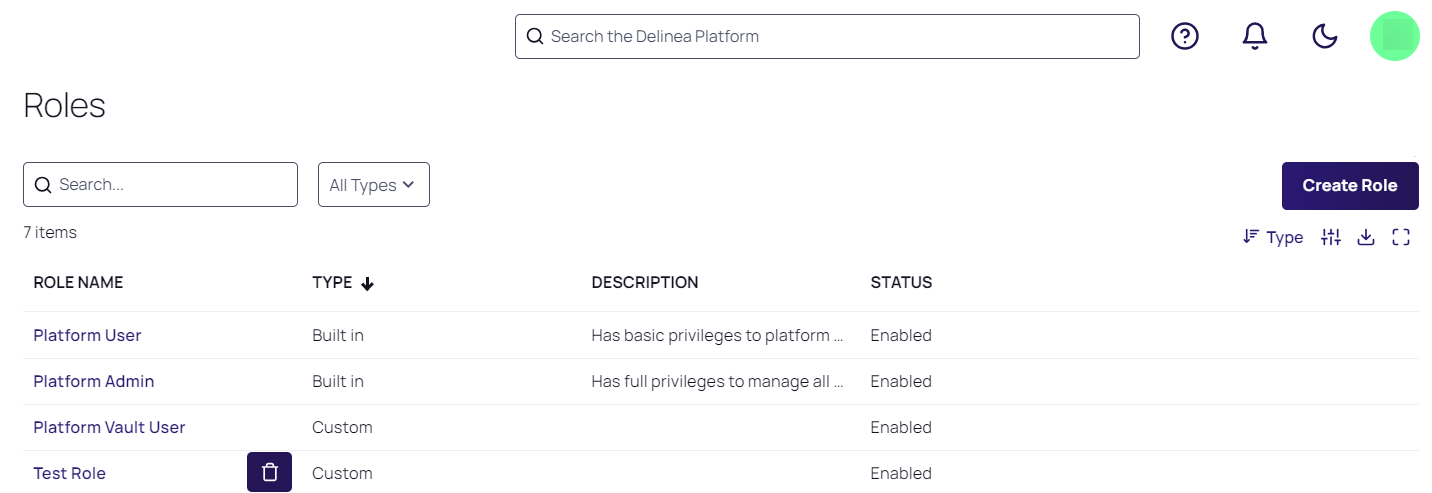
Built-in Roles
The Platform provides two built-in roles, which cannot be edited or removed (but can be detached from groups):
-
Platform User: All users of Delinea Platform belong to the Everybody group, and inherit the Platform User role through their membership in that group. The Platform User role provides basic permissions for a user to log in to the platform, launch PRA sessions, access their own secrets, and view their own session recordings.
-
Platform Admin: Users of Delinea Platform who belong to the System Administrator group inherit the Platform Admin role through their membership in that group. The permissions for every Delinea Platform feature that a customer has purchased are included in the Platform Admin role automatically, with one exception. The very sensitive permission Read All Secret Names is not automatically granted.
Custom Roles
The Platform also supports the creation, editing, and deletion of custom roles. Those topics are covered later in this page.
Permissions, Roles, and Groups
On the platform, permissions are made available for assignment to Roles according to the services available in your Platform environment. Roles and their associated Permissions are assigned to Users through the Users' memberships in Platform Groups, including Platform Groups mapped to federated groups. Put another way, a User inherits Roles, along with each Role’s Permissions, through the Group or Groups the User belongs to. To better understand the relationships between Permissions, Roles, and Groups, review the following points:
Permissions
-
Permissions can be attached directly to one or more Roles.
-
Permissions cannot be attached directly to a User.
-
Permissions cannot be attached directly to a Group.
Roles
-
Roles can be attached directly to one or more Groups.
-
Roles can also be attached directly to one or more Users, but this is not a best practice.*
Groups
-
Groups can be attached to one or more Users.
-
Groups can be attached to one or more Groups.
*Although you can assign a Role directly to a User, this is not a best practice. The best practice is to assign a Role to a User only indirectly, through the Groups the User is assigned to, as illustrated in the diagram below.

Editing Role Permissions
To edit an existing role:
Click Access from the left navigation menu, then select Roles.
Click the name of one of the roles displayed. The role page opens to the Overview tab.
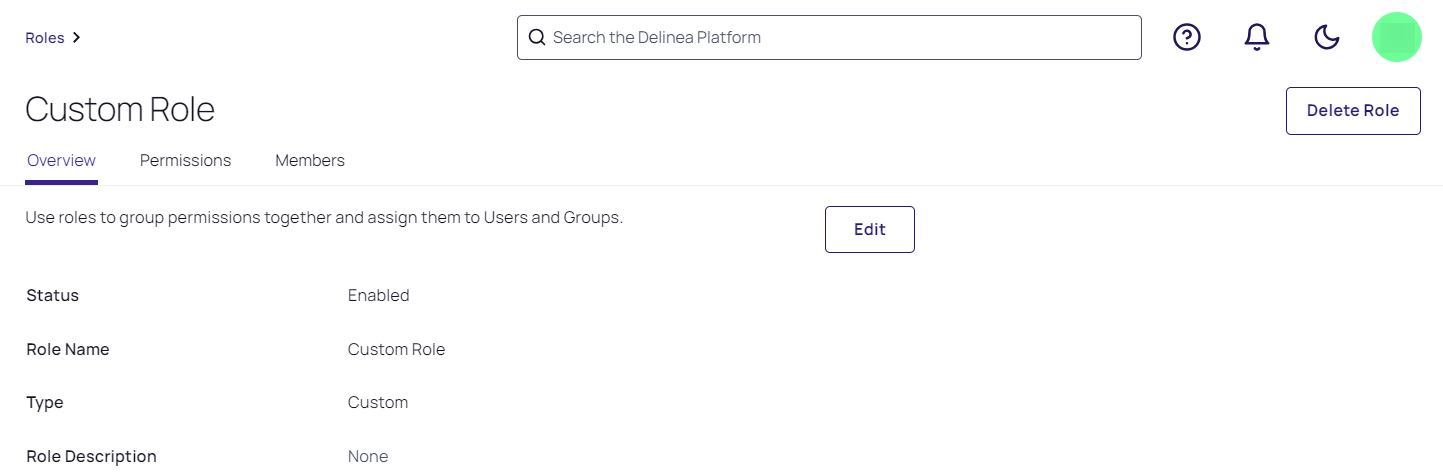
Click the Permissions tab. All permissions assigned to the role are listed on the tab.

- To add a permission to the role, click Add Permission. The Add Permissions dialog pops up.
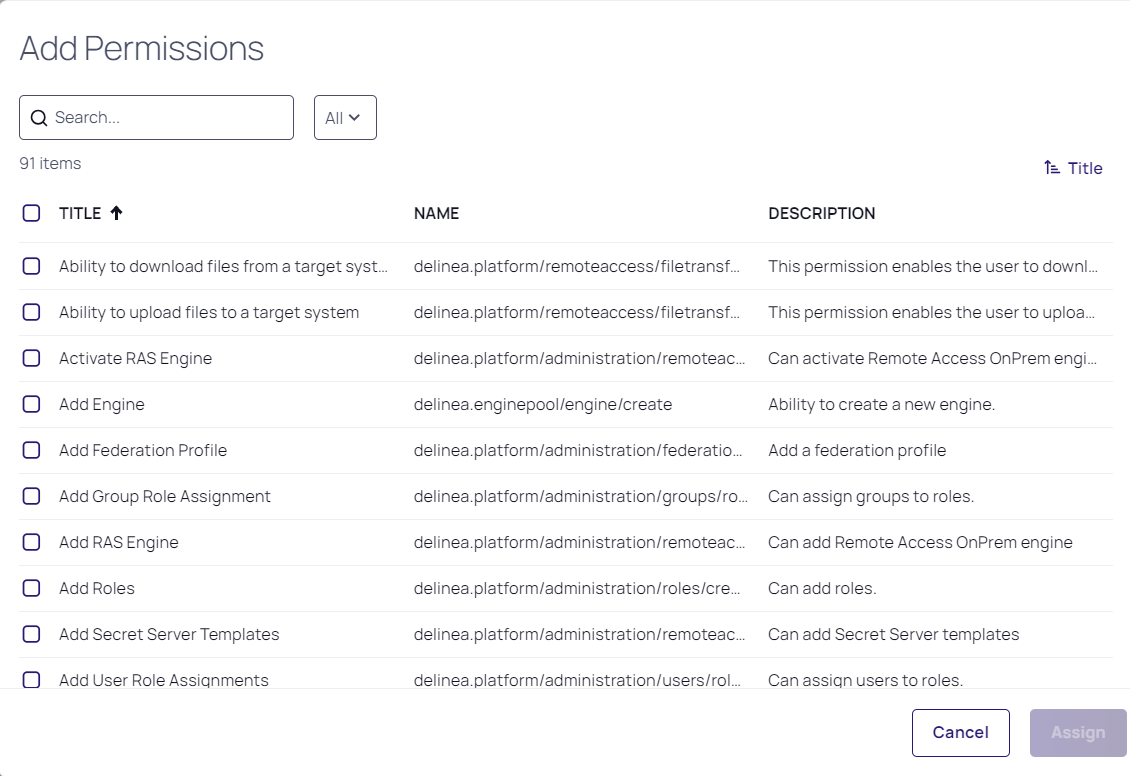
- Select the box next to each permission you would like to add to the role.
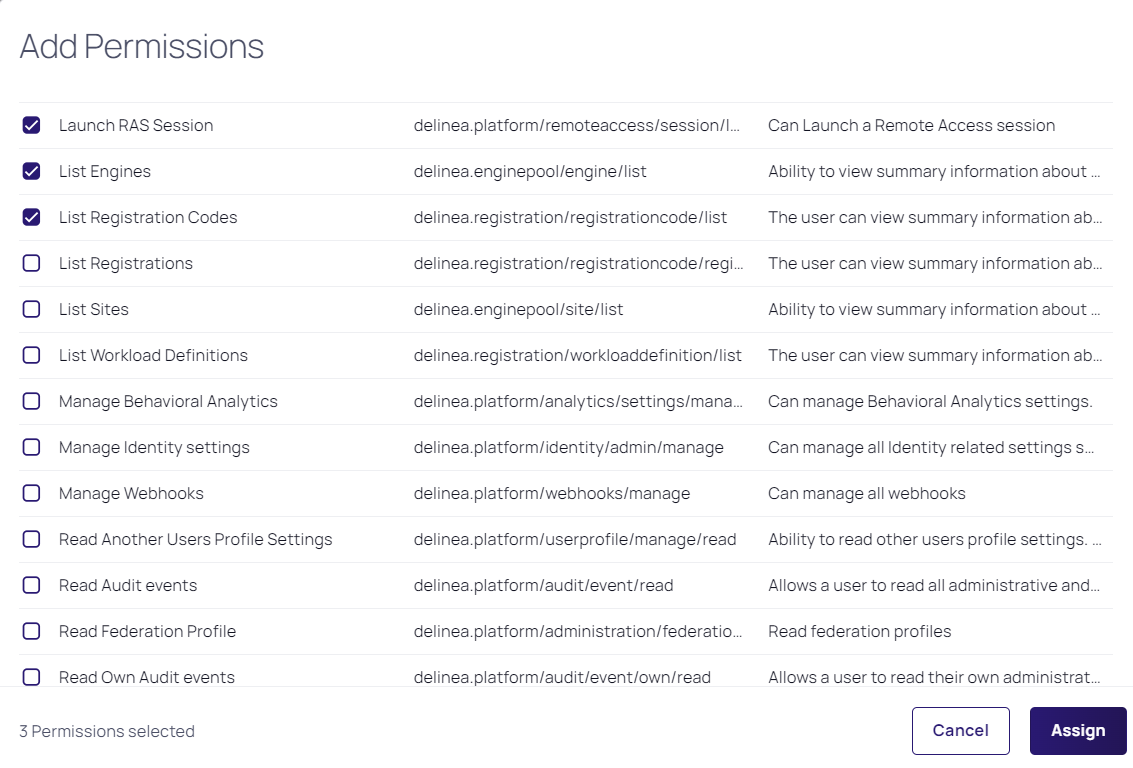
- Click Assign.
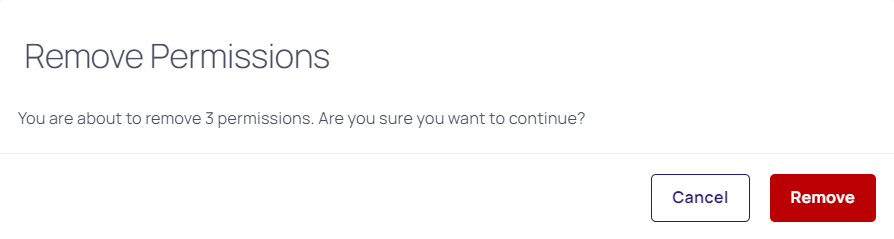
- To remove one or more permissions assigned to a role, select the box next to each permission you would like to remove, then click Remove Selected.
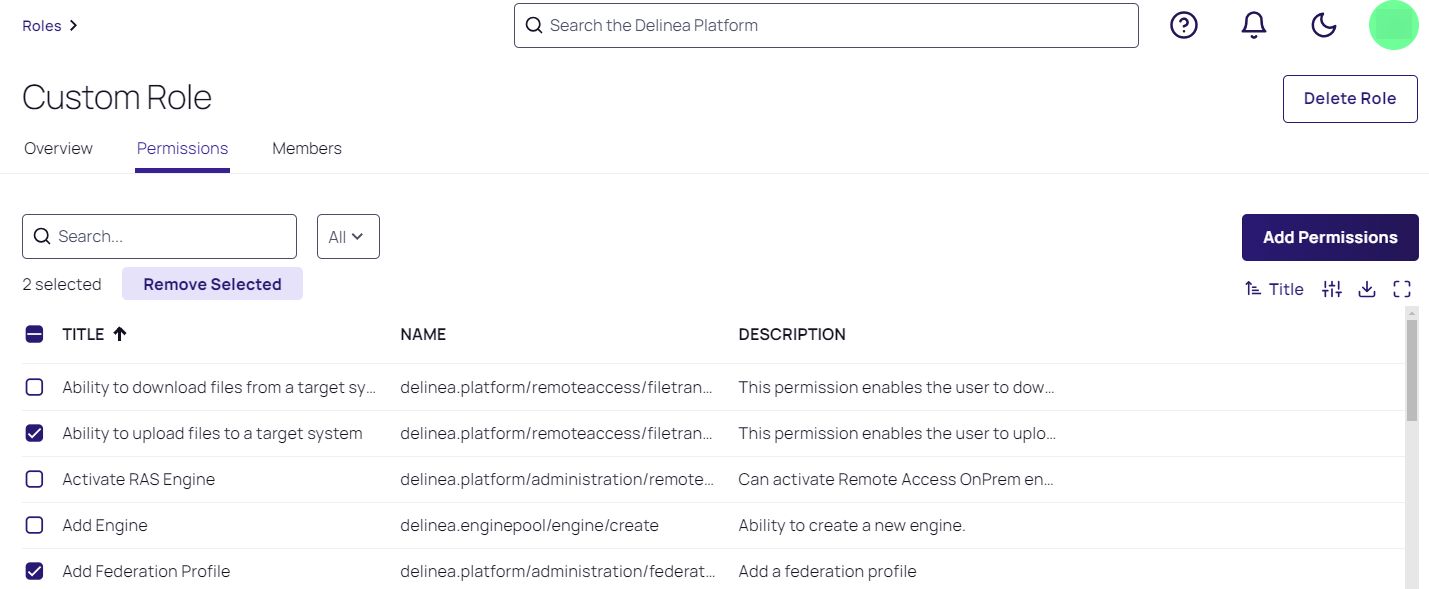
- Click Remove from the pop-up banner to confirm that you want to remove the permission(s).
Editing Role Members (Groups)
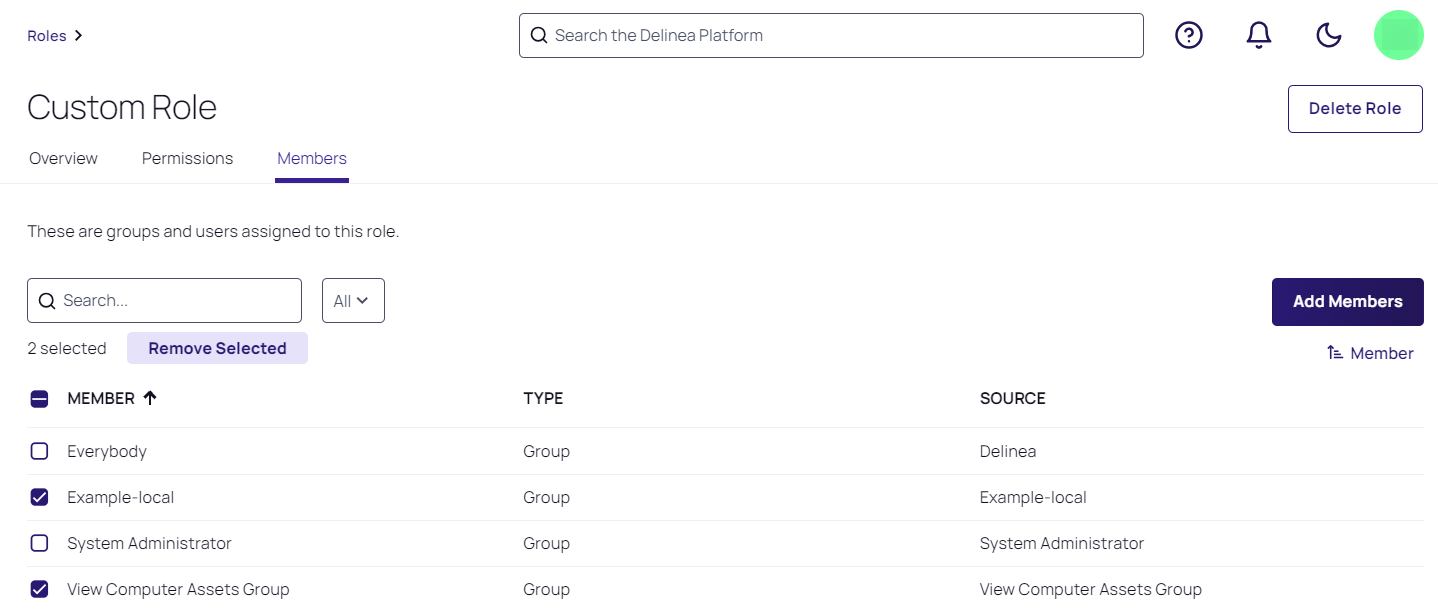
Click the Members tab.
To add members (groups) to the role, click Add Members.

The Add Members dialog pops up.
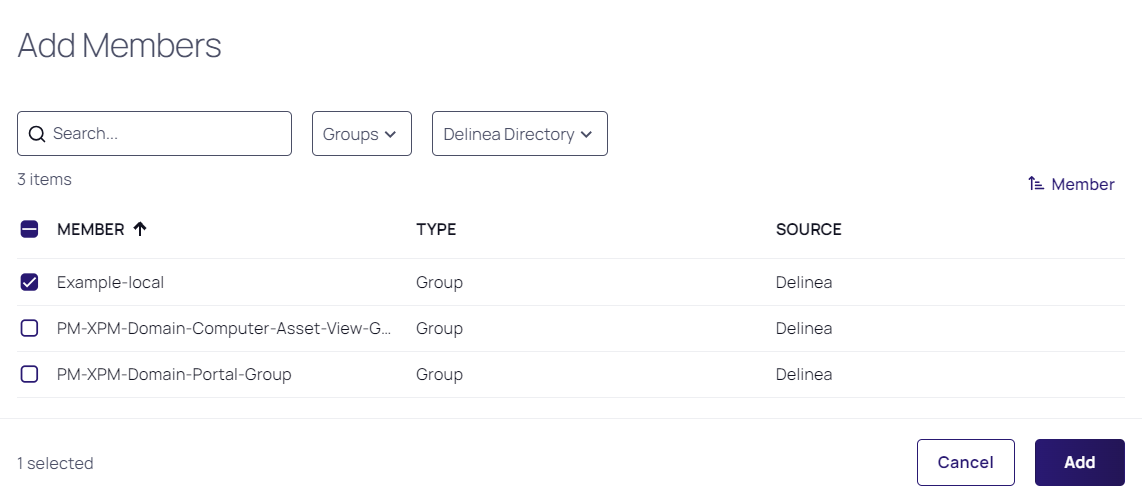
Select the box next to the groups you want to add, then click Add.
To remove members (groups) from the role, go to the Members tab and select the box next to each group you wish to delete, then click Remove Selected.
Deleting a Role
Custom roles can be deleted. Some roles, like Platform User and Platform Admin, are unable to be deleted. To delete a role:
- Click Access from the left navigation menu, then select Roles.
Hover your cursor over the role you wish to delete, then click the trash icon that appears.
- Click Delete from the confirmation pop-up.

You can also delete a role directly from the role's details page by clicking the Delete button at the top right of the page.
Assigning a Group to a Role
The platform supports the following types of groups: global AD security groups, universal AD security groups, Entra ID security groups, and user attributes/claims named groups.
It does not support domain local groups. It also does not support distribution lists. A distribution list, sometimes inaccurately called a distribution group , is used to send email to users specified on the list. But on any access control system including the Delinea Platform, groups are used for access control. A distribution list cannot be used for access control because it cannot be listed in discretionary access control lists (DACLs). A distribution list has no index, so you can’t query it to determine if a user (trying to access something) is or is not on the list, rendering the distribution list useless for purposes of controlling access.
- Click Access from the left navigation, then select Groups.
Select a group you would like to assign to a role.
Select the Roles tab, and click Assign to Role.
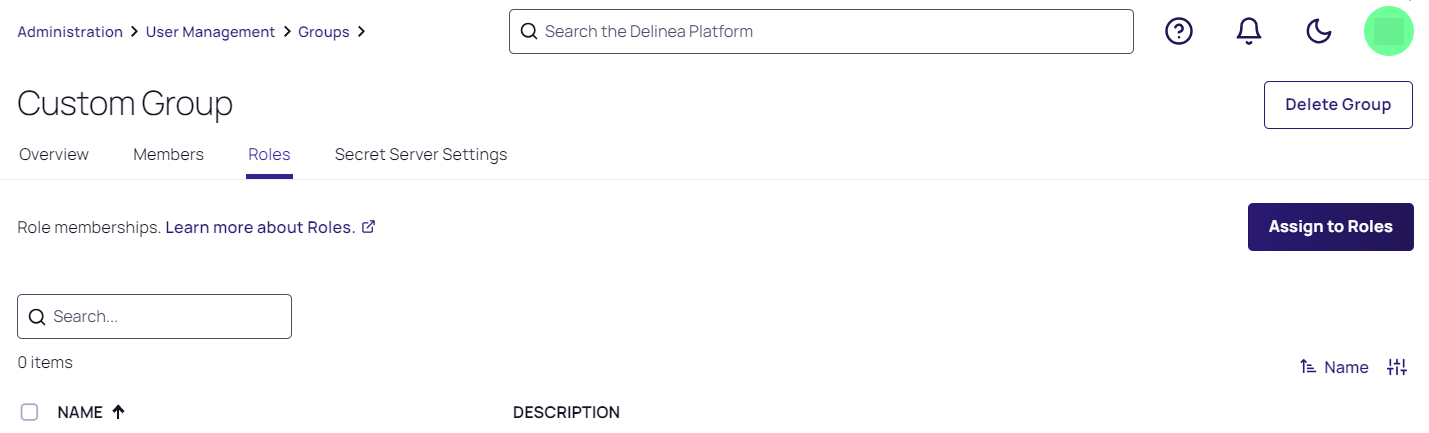
Select the role(s) and click Assign.

Creating a New Role
- Click Access from the left navigation menu, then select Roles.

Click Create Role.
To create a new role from scratch, select Create New Custom Role. To create a role by cloning an existing role and editing it, select Clone Existing Role.

Enter appropriate information in the Role Name and Role Description fields.
Click Save.
Click the Permissions tab.
Click Add Permissions to assign appropriate permissions to the role.
- To search through existing permissions, enter terms into the Search box.
- To restrict your search results to just one type of permission, make your selection from the All dropdown list.
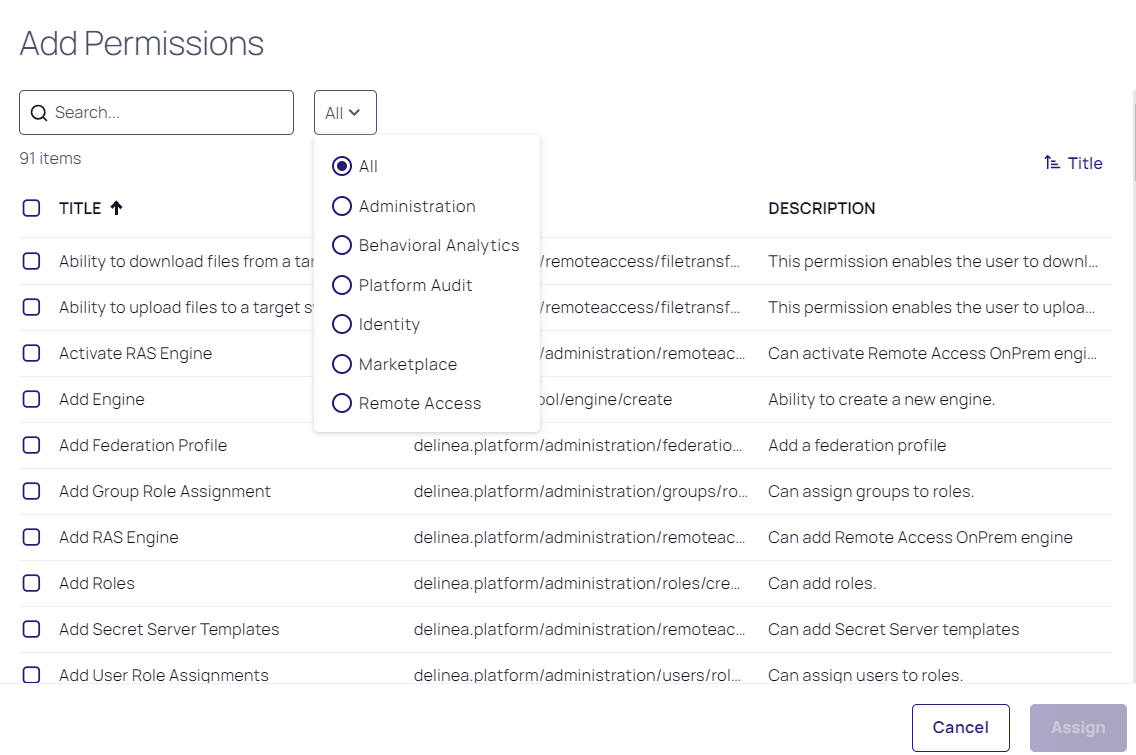
Click Assign.
Adding Members (Groups) to a Role
Click the Members tab.
Click Add Members.
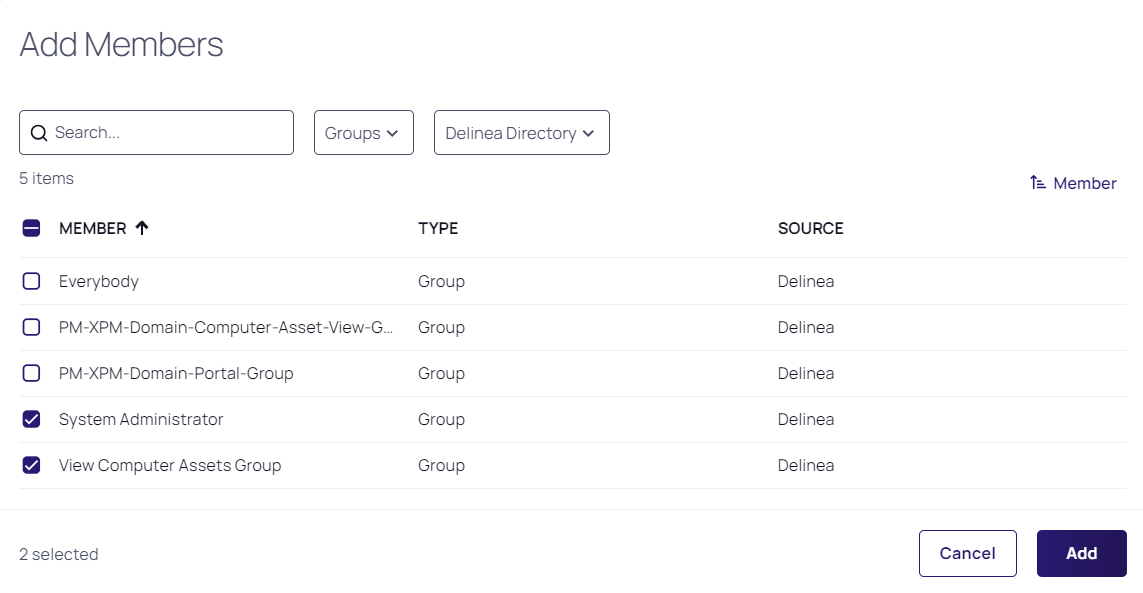
To search through existing groups, enter terms in the Search box.
The first search filter is set to restrict search results to Groups by default. Although you can select Users from the dropdown list, adding individual users to a role is not considered a best practice.
To search across a specific directory (for example, Active Directory), click the Delinea Platform Directory dropdown list and select the desired directory.
When you have made your selections, click Add.
Replacing Default Groups or Roles
The default user role, Platform User, and the default admin role, Platform Admin, provide the permissions needed for everyday use and administration of the Delinea Platform. The Everybody group (all users) is attached to the Platform User role, and the System Administrators group (admins) is attached to the Platform Admin role. For the Platform User role, that group attachment can also be removed. If you don’t want all of your platform users to have the permissions in the Platform User role, unassign the Everybody group from Platform User. From there, you can duplicate the Platform User role, update its permissions, and assign the duplicate to the Everybody group or to whatever groups you want.
Example: Reducing Permissions for a Subset of Users
In this example, the goal is to give a subset of users fewer permissions than the default Platform User role provides, while leaving everyone else unaffected. To do this, you will create and attach a new group to the Platform User role that includes everyone except the users you want to restrict. Then, give a restricted group and role to the users you wish to restrict, and lastly remove the Platform User role from the Everybody group.
In the Delinea Platform, go to Access > Groups and select Add Group. This group replaces the Everybody group’s function for standard users, so name it accordingly (for example, "All Standard Users").
Open the group and add all users to it except the users you want to restrict.
Edit the group and add the Platform User role to it.
Using the same method, create a group for the users you want to restrict (for example, Auditors, Contractors, or Read-Only Users).
In Access > Roles, duplicate the Platform User role, then edit the duplicate’s permissions to remove anything you don’t want the restricted group to have. Apply the new role to the restricted group.
Remove the Platform User role from the Everybody group. Now, most of your users belong to the new group but keep the same Platform User role as before, while your restricted users use a new group and a new role with only a subset of the Platform User role’s assigned permissions.
You are left with a group for most users that is attached to the Platform User role, as well as a new smaller group with a more restricted set of permissions for your target subset of users.