Ping Identity
This documentation is a detailed guide for setting up single sign-on (SSO) through PingOne, leveraging SAML 2.0 or OIDC.
The following procedures require copying and pasting information between PingOne and the Delinea Platform. We recommend opening both applications before you begin, and keeping both open until you are finished.
You do not need to configure both OIDC and SAML applications for your integration. Depending on your organization's infrastructure and preferences, you can choose either OIDC or SAML.
Prerequisites
-
On the Delinea Platform, you need to be an Admin with federation privileges.
-
In Ping Identity (PingOne), ensure that you have administrative privileges to manage application settings.
Build a Ping Identity SAML Application
-
Log in to your Ping Identity account.
-
From the main menu, select Connections > Applications.
-
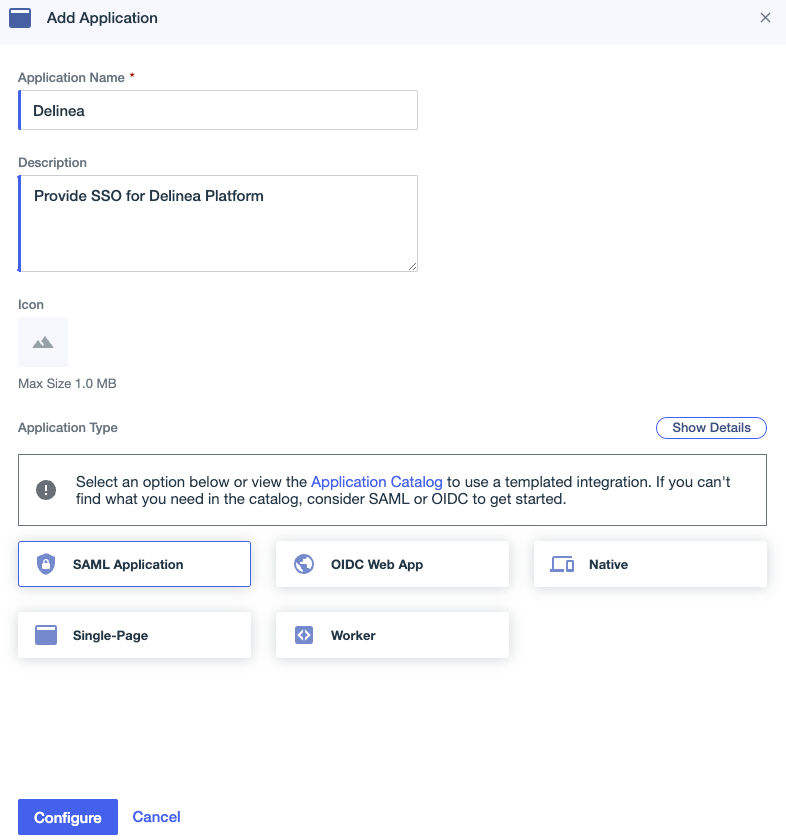
On the Applications page, click the + button at the top of the page to add a new application.
-
Provide a name for your application and select SAML Application.
-
Click Configure.
-
In the SAML Configuration section, choose Manually Enter.
-
ACS URL:
https://<tenant-name>.delinea.app/identity-federation/saml/assertion-consumer -
Entity ID: Set it to
none. We will revise this setting in the forthcoming instructions.
-
-
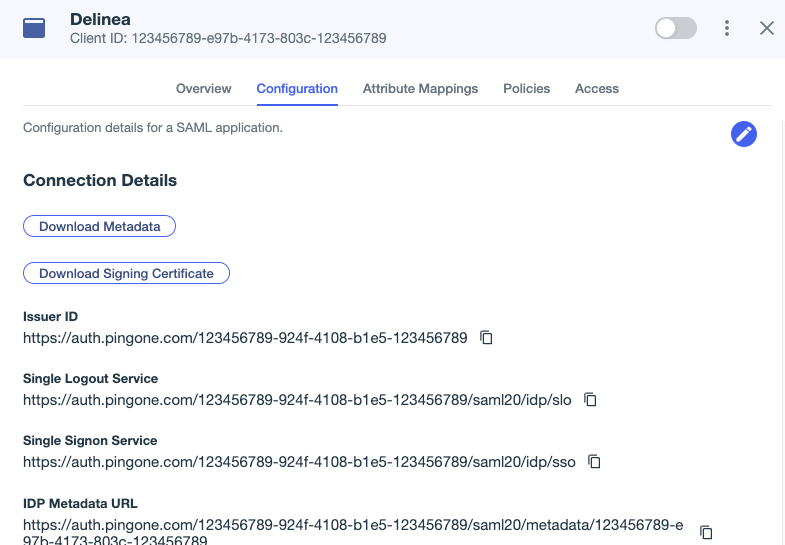
Clicking Configuration > Connection Details
- Click Download Metadata.
- Click Download Signing Certificate.
Add the Provider to the Platform
-
In a new browser tab, access the platform and log in.
-
Click Settings from the left navigation, then select Federation Providers.
-
Click Add Provider.
-
Select SAML. The Add Provider page opens.
Settings
In the Settings section, the first fields are automatically populated when you select the SAML provider configuration file and click Apply.
-
SAML provider configuration: Click Select file.
-
Navigate to and select the federation metadata XML file you downloaded.
The word, Apply appears as a clickable option above the right end of the SAML provider configuration field. -
Click Apply. The words Uploaded successfully will appear next to SAML provider configuration, and the fields below will be auto-populated:
-
Name: Auto-generated from metadata
-
Protocol: SAML (auto-filled)
-
Status: Disabled
-
Entity ID [example: https://sts.windows.net/808444af-4011-40d5-9b0a-a9a5c95f88e9/]
-
IDP Certificate: Click Select File, then navigate to and select the Signing Certificate file you downloaded, to populate the following fields:
-
Signature
-
Algorithm
-
Thumbprint
-
Not valid before
-
Not valid after
-
Issuer
-
-
-
IDP Login URL: Paste in the Login URL from your Ping Identity application.
-
IDP Logout URL: Paste in the Logout URL from your Ping Identity application.
-
Platform Callback URL: https://[HOST-NAME].delinea.app/identity-federation/saml/assertion-consumer
Copy the Platform Callback URL to paste into the appropriate field in your Ping Identity application. -
Platform Logout URL: https://[HOST-NAME].delinea.app/identity-federation/saml/logout-consumer
-
Status: Select the box next to Enabled.
Advanced Settings
-
Customize certificate issuer sent to IDP: Check the box to enable this setting. This setting overrides the default Certificate Issuer (also referred to as the Entity ID) information sent to the Identity Provider (IdP).
-
Request Binding: Update this setting to HTTP-POST for form-based. This setting controls the method for binding SAML authentication requests to the communication protocol.
-
Sign Request: Check the box to enable this setting. Upload your certificate (format supported pfx or p12). When enabled, this setting ensures that the SAML authentication request sent to the identity provider is digitally signed for added security.
Also see Switching Federation Providers under Federation Management.
Attribute Mappings
Source | Destination
-
EmailAddress | email
-
DisplayName | displayname
-
saml_subject | sub
-
upn | upn
Also see Attribute Mappings under Federation Management.
Group Mappings
See Mapping Federated Groups under Federation Management.
User Mappings
See Mapping Federated Users under Federation Management.
Domains
-
Click Add Domain and enter the domain from the email addresses of the users you are including in this federation.
When all required fields are populated, click Add Provider.
Post-configuration to Ping Identity Application
Update Entity ID
Adjust the Entity ID to match the customized issuer value previously chosen on the platform.
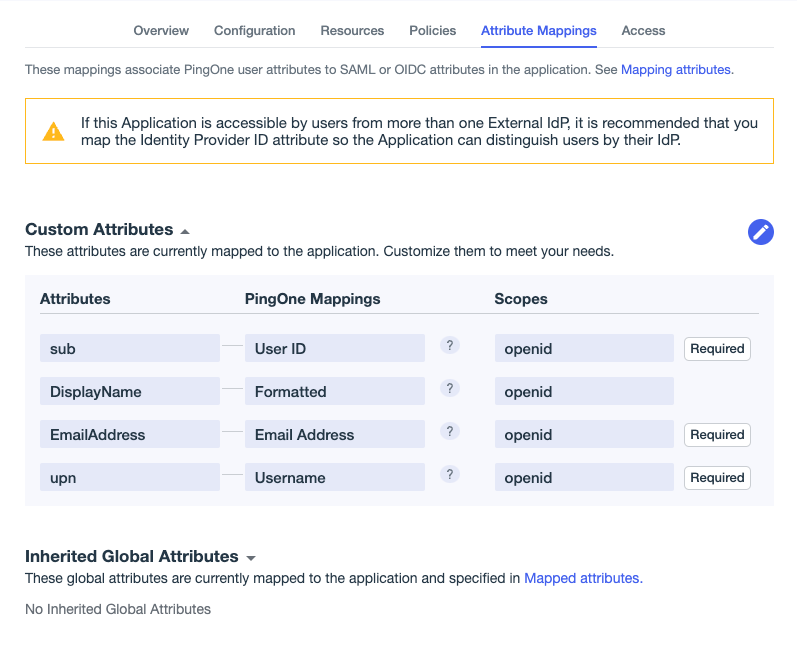
Attribute Mappings
-
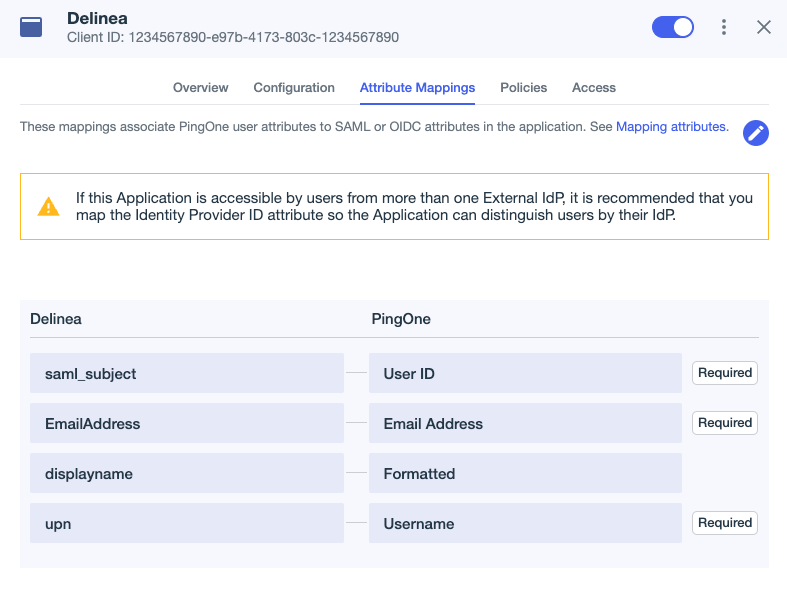
Go to the Attribute Mappings tab.
-
Add or modify the parameters as shown below:
-
saml_subject | User ID (mark as required)
-
EmailAddress | Email Address (mark as required)
-
displayname | Name (Formatted)
-
upn | Username (mark as required)
-
-
Click Save.
Activate the Application
Activate the application by engaging the toggle button in the top-right corner.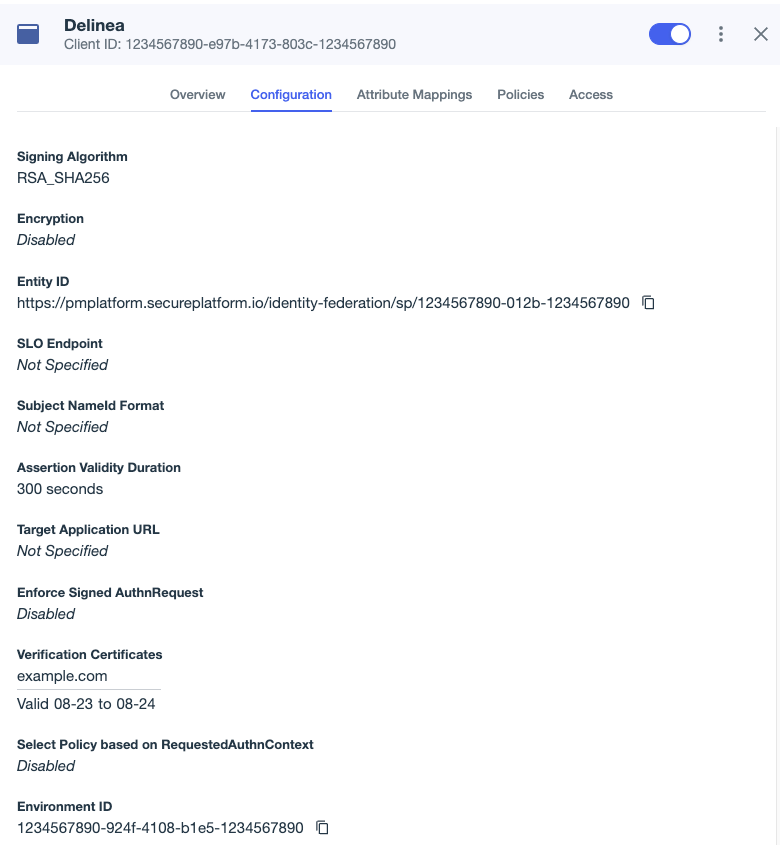
Map Ping Identity and Platform Groups
From Your Ping Identity Application
Users can be automatically assigned to groups on the platform by sending their group memberships from PingOne.
-
Go to the PingOne application > Attribute Mappings.
-
Click Edit.
-
Add a new attribute by clicking the + Add button.
The new attribute should be as follows:
groups | Group Names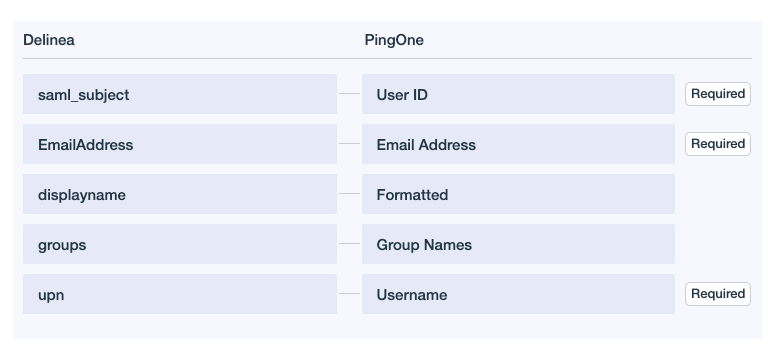
-
Click Save.
From the Platform
-
Click Settings from the left navigation, then select Federation Providers.
-
Click the Ping One provider.
-
Click Edit.
-
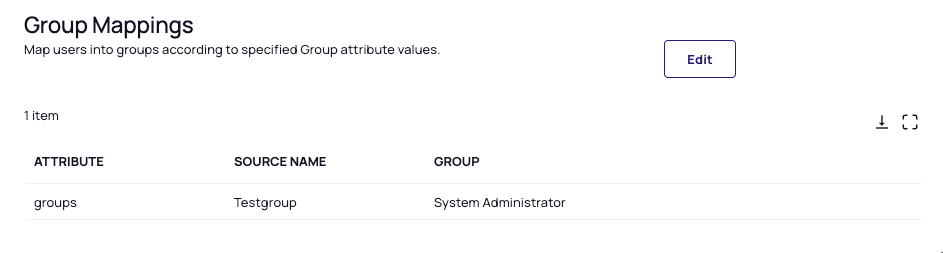
Click Add Group Mapping.
-
Attribute: groups
-
Source Name: Use the PingOne group.
-
Group: Select the Delinea group.
-
Test Connection
-
On the Delinea Platform, go to the Debug Log tab for the provider.
-
Select Start Debug Log.
-
Open a new web browser tab in incognito mode and open the Delinea Platform.
-
Try logging in using a federated account.
-
Review the results in the original tab.
For additional details regarding troubleshooting federated log-ins, refer to Debugging the Federation Log on the Federation Management page.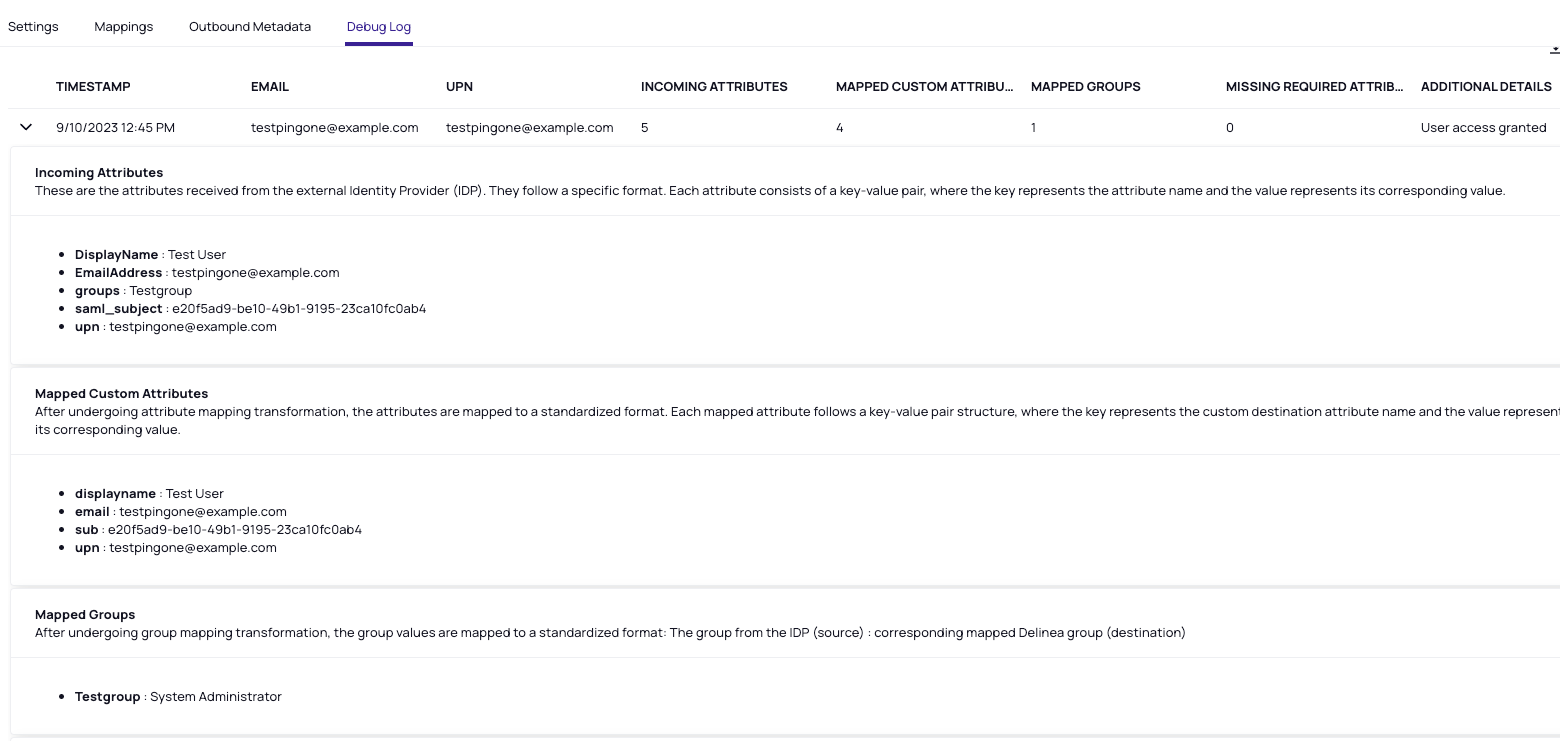
Troubleshooting
ErrorCode: Invalid Issuer – Unable to find application for spEntityId
Solution: This error commonly occurs when the Entity ID is either not configured or when there is a discrepancy for the Entity ID between the IdP and SP settings.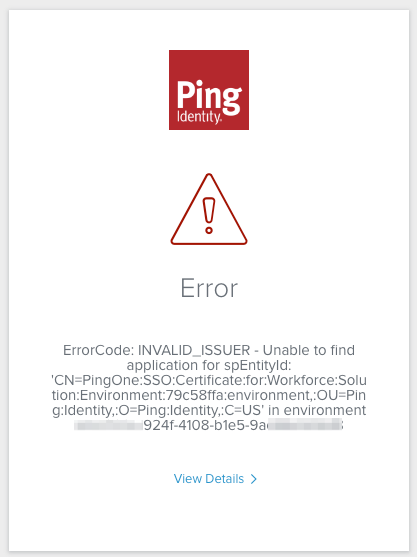
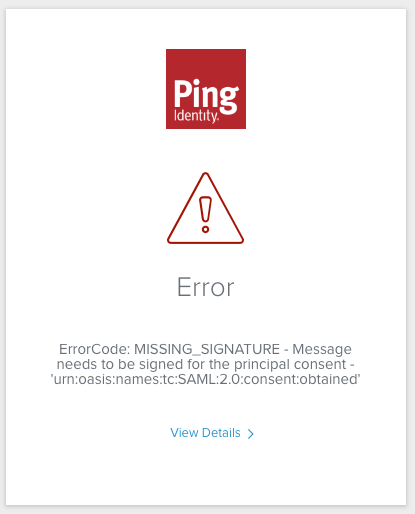
ErrorCode: MISSING_SIGNATURE – Message needs to be signed for the principal consent
Solution: Typically, this error arises when the sign request certificate on the platform is not set up or when the request binding is not set to HTTP-POST.
Build a Ping Identity OIDC Application
-
Log in to your Ping Identity account.
-
From the main menu, select Connections > Applications.
-
On the Applications page, click the + button at the top of the page to add a new application.
-
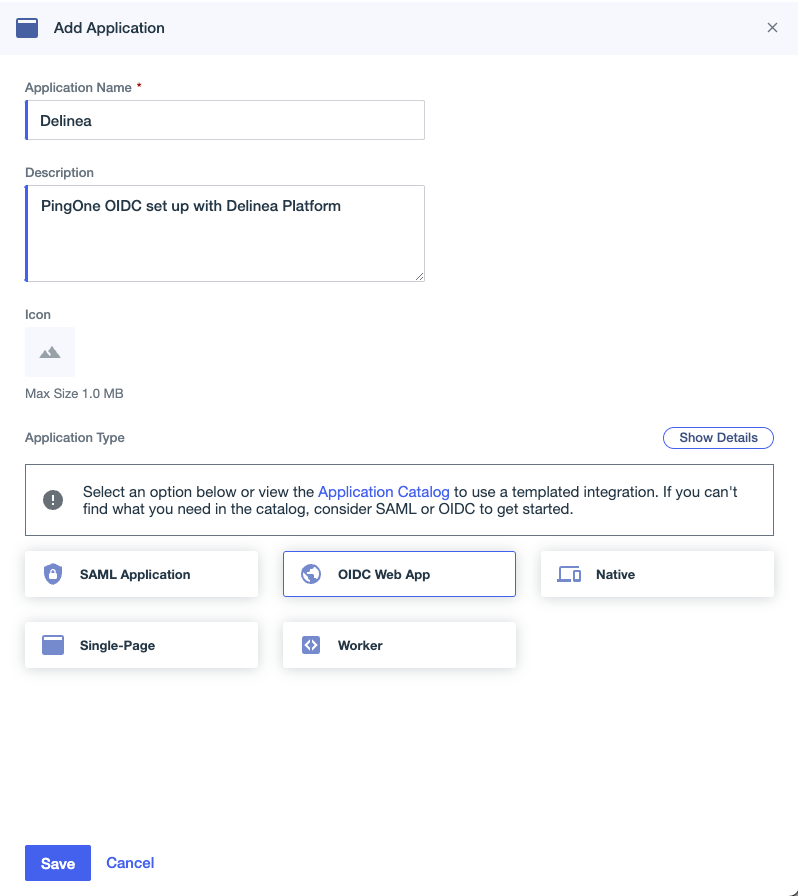
Provide a name and description for your application and select OIDC Web App.
-
Click Save.
Configure the Application on Ping Identity
-
Select the Configuration tab.
-
Click the Edit (pen) button.
-
Change the token endpoint authentication method (Token Auth Method) to: Client Secret Post.
Add the Provider to the Platform
-
In a new browser tab, access the Platform and log in.
-
Click Settings from the left navigation, then select Federation Providers.
-
Click Add Provider.
-
Select OIDC from the drop-down menu. The Add Provider page opens.
Settings
-
Name: Enter a unique name.
-
Status: Check the box next to Enabled.
-
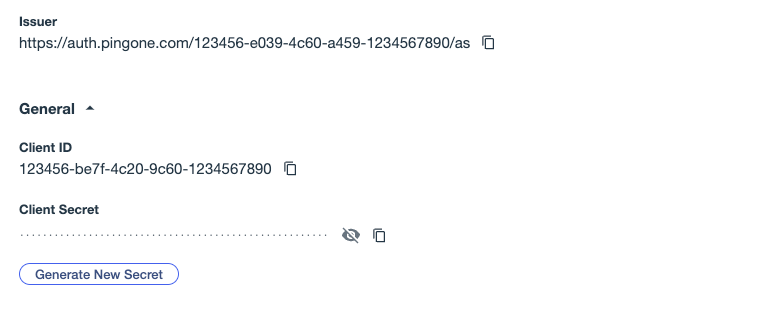
Endpoint URL: Locate the Issuer URL listed for your application under PingOne > Configuration > URLs and select the metadata file previously downloaded from PingOne.
-
Client ID: copy and paste in the client ID from your PingOne application as shown below:
-
Client Secret: Copy and paste in the client secret from your PingOne application.
-
Prompt: See Prompting for Re-authentication (OIDC only) under Federation Management.
-
Platform callback URL: Copy the Callback URL. Add the platform’s callback URL to the Redirect URIs setting in Ping Identity.
Attribute Mappings
Modify the attributes to align with the following:
Source | Destination
-
EmailAddress | email
-
DisplayName | displayname
-
http://schemas.xmlsoap.org/ws/2005/05/identity/claims/nameidentifier | sub
-
http://schemas.xmlsoap.org/ws/2005/05/identity/claims/upn | upn
Group Mappings
Follow the steps under Map Ping Identity and Platform Groups on this page.
Also see Mapping Federated Groups under Federation Management.
User Mappings
See Mapping Federated Users under Federation Management.
Domains
-
Click Add Domain and enter the domain from the email addresses of the users you are including in this federation.
When all required fields are populated, click Add Provider.
Post-Configuration to Ping Identity
Update Redirect URIs
Add the platform’s callback URL to the Redirect URIs setting in Ping Identity.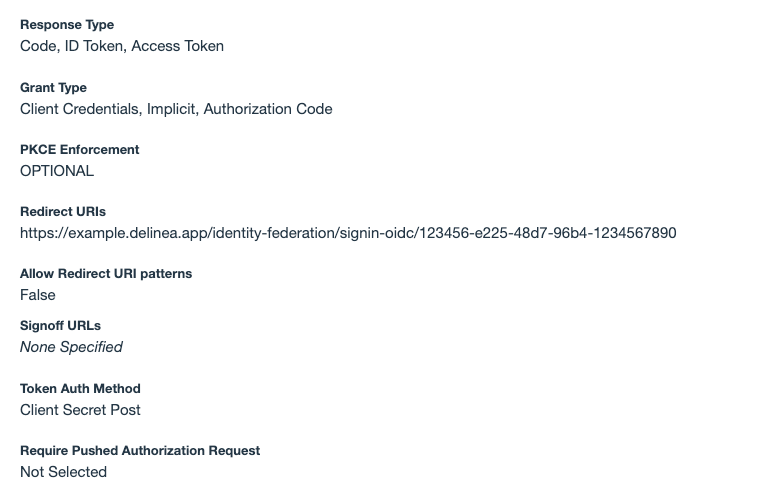
Attribute Mappings
-
Go to the Attribute Mappings tab.
-
Add or modify the parameters as shown below:
-
sub | User ID (mark as required)
- DisplayName | Name (Formatted)
- EmailAddress | Email Address (mark as required)
-
upn | Username (mark as required)
-
Enabling the Application
Activate the application by enabling the toggle button in the top-right corner. 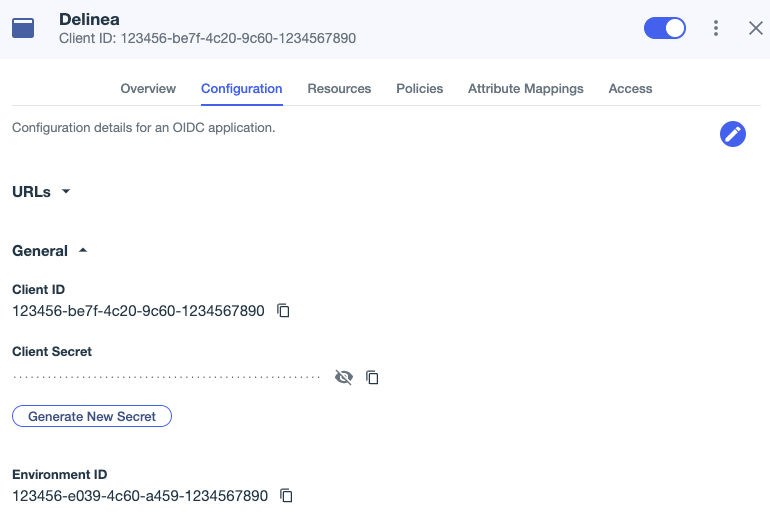
Test Connection
Follow the steps under Test Connection in the SAML portion of this document.